Published: 10/30/2020
- Kalina front bumper
- Bumper Removal Tools
- Replacing the rear bumper
- Removing the front bumper of the Lada Granta liftback and sedan
- setting
- Payment via PayPal
- Removing and installing the front body kit
- Types of headlights
- Procedure for dismantling the rear bumper
- How to remove the front bumper on a Priora in 7 steps? Instructions, tips
- Procedure for dismantling the rear bumper
- ➤ How to remove the rear and front bumper of a grant liftback
- Removing the rear bumper
- Results
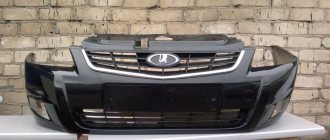
Characteristic differences between sedan and liftback bumpers
The front/rear “plastic” of both modifications is completely identical in terms of the mounting method. The main difference is in the exterior, color, and shape of the radiator grille. You can visually distinguish the first generation from the second by the color of the front grille of the cooling system.
In the first generation, she is in her original color - the natural color of plastic. In the second - to match the main color of the car. This rule also applies to the Grant liftback model, the so-called “bolt on” landing. This is such slang among motorists.
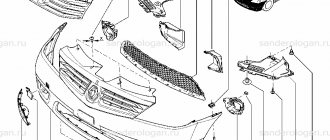
Typical bumper mounting locations:
- front: four bolts in the upper perimeter, two in the middle, four at the bottom, on each side;
- rear: two side fasteners, four upper and the same number of lower.
Removing the rear bumper
The process is the same as above, except for the placement of the fasteners.
So, how to remove the rear bumper of a grant liftback:
- Place the car on a level platform, open the trunk lid;
- remove the plastic latch, remove the lamps, unscrew the three nuts, remove the left/right lamp one by one;
- Having done the work described above, we proceed to unscrewing eight bolts in the upper perimeter and four in the lower. First remove the mudguards in the wheel arches;
- Carefully tear off the plastic clips and remove the bumper.
We carry out planned work, preventive maintenance, cleaning, etc.
How to put the rear bumper back
Replacing the rear bumper on a Lada Granta, like the front one, may be necessary not only if it is damaged, but also in order to improve its image. Installation is in the reverse order.
- Having installed the rear cowlick behind the car, connect the blocks of wires going to the license plate lighting unit. Hide the pads in the housing and insert the rubber seal in place.
- Fasten the rear bumper with the latches and tighten the upper mounting bolts.
- Place the light on the guides, push it all the way and tighten the 3 fastening screws. Insert the wiring harness connector until it clicks. Cover with trunk trim. Repeat the steps for the second flashlight. If necessary, attach the trim with screws.
- Tighten the remaining bolts and screws, attach the mudguards.
After completing the work, connect the battery. Check the operation of electrical appliances. If everything is in order, you can hit the road.
DIY rear bumper installation
Replacing the Grant liftback bumper, hanging the upper perimeter, snapping the side and bottom, tightening the bolts. At this stage it is important to maintain the integrity of the plastic clips. In case of damage or deformation, tightness to the surface is not guaranteed.
If you accidentally damage the clip, consult a specialist. Restoring without experience does not always lead to guaranteed success. Self-replacement of the rear bumper on a Lada Granta liftback is completed.
Subtleties that everyone should know about
If the plastic clips are damaged, tightness is not guaranteed. The gap at the joint will increase and waviness will form on the surface.
As soon as this is discovered, be sure that the clip is damaged. It is better to replace it with a new one yourself or contact a service center.
Related link:
Tips from experts on replacing windshield wipers with your own hands on a Granta liftback
In what cases is it necessary to replace the bumper?
- the consequence of a frontal collision, an accident, when the structure of the plastic is deformed, standard fasteners are destroyed, subsequent use is not rational;
- manufacturing defects at the assembly line stage;
- negative consequences of operation in critical negative / positive temperatures;
- mechanical damage caused by the driver;
- combustion, melting;
- installation of tuning elements, local upgrade, insertion of non-standard designs.
Regardless of the type of damage, carry out preliminary diagnostics in order to assess the general technical condition of the machine, components, and assemblies. Based on the results, choose the recovery method.
Assess the condition of the machine either independently or by turning to service station specialists for help.
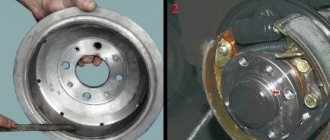
The concept and purpose of the front bumper amplifier on the Lada Granta
Many motorists practice strengthening the frontal structure of the car in order to minimize possible risks. One way is to install a metal amplifier. It is fixed on standard fasteners in the middle, covering the radiator and fan. A plastic bumper is placed on top of the metal tire. The location of the tire is secretive, invisible to the eye.
In the event of an accident or collision, the metal protection will take the blow, minimizing damage to the engine compartment. In the event of a frontal collision at a speed of no more than 50 km/h, the protection will maintain the integrity of the plastic. The maximum that can happen is damage to the paintwork.
| Catalog article / OEM number | Price, rub.) |
| 21900280313100 | 430 — 460 |
| 21900280313118 | from 450 |
| 21900280313279 | from 450 |
| (21911428459) |
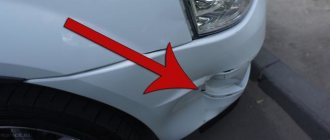
Why do you need to remove the front bumper?
From time to time, for various reasons, the car owner needs to independently carry out some work on the car, which involves removing the front bumper.
- Installation or replacement of lighting fixtures located in the front part of the car.
- Work with electrical wiring.
- Repair and replacement of signaling device.
- Tuning works.
- Bumper straightening, repair or replacement.
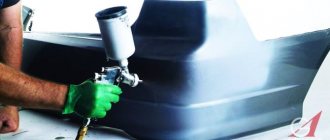
- Body painting.
- Installation of sensors, for example, external temperature.
- Installation of additional equipment and devices.
In order to detach the front body kit yourself, the car owner will need the simplest set of tools and auxiliary materials.
Branded accessories
The choice of additional equipment and services at car dealerships is extensive. Branded accessories are divided into classic accessories and additional options (equipment).
Classic accessories can be called souvenirs; the car dealership even has a sales plan for these souvenirs. Among the accessories that have become widespread:
- Branded key rings
- T-shirts and baseball caps with the brand logo
- Mug with logo
- Flash drive with logo
- Soft toy or pillow
All this souvenir is not in demand among buyers of budget cars, if only key fobs.
And we know very well that all this in a regular store costs 2-3 times cheaper, but there are also lovers of this product. My wife's brother has his own auto parts store and ordered a windbreaker with the BMW logo from his supplier, and he didn't even know what it looked like, what material it was made of, but the fact that it was 50% cheaper than in the official store encouraged him to buy. As a result, he received a white sweatshirt with a small BMW logo on the chest for 3,800 rubles and is satisfied; for a premium BMW owner, this is not money.
The same goes for an amenity kit in a leather case for 15 thousand rubles with Porsche branded embossing. Is 15 thousand a lot of money for a Porsche buyer for several million rubles? This is his pocket money for “seeds”.
How to remove the front bumper on a Lada Granta
For a car enthusiast who has driven a Lada Grant, removing the front bumper is a common thing. After all, this is often required to repair or replace the front “whisker”, as well as to access what is behind it, install fog lights, a signal, etc. It is possible to replace the radiator grille or the entire bumper with an improved model that improves aerodynamic characteristics and modernizes the external type of car.
Before you begin dismantling, make sure that all tools are at hand and that access to the front of the underbody is sufficiently clear.
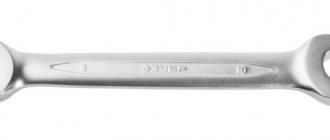
- It is necessary to remove the license plate, behind which there are 2 bolts. They should be unscrewed with a 10 mm wrench.
- Lifting the hood cover, use the same key to unscrew the 6 bolts located under it that secure the bumper and radiator.
- Unscrew the 2 bolts on the fender liners, at the top and bottom of the arch. To be more precise, these are not bolts, but self-tapping screws with an asterisk head. They are unscrewed with a TORX T-20 key. To access them, turn the wheels all the way to the left and unscrew the screws from the right fender liner. Turning the wheels to the right, unscrew the screws from the left fender liner.
- Another 4 self-tapping screws attach the bumper to the fender liners from below - 2 on the left and 2 on the right. They are also unscrewed with a TORX key.
- Using a 10mm wrench, you need to unscrew the 3 bolts securing the part from below. Depending on whether there is an engine guard and how it is installed, you may need to remove 2 more bolts that hold the crankcase cover in place at the front. When they are unscrewed, the cover should not hang on the rear bolts. To prevent the fastening from deteriorating, place an object under the crankcase protection.
- Now the bumper is free, only the latches hold it in place. But you should unhook them carefully, because the plastic can easily break. First unhook the latch on the left side, then also carefully on the right, or vice versa. If fog lights are already installed, be sure to disconnect the connector. Place the part aside to avoid accidental damage.
Necessary tool
Cooking:
- Torx hexagon T-20;
- Phillips screwdriver;
- Wrenches 10: ring or open-end, ratchet with corresponding head;
- Pit or lift.
How to remove step by step
Let's get to work.
Step 1 : remove the license plate frame from the front bumper - there are 2 10mm bolts under it. Unscrew them.
For bolts, a socket wrench or ten-point socket is suitable. Photo from Drive2 website, Lada Granta MAGMA logbook
Step 2 : open the hood. We unscrew 6 bolts: 4 hold the radiator frame from above, one more to the right and left of the frame.
Use the same head to unscrew the bumper mount from above.
Step 3 : remove the star screws (Torx wrench required) that secure the fender liners. 2 on each side.
If the wheels are in the way, you can turn them one by one to their extreme positions for better access.
Step 4 : from below we find 2 screws (on the right and on the left) closer to the wings - we unscrew them.
We remove the screws either from the hole or by lying under the bumper.
Step 5 : remove the last three fastening bolts from the bottom closer to the protection. If the protection interferes, unscrew the edge that interferes with dismantling.
It is not necessary to remove all protection.
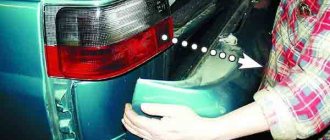
Step 6 : along the edges near the wings, carefully pull the bumper towards you until it comes off the latches.
Are fog lights installed? Disconnect them before work!
Reassemble in reverse order .
General questions about body kit 2190
Let's answer a couple of basic questions about Granta bumpers.
Differences between sedan and liftback bumpers
The principle of working with front and rear bumpers on a sedan and a liftback is the same! There are no fundamental differences.
Why you may need to replace the bumper
Possible reason for replacing the body kit on a VAZ 2190:
- Minor (or major) accident;
- Installation of a non-original body kit;
- Installation of additional devices: emergency parking sensors, rear view camera, etc.;
- Curiosity.
There are many options for non-standard body kits for Lada today.
Non-native body kits are made unofficially. This can lead to problems with joints and color mismatches.
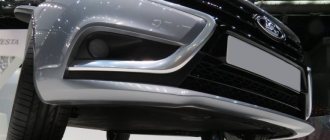
Where to find the front bumper amplifier
Unlike pre-restyling Kalinas, Grant comes with a bumper reinforcement from the factory . Many people confuse it with a regular mount. You will gain access to the part only after dismantling the front body kit.
The amplifier on the Lada is rather symbolic, like the factory crankcase protection. But there is no such thing on Kalina.
Reminder
Let's summarize:
- To remove the front/rear body kit, it is better to use a lift ;
- You will need: a Phillips screwdriver, a 10mm socket wrench, a 20/30 Torx sprocket, a ratchet with a set of sockets;
- Simple, but important: wash the car before work, since we will be tinkering with the dirtiest part of the car;
- After dismantling all mounting points, check and disconnect all wiring, such as PTF, license plate lights or parking sensors.
Do you like working with Granta? See other articles. For example, how to install acoustics yourself.
Write comments . This is important - otherwise we will miss details or lose motivation.
general information
Manipulating the body kit takes no more than 20 minutes, even for a novice auto mechanic. Bolts with soured threads can complicate the situation and prolong the work time. Most often this happens with the four screws that secure the radiator and body kit. The bolts sit as if rooted, and it takes no effort to move them. In such cases, a penetrating lubricant such as WD-40 comes in handy. It must be applied in advance, right under the bolt head. After a short period of time, the lubricant will do its job, and the screw will easily unscrew.
When installing the body kit, it is recommended to lubricate the screw threads with grease or grease, such as “Universal” or “Mobile”. Thanks to this treatment, it is possible to avoid souring and corrosion of fastening joints. This will make it easier to remove the bumper again and extend the life of the screw elements.
A removed body kit is a good reason to inspect devices and parts to which access was denied. Check the condition of the wires, fasteners, inspect the power bumper, etc. If rust is detected on the body, the area is treated with anti-corrosion treatment. This will prevent further damage and hole formation.
Preparation
Before removing the front bumper on the Lada Granta, you need to prepare the following.
- Crosshead screwdriver.
- Open-end wrench No. 10 and No. 12.
- Ratchet No. 10.
- Fasteners with Torx slot T No. 20.
- Fasteners with Torx slot T No. 30.
- Rags.
- Any penetrating lubricant, such as WD-40.
- Grease.
If the crankcase protection is of a non-standard type, then you will need some rectangular object on which to place it just right after removal. This could be a small plastic canister, cardboard box, etc.
Purpose of headlights
A car headlight is designed to illuminate the cavity of the front and side parts of the road surface. It provides the necessary visibility and also performs road safety functions.
Lada Granta headlights, in accordance with international automotive legislation, have passed all the necessary tests and received certificates and licenses that make it possible to carry out international traffic in any country in the world.
Reasons why headlight removal may be necessary
The reasons for removing the headlight on a Lada Grant can be many factors, namely:
- Damage to the structure of the surface or body due to an accident, as well as exposure to external factors.
- Dismantling for repair of adjacent parts.
Disassembling the headlight for repair
- Restoring the surface or soldering fasteners.
- Replacing the headlight.
Tuning headlights for Lada Granta
All these or other factors contribute to the need to remove the Lada Granta headlight.
Types of headlights for Lada Granta
There is an original headlight and several of its analogues, which can be used as an alternative or tuning optics. Let's look at the catalog numbers and descriptions for all:
- The original Lada Granta headlight has a catalog number - 21900-3711010-00. It is easy to remove and install, and does not require special knowledge for this.
- The closest analogue with xenon lenses from, which is not widely used, is 21901-3711010-90. This is the same original headlight, which was already initially made by the factory for the installation of xenon. The price is 15% more expensive than the original.
- Optical tuning. In order not to redo the headlight mounts, I released two analogue models. The first has integrated LED turn signals and daytime running lights. Catalog number – DM-171052. The second option has different lenses for low and high beam, and the headlight edging itself has LED backlighting in blue, green or white. Listed in the catalog under number DM-171118.
A special mention is worth mentioning such a useful modification as installing a lens in the headlight unit.
Installing a lens into a standard headlight
Thus, it can be seen that there are several options for standard headlights on the Lada Granta, which do not require alteration of the mounts for removal and installation.
The most popular extras are the most profitable
Car dealership managers have a list of priorities, what to offer the buyer first and what to offer last. And although they sell rugs with great profit, they are in the middle of this list. The salon receives the most profit from the alarm system and additional processing of the car body.
The dream of many car owners is for the car not to rust ahead of time. And car dealerships know this; they offer to apply anti-corrosion coating to the body without leaving the showroom. The main argument: we will apply a coating to a clean body, this will give a greater percentage of protection than coating elsewhere on a body that has been exposed to external influences. They will also offer to provide protection from gravel and sound insulation, and they will apply the same anti-corrosion compound, because all these properties are listed on its labels. This is already some kind of scam.
The second priority is the sale of alarm systems. In order not to miss out on the client, managers argue for installing the alarm directly in the salon by the fact that installation in a third-party organization will lead to disruption of the fastening of the trim elements and, as a result, to damage to the wiring. Well, in order not to let the client cool down, immediately tell him about the advantages of autostart, which he will receive right in their salon when installing an alarm system.
Reasons for removing headlights
There are a number of reasons why the owner of a Grant will need to remove the headlights on his car. These include:
- The occurrence of disturbances in the surface structure or in the body of a part that occurred as a result of a traffic accident or due to exposure to environmental factors.
- In the case when removing the headlights is necessary to repair any adjacent part.
- When restoring the headlight surface or when performing soldering work on fasteners.
- Directly when replacing them.
All of the above factors are a valid basis for dismantling headlights.
Downloading a book
After successfully completing the payment (by any method) and returning to the KrutilVertel store from the payment system website, you will be taken to the successful payment page:
On this page you need to indicate your where access to download the book will be sent.
If you are already registered on our website, then simply follow the link to your personal account.
The book you purchased will be in your personal account, from where you can always download it.
Please note that after making the payment, you need to return back from the payment system website to the KrutilVertel website.
If for some reason you did not return back to the site and closed the payment system tab with a message about the successful completion of the payment, please let us know - we will send you a letter indicating access to download the book.
Technological process of removing headlights on Grant
Many car owners are wondering: how to remove the headlight of a Lada Grant? Easier than it seems. To begin with, you will need two keys from the tool - 8 and 10. And now you can go directly to the process itself:
- To begin with, we remove the “negative terminal” from the battery so as not to accidentally short-circuit anything.
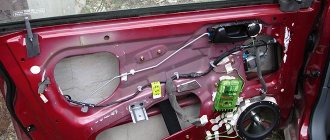
- We are dismantling the front bumper, since it is impossible to get to the lower mount otherwise.
We removed the bumper and took out the headlight (I ran a little ahead)
- Now we disconnect the clamps of the direction indicator lamps and daytime running lights.
- Counterclockwise, we dismantle the cover of the main light (more details in the material on replacing the low and high beam lamps) and gain access to the inside of the headlight.
- Remove the wire clamp from the low and high beam lamps.
- We dismantle the headlight hydraulic corrector by turning it counterclockwise.
We remove the hydraulic corrector unit (it doesn’t work for me and the hose is cut off, you can see in the photo)
- Now you can unscrew the 4 bolts securing the headlight and carefully remove it.
It is worth remembering that when the lower mounts are removed, the optics should be held so that the upper “ears” do not crack under load when dismantling occurs.
Is native better?
But we could buy a non-original carpet for the trunk, we decided.
The interior was original to the old owner and is in very good condition. The Chinese trunk litter we bought, there is no other way to call it, disappointed us. She warped immediately, although it was not winter. It was problematic to take it out for cleaning and put it back, we were afraid it would burst. Car owners are right when they say that the original floor mats will not slip under the pedal at the most inopportune moment; the original ones fit like a glove, unlike the universal ones. Moreover, now the difference in price is not big; if you save on rugs, you will blame yourself later.
The same can be said about original covers, unlike universal ones, they fit great, and if we take a non-original one, at least not the cheapest one, this rag won’t last even a year.
Results
In general, the process of dismantling the Lada Granta bumper is not very complicated. You just need to keep in mind that you are working with a fragile material that can break very easily. To prevent this, never leave the bumper without support, especially when it has already lost some of its fastenings.
In addition, you do not need to pull the bumper too much. If it doesn't snap off, it means something is blocking it. You can find out by once again inspecting all the fastening points.
And, of course, the help of another person will not be superfluous, with whom the chance of breaking the bumper will be much lower.
Sources
- https://o-ladagranta.ru/kak-snjat-perednij-bamper-na-grante-video/
- https://carfrance.ru/snimaem-perednij-bamper-na-lada-granta-svoimi-rukami-video-i-foto/
- https://InfoKuzov.ru/kuzov/zamena-bampera-lada-granta
- https://ladaprofi.ru/lada-granta/kak-samostoyatelno-snyat-perednij-bamper-na-lada-granta.html
- https://car-fact.ru/marki-i-modeli/otechestvennye/lada-granta/granta-bampery.html
- https://umelyeruki.info/avto/zamena-perednego-bampera-lada-granta/
- https://carfrance.ru/snimaem-faru-na-lada-granta-svoimi-rukami/
- https://new-granta.ru/kak-snyat-i-samostoyatelno-ustanovit-fary-na-lada-granta/
Optional equipment
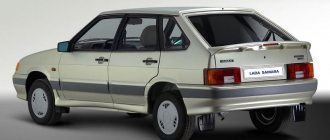
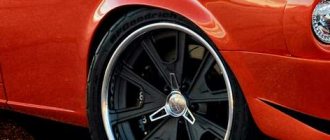
Transforming a car is rarely complete without replacing the front bumper
As a rule, tuning the front part of a Lada car is not limited to replacing the described accessory with a more modern and durable option. That’s why car enthusiasts buy a Lada Granta bumper, which at first glance does not at all correspond to this car model. For the new model, you also need to buy the appropriate headlights, foglights, and direction indicators.
It will take longer to remake such a front bumper for a Lada Granta, since not only the mounting points may not fit the car (after all, it’s easy to do them yourself in the right places). Car enthusiasts are still trying to “finish up” even the latest new product that they managed to buy.
Frankly, such zeal and desire of car enthusiasts to remake the Lada externally only evokes a desire to create: the cars turn out to be very beautiful and unusual. After this, I also want to buy a car that is not entirely new and make something original and dear out of it. There have never been limits to technical creativity, as well as to flights of fancy. Look at the video or photo at how car owners were able to remake their iron horses, and you will see for yourself.