In a VAZ-2114 car, the rear bumper is a decorative part that enhances the body. Its main component is plastic, easily destroyed by the slightest collision. A small accident and the owner of the brand is forced to think about how to remove the rear bumper on a VAZ-2114, what is required for this, and what to do with the damaged spare part. Let us consider possible nuances regarding the dismantling and subsequent installation of the structure.
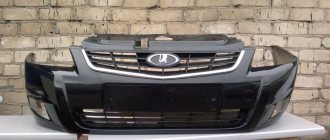
Rear bumper VAZ 2114
In what cases is it necessary to replace the bumper?
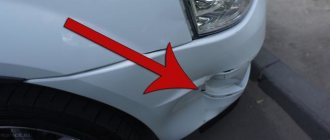
Often, cobwebs may appear on the bumper. Small cracks can be very noticeable, and if the driver is concerned about the appearance of the car, then he will need to start dismantling the bumper and its further repair or replacement. Due to body deformation, the bumper in most cases also needs to be replaced. Various chips, cracks, more serious damage - all this is the most common reason for replacing the bumper.
Features of the work
New versions of the car have some differences. They touch the bumper reinforcement. It has teeth under the headlights and also under the grille. They are put on with special slots. As a result, in order to remove the bumper without any damage, you will also need to remove the headlights along with the grille. This is very inconvenient, but you can’t do without it.
If you still need to replace the bumper with a new one, you should carefully select the model of the new bumper. Under no circumstances should you buy metal bumpers. They pose a serious threat to the driver during an accident. It is better to give preference to bumpers made of plastic.
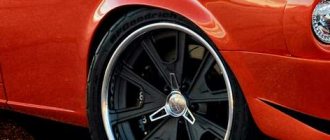
We must not forget about color. It must perfectly match the color of the entire body, otherwise a car with multi-colored elements will look simply terrible.
Replacing a bumper without assistance
Many experienced drivers claim that in most cases, replacing a bumper yourself will cost much less than repairing it using professional services.
Therefore, if problems arise with the bumper, you should not rush to transfer the car into the hands of specialists, because such services can be quite expensive. Initially, you should search for information on the Internet, where there are many specialized forums that tell in detail how to remove the rear bumper on a VAZ 2114.
Having delved a little into the features of such repairs, you can quickly replace the bumper without any special skills without the help of qualified specialists. If you just follow the step-by-step instructions for dismantling the bumper, you can carefully and easily remove the damaged part and install a new one.
Cost of work
The cost of repairing a rear or front bumper is determined after an express examination carried out by knowledgeable craftsmen. In any case, repair work will cost an order of magnitude cheaper than the price of a new part.
| Removal/installation of part | Part replacement | Painting a new part (with material) | Painting parts up to 30% damage (with material) | Painting parts up to 50% damage (with material) | |
| Front bumper | from 500 rub. | from 600 rub. | from 3700 rub. | from 3900 rub. | from 4200 rub. |
| Rear bumper | from 300 rub. | from 400 rub. | from 3700 rub. | from 3900 rub. | from 4200 rub. |
| Radiator grille | from 200 rub. | — | from 1100 rub. | — | — |
Obvious advantages of our offer
- You are offered a high-quality repair of plastic bumpers with perfect welding, painting and polishing, giving you the opportunity to avoid purchasing a new expensive part.
- Our craftsmen take on the most hopeless cases, and such little things as local repairs of cracks and scratches are eliminated in a couple of hours.
- Doctor Bumper service stations are located in every district of the city, which will allow you to save time.
- Refurbished bumpers are provided with a 2-year documentary warranty. If a crack or chip appears again in the same place without serious external influences, we will eliminate such a defect free of charge.
- Our prices differ from competing companies by approximately 15-20% in favor of the car owner. We will pleasantly surprise you not only with good work, but also with a truly attractive price!
How we do it
The presence of special equipment makes it possible to successfully carry out the following operations:
- qualified dismantling, disassembly and installation
- efficient welding of plastic;
- selection of lost fragments from similar material;
- bumper reinforcement;
- bumper welding;
- grinding of restored surfaces;
- putty and primer
- complete or local painting of a plastic bumper
Stages of dismantling the bumper on a VAZ 2114
To remove the VAZ 2114 rear bumper, you do not need to immediately resort to the help of specialists or use specialized lifts. Ordinary jacks can handle this task quite well.
- Replacing a part should be done on a flat and hard surface. The front wheels must be secured with chocks.
- After fixing the front wheels, you can begin to raise the rear of the car using jacks.
- The next step is to remove the wheels. This must be done to gain access to the fender liners, which will also need to be removed.
- With such dismantling, there will be an excellent opportunity to get rid of the dirt that accumulates in such places.
- Next, you will need to turn off the license plate light. The electrical wiring is completely disconnected and the lamp is removed, after which the license plate itself is removed.
Having completed all the previous steps, you can begin to directly dismantle the bumper. The mounting of the rear bumper 2114 itself is carried out in several stages. You need to follow certain steps in order to remove the bumper without any problems.
- Initially, you need to unscrew two linings with which the part is fixed.
- Next, you need to unscrew the three bracket nuts that hold the reinforcing beam.
- All fixing elements must be carefully treated with lubricant.
- Having disconnected all the fasteners, you can begin to remove the bumper.
- The bumper is detached from the body along with the amplifier, which is mounted on ordinary self-tapping screws, and disconnecting the amplifier is not difficult.
Design Features
The design and method of attaching body kits on Lada 13-15 series cars differs from other models of the “tenth” VAZ family. Design features are as follows:
- Additional metal brackets for fastening to the body are installed inside the plastic elements;
- the brackets are held on by threaded connections and screwed to the bumper with self-tapping screws;
- plastic latches appeared on the central part of the front bumper;
- the edges of the rear body kit are pulled to the body by nuts hidden behind the wheel arches;
- It is easier to remove the front and rear parts together with the amplifier, and then unscrew it if necessary.
Front bumper design
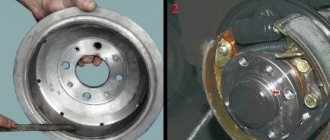
The listed features make it somewhat difficult to dismantle elements from the machine, since the threads located next to the wheels become covered with dirt and rust during operation. Over the years, corrosion also eats away at bare metal brackets that are not protected by any coating.
The rusted bracket needs to be replaced
Damage analysis
The dismantled bumper should be carefully inspected for damage. Even a small defect on the bumper can lead to serious problems. A damaged part contributes to the development of body corrosion. A corrosion problem is much more difficult to fix than replacing a bumper. Therefore, tracking damage to the bumper should be taken very seriously. If the detected defects are large enough, then finishing work can be very expensive, so if the bumper is seriously damaged, it is better to immediately purchase a new one.
DIY bumper repair
If the defects are not very large, you can try to correct the problem with your own efforts. You will need putty, paint and sandpaper.
- The area with the crack must be thoroughly cleaned of all additional coatings. The required layer of putty is applied to the damaged area, which should hide all the unevenness.
- After the putty has dried, additional cleaning and leveling occurs with sandpaper.
- To make it easier to clean the surface, you can use a special grinding machine. When the putty layer has been sanded, you can begin painting work.
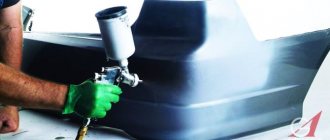
- You can paint the part using a regular brush or roller, but this is the roughest method of applying paint. It would be much better to use a spray bottle.
- You can paint only a certain area or the entire bumper. The best way would be to paint the entire part. It is not always possible to choose the most suitable color, so the painted area may differ noticeably in shade from the rest of the coating.
- Painting through a sprayer will allow you to apply the most even layer, but still such painting will not be easy. You need to apply the paint with smooth movements, passing over one place a certain number of times. If you overdo it with the amount of paint applied, streaks will form that are difficult to remove without leaving traces.
- When the bumper is dry, it can be installed on the body. This amount of work will not take much time, and even without professional skills and without outside help, you can replace and repair the bumper.
The Internet is full of additional information that can describe in detail any nuances that arise when replacing or repairing a bumper. After the first dismantling and installation of the bumper, everything will become extremely clear. And subsequent work to replace this part will be much easier and faster.
When servicing and repairing a car, you can perform many processes yourself, saving a lot of money. By making repairs yourself, a person gains very valuable skills that can be useful in a variety of situations. Having the necessary set of simple tools and modest knowledge, you can safely refuse the help of specialists and carry out simple repair work yourself without any unpleasant consequences.
Removal process
How to change the fuel pump on a VAZ 2114
To carry out this work you will need to prepare the following tools:
- a set of screwdrivers or screwdriver attachments;
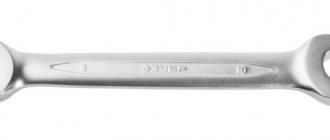
- wrenches for 8 and 10 (sockets);
- end at 13.
It is best to work on an inspection ramp or in a pit. For an experienced master it will take about an hour. A car enthusiast doing this for the first time will have to suffer longer. However, in any case, you should be warmed by the knowledge that by performing the replacement yourself, you save good money, which otherwise you would have to pay to a car service center.
The procedure is as follows:
- the protection is removed from both front wheels (they are attached to three screws each);
- unscrew 4 nuts holding the bumper itself in place (they are located from the inside, on both sides);
- the license plate number is removed (it is fixed with four screws);
- The bumper is dismantled (some effort will be required).
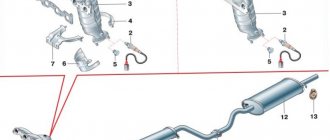
The amplifier should only be removed if damage is visually visible. This part is secured with two 13 nuts on each side. It is better not to touch the adjusting washers.
Next, the brackets are removed from the old bumper and moved to the new product. The new amplifier needs to be adjusted in height. There should be a gap between the fender and the headlights.
Assembly is carried out in reverse order.
If the damage was insignificant, then it makes sense to repair the protective element. For this purpose, special kits are now sold in car dealerships. They are not expensive.
This video will help you understand the issue in more detail:
Many car enthusiasts who are wondering how to remove the front bumper on a VAZ 2114 should study the information below as carefully as possible.
The front bumper is a particularly important part of the body. If it is in poor condition, then the appearance of the car will leave much to be desired.
However, this body element is not only a decorative part of the car. The bumper performs a number of different functions to protect the engine as well as the driver. If a collision occurs, the bumper must absorb a significant portion of the force of the impact.
It also dampens any negative impacts that may occur during a head-on collision with another car or any object.