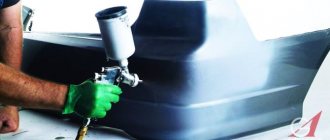
How to remove the bumper on a Lada Largus video
Removing the front bumper
Lada Largus
We carry out work when repairing and replacing the front bumper, removing headlights.
We work with an assistant. Remove the front bumper mudguards (see “Removing the front bumper mudguards,” p. 236).
We unscrew the screws securing the front wheel fender liners to the bumper (see “Removing the mud flaps and front wheel fender liners”, p. 237).
Below the car, above the left mudguard of the front bumper.
Using a Torx T-30 wrench with an extension or a 10mm socket, unscrew the bolt securing the bumper to the left front fender of the body.
Similarly, unscrew the bolt securing the bumper to the right front fender.
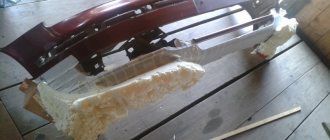
We remove the front bumper with an assistant.
Install the front bumper in reverse order.
1200 rub. for the photo report
We pay for photo reports on car repairs. Earnings from 10,000 rubles/month.
Write:
The front bumper on the Largus is attached securely, so to remove it you need to remove the clips from above, below and unscrew three screws on the fender liners in the wheel arches, and also unscrew the screws securing the bumper from below using a Torgs T20 head. To find out how to remove the front bumper of Lada Largus, watch the video. When unlatching the bumper latches on the sides and near the headlights, be careful not to break the fasteners. It is also worth noting that on the sides from the inside (you need to get behind the fender liner) the corners of the bumper are screwed with turnkey bolts “10”, so do not break them, but unscrew them first.
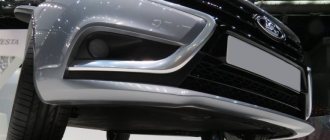
The front bumper of a Lada Largus car is removed in case of body work, also in case of its replacement. In addition, the bumper is also removed when removing the radiator grille, which is installed on the front bumper (in it). The radiator trim is made in one piece with the front bumper. In this article we will talk about how to remove the front bumper from a Lada Largus car.
Tools required when removing the front bumper of Lada Largus
You will need: a special mounting blade, a flat-blade screwdriver, 10mm wrenches and TORX TZO.
Operations for removing the front bumper of Lada Largus
1. Remove the three front mounting screws of the lower part of the side engine splash guard and remove the screws.
2. Using a suitable tool, slide the core out of the rear fastening clamp of the lower part of the mudguard and remove the clamp.
3. Using a suitable tool, pry the piston securing the lower part of the mudguard to the subframe and remove the piston.
4. Disengage the lower part of the mudguard from the upper part and from the front bumper, then remove it.
5. Remove the fender liner 6. Similarly, remove the lower part of the mudguard and the fender liner on the right side of the car. 7. In the left wheel arch, disconnect the block of the fog lamp wiring harness.
8. Remove the three screws securing the lower edge of the bumper to the front suspension subframe.
9. In the arches of both wheels, remove one screw securing the sidewalls of the bumper to the wings.
10. Remove the four screws securing the upper edge of the bumper to the radiator frame.
11. Lower the rear corners of the bumper down a little to bring the stops A out of the holes in the lower edges of the front fenders
12. Slide the sides of the bumper forward.
13. . and remove the bumper.
14. If necessary, remove the wiring harness for the fog lights from the holders on the bumper.
15. Remove three screws securing each fog light and remove the headlights.
16. By pressing the corresponding plastic clips on the inside of the bumper, you can remove the radiator grille.
17. . coverings for fog lights.
18. . air guide flaps.
19. Grille of the lower bumper opening. 20. The front bumper on a Lada Largus car is installed in the reverse order of removal.
Possible reasons for removing the bumper
The reasons for dismantling can be very different, but the main one remains physical damage. Many people have come across this concept. So, let's look at the cases in which you will have to remove the front bumper on Largus:
- Road accident. The most common reason why a part needs to be dismantled. In 75% of cases this happens due to the fault of the Largus driver. A simple failure to maintain distance can lead to deformation and damage not only to the bumper, but also to the elements underneath it.
Front bumper on Largus after an accident
- Hitting an obstacle (although Largus’s ground clearance is quite high), which resulted in deformation of the lower part of the radiator frame. To eliminate damage to the body element, you will have to dismantle the bumper.
Clearance at the front bumper point
- Replacing the radiator grille will also require removing the buffer. This is so because the frame is an integral part of the security element.
- A banal but worthwhile reason - tuning. To upgrade or install a body kit, you will have to remove the bumper.
- Touch-up paint or other reasons will also be a reason to remove the front bumper.
- In some cases, the bumper will have to be removed if the radiator needs to be replaced .
- Installing DRLs (daytime running lights) in the bumper.
All these and other reasons may be a reason to remove the bumper on Largus.
Front bumper, radiator grille - removal and installation
Note: Removing the front bumper on the pre-restyling version and on the Largus FL modification is no different, except for the location of the bumper side mounting screws. (see below)
For catalog numbers and full details of the front bumper, see here, here, here
Place the car on a two-post lift and brake it with the parking brake (electro-hydraulic lift type P-3.2 G).
Open the hood and disconnect the earth wire terminal from the battery
.
Raise the car to a height convenient for doing the work.
Remove the side mudguards of the front bumper (engine mudguards) (see details here)
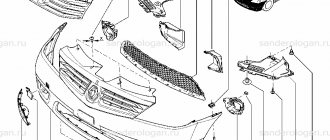
Unscrew the self-tapping screws 1, Figure 2-1, for the side mounting of the bumper (Torx head T20) on the right and left sides of the car.
Figure 2-1 — Side fastening of the bumper: 1 — screw of the side fastening of the bumper; 2 — bolt of the side fastening of the bumper; 3 — wheel arch protective cover
And on the Largus FL modification, unscrew three screws 1
Remove completely, or move the fender liner to the side and unscrew bolt 2 of the side fastening of the bumper (Torx head T30, extension). Unscrew the bolt on the other side of the car in the same way. (this stage is missing on the Largus FL modification)
Unscrew bolts 1, Figure 2-2, of the lower fastening of the bumper to the subframe (Torx head T30).
Figure 2-2 — Lower bumper fastening:
1 — bolt of the lower bumper fastening to the subframe
Unscrew the four screws 1, Figure 2-3, fastening the bumper to the upper cross member of the radiator frame (Torx T30 head).
Figure 2-3 — Upper bumper mounting:
1 — screw securing the bumper to the upper cross member of the radiator frame
If there are fog lights, disconnect the front bumper wiring harness block from the instrument panel wiring harness block. (in the niche of the front fender on the left side)
Lower the rear corners of the bumper a little down and forward, like this.
. so that guide 1 disengages with the wing, and pin 2 comes out of the corresponding groove in the lower edge of the wing.
Slide the sides of the bumper forward.
Remove the front bumper (it is advisable to carry out the work with an assistant)
If it is necessary to remove the wiring for the fog lights, remove it from the holders on the bumper.
If necessary, remove the fog lights from the front bumper:
Figure 2-4 — Fog lamp: 1 — fog lamp; 2 — front bumper wiring harness block
— disconnect from the fog lights 1, Figure 2-4, blocks 2 of the front bumper wiring harness, remove three fastening screws and remove the fog lights
To remove the decorative radiator trim (radiator grille), press out the corresponding plastic clips on the inside, and then remove it from the bumper.
Remove the lower radiator grille in the same way.
The fog lamp covers are removed in the same way.
. and air guide flaps
Install all parts and the bumper in the reverse order of removal.
Video
Fog lights
At the request of potential buyers, LADA Largus cars are equipped with fog lights, which are integrated into the lower part of the front bumper.
Here:
- Halogen single-filament lamp H11.
- Adjustment screw.
Replacing the lamp
Replacing a burnt-out lamp in the fog lamp of the Lada Largus station wagon begins by dismantling:
- front wheel;
- fender liner installed in the front wheel arch;
By removing the fender liner, we gain access to the niche where the fog lamp is installed.
Further:
- pressing the latch, disconnect the block with electrical wires;
- turn the lamp counterclockwise until it stops and remove it from the headlight housing.
In order to install a working lamp in place, repeat the dismantling process in reverse order.
How to remove the bumper on a Largus
Removing the front bumper of Lada Largus — DRIVE2
Hello everyone, friends! About 3 weeks ago I removed the bumper on the Lada Largus, well, since I already had to remove it, I decided to show in detail how to do it.
Open the hood and see 4 screws
These screws must be unscrewed using Torx 30
Next, unscrew the 2 screws securing the fender liner using Torx 20
on the other side we also unscrew 2 screws
then from the bottom of the bumper on the left side we unscrew these 3 screws
We also unscrew 3 screws on the right side
and then unscrew the 3 central screws
General questions about body kit 2190
How to independently remove the front bumper on a Lada Granta
Let's answer a couple of basic questions about Granta bumpers.
Why you may need to replace the bumper
Possible reason for replacing the body kit on a VAZ 2190:
- Minor (or major) accident;
- Installation of a non-original body kit;
- Installation of additional devices: emergency parking sensors, rear view camera, etc.;
- Curiosity.
There are many options for non-standard body kits for Lada today.
Non-native body kits are made unofficially. This can lead to problems with joints and color mismatches.
Where to find the front bumper amplifier
Unlike pre-restyling Kalinas, Grant comes with a bumper reinforcement from the factory. Many people confuse it with a regular mount. You will gain access to the part only after dismantling the front body kit.
The amplifier on the Lada is rather symbolic, like the factory crankcase protection. But there is no such thing on Kalina.
Removing the front bumper of Lada Largus (radiator grille)
The front bumper of a Lada Largus car is removed in case of body work, also in case of its replacement. In addition, the bumper is also removed when removing the radiator grille, which is installed on the front bumper (in it). The radiator trim is made in one piece with the front bumper. In this article we will talk about how to remove the front bumper from a Lada Largus car.
Tools required when removing the front bumper of Lada Largus
You will need: a special mounting blade, a flat-blade screwdriver, 10mm wrenches and TORX TZO.
Operations for removing the front bumper of Lada Largus
1. Remove the three front mounting screws of the lower part of the side engine splash guard and remove the screws.
2. Using a suitable tool, slide the core out of the rear fastening clamp of the lower part of the mudguard and remove the clamp.
3. Using a suitable tool, pry the piston securing the lower part of the mudguard to the subframe and remove the piston.
4. Disengage the lower part of the mudguard from the upper part and from the front bumper, then remove it.
5. Remove the fender liner 6. Similarly, remove the lower part of the mudguard and the fender liner on the right side of the car. 7. In the left wheel arch, disconnect the block of the fog lamp wiring harness.
8. Remove the three screws securing the lower edge of the bumper to the front suspension subframe.
9. In the arches of both wheels, remove one screw securing the sidewalls of the bumper to the wings.
10. Remove the four screws securing the upper edge of the bumper to the radiator frame.
11. Lower the rear corners of the bumper down a little to bring the stops A out of the holes in the lower edges of the front fenders
12. Slide the sides of the bumper forward.
13. . and remove the bumper.
14. If necessary, remove the wiring harness for the fog lights from the holders on the bumper.
15. Remove three screws securing each fog light and remove the headlights.
16. By pressing the corresponding plastic clips on the inside of the bumper, you can remove the radiator grille.
17. . coverings for fog lights.
18. . air guide flaps.
19. Grille of the lower bumper opening. 20. The front bumper on a Lada Largus car is installed in the reverse order of removal.
Fuel filter Lada Largus
To clean the gasoline that enters the power plant, the Lada Largus car has a fuel filter. During the operation of the vehicle, the consumables lose their capacity as they become clogged with debris.
Because of this, the engine stops working stably, and an additional load is placed on the fuel pump. To solve the problem of a clogged filter, it must be replaced. It’s not particularly difficult to do it yourself.
Article number of the branded fuel filter Lada Largus
Fine and coarse fuel filters for Lada Largus are part of the fuel module. Officially, the manufacturer allows replacement of the glass only as an assembly. Therefore, neither the fine filter nor the mesh have their own article numbers and are not available for retail sale. Therefore, it is impossible to purchase original new consumables separately, and they are expensive when assembled with a module.
The original fuel tank for the Lada Largus with an 8-valve engine has article number 172024388R. A similar unit is used on cars with a 16-valve engine. A branded fuel module costs from 18,000 to 30,000 rubles.
Since the cost of the original module with fine and coarse filters is high, drivers resort to purchasing analogues. There are quite a lot of good options among them. The table below shows the best alternatives to the original fuel cup.
Table - Analogues of the fuel module for the Lada Largus car
| Company manufacturer | Article number | Estimated cost, ruble |
| Krauf | KR0820M | 2500-4000 |
| Bosch | 986580957 | 5400-7000 |
| ERA | 775120A | 3800-5000 |
| Pierburg | 700468770 | 4800-6000 |
| Messmer | 775120A | 4200-5300 |
Despite the lack of original fine fuel filters on sale, wanting to save money, car owners adapted consumables from other cars for the Lada Largus. The table below shows filters that are suitable for restoring normal operation of the module.
Table - Fine fuel filters for the Lada Largus car
| Company manufacturer | Article number | Estimated cost, ruble |
| Japan Parts | FC130S | 900-1100 |
| Profit | 15350023 | 800-1000 |
| Nipparts | N1331054 | 600-670 |
| Ashika | 3001130 | 910-1300 |
Filter meshes from some other cars are also suitable for Lada Largus. The table below presents third-party manufacturers whose consumables are recommended to be installed when the coarse mesh is clogged.
Table - Fuel filter screens for the Lada Largus car
| Manufacturer brand | Catalog number | Approximate price, ruble |
| Francecar | FCR210141 | 270-350 |
| Knecht-Mahle | KL4161 | 320-400 |
| Opel | 4408101 | 190-230 |
| Mercedes | 4534700400 | 700-900 |
| Renault (RVI) | 7700845961 | 400-450 |
Fuel filter location
Fine and coarse filters are combined with a fuel cup. The module itself is located directly in the gas tank. To dismantle it, you will need to remove the rear row of seats.
Frequency of replacing the fuel filter
According to official statements from the manufacturer, the fuel module and, accordingly, the filters contained in it are designed for the entire service life of the vehicle. Its replacement is not provided, so there are no official recommendations on the frequency of installation of new consumables.
Operating experience of the Lada Largus showed car owners the need to replace fuel filters, both fine and coarse. According to the observations of drivers, the mesh becomes clogged when the mileage approaches 30-50 thousand km. The fine filter lasts a little longer. Its replacement is usually necessary after a mileage of 60-100 thousand km.
The following symptoms indicate the need to change the fuel filter:
- difficulty starting the engine;
- jerking while moving;
- During intense acceleration, the engine stalls;
- the engine does not work well under load;
- deterioration in dynamics;
- Extraneous sounds appeared when the fuel pump was operating.
Replacing the fuel module and filters
Instructions for replacing the fuel module and its fine and coarse filters are presented below.
- Remove the rear row of seats.
- Open the lid.
- Press the terminal block lock.
- Disconnect the connector.
- Disconnect the fuel line.
- Unscrew the fixing ring of the fuel module.
- Remove the fuel cup. If there is a new module, replace it.
- To replace the mesh, you must partially disassemble the glass.
- Replace the mesh.
- To replace the fine filter, continue disassembling the glass.
- Install a new fine filter and assemble everything in reverse order.
Largus rear bumper removal video
Place the car on a two-post lift and brake it with the parking brake (electro-hydraulic lift type P-3.2 G).
Open the hood and disconnect the earth wire terminal from the battery
.
Raise the car to a height convenient for doing the work.
Unscrew two self-tapping screws 2 on the right and left sides of the car, Figure 3-1, securing the casing to the bumper
.
Move the wheel arch protective casing aside and unscrew bolts 1 of the side bumper fastening on the right and left sides of the car (replaceable Torx T30 head, extension, wrench).
1 – bolt of the side fastening of the bumper; 2 – self-tapping screw securing the casing to the bumper; 3 – protective casing of the rear wheel arch
Unscrew five screws 1, Figure 3-2, of the lower bumper mounting (replaceable Torx T30 head, wrench).
1 – screw for lower bumper mounting
1- side bracket for rear bumper
Remove the sidewalls of the bumper from engagement with the side brackets 1, Figure 3-3.
Unscrew the eight bolts 1 securing the bumper, Figure 3-4 (replaceable Torx T30 head, wrench).
Remove the rear bumper.
1 – bolt of the upper bumper fastening
Installation is carried out in the reverse order of removal.
As in all cases, to remove a car part you will need tools. To remove the rear bumper from a Lada Largus, you need a minimum kit, which many owners probably have. So, let's look at what is needed: the 10th head, T20 and T30 nozzles, and, as in the case of the front bumper, a flat-head screwdriver or a special tool for removing clips.
Rear bumper removal process
The process of dismantling the rear bumper is not complicated and will take from 30 minutes to 1 hour, depending on the abilities of the person who will carry out this operation.
But before you start work, you need to prepare your workplace. To remove the buffer, access from below is required. Of course, you can do without lifting the car, but it is better to perform operations on a pit or a lift.
So, let's look at the step-by-step process of removing the part:
- First of all, you need to disconnect the fender liners from the bumper. To do this, using a 10mm socket, unscrew the screws securing the rear part of the fender liner on the right side and on the left (2 pieces each, 4 in total).
The bolts in the diagram are indicated by a red arrow
There are screws under the fender liner that secure the bumper to the body. They need to be removed.
Screws under the flap
Now the bumper is removed, and you can carry out the remaining manipulations.
Removing the rear bumper LADA LARGUS – HOW TO REMOVE THE REAR BUMPER
Removing the bumper on LADA Largus detailed instructions
Repair of Largus – Installation of rear bumper protection on LADA Largus.
LADA LARGUS repair
Replacing the rear bumper on a Renault Logan - eliminating sagging.
How to remove the front bumper on Renault Logan and Lada Largus
LADA LARGUS Bumper repair
Lift. Sagging rear bumper on Renault Logan/Renault Logan.
Repair of Largus - Part 2 Conversion of PTF into a reversing light on LADA Largus +18, be careful
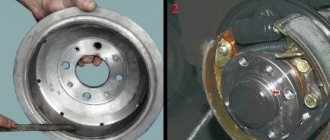
DIY rear brake drum puller Logan
Why do you remove the bumper?
This action is prompted by a not so wide range of reasons. If there is a need for dismantling, then for this purpose it is not at all necessary to go to a service center. An ordinary Lada Largus driver is quite capable of handling this procedure on his own and, in addition, saving a considerable financial resource.
So, let's take a closer look at cases when it is necessary to dismantle an element.
- Breaking. This can happen in an accident or during careless parking. The latter case in most cases assumes the integrity of the body element itself, and its paintwork is damaged.
- Needs painting. This event involves removal, which will ensure better quality of painting work compared to a similar procedure without dismantling the element.
- Body modernization. Some owners seek to update the exterior of their “horse” and are inclined to replace the standard product with a tuning element. Plus there is a cover on the rear bumper.
- The need to install additional tools. Such accessories may include parking sensors, a camera, etc.
- When installing overlays.
How to remove a headlight on a Largus?
How to remove a headlight on a Lada Largus?
- Disconnect the wires from the headlight bulbs (1. low/high beam - remove the cover and pull out the block with wires. remove the turn signal and marker sockets. ...
Unscrew the three fastening screws around the perimeter of the headlight (No. 1, 3, 4), using a 10mm wrench, and remove the headlight.
- How to remove the rear bumper of a VAZ 2115
- How to remove the bumper on a VAZ 2112
- Kia Rio bumper replacement
- How to remove a Renault Duster bumper
- How to remove the bumper on a viburnum
- How to change a headlight on a Priora
- How to remove a bumper on a Priora
- Hyundai Solaris bumper replacement
- How to remove the headlight on a Priora
How to remove the Lada Largus bumper?
Unscrew screws 1, Figure 2-3, securing the bumper to the upper cross member of the radiator frame (Torx T30 head). If there are fog lights, disconnect the front bumper wiring harness connector from the instrument panel wiring harness connector. Remove the front bumper. Installation is carried out in the reverse order of removal.
How to remove the headlight on Renault Logan 2?
- Using a 10mm socket wrench, unscrew the three headlight mounting bolts one by one, first the bottom one under it, then the two at the edges on each side and the third bolt on top.
- Having slightly removed the headlight, disconnect the corrector adjustment cable by first removing the rubber cap from it.
How to remove the right headlight of Renault Logan?
- First you need to remove the front bumper.
- After removing the bumper we will have access to the headlight mounting bolts. ...
- We unscrew the three bolts securing the headlight under the head by ten.
- After unscrewing the bolts, move the headlight slightly towards you.
- Remove the headlight level control cable.
How to remove the rear bumper on Lada Largus?
Rear bumper Lada Largus (removal and installation)
- On both sides, remove two screws securing the fender liners to the rear bumper.
- Unscrew the two plastic holders securing the fender liner to the wheel arch and remove the fender liner.
- From the bottom of the car, remove one screw each (on the left and right sides) securing the corner of the bumper to the wheel arch.
How to remove the radiator grille on a Largus?
The Lada Largus instruction manual states that to remove the upper radiator grille, you must first remove the front bumper. ...Remove the radiator grille
- Unscrew the 4 screws for the top grille mounting.
- Bend the top part of the radiator grill towards you.
- Unclip the grille latches around the entire perimeter.
How much does a bumper cost on Largus?
Front bumper Lada-Largus painted 8450000245. from 3,550 rub. from 3,550 rub.
How to remove a headlight on a Renault Logan?
- First you need to remove the front bumper.
- After removing the bumper we will have access to the headlight mounting bolts. ...
- We unscrew the three bolts securing the headlight under the head by ten.
- After unscrewing the bolts, move the headlight slightly towards you.
- Remove the headlight level control cable.
How to remove headlight range control on Renault Logan?
The fastenings have been released and before removing the headlight, it is necessary to disconnect the corrector cable. The protective rubber cap is removed first, then we lift the corrector cable up and it comes out of its housing niche. Then we take out the headlight towards ourselves and now there is excellent access to all connectors.
How to remove the bumper on Renault Logan 2?
Replacing the front bumper on Renault Logan 2
- We prepare the car for work. ...
- Use a slotted screwdriver to remove the holder of the lower left bumper shield... ...
- Similarly, remove the right shield. ...
- Disconnect the left side of the bumper trim from the side holders.
- We perform a similar operation on the other side of the car.
Fuel filter Lada Largus
Like most Lada cars, Lada Largus uses two types of fuel filters: fine and coarse. Both of them are built into the fuel module of the fuel pump, both on Largus with 16-valve engines and with 8-valve ones. Separate replacement is not regulated by the manufacturer, only completely assembled.
The fine filter on Largus is installed in the module in the same way as on Renault Logan. These models have a common platform and the same complex design solution for the fuel purification system. But the service life of fine filters in Europe is longer due to higher quality gasoline. And if for the main filter you can only change the module, then the filter mesh of the fuel pump can at least be cleaned (rinsed) or you can choose an analogue that is suitable for mounting. This procedure will extend the life of both the fuel pump and the fine fuel filter. Therefore, let’s look at which fuel module and mesh filter (the so-called diaper) you can buy.
Where is the Lada Largus fuel filter located?
It is not difficult to determine where the Lada Largus fuel filter is located. The basic configuration of the Lada Largus involves the use of a single fuel module to purify fuel for a 1.6 MT engine. It is mounted in the fuel tank and has access from the passenger compartment under the rear seat.
In the AvtoVAZ catalog, the fuel module of the electric fuel pump for Lada Largus has the original number: 172024388R. The filter element itself is a special paper; it is not sold separately and does not have its own number.
Fuel filter for Lada Lagrus - article number and dimensions
The entire electric fuel pump module is sold assembled with a fine and coarse fuel filter and it is originally expensive, as for a domestically produced car. Technical parameters are shown in the table below.
| Dimensions of fine fuel filter Lada Largus | |||||
| External diameter, mm | Length, mm | Current strength up to, A | Voltage, W | Pressure, psi | Pressure, bar |
| 134 | 198 | 4,4 | 12 | 50,75 | 3,5 |
There are analogs from cheaper manufacturers on the market.
| Manufacturer | vendor code | price, rub. |
| Henko | MV-PFA18 | 2515 |
| Ween | 192-0001 | 3851 |
Coarse filter (mesh)
The coarse fuel filter is a mesh made of polymer material in the electric fuel pump module installed in the fuel tank of the car.
The Lada Largus coarse fuel filter is also sold assembled with an electric fuel pump module and does not have its original number.
But such meshes are available for sale from different manufacturers, for example, the manufacturer Francecar offers such a mesh under the number: FCR210141. This is what Largus owners most often purchase.
When should you change?
The automaker states that on Largus the fine fuel filter is designed for the entire service life of the car’s fuel pump, and the service life of the Lada Largus itself, again according to AvtoVAZ, is 160 thousand kilometers.