How to adjust the headlights on a car WITH YOUR OWN HANDS.
DIY headlight adjustment
ADJUSTING CAR HEADLIGHTS UNIVERSAL FOR ALL MODELS
DRL on LADA Largus with your own hands for 3 rubles 50 kopecks
Adjusting the headlights of Lada Granta
Secret menu of the head unit for Largus, Logan, Duster, Sandero
How to remove a headlight in Largus or CASCO FINAL
Video: How to adjust low beam headlights correctly and with your own hands?
Restoring the front headlight for Renault Logan. headlight polishing
Adjustment of the headlights without the device
Also see:
Now the headlights illuminate, rather than just shine. Replacing lamps + FAQ: How to adjust the headlights yourself!
The original headlights were not bad, but they weren’t satisfactory - they were rather weak.
We are used to better road lighting along Logan and Fiesta. And adjusting the headlights, two weeks ago, helped, but only slightly. Therefore, on Saturday new lamps were purchased and installed in the headlights.
Traditionally, this is Philips X-treem vision +100% H4 55/60W
Why these lamps
: at Fiesta and before that at the four, I tried almost the entire range of lamps from stores. So - no Osram Knight Breaker Plus, no PIAA, and even xenon installed instead of standard lamps, without blinds, does not shine so well!
By the way, the old dumps are quite good - Osram, made in Germany, but it felt like after installing the new lamps - they were as bright as a light bulb in the glove compartment!
Now you don’t have to strain when driving in the dark, a very even light, of a whitish tint, illuminates even the oncoming side of the road 25 meters ahead, and your own side of the road about 100 meters.
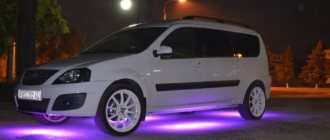
The photo on the brown fence is certainly not an indicator, but in general the lighting is better than the native osram, even here, 2 meters from the fence =)
Comparison of Philips X-treem vision with xenon instead of standard lamps:
These lamps were compared with “makeshift” xenon (that is, xenon installed instead of standard lamps, without special blinds) back at Fiesta - the illumination is approximately the same, but the xenon either shines strongly into the eyes of those oncoming - it illuminates a large area above the “tick”, or only shines 15 meters from the hood. Bright. But there’s no point - what’s the point of having headlights shining under your nose? Philips X-treem vision, when the headlights are adjusted correctly, illuminates much of the road without blinding oncoming traffic. On an unlit road, you can safely drive without turning on the driver at a speed of up to 90-100 km/h.
In general, if you do not have enough headlight light, I highly recommend Philips X-treem vision - this is the best choice. Moreover, in one of the most famous chains of auto stores (so that this blog is not considered an advertisement, I don’t write the name) they have a sale until November 30 - only 849 rubles. Usually they cost 1400-1700 rubles. ______________________________________________________________
Well, now what was promised - about how to adjust the headlights
(
on any car, not just Largus!
),
To make adjustments you will need a tape measure, a ruler, a chalk, a 5mm internal hexagon,
0) set the corrector to 0, no one should be in the car during adjustment! There shouldn't be a load either!
1)
We choose a horizontal platform with a wall at the end, stand so that there is exactly 5 meters from the front of the car to the wall!
( L=5
meters on the diagram)
2)We measure the height A
. To do this, we look for a circle with a cross on the approximate center of the headlight, similar to a target, the size is approximately 1 mm in diameter. It is there, but not on all cars, if you haven’t found it, then turn on the low beam, put a dot in the place , (on the headlight the light is mirrored, relative to the wall, that is, the checkmark is down), that is, in the place where the light bends down from the horizon. And we measure the height A to this place.
3)
We measure the same height A on the wall and draw a strictly horizontal
line 1
4)
Draw
line 2
strictly 5 cm below line 1 (If you have an angle α written under the hood α = 1% If it is more than 1% (sometimes it is 1.3, or even 1.5% - then you will have to calculate how much your % of 5 meters. And draw a line that much lower 2)
5)
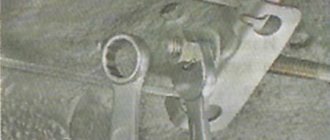
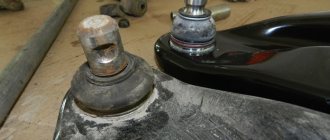
We set the horizontal part of the light to line 2, no higher, no lower. On Largus and Logan it is screw 4 (see picture below) - it is turned with an internal hexagon 5.
6)
Using screw 7, we set the light so that the “checkmarks” are strictly opposite each headlight. It can be turned by hand or with an adjustable wrench.
Everyone, enjoy life! Everything seems complicated, but it actually takes 5 minutes!
I can say that the factory setting of the headlights was approximately 2% slope, and should have been adjusted by the dealer during pre-sale preparation.
Chevrolet Lacetti Replacing lamps in a Chevrolet Lacetti headlight
How to change a light bulb in a Lacheti headlight
Here, do not rush to tighten the fasteners, first make sure that everything works as expected. By pressing down on the spring clamp, we disengage it from the hook and move it to the side. Attach the headlight protection cover and turn it in a clockwise direction until secure.
Find out which side light bulbs you need?
To replace the low beam bulb, disconnect the block with wiring harnesses from it.
Mount the new lamp, clamp it with the clamp and connect the block with the wiring harness to it. Replacing side light bulbs To replace the side light bulb, you need to remove the socket together with the lamp assembly from the hole located in the headlight reflector.
Remove the lamp from the socket. Insert a new light bulb into the socket and mount the entire structure in place.
Diode lamps in dimensions — Lacetti — logbook Chevrolet Lacetti 5D MISTY LAKE on DRIVE2
Reinstall the headlight protective cover and turn it in a clockwise direction until it is secured. Replacing the high beam lamp To replace the high beam lamp, you will need to dismantle the inner cover of the headlight unit; to do this, turn it in the reverse clockwise direction.
Disconnect the block with the wire harness from the light bulb. Clamp the spring clamp, slide it up, for the right headlight there will be a shift in the opposite direction - down, and fold it back.
Install a new light bulb, clamp it with the clamp and connect the block with the wire harnesses. Attach the headlight protection cover and turn it in a clockwise direction until secure. Replacing the turn signal bulb To replace the turn signal bulb, you need to slightly turn the socket in the reverse clockwise direction and remove it from the base of the headlight.
By pressing down on the spring clamp, we disengage it from the hook and move it to the side. Remove the lamp from the headlamp housing. The high beam lamp is halogen.
You should not touch its glass bulb with your fingers, as traces from them will cause the lamp to darken when heated and deteriorate the glow. You can remove dirt from the flask with a clean rag soaked in alcohol.
Some Title Here
The process of replacing side lamps in Chevrolet Lacetti headlights takes about minutes, depending on the skill of the car enthusiast. In order to change lamps, you need to have a new lamp, a screwdriver and hands that grow from the right place.
How to get to the low beam bulbs without breaking anything on a Chevrolet lacetti sedan
https://youtube.com/watch?v=NPoBOdMWsuo
So, now that everything is collected, we could begin the process. It is worth noting that in order to replace the side lights, you will have to dismantle the headlights, and this process is labor-intensive and not everyone can do it.
As a result, the sequence of actions that will lead to replacing the lamps: First, you should open the hood and remove the negative terminal from the battery. This is necessary in order not to accidentally short-circuit anything and to comply with safety regulations when carrying out repair operations.
To remove the headlight you will have to remove the radiator grille. To do this, you need to unscrew the fixing screws or remove the clips. After carrying out the preparatory activities associated with dismantling the headlight unit, you can begin replacing the light bulbs. Replacing low beam bulbs From the back of the headlight unit, unscrew the outer protective cover by turning it in the opposite direction to the clockwise movement.
To replace the low beam bulb, disconnect the block with wiring harnesses from it. Press the spring clamp and slide it up; on the right headlight, the clamp will move in the opposite direction, i.e.
Mount the new lamp, clamp it with the clamp and connect the block with the wiring harness to it. Replacing side light bulbs To replace the side light bulb, you need to remove the socket together with the lamp assembly from the hole located in the headlight reflector.
Remove the lamp from the socket. Insert a new light bulb into the socket and mount the entire structure in place.
How to adjust headlights on Lada Largus
It should be admitted that adjusting the headlights on Largus is considered a scrupulous and slightly tedious procedure. But, despite this, it is extremely necessary, since the safety of the car owner and his passengers depends on how well the lighting is set up. If, while driving, drivers of other vehicles signal by flashing their head optics, thus indicating that they are being blinded, then adjustment of the headlights is simply inevitable.
On the road you need to respect not only yourself, but also other road users.
conclusions
As you can see, the procedure for adjusting the headlights on a Lada Granta with your own hands is not at all complicated. The whole procedure, if you have a ready-made “wall”, will take no more than twenty minutes.
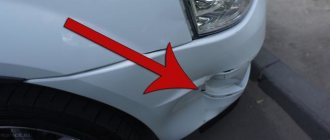
The right headlight literally “fell” down, it’s dangerous to drive like that
As a rule, optics do not have a clear operating time. The duration of use is not limited in any way, since everything depends on the road conditions, as well as the style in which the driver drives the car.
But, even with normal output data, optics rarely withstand more than one hundred thousand kilometers, since its surface is covered with an abundance of small scratches. As we have already said, such scratches can be removed with polishes or a more significant abrasive, but the resources for such restoration are not unlimited.
Give some attention and power to your halogen headlight. The fact is that deviations up or down can lead to the fact that the adjustment of the headlights on the Lada Granta cannot be performed efficiently.
In addition, each batch of cars may have its own characteristics of setting up the light beam, which you can find out about by simply looking at the operating instructions.
Adjusting the Lada Granta headlights is required if you do not have enough factory light settings. Do you have to turn the hydraulic corrector to maximum? It's time to adjust the headlights. We’ll tell you how later.
Causes of malfunction of car optical devices
Before you start adjusting the headlights, you should make sure that this is the cause of all the problems. The vehicle must be checked for serviceability, since the correct direction of the light is directly related to the following components:
- differences in tire sizes and tire pressures;
- condition of shock absorbers;
- uniform distribution of the load on all parts of the body.
If at least one of them performs poorly, the angle of illumination can be dramatically changed. If there are no such faults, then you can begin adjusting the lighting.
The procedure for adjusting the headlights of Lada Largus
This procedure can be carried out by the car owner independently or by contacting service center specialists. Moreover, it is almost the same on all modifications of such a vehicle. It is carried out both on a completely new car and on one that has already been driven for more than one year.
Preliminary data fixation
Before starting this diagnostic step, the driver should prepare a tool box, a spare tire, and a full tank of fuel. The car is placed on a horizontal surface, and the smoother it is, the more accurate the indicators of the current state of the headlights will be. In addition to this, the engine remains idling and the handbrake is fully depressed.
An artificial wall is installed in front of the car, the height of which is 1.8–2.0 m. Moreover, the distance showing how any headlight on Largus works should not exceed 2.8–3.2 m. It is worth noting that such a visual barrier can make it yourself from chipboard or similar materials.
This scheme is suitable not only for Largus, but also for other cars
A load weighing 55–70 kg is placed on the driver’s seat. This helps align the lighting line. After this, the distance between the headlights, their height above the road is measured and the average value between them is found. All this is transferred to the wall using chalk, ultimately representing a dot projection with marked edges and centers of the headlights.
The actual adjustment
To start adjusting the lighting, you need to create pressure in the chair, that is, either sit on the seat or put additional weight there. At the same time, slight rocking of the car will help remove vibrations from the body and shock absorbers.
The regulator is moved to a position oriented towards one person. This is precisely why the load was placed on the driver's seat. Then the low beam is turned on and the output is carefully examined with the actual deflection of each headlight beam.
Under the hood there are regulators that allow you to use a screwdriver to level the output of the light beams. They must fully correspond to the points displayed on the artificial wall, both vertically and horizontally.
Checking the correction made
All optics, like each individual headlight of the Lada Largus, are considered adjusted if its rays go directly to their wall projections. Fixing the adjustment and checking the work done is carried out through a test drive. The main thing here is that the light beams of car headlights did not blind other road users.
Checking and adjusting Lada Granta headlights
Let's talk about adjusting the headlights, which is similar to how adjustments are made on other car models. This procedure must be carried out both on a completely new car and after driving on a rough road.
If your low beam headlights stop working, the culprit may be a relay or fuse. But if, on the contrary, the low beam does not turn off, then most likely your relay is stuck.
To make adjustments, we will need to acquire a Phillips-type screwdriver, a standard tool, as well as a spare tire and a full tank of gasoline (if possible). The last points are needed to ensure that the vehicle is fully loaded.
Checking the vehicle's leveling
Adjustment diagram for adjusting headlights
Hydrocorrector in position “0”
Headlight adjustment (adjustment dials)
The thumbwheel is used for adjustment in the horizontal plane, and the hex bolt adjusts the position of the light beam vertically. If possible, the beams should correspond as closely as possible to points on the manufactured wall, both in the vertical and horizontal planes.
In the photo there are two headlight adjustment dials
The most difficult to reach vertical adjustment bolt
It is considered that the optics are correctly adjusted when the rays go directly to the places of the required projections, previously applied to the wall, according to the operating rules of the machine.
Now a so-called test run is being carried out. This must be done in order to secure the headlight adjustment, and also to check whether the work was done correctly. Make sure that the beams of light do not blind drivers coming towards you.
We improve the quality of work done
To achieve the optimal result, it is necessary to check that the car body does not have any deformations, otherwise it will be extremely difficult to adjust the headlights, and the light from them will shine as if scattered.
Also check that the glass of the optical instruments is as clean as possible. You can remove dust and some other types of dirt using a vacuum cleaner without removing the headlight.
Scratches on a car headlight can be seen even with the naked eye.
If the car has been in use for a long time, especially on unpaved roads, then the headlight glass could have received damage in the form of small scratches. It is not necessary to change the headlights at all. Simply polishing them will be enough.
Some problems can also occur if the reflector is damaged or its geometry is violated. It’s difficult to help here, since the mirror surface is extremely difficult to restore. You will have to replace the reflector with a new one. It is not difficult to detect defects on it, since the uniform curvature of the image on the reflector will be disrupted.
And, of course, keep in mind that the optics must have lamps with equal power to each other, as well as identical dimensions. If this is not the case, then the adjustment will be of no use at all.
Reasons for poor lighting even after adjusting the headlights
- Cloudiness of the plastic shell results in poor light dispersion. There are two solutions here - buying new optical elements or polishing, which, by the way, you can even do yourself. For this purpose, a grinding machine is used, during breaks in which the plastic is washed to the desired level of transparency.
- The characteristics of headlights also affect the quality of illumination, since some are equipped with more powerful bulbs, while others have less. In this case, some use xenon “support”, which provides the proper luminous flux with minimal power.
- Cracks in glass can cause light to refract incorrectly. Here either its “reanimation” or complete replacement should help. In any case, this is one of the most expensive repairs, so it is better to periodically check the glass for mechanical damage.
Headlights for Lada Largus - main characteristics and tuning
A modern car is equipped with a large number of light sources. Some are used to indicate the dimensions of a car, others are used to notify traffic participants of the intention to perform a particular maneuver, and to give signals. There are rear and front lights installed on the right and left corners of the body. Among them, the main ones are those that are responsible for illuminating the road at night.
Headlights perform an important function: they illuminate the space in front of the car and make it visible to other road users. They should not be so bright that they blind oncoming traffic. It is important that the headlights are always in working order, because without quality lighting it is dangerous to move in bad weather and at night. If the headlights are faulty, the driver may not see an obstacle on the road, and the consequences will be disastrous.
Main characteristics of standard Largus head optics
During the development and production of the Lada Largus, the engine and headlights were borrowed from Renault Logan. The standard headlights are equipped with standard AvtoVAZ halogen lamps (H4 base) with two filaments. They are chosen as light sources due to their durability, optimal light output and the fact that they do not darken over time. A standard Largus lamp with a power of 60/55 W (high and low beam, respectively) produces a luminous flux of at least 1500 lm.
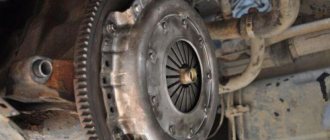
The Lada Largus optics use a standard fixed diffuser, with the help of which the direction of the light flux is adjusted by the position of the reflector and the lamp. The adjustment screws are hidden in the engine compartment, thereby protecting them from dirt and moisture. The headlights can be adjusted from inside the cabin using a hydraulic adjuster, but if precise adjustment is needed, this is not enough.
Low beam lamp “Kalina”: causes of malfunctions
Lamp burnout is the most common malfunction. Sometimes this begins to happen too often, which indicates the occurrence of an additional factor that causes the breakdown.
Important: when installing halogen lamps, it is necessary to monitor the cleanliness of the bulb and prevent contamination. Therefore, even contact of the skin of your fingers with the glass of the flask is unacceptable.
Reasons why the low beam lamp “Kalina” does not light:
- Failure of the fuse protecting the lamp power circuit.
- Depressurization of the headlight housing and dirt and dust getting inside. The bulb and reflector of the lamp become dirty, which leads to its overheating and failure of the filament.
- Unstable operation of the generator voltage regulator. Voltage surges in the on-board network greatly accelerate the failure of halogen lamps.
- Malfunction of the power supply circuit of external lighting devices, for example, oxidation and poor contact of lamp plugs, wire breakage.
During assembly, LADA “Kalina” cars are equipped with 55-watt low-beam lamps from the German company OSRAM, designed to operate at a voltage of 12 volts. Instead, you can install H7 modification lamps, for example, Phillips Extreme Vision, GE SportLight. These brands are unpleasantly surprising with the price of the lamps, but they are very pleasing with their service life and, most importantly, the power of the luminous flux.
The last factor has a decisive influence on the safety of night driving. You can save a little by installing lamps from Russian manufacturers on Kalina. Among them, the products of the Mayak plant stand out. The low-beam lamp “Kalina” from this company, at a very affordable price, is practically not inferior to its foreign analogues.
Advice: do not get too carried away with saving money when choosing low beam lamps. Too cheap lamps from unknown manufacturers require frequent replacement, which covers up the savings. But the quality of the head account will be noticeably worse.
Headlight malfunctions and how to fix them
There are not many items on the list of headlight headlight breakdowns. This is mainly due to damage to the lantern glass, failure of the corrector or the lamp itself. If the Lada Largus low beam lamp and corrector can be replaced, then the glass is installed only with the headlight assembly. Largus optics do not cause any inconvenience to owners. The most common problem is low beam bulbs burning out.
You can choose and install a good headlight bulb yourself. On the market of automobile spare parts and accessories there are light bulbs from both domestic and foreign manufacturers. Chinese lamps are not of very high quality: they burn out quickly and do not provide sufficient visibility on the road.
Standard halogen light should be yellowish. Many people prefer the so-called pseudo-xenon, which makes the glow white, but in bad weather conditions such lamps are inferior to standard ones. The latter sometimes even outperform LED and xenon optics, which produce a powerful luminous flux, but cost a lot of money and are installed in specialized centers. In fog and rain, halogen lamps demonstrate the highest penetrating ability of the light beam, which ensures their leading position.
Replacing lamps
The operation of replacing the lamp is simple and even beginners can do it. It is carried out as follows:
- The negative terminal is disconnected from the battery.
- A slight turn removes the plug from the back of the headlight.
- The wire block is disconnected from the lamp.
- The latch is removed from the grooves by pressing it with your finger.
The failed lamp is removed and a new one is installed in its place. It is recommended to use gloves when working, as fingerprints on the flask can lead to its premature burnout. The lamp is attached using a latch, a block with wires is connected to it, and a plug is put in place. A terminal is connected to the battery, then the operation of the headlight is checked.
It is recommended to change the bulbs in both headlights at once. This way you will be able to avoid the failure of another light bulb at the wrong time and ensure a uniform glow.
The problem due to which the Lada Largus headlight does not light may not be in the lamps. If replacing them does not bring any results, the fuse may have blown. The mounting block is located in the cabin at the bottom left of the steering column. Replacing fuses is a matter of seconds. Two fuses are responsible for the light. Even if they look intact, the cause of the malfunction may be hidden in poor contact. There is no special relay for headlights in Largus, and therefore the source of the problem may be oxidation of the contacts of the headlight itself.
There are often situations when the headlights do not work due to poor ground contact. In this case, inspection and cleaning of the contact is necessary. If this does not help, contact the service center specialists to identify the causes of the malfunction and eliminate them.
To replace the low/high beam bulbs, you do not need to dismantle the entire headlight or any of its parts, so the process does not take much time. If the headlights are shining, but the light beam is incorrect, the reason is a faulty corrector. Its main task is to lower or raise the luminous flux depending on the location of the car body. If the vehicle is loaded, then without adjustment by the corrector the light will blind oncoming traffic. This part cannot be repaired, which means it is immediately replaced with a new one. This will require disassembling the headlight unit.
Block lights
Structurally, each block headlight of the LADA Largus station wagon consists of two sections. One contains:
- "marker" lamp (W5W).
- double-filament lamp for low and high beam (type H4);
Nearby is the section in which the PY21W turn signal lamp is located.
The headlight unit is dismantled when it is damaged or needs to be modified (tuning).
Replacing the headlight
Before you begin work related to replacing the headlight, you must:
- Secure the station wagon using the handbrake.
- Remove the key from the ignition.
- Remove the negative wire from the battery terminal.
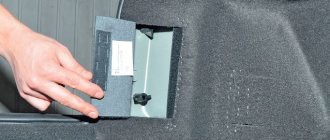
The dismantling of the headlight block of the LADA Largus station wagon begins by first removing the front bumper. This operation is shown in detail on the video page:
After this, access to the fastening elements in the lower part of the case will open. Next, you need to disconnect the electrical wires:
- going to the H4 type lamp. To do this, remove the cover 3 and disconnect the pads;
- remove the sockets for the direction indicator lamps 5 and indicator lamps 7;
- remove the actuator of the headlight hydraulic corrector (if equipped) from the headlight housing, to do this, slide boot 4 along the cable and unclip the fastening latch.
- after this, you need to unscrew the fastening bolts (items 1, 3 and 4) located around the perimeter of the body part (2);
- push the headlight housing forward a little and remove it.
The new headlight unit is installed in the reverse order, maintaining a uniform gap between housing 2 and body parts.
Adjusting the luminous flux
After carrying out any work related to the head optics of the LALA Largus car, it is mandatory to check and adjust (if necessary) the direction of the luminous flux of the switched on lamps. To do this, it is best to contact a specialized service station, equipped with special instruments and staffed by qualified specialists. However, in case of emergency, such an operation can be carried out independently and without the necessary equipment. In practice, there are several ways to check and adjust headlights. You can see one of them by watching the video:
Replacing lamps in a headlight
Among the sudden malfunctions that almost all car owners encounter, one of the first places is the failure of head optics light sources. These include lamps:
- low/high beam;
- direction indicator;
- Dimensions indicator.
All of them are located inside a separate headlight and changing them, if necessary, is not difficult.
Replacing the low/high beam lamp
Change the low/high beam lamp in the LADA Largus headlight in the following order:
- remove the protective cover;
- disconnect the block with wires;
- pull out the rubber seal;
- pressing on the spring holder, remove it from under the latch;
Replacing the headlight
It may be necessary to replace standard optics in rare cases. Usually the headlight is removed if you need to replace it with a new one, or during tuning. The process is quite simple, the only problem is that you need to remove the front bumper, since without this you cannot get to the lower mounting screws. The procedure for replacing a Largus headlight is as follows:
- The car is placed on a level surface and secured with a parking brake.
- The negative terminal is disconnected from the battery.
- The front bumper is removed.
- Bolts 1,3 and 4 (photo) are unscrewed, thereby releasing the headlight from the mount.
Headlight mounting screws
- The cover is removed and the wiring block is disconnected from the lamp.
- The headlight range control is removed.
- The marker lamp holder is removed.
- The headlight unit is released and can be removed.
New optics are installed in the reverse order, the gaps between all contacting parts should be minimal. After replacement, the headlights must be adjusted.
Block lights
Structurally, each block headlight of the LADA Largus station wagon consists of two sections. One contains:
- "marker" lamp (W5W).
- double-filament lamp for low and high beam (type H4);
Nearby is the section in which the PY21W turn signal lamp is located.
The headlight unit is dismantled when it is damaged or needs to be modified (tuning).
Replacing the headlight
Before you begin work related to replacing the headlight, you must:
- Secure the station wagon using the handbrake.
- Remove the key from the ignition.
- Remove the negative wire from the battery terminal.
The dismantling of the headlight block of the LADA Largus station wagon begins by first removing the front bumper. This operation is shown in detail on the video page:
After this, access to the fastening elements in the lower part of the case will open. Next, you need to disconnect the electrical wires:
- going to the H4 type lamp. To do this, remove the cover 3 and disconnect the pads;
- remove the sockets for the direction indicator lamps 5 and indicator lamps 7;
- remove the actuator of the headlight hydraulic corrector (if equipped) from the headlight housing, to do this, slide boot 4 along the cable and unclip the fastening latch.
- after this, you need to unscrew the fastening bolts (items 1, 3 and 4) located around the perimeter of the body part (2);
- push the headlight housing forward a little and remove it.
The new headlight unit is installed in the reverse order, maintaining a uniform gap between housing 2 and body parts.
Adjusting the luminous flux
After carrying out any work related to the head optics of the LALA Largus car, it is mandatory to check and adjust (if necessary) the direction of the luminous flux of the switched on lamps. To do this, it is best to contact a specialized service station, equipped with special instruments and staffed by qualified specialists. However, in case of emergency, such an operation can be carried out independently and without the necessary equipment. In practice, there are several ways to check and adjust headlights. You can see one of them by watching the video:
Replacing lamps in a headlight
Among the sudden malfunctions that almost all car owners encounter, one of the first places is the failure of head optics light sources. These include lamps:
- low/high beam;
- direction indicator;
- Dimensions indicator.
All of them are located inside a separate headlight and changing them, if necessary, is not difficult.
Replacing the low/high beam lamp
Change the low/high beam lamp in the LADA Largus headlight in the following order:
- remove the protective cover;
- disconnect the block with wires;
- pull out the rubber seal;
- pressing on the spring holder, remove it from under the latch;
- Carefully releasing the holder, carefully remove the burnt out lamp.
The new lamp is inserted into the reflector hole and secured using standard fasteners. Then all the removed parts are returned to their places.
Replacing the turn signal lamp
In order to change a faulty lamp installed in the turn signal compartment, you must:
- gently press out the plastic connector retainer;
- disconnect the connector with the on-board power supply wires;
- remove the lamp socket from the headlight socket by turning it clockwise (left lamp) or counterclockwise (right lamp);
- By pressing and turning the lamp counterclockwise, we take it out.
The new lamp is installed in the reverse order.
Replacing the indicator lamp
A burnt-out baseless bulb installed in the size indicator is changed as follows:
- disconnect the block with electrical wires from the cartridge;
- turn the socket clockwise (left lamp) or counterclockwise (right lamp) and remove it from the headlight housing;
- A new lamp is placed in place of the burnt one.
The cartridge is returned to the standard socket, performing all operations in the reverse order.
Headlight adjustment
Car owners know that the procedure for adjusting Largus headlights with your own hands is not the fastest and easiest process. But it is extremely important, since the safety of those in the cabin depends on the correct setting of the light. The fact that there is a need to adjust the lighting of the head optics may be indicated by the signals of oncoming cars: they will flash their high beams, indicating that you are blinding them.
Before you start setting up, you need to make sure that it is necessary. The correct light is ensured by the following conditions:
- good condition of shock absorbers;
- optimal tire size and pressure;
- uniform distribution of load on different parts of the body.
If these criteria are deviated, the glow angle will be incorrect. If the problems described above are not identified, then you can safely move on to adjusting the light.
What is a hydraulic corrector and how does it work?
The hydraulic headlight corrector is installed on the Grant from the factory. This device adjusts the headlights higher or lower depending on the vehicle's load.
You need to adjust it yourself - there is no automatic setting.
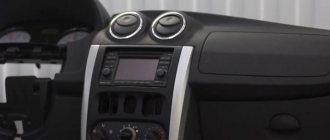
The corrector control is located under the light switch handle. Position 0 corresponds to a car with one person - the driver.
The more the machine is loaded, the higher the hydraulic corrector value should be.
Principle of operation:
- the handle controls the hydraulic corrector cylinder;
- the cylinder regulates the pressure in the flexible tubes that go to the pushers;
- pushers are installed in the headlights - the higher the pressure in the tubes, the stronger the liquid inside the pusher presses on the rod;
- the position of the rod deeper/further is responsible for adjusting the headlight higher/lower.
The operating principle of the hydraulic corrector is clearly shown below:
Visual representation of the headlight hydraulic adjustment system
What to do if the hydraulic corrector is broken
Have both or one headlight stopped responding to the hydraulic corrector? Most likely your pusher is broken .
According to the regulations, the entire hydraulic corrector mechanism is replaced as an assembly and cannot be repaired. Price from 400 to 1000 rubles. Order number: 21903718010.
If you want to fix the pusher, there are two ways .
Table 1 . Options for repairing the headlight range control pusher.
No further adjustment.
Link to a detailed description of the second method with comments here.
A corrector kit costs about 700 rubles - it may be easier to replace it
How to replace a hydraulic corrector with an electromechanical one
Do you want to replace the hydro with an electric corrector (EMKF)? The process is simple, as there are ready-made solutions from the factory.
Headlight adjustment algorithm
To adjust the Lada Largus headlights, you can either contact a service center or do it yourself. The main feature of this procedure is that the model of the vehicle, its modification and equipment does not matter. The adjustment is carried out the same way on both new cars and used cars.
Data capture
This stage is diagnostic; before starting it, you need to prepare the tools, install the spare wheel in its original place, and fill the tank full. After this, the car is placed on a flat horizontal surface. The accuracy of the performance indicators of the head optics will depend on how flat the plane is. Additionally, the car must be started and idling. The car should be secured with a parking brake.
What you need to know about adjusting headlights
- On many cars, the lamps combine high and low beam, and the adjustment is made according to the low beam. There are optics where the low and high beams are separated; for each option, adjustments must be made separately.
- Before starting adjustment work, the headlights should be washed and the integrity of their fasteners checked.
- The most accurate way to adjust the headlights is on a car that has a front suspension in full working order, a half-filled fuel tank, and properly inflated tires.
- Many round or rectangular fog lights have symmetrical fasteners; they are installed in two positions. If the PTFs are installed backwards (upside down), they will not be able to be adjusted.
- If you cannot adjust the headlights yourself, you should contact a specialist service station. In any case, using special equipment, adjusting the headlights will be more accurate than when doing such work yourself.
- For right-hand drive cars (Japanese, from the UK), the headlight adjustment scheme differs from the setting used for left-hand drive cars.
- There are different data on the Internet and published videos regarding the height of the headlights when adjusting, but the light should not be directed parallel and not higher than the level of the optics itself; the headlights cannot be directed very low.
Tuning Largus headlights
Many Lada Largus owners are dissatisfied with its appearance. Although the designers have created a new look, which is strikingly different from previous VAZ models, it is still not original. Largus owners are offered kits for upgrading optics, varying in quality and price.
Instead of standard optics, it is possible to install a more powerful lensed one. It can perform two functions at once: it increases driving safety at night and makes the car more attractive. In some Largus configurations, fog lights (FTL) are also installed at the manufacturer's factory.
You can install not only xenon, but also bi-xenon, when low and high beam are combined in one lamp. At the same time, it is not necessary to buy new headlights: xenon is easy to install in standard optics. The on-board computer may resist such modifications; in such cases, so-called “decoys” will help.
Xenon is installed not only in conventional headlights, but also in lenses. You can add “angel eyes” - a signature feature of the exterior of BMW cars. Stores offer block headlights with daytime running lights or additional lights for Lada Largus, which can be installed in their original place without any modifications.
Replacing optics on Largus is an expensive procedure even when installing standard equipment, not to mention lenses or xenon. For this reason, it is recommended to carefully monitor the condition of the headlights and avoid possible mechanical damage in every possible way. It is recommended to use a car in the dark (this is especially true in winter) only if there are properly adjusted lights. This is necessary to ensure that insufficient lighting does not cause a serious accident and threaten the health and life of all passengers.
Block lights
Structurally, each block headlight of the LADA Largus station wagon consists of two sections. One contains:
- "marker" lamp (W5W).
- double-filament lamp for low and high beam (type H4);
Nearby is the section in which the PY21W turn signal lamp is located.
The headlight unit is dismantled when it is damaged or needs to be modified (tuning).
Replacing the headlight
Before you begin work related to replacing the headlight, you must:
- Secure the station wagon using the handbrake.
- Remove the key from the ignition.
- Remove the negative wire from the battery terminal.
The dismantling of the headlight block of the LADA Largus station wagon begins by first removing the front bumper. This operation is shown in detail on the video page:
After this, access to the fastening elements in the lower part of the case will open. Next, you need to disconnect the electrical wires:
- going to the H4 type lamp. To do this, remove the cover 3 and disconnect the pads;
- remove the sockets for the direction indicator lamps 5 and indicator lamps 7;
- remove the actuator of the headlight hydraulic corrector (if equipped) from the headlight housing, to do this, slide boot 4 along the cable and unclip the fastening latch.
- after this, you need to unscrew the fastening bolts (items 1, 3 and 4) located around the perimeter of the body part (2);
- push the headlight housing forward a little and remove it.
The new headlight unit is installed in the reverse order, maintaining a uniform gap between housing 2 and body parts.
Adjusting the luminous flux
After carrying out any work related to the head optics of the LALA Largus car, it is mandatory to check and adjust (if necessary) the direction of the luminous flux of the switched on lamps. To do this, it is best to contact a specialized service station, equipped with special instruments and staffed by qualified specialists. However, in case of emergency, such an operation can be carried out independently and without the necessary equipment. In practice, there are several ways to check and adjust headlights. You can see one of them by watching the video:
Replacing lamps in a headlight
Among the sudden malfunctions that almost all car owners encounter, one of the first places is the failure of head optics light sources. These include lamps:
- low/high beam;
- direction indicator;
- Dimensions indicator.
Adjusting the direction of light of the main (low, high) and fog lights
See also: Adjusting headlights with a corrector (depending on load)
For adjustment you will need: a 5" (or 6") hex key and a Phillips screwdriver.
Note: Check and adjust the headlights with the vehicle equipped (with a fully filled tank, tools and spare tire).
1. Pre-check and, if necessary, adjust the tire pressure to normal. (see here)
2. Place the car against a wall, at a distance of 3 m (for example, in a garage). Place an additional 75 kg weight on the driver's seat, thereby simulating the driver's weight. Mark the screen on the wall as shown in the figure. The longitudinal plane of symmetry of the car should pass along line 0 on the screen. Rock the car laterally so that the suspension springs self-align.
3. Measure the distance from the center of the headlights to the floor on your vehicle. This will be the distance h on the screen.
4. Set the headlight level control (if installed) on the instrument panel to a position that corresponds to the load of a single-driver vehicle. (see here)
5. Turn on low beam.
6. It is recommended to check the direction of the light spot for each headlight separately. Cover the second headlight with opaque material during adjustment.
7. If the location of the light spots does not match the picture, open the hood. By rotating the adjusting screw (view of the left headlight from the engine compartment), adjust the horizontal position of the light spot on the screen...
8. ...and vertically.
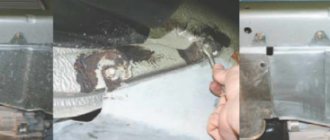
To rotate the vertical adjustment screw, insert the hexagon through the hole in the upper cross member of the radiator frame.
This is where the screw for adjusting the headlights vertically is located.
9. The headlights are considered adjusted when the upper boundaries of the left parts of the light spots coincide with line 4, and the vertical lines 1 and 2 pass through the intersection points E1 and E2 of the horizontal and inclined sections of the light spots.
10. If necessary, adjust the second headlight in the same way.
Adjusting the fog lights
1. The light beams of the fog lights are adjustable only in height. For access to the adjusting screws on the fog lamp housings, holes are provided in the fog lamp trims. By rotating the adjusting screws with a Phillips screwdriver, ensure that the upper boundaries of the light spots are on line 4 or slightly below it.
This is where the adjusting screw A is located on the fog lamp housing and the hole B for adjustment in the headlight trim (view with the fender liner removed).
Fog lights
At the request of potential buyers, LADA Largus cars are equipped with fog lights, which are integrated into the lower part of the front bumper.
- Halogen single-filament lamp H11.
- Adjustment screw.
Replacing the lamp
Replacing a burnt-out lamp in the fog lamp of the Lada Largus station wagon begins by dismantling:
- front wheel;
- fender liner installed in the front wheel arch;
By removing the fender liner, we gain access to the niche where the fog lamp is installed.
- pressing the latch, disconnect the block with electrical wires;
- turn the lamp counterclockwise until it stops and remove it from the headlight housing.
In order to install a working lamp in place, repeat the dismantling process in reverse order.
Replacing the headlight
The operations by which the headlight is accessed are described above. Having reached it, use a Phillips screwdriver to unscrew the three mounting bolts and remove the headlight housing.
The new headlight is placed in a niche specially designed for this purpose; it must be secured using standard fasteners.
Having secured the headlight, it is necessary to adjust the light beam in the vertical plane. To do this, insert a slotted screwdriver into the hole specially provided in the front bumper and rotate the adjusting screw - clockwise if you need to raise the light beam or counterclockwise if you need to lower it.
«>
Adjusting headlights with a corrector in the interior of Lada Largus / Lada Largus
See also Instrumental adjustment of main and fog lights
Note: If the headlight range control does not work, and one of the headlights begins to shine too much downwards, then check whether the adjustment cable has come off the headlight range control. To do this, remove the rubber boot from the corrector on the headlight and insert the cable into place (see picture here)
Turn knob 1 down to make the headlights shine lower, or up to raise the beam of light.
| Basic position: car with empty trunk, one driver or driver and one passenger in the front seat. | |
| 1, 2, 3 passengers and luggage not loaded. | 1 |
| 3 passengers and trunk loaded. | 2 |
| One driver and the trunk is fully loaded. | 3 |
The regulator is located on the left side of the panel. Adjust the low beam height. There are three numbers on the regulator: “0, 1, 2, (3)”. Turn the control knob from 0 to 2 (or 3) one by one and the low beam will gradually lower. Try to turn the knob at one minute intervals. If the regulator is returned too quickly, the electrical regulator may malfunction.
Addition (experience of forum members)
When driving around at night with an oncoming car, I often think that 50% of our drivers do not know and do not know how to use headlight range control. I myself use it very often, and what I like about Largus is that the corrector does not have fixed positions. On cars with fixed corrector positions, the adjustment step is often too large. On Largus you can very accurately adjust the position of the headlights.
How often do you use a headlight corrector, and what criteria do you use to set it?
Where there is a corrector: Outside the city, I put it in the upper position in order to increase the illumination. When fully loaded, I lower it down. In the city I set it as low as possible, there is enough street lighting, headlights in the city are more needed to indicate a car on the road than to illuminate the path. Where there is no corrector, there is no need to adjust anything. On the highway, it's mostly unadjusted headlights, lovers of pseudo-xenon with non-standard lamps and xenon installed in unsuitable optics that hurt your eyes.
How to remove the headlight and turn signal on a Lada Largus
We place the car on a viewing hole or on a lift.
Remove the front bumper.
Disconnect the battery.
Using a 10mm socket, unscrew the three bolts 1, 3, 4 (Fig. 1) securing the headlight to the car body
Remove cover 3 (Fig. 2) of the high and low beam lamp socket
Disconnect the lamp connectors.
We slide the sealing cover 4 of the headlight range control along the cable sheath.
We remove the actuator of the headlight range control from the headlight housing (see Fig. 3).
Remove the side light bulb socket.
Installing the headlight unit
Install the headlight unit in the reverse order of removal.
In this case, it is necessary to ensure uniformity of gaps between the headlight unit and the mating parts of the car body.
If it is necessary to replace the headlight lamps, remove the protective cap from the engine compartment side of the corresponding lamp, Figure 2, and replace the lamp.
Do not touch the halogen lamp bulb with your fingers. Remaining grease marks can cause the lamp to overheat and explode. If you touch the glass of the lamp, wipe it with a lint-free cloth. When replacing lamps, wear clean cloth gloves.
Installing the front bumper.
Adjust the direction of the headlights.
To remove the headlight range control drive:
Disconnect cover 3, Figure 2, of the high and low beam lamp socket.
Slide the sealing cover 6 along the cable sheath (Figure 3)
Press latch 2 of the corrector housing fastening and, turning it, remove the corrector housing from the headlight unit.
We press the pusher 3 of the drive so that a small gap is formed at the tip of the cable 4.
Disconnect the end of the cable sheath 5.
Disconnect the cable from the drive.
Installing the headlight range control drive
Pull reflector 1 towards you, Figure 4, so as to bring the holder slot as close as possible to the corrector pusher.
Fix the pusher in the slot of the holder 2.
Secure the corrector drive with a clamp.
Install tip 4, Figure 3, of the corrector drive cable into the pusher.
Pull back and secure the end of the cable sheath 5 in the corrector drive housing.
Place sealing boot 6 in place.
Install cover 3, Figure 2, of the high and low beam lamp socket.
Removing the turn signal
We install the car at the workplace. Raise the hood, disconnect the earth wire terminal from the battery.
Squeeze the two clamps 2 (Fig. 5) and remove the turn signal housing 3 with the seal assembly from the front fender of the car
We remove cartridge 1 from housing 3 (Fig. 6) of the turn signal repeater, turn it a quarter turn counterclockwise and pull lamp 2 towards you
We install the side turn signal in the reverse order of removal.
Source
Preparing to make adjustments
To achieve the correct position of the headlights, the adjustment procedure must be performed under certain conditions. Carry out the following preparatory work:
- Find a flat area without a slope adjacent to a vertical wall. One of the suitable options is a concreted entrance to the garage; the role of the setting template will be played by the gate.
- Remove unnecessary items from the trunk and interior of the car, leaving only the factory tool kit, first aid kit and spare tire. The goal is to ensure the curb weight of the vehicle specified in the operating instructions.
- Check the pressure in all tires and adjust them to normal if necessary.
- Clean the optical glass from dust and other contaminants that block the path of light flow. Do not use solvents, only ethyl alcohol-based glass cleaners.
- It is advisable to fill the fuel tank full, fill the washer tanks to the top and, if necessary, add antifreeze to the expansion tank.
A headlight adjustment diagram is drawn on the garage door or wall adjacent to the site. You will need a tape measure, a long straight bar and a marker. The color depends on the chosen background - for a white wall it is better to take a black felt-tip pen, for a dark gate - chalk. The diagram is drawn as follows:
- Drive the machine close to the wall. Using body parts or the car brand emblem as a guide, mark a point on the surface that coincides with the central (longitudinal) axis of the vehicle.
- Measure 7 m from the gate and drive the car to the specified distance. Draw a vertical line through the marked point.
- Take 4 measurements on the car: from both headlight bulbs to the ground and to the center of the car. On models equipped with separate high and low beam optics, the listed measurements are made for all four bulbs separately.
- Subtract 50 mm from the number indicating the distance to the ground. Set this size aside on the wall and draw a horizontal line.
- From the vertical axis, plot the distances to the centers of the lamps along the drawn line. Place marks in the form of segments. The scheme is ready.
Before adjusting the position of the optics, it is also recommended to treat the adjustment screws with a penetrating aerosol lubricant such as WD-40, since the connection threads could become soured due to extremely rare rotation. As a rule, the adjusting screws are located on the rear plane of the headlight housing, facing into the engine compartment. The shape of the head is for a Phillips screwdriver, hexagon or special key.
Adjusting the light emission
The standard situation for Renault Duster is observed when changing the parameters of the light beam after replacing a used lamp. Headlights need adjustment. Upon detailed examination, it turns out that the spot of light is projected with a deviation from the norm: either up or down. It is also possible to shift the beam in any direction along the horizontal plane. How to adjust headlights? This problem is eliminated by adjusting the beam. There are many videos on the Internet about this.
On the Renault Duster crossover, an adjusting bolt is responsible for this function. It is also possible to move the moving block in the required direction. There is no need to remove the body or bumper to do this. The offset is done using a #6 hex. This adjustment is very easy and there are many videos on this.
In this case, you also need to start by removing the boot of the beam regulation mechanism. The work is similarly done manually without tools. Afterwards, the adjustment screw is adjusted using a wrench.
When adjusting the beam, the light device itself must be turned on, and the machine must be standing in front of a wall or screen, so that it is clear whether the adjustment is being made correctly according to the projection or not. How are the headlights adjusted? To set the light more accurately, it is necessary to perform the procedure in the evening or in a dark box. By rotating the bolt left and right, a significant horizontal movement of the beam is achieved. After achieving the desired result on the beam, you need to return the boot to its place and the work can be considered complete.
Now the headlights illuminate, rather than just shine. Replacing lamps + FAQ: How to adjust the headlights yourself!
The original headlights were not bad, but they weren’t satisfactory - they were rather weak. We are used to better road lighting along Logan and Fiesta. And adjusting the headlights, two weeks ago, helped, but only slightly.
Therefore, on Saturday new lamps were purchased and installed in the headlights.
Traditionally, this is Philips X-treem vision +100% H4 55/60W
Why these lamps
: at Fiesta and before that at the four, I tried almost the entire range of lamps from stores. So - no Osram Knight Breaker Plus, no PIAA, and even xenon installed instead of standard lamps, without blinds, does not shine so well!
By the way, the old dumps are quite good - Osram, made in Germany, but it felt like after installing the new lamps - they were as bright as a light bulb in the glove compartment!
Now you don’t have to strain when driving in the dark, a very even light, of a whitish tint, illuminates even the oncoming side of the road 25 meters ahead, and your own side of the road about 100 meters.
The photo on the brown fence is certainly not an indicator, but in general the lighting is better than the native osram, even here, 2 meters from the fence =)
Comparison of Philips X-treem vision with xenon instead of standard lamps:
These lamps were compared with “makeshift” xenon (that is, xenon installed instead of standard lamps, without special blinds) back at Fiesta - the illumination is approximately the same, but the xenon either shines strongly into the eyes of those oncoming - it illuminates a large area above the “tick”, or only shines 15 meters from the hood. Bright. But there’s no point - what’s the point of having headlights shining under your nose? Philips X-treem vision, when the headlights are adjusted correctly, illuminates much of the road without blinding oncoming traffic. On an unlit road, you can safely drive without turning on the driver at a speed of up to 90-100 km/h.
In general, if you do not have enough headlight light, I highly recommend Philips X-treem vision - this is the best choice. Moreover, in one of the most famous chains of auto stores (so that this blog is not considered an advertisement, I don’t write the name) they have a sale until November 30 - only 849 rubles. Usually they cost 1400-1700 rubles. ______________________________________________________________
Well, now what was promised - about how to adjust the headlights
(
on any car, not just Largus!
),
To make adjustments you will need a tape measure, a ruler, a chalk, a 5mm internal hexagon,
0) set the corrector to 0, no one should be in the car during adjustment! There shouldn't be a load either!
1)
We choose a horizontal platform with a wall at the end, stand so that there is exactly 5 meters from the front of the car to the wall!
( L=5
meters on the diagram)
2)We measure the height A
. To do this, we look for a circle with a cross on the approximate center of the headlight, similar to a target, the size is approximately 1 mm in diameter. It is there, but not on all cars, if you haven’t found it, then turn on the low beam, put a dot in the place , (on the headlight the light is mirrored, relative to the wall, that is, the checkmark is down), that is, in the place where the light bends down from the horizon. And we measure the height A to this place.
3)
We measure the same height A on the wall and draw a strictly horizontal
line 1
4)
Draw
line 2
strictly 5 cm below line 1 (If you have an angle α written under the hood α = 1% If it is more than 1% (sometimes it is 1.3, or even 1.5% - then you will have to calculate how much your % of 5 meters. And draw a line that much lower 2)
5)
We set the horizontal part of the light to line 2, no higher, no lower. On Largus and Logan it is screw 4 (see picture below) - it is turned with an internal hexagon 5.
6)
Using screw 7, we set the light so that the “checkmarks” are strictly opposite each headlight. It can be turned by hand or with an adjustable wrench.
Everyone, enjoy life! Everything seems complicated, but it actually takes 5 minutes!
I can say that the factory setting of the headlights was approximately 2% slope, and should have been adjusted by the dealer during pre-sale preparation.
How to choose a lighting element
The range of lamps for installation in car headlights is very extensive. However, there are two factors that significantly limit your choice:
- the design of the headlamp block does not allow the use of any options you like;
- code requirements that expressly prohibit the installation of any elements other than those originally used by the manufacturer.
In the Lada Largus car, the functions of low and high beam are performed by one double-filament halogen lamp. This is convenient as it allows you to save space under the hood and reduce the size of the headlight unit. One tungsten filament produces a beam of light of greater brightness, directed primarily horizontally (high beam), and the second creates a beam with an opening angle of 30°, of which 10° are directed above the horizontal, and the remaining 20° below it.
The ability to reduce the size of the headlight unit results in the need to change the light bulb when any filament fails, even if the second one works quite reliably. In addition, you always have to change both lamps, left and right, since for high-quality lighting you need a set of two lamps selected according to their characteristics.
Lada Largus lamp base
High and low beam are realized using one light bulb with h4 socket. In addition, the following types of base are used for different positions:
In addition, there is a C3W baseless bulb that illuminates the stove control.
Table of lamps used in Lada Largus
Let's consider what lamps are installed for light signaling on Largus. Front lamps:
| Front lamps | Type | Power, W |
| Low/high beam | H4 | 60/55 |
| Front turn | PY21W | 21 |
| Dimensions | W5W | 5 |
| Fog lights | H11 | 55 |
| Side dimensions | WY5W | 5 |
| Rear lamps | Type | Power, W |
| Direction indicators | PY21W | 21 |
| Dimensions and brake signal | P21/5W | 21/5 |
| Fog light | P21W | 21 |
| Reverse | P21W | 21 |
| Additional brake light | P21W | 21 |
| License plate lamp | W5W | 5 |
| Trunk lighting | W5W | 5 |
Interior lighting and service lighting:
| Purpose of the lamp | Type | Power, W |
| Interior lighting | W5W | 5 |
| Individual lighting | W5W | 5 |
| Glove compartment lamp | W5W | 5 |
| Cigarette lighter illumination | W1.2W | 1,2 |
| Illumination of the ventilation, air conditioning and heating unit | W1.2W | 1,2 |
| Hazard switch illumination | W1.2W | 1,2 |
Important! This is a complete list of lamps used on the Lada Largus. It must be taken into account that new models, for technological or other reasons, can be equipped with other types of lamps.
The best n4 lamps for Largus
To install the high/low beam of the Lada Largus, H4 halogen lamps are required, provided by the optics of the headlights. The most popular models:
- Philips X-treme Vision. Bright lamps giving cool white light. This is convenient in good weather, but in fog or snow the lighting efficiency is sharply reduced;
- Philips LongLife EcoVision. Inexpensive models with extended operating time;
- Osram Original Line. All-weather design with extended coverage area;
- Bosch Pure Light. They have bright light and extended service life.
According to users, the best option is Bosch Pure Light, the cheapest and brightest designs. Philips X-treme Vision is too expensive and often fails quickly, in addition, vision 130 models are too often counterfeited by unscrupulous manufacturers from Southeast Asian countries. Osram products represent an average option in terms of characteristics and service life, but when purchasing you need to carefully monitor the supply voltage - many models are designed for 24 V.