Renault Duster is a compact crossover. Typically, its owners rarely encounter situations after which there is a need to remove the Renault Duster bumper, mainly if it is necessary to change the bulbs in the fog lights. But if you have to often travel outside the city, then there is a risk of encountering obstacles such as dirt, branches and stones. This may cause minor damage to vehicle attachments and, in rare cases, require replacement or repair of an element such as the bumper. This procedure is not complicated, it is only important to remember that on new versions of the SUV and pre-restyling versions, the location of the fasteners may be slightly different, so before carrying out work, you must carefully read the instructions.
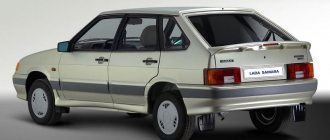
How to choose a bumper for a Priora
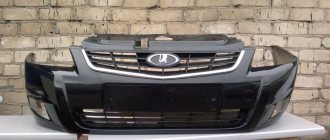
This is a question that car owners ask after minor accidents, when a part cannot be repaired and needs to be replaced. Before purchasing a bumper, you need to understand that Lada does not produce original bumpers.
The official suppliers for the conveyor are KamPlast and PPI companies.
The best quality is KamPlast. However, the choice of bumper may be limited to purchasing a used version in color. And this has its advantages:
- factory color;
- there is no need to select paint and paint;
- The paintwork holds up much better.
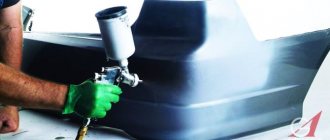
Having purchased a new bumper, the car owner risks running into an unscrupulous painter who will not be able to paint the part properly. The varnish may peel off after just six months, and after a year the bumper may even “lose” some of the paint.
Attention! You should not buy an unpainted bumper and install it on your car right away. During operation, there is a risk of getting nicks and scratches, which will have to be smoothed out with putty, but it holds up much worse. After purchase, it is recommended to paint it immediately.
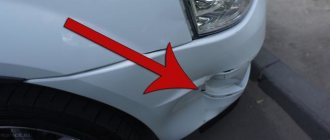
In what cases is it necessary to replace the bumper?
The presented element performs a protective function for the vehicle body, therefore it takes on the bulk of the damage in a collision. With minor impacts, cracks and other defects appear on the product, which must be restored. However, in some cases, for example, after a serious accident, repairs are impractical and a new bumper must be installed. Among the reasons that necessitated this procedure:
- the protective element is completely destroyed;
- individual parts of the product are missing;
- through holes of a large area were formed.
In these situations, replacing the bumper is much more profitable and faster. This process includes several key steps:
- Assessment of the nature of damage.
- Dismantling elements that block access to the fasteners of the part.
- Removing the damaged bumper.
- Restoring the geometry of adjacent body elements.
- Installation of removed elements and new parts.
Our specialists have extensive experience in working with various brands and models of cars, so they replace the bumper as accurately, quickly and in strict accordance with factory regulations. The cost of work depends on several factors (the degree of damage, the price of new spare parts, etc.), therefore, it can only be clarified after a preliminary inspection.
Please note that experts do not recommend changing the bumper yourself. The lack of precise knowledge about the technology of work (especially in the presence of serious body defects) is fraught with broken geometry of parts, broken fasteners and other unpleasant consequences for the car owner.
How to repair a bumper
Often replacement can be avoided and damaged plastic can be repaired. Here, of course, you cannot do without the help of an experienced craftsman, but if you wish, you can do it yourself.
There are two very reliable ways to solder a bumper on a Priora:
- Metal grid.
- Welding using a hair dryer and a plastic rod.
The first method has been used before. To do this, you need to have a powerful soldering iron - from 80 watts and above and a metal mesh, which is used, for example, to protect audio speakers.
The parts to be fastened must be cleaned at the site of the future seam, and then the mesh must be cut off and applied to the joint on the back side of the bumper.
Heat the mesh with a soldering iron and it will “fall” into the melted plastic. All that remains is to move it to the side to tighten the mesh with liquid plastic and move the soldering iron away.
This makes a fairly strong connection. However, finding a suitable mesh is often difficult, and the connection is not durable. The best method is using a hair dryer and a rod.
Procedure:
- The bumper must be removed from the car and the soldering area must be processed using a grinding machine.
- The connection point is secured with clamps. And it is cleaned with a Dremel - you need to create a groove.
- Using a special nozzle, heat the plastic rod and move it along the joint, creating a seam. Treat the front of the bumper as well.
- The seams must be smoothed using a sanding machine.
- After this, the repair area is leveled, primed and painted.
Not every bumper can be repaired. It is impossible to solder a crack in the areas of the bumper's power component. For example, on the ribs, which strengthen the structure.
Unfortunately, such a bumper will have to be thrown away or used for spare parts in the future.
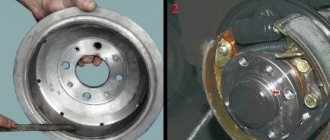
What to do if fasteners are broken
Modern bumpers are equipped with parts made of plastic; they are the ones that most often break during various repair work, as well as in accidents. In the case where the fastening elements are broken, it is absolutely not necessary to buy a new damper; it is enough to repair them yourself.
When you have purchased new plastic latches, all you need to do is install them on the dismantled bumper. To do this, you first need to install a new ear of such a fastening. This element must be glued to the surface of the damper, then secured with self-tapping screws and then checked for reliability of the entire connection. In addition, fastening the shock-absorbing device latch on the inner surface can also be done using rivets.
This is interesting: Causes of malfunctions and self-repair of the fuel sensor level
In the same case, when you could not find a suitable set of new latches, you will have to resort to handicraft production of such parts. Such a move is justified only in rare cases, since it is associated with a violation of the integrity of the damper, which can lead, in the future, to its rapid destruction. From a technical point of view, such a repair consists of cutting a rectangle of the required size from a sheet of metal. A hole is drilled in it for the mounting bolts that will now hold the bumper.
This is a barbaric method, so it is better to try to select standard fasteners in the kit. Such mounts do not have to be produced for a specific model; installation of suitable products from other cars is quite acceptable. This procedure ends with the installation of the bumpers in their original places.
Despite the fact that the car bumper mounts are made of fragile plastic, if they are properly dismantled and installed, they can be prevented from being damaged. In the same case, when this does happen, you can easily install new ones in their place. Thus, this element of the body structure will be restored and can serve you for a long time.
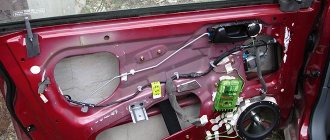
Removing and installing the front bumper of Priora
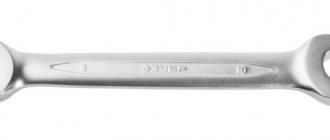
To remove the front bumper on the Lada Priora of the first and second generations, you will need a 10mm socket and a Phillips screwdriver.
The procedure is as follows:
- Unscrew the three screws securing the part to the fender liners on the left and right sides.
- Remove the left and right headlight housings by unscrewing three screws on each side.
- Unscrew the lower bumper mounts - three pieces on each side to the lower plastic protection and remove the engine protection.
- Remove the fog lamp connectors.
- After unscrewing the upper fastening screws, remove the assembled part.
- Installing a new bumper on Priora 1 is done in the reverse order.
The bumper on Lada Priora 2 is dismantled in the same way and is completely interchangeable with the first one.
Features of installing tuning elements
Since most body kits significantly increase the mass of parts, the fasteners must be of the highest quality. You cannot use the cheapest materials for expensive tuning bumpers with a skirt.
The best way out is to contact a specialized service center. Experienced employees will be able to securely fasten the body kits, guaranteeing a long service life of the products.
After installing non-standard parts, you should check the rigidity of the fixation after some time. The peculiarity of tuning elements is that they are not always made of reliable materials. Therefore, the attachment points become loose.
Installation example:
Thus, following simple step-by-step instructions, you can not only remove and install bumpers if necessary, but also repair fasteners.
Did you manage to solve your problem using the recommendations from the article?
Yes!
46.52%
No. More answers required. I'll ask in the comments now.
37.79%
Partially. There are still questions. I'll write in the comments now.
15.69%
Voted: 733
Replacing the rear bumper of Lada Priora 1 and 2
The rear bumper is attached in a similar way, so the order is almost the same. We do the following:
- We unscrew three screws that secure the bumper to the fender liners.
- Unscrew one nut on each side.
- Unscrew the lower screws securing the bumper to the bump stop.
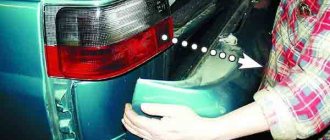
- Remove the top fastenings shown in the photo.
- We remove the rear bumper from the Priora.
As you can see, there is nothing complicated in this process. Naturally, Priora 2 has the same bumper mounting. The only differences are in the cosmetic component.
Dismantling for restyled models (2nd generation)
The bumper of Renault Duster 2016 and later releases is slightly different. In this case, you need to start with the screws located under the hood. They are unscrewed using a T30 key.
Then you need to unscrew 6 screws, unlike 9 in the pre-restyling version.
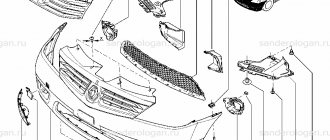
Here are the main attachment points:
- From the side of the fender liner, at the level of the connection between the wing and bumper
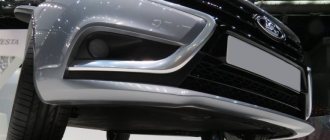
- One is located next to the lower false grille
- The lower grill itself is not removable and is supplied assembled. The bumper is screwed through it directly to the body with two self-tapping screws. You can unscrew it using a T20 bit.
The process of complete removal will already occur in exactly the same way as with 1st generation models. You need to carefully bend the top part of the plastic, while removing the bumper from the latches, moving it to the side.
“It is important to remember that there are 3 latches on each bracket. Usually, during removal, they skip the one located in the center, as a result of which the bracket is deformed.”
If during work it is necessary to replace several fastening elements, article numbers of original spare parts and their equivalents may be required.
Is it possible to find an alternative to Torx keys?
To carry out quality work, you must use a set of original tools. This is due to the fact that the screws have a specific head, with a recess for the key in the form of an asterisk, the edges of which have very thin edges. In addition, such screws use a larger tightening torque, so if you use a regular screwdriver, you can damage the slots. The result will be an additional set of work to drill out the old screw. A screwdriver may only be needed in pre-restyling models to remove deflectors and PTF holders.
Therefore, to carry out the work, it is necessary to prepare in advance two Torx bits with sizes T20 and T30.
We examine the extent of repair
Replacing the front bumper, as well as the rear, requires purchasing one. But before that, it would be a good idea to determine what exactly is needed. Assuming that the plastic is simply damaged when the entire component needs to be replaced, the purchase will only guarantee disappointment once the time comes to carry out the replacement.
The video shows how to replace a bumper on a Nissan Qashqai:
To examine the extent of the damage, you need to lie on your back under the front with a flashlight. If the car is too low to the ground, raise it with jacks and properly support the car for inspection.
The purpose of this inspection is to determine the extent of the damage, in particular to identify all damaged parts. Examine if there are concavities back on one side or the other, or if there is damage to other components. If you are unsure, compare the front bumper to its mirror image on the other side of the vehicle. In order to replace the element yourself, you will need:
- tool skills;
- flashlight;
- lubricant;
- wrench;
- new bumper.
Useful video
It is easy to notice that there are no difficult moments in the removal and subsequent installation of the structure. Even novice car enthusiasts can do everything. Finally, it is worth mentioning the last nuance - it is better to carry out the work of replacing the rear bumper on a VAZ-2114 with a partner, this greatly simplifies the task. But even without support, you can do everything on your own.
- Replacing the starter on a VAZ 2110 Photo instructions on how to change the starter on a VAZ 2110
- How to replace the rear wheel bearing of a VAZ 2109 with your own hands with video
- Replacing valve stem seals for VAZ 2107
- Replacing the windshield of a VAZ 2110 with your own hands: video instructions
Discussion
Reviews and opinions of crossover owners are divided.
Some people are impressed by such a body kit. They consider it not only useful in terms of protecting bumpers, but also very impressive in appearance. With pipes, the car looks much more aggressive and solid. His image becomes more serious and squat, and the shine of stainless steel creates a unique ambiance.
Others believe that the pipe body kit for the Lada X-Ray bumper is completely inappropriate. After all, the X-Ray is not even a crossover in the full sense of the word (due to the lack of all-wheel drive), and certainly not an SUV. That’s why the “kenguryatnik” is completely useless for him. The car is already visually short due to the X-shaped stampings and high ground clearance, but with these pipes it also looks heavy.
Therefore, to the question of whether to install a body kit made of pipes on the Lada X-Ray bumper or not, everyone must answer independently, depending on their own preferences.
Features of the work
New versions of the car have some differences. They touch the bumper reinforcement. It has teeth under the headlights and also under the grille. They are put on with special slots. As a result, in order to remove the bumper without any damage, you will also need to remove the headlights along with the grille. This is very inconvenient, but you can’t do without it.
If you still need to replace the bumper with a new one, you should carefully select the model of the new bumper. Under no circumstances should you buy metal bumpers. They pose a serious threat to the driver during an accident. It is better to give preference to bumpers made of plastic.
We must not forget about color. It must perfectly match the color of the entire body, otherwise a car with multi-colored elements will look simply terrible.
Differences in styles
The basic design has changed over the years. The old ones were a chrome-plated metal structure that was equal to the width of the car. They were installed on the front of the frame using four bolts that went through and were screwed into flanges welded to the frame.
The new components are made of flexible plastic (polycarbonate, polypropylene, fiberglass or polyurethane), painted to match the color of the car and mounted with shock-absorbing foam, which is applied to the structure itself. In most cases, the part that needs to be replaced is the flexible plastic. However, if the structure is damaged, replacement must be carried out completely.
Signs of wear and damage
The controllability of the car directly depends on the condition of the silent blocks. A silent block with a damaged gasket does not fully fulfill its purpose, and in addition, its destruction inevitably causes damage to other suspension elements.
Attention! It is recommended to carry out a preventive inspection of silent seals every 100,000 km, and when driving on bad roads - every 50,000. At the slightest sign of discrepancy, they need to be changed
Urgent repair or replacement of silent blocks may be required if the following faults are detected:
- decreased sensitivity to turning the steering wheel - the car responds with a delay, play or resistance has appeared;
- decreased controllability when driving straight - the car pulls in one or both directions, it sways and does not maintain its original direction;
- squeaks and knocks in the wheel area, especially when going over uneven surfaces;
- uneven tire wear;
- wheel play;
- When checking the wheel alignment, a discrepancy with the parameters was detected;
- detection of cracks or peeling on the elastic element of the silent, loose fit or deformation of its metal parts during inspection.
Let's sum it up
Tuning solutions for the Renault Duster radiator grille allow you to save on repairs and significantly change the appearance of the car. A detailed study of photo and video instructions for carrying out these works will allow you not to spend extra money on the service, but to do the tuning yourself. This will allow you to insulate and protect from dirt everything that is hidden by the grille. This publication revealed the questions step by step: how to remove, install, gave an explanation regarding the summer mesh and the protective shell for the cold period. It also presents the sequence of operations for installing the mesh and insulating the radiator.