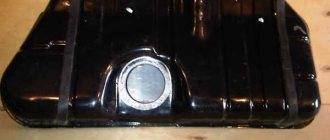
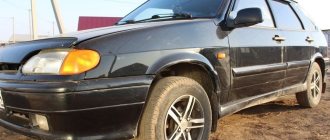
Replacement of rear and front seats on VAZ 2108, VAZ 2109, VAZ 21099
Welcome! On every car, seats become unusable from time to time. For some they tear, for others they become deformed, etc. After reading this article, you will become familiar with the correct instructions for replacing the front and rear seats. And also from this article you will learn for yourself the process of replacing the front seat slides.
Note! From start to finish, the work will be carried out exclusively on cars of the Samara family!
Summary:
Using WD-40 or oil
The simplest, but almost always effective method. Most often, problems with pulling out head restraints occur due to rust starting or the retainer getting stuck in the grooves of the pin. This can be corrected with a special lubricant, popularly called Vdshka. The principle of its operation is simple, it softens rust and makes surfaces more slippery, due to which the friction force increases and the headrest can be easily pulled out.
You can also remove the head restraints on a Priora using oil. WD-40, of course, is preferable, as it softens rust faster and better, but if only oil is left in the garage, then you can use that too. The application procedure is similar.
How to replace the rear and front seats, together with the slides, on a VAZ 2108-VAZ 21099?
Replacing front seats:
Removal: 1) First move the front seat back and all the way.
2) Then, using a screwdriver, use it to disconnect the torsion bars from the pillow base post.
3) After disconnecting, remove the torsion bars from all brackets and, as a result, remove them.
4) Next, using a socket, unscrew two nuts on both sides that secure the holding brackets.
5) Once the nuts are out, remove the retaining brackets from the studs.
6) Now tilt the front seat back a little to reach the skids.
7) When the seat is reclined, unscrew one bolt on each side that secures the front mounting slides.
Then I’ll move the seat forward a little, get to the back of it and then unscrew one bolt securing the rear slide on both sides.
9) Next, remove the seat from the front door opening. After removal, unscrew the bolt that secures the seat belt buckle, and then remove the buckle.
Installation: The entire installation occurs in reverse order, that is:
1) First, the new front seat is installed in its place.
2) After installation, the seat is moved forward all the way and then two bolts are screwed in that secure the rear slide.
3) Next, the seat is moved back all the way, and after that it reclines and, as a result, two bolts securing the front slide are tightened.
4) Then, while the seat is moved all the way back, put both brackets on the studs and tighten the nuts that secure them.
5) Finally, install the torsion bars in their place.
Note! When the installation of the new front seat is completed, screw the seat belt buckle into place. Also, if you purchased seats without slides, then install the slides on it by removing them from the old seat! (How to remove the skids, see the same article in the section: “Replacing the front seat skids”)
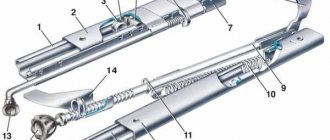
Replacing front seat slides:
Removal: 1) First remove the lock washer that secures the first slide bushing to the seat.
2) Once the washer is removed, remove the bushings from the hole in the slide.
3) Now do the same operation but only with the second slide, that is, first remove the lock washer, and then remove the bushing from the second slide.
4) Once the bushing is removed, remove both slides.
Note! Installation of the first and second slides occurs in the reverse order of removal; replace all damaged and deformed bushings with new ones!
Rear seat replacement:
Removal: 1) At the beginning of the operation, use a screwdriver to pry off the right and left decorative trim that covers the seat mounts. After prying, remove them.
2) When the covers are removed, use a socket head extension to remove one bolt from each side that secures the rear seat cushion.
3) After unscrewing the bolts, slightly lift the cushion and then remove it.
4) Then move the central lever for fastening the back of the rear seat by hand to the extreme left position.
5) Now take the extension with the union head in your hands again, and then unscrew one bolt on each side of the seat back mounting.
6) After unscrewing the bolts, remove the rear seat backrest together with the carpeting of the luggage compartment floor.
Note! To install the new rear seat in its place, perform the entire operation in the reverse order of removal!
How to remove the seat of a VAZ 2109
The front seats in the VAZ 2109 are not the most comfortable position; the backs and knees of the rear passengers feel stiff from fatigue and feel like a massage. An alternative to this torture could be seats from a foreign car or the restoration of relatives. Today we will talk about the second option.
1. The agony of choice. ______________________________________________ The decision to replace the front seats will most likely lead you to a fork in the road. What to do next? Install the same ones (the easiest way, but the torment will remain), buy from a foreign car (you can choose in our store) or restore your original ones beyond recognition. It's up to you to decide what to do. And today we will share with you the secrets of restoring stock seats. We will talk about a kit for self-assembly of an anatomical interior for a VAZ. You can find such a set using any search engine. Here is one of the sites that sells interiors and DIY kits. They also have an assembly manual on their website. We will share with you photos detailing the actual assembly and installation of such a kit.
2. Disassembly ______________________________________________________________________________ In principle, there should not be any special problems with disassembling the seats, but for many it will be useful to know the details. So, let's begin. We remove the seat, take it out of the car and start disassembling it. The disassembly report is based on the example of the driver's seat:
The back is disassembled. Now let's move on to the seat:
We are done with disassembling the front seat. As you can see, nothing complicated. Even a schoolboy can do it. Now the fun begins!
3. Assembly ______________________________________________________________________________ We present to your attention the SHS “Omega” kit for the restoration of the front seats:
Along with the kit came a bit of "fun". Firstly, there was a problem with delivery times. The boys sitting by the phone haven't quite figured out the order. Well, that’s okay, it happens. We confirm the order a week and a half after the last call. We are waiting another 3-4 days for delivery. Secondly, when the order arrived, there was no crown frame in it! Well, yes, that also happens. Still people. We pay for the next shipment. Everyone is happy, everyone is laughing. When assembling the seats, it turns out that the foam insert was also not included in the parcel. Well, there’s already a problem here, they didn’t call again and swear - they found foam rubber in the reserves. Thirdly, when welding the factory frame and the crown frame, the latter did not have enough length in two places. Manufacturer's assembly problem? Well, yes, that also happens. We get out on our own... In general, look at the assembly report, everything is clearly shown there. Taking into account the above, check the completeness.
3.1 Seat ______________________________________________________________________________ I’ll start by assembling the seat seat. In fact, it’s also nothing complicated. The most ordinary designer.
To work you will need: 1. flat screwdriver; 2. hammer; 3. knife (or scissors); 4. wire; 5. glue (type moment 88, ur-600, etc.); 6. glue brush; 6. foam rubber 10mm, 0.5x0.5m (if not included); 7. awl (optional); 8. electrical tape (optional);
Instructions from the manufacturer can be found here. We are posting detailed instructions for assembling the Omega seat from one of the buyers. Supplemented and with comments
Important! In the end, an operation was performed that was not described in the instructions for assembling the seat. It is not necessary to do this, but in order to achieve higher strength against abrasions and wear of the seat, it is recommended.
In general, some points during assembly, added on my own, oh. That is, if at the beginning of a comment under some picture you see this prefix, it means that the manufacturer did not carry out this operation - this is a pure gag
Next, we assemble the seat to the end:
The seat is assembled. As you can see, several points have been added regarding the standard assembly instructions. We think they won’t be superfluous. Let's keep working hard!
3.2 Back ______________________________________________________________________________ Well, this is where the second half of our movie begins. I hope there's still some popcorn left? No?! Urgently run to the kitchen and look for a replacement! ...but, although... wait! Never mind! Let's look further!
Jokes aside, let's continue. Upon arrival of the crown frame, it and the factory back frame were taken to the welder. He did his dirty work with them. Everything turned out great. Perhaps the design of the frame-crown itself let us down. In the central part it was not long enough to reach the back frame. Added bolts and studs and voila! The new backrest frame is ready for assembly. And now the pictures! Enjoy watching!
Case options for the "nine"
The choice of cover material is quite rich. Eco-leather is becoming increasingly popular. The prefix “eco” in its name is not justified by anything other than marketing. This is a synthetic material in which a layer of polyurethane rather than polyvinyl chloride polymer is applied to a fabric base. Therefore, there is no “aroma” of leatherette. In addition, polyurethane is a porous material, it “breathes”, and even better than dyed natural leather. The disadvantages of eco-leather include low resistance to thermal influences - the ember from a cigarette burns right through the eco-leather.
One of the most popular materials for car seat covers is velor. This is a pile material that does not slip on clothes or skin. Doesn't burn in summer, doesn't get cold in winter. Very practical, does not require complex care. At the same time it attracts dust.
Another increasingly popular car seat upholstery material is Alcantara. This is artificial suede, which is difficult to distinguish from the real thing. It has a rough surface that is pleasant to the touch. The color range of the material is very diverse. Alcantara's thermal resistance is unique: in winter and summer, the temperature sensations when touching it are equally neutral. If it were not for the relatively high cost of Alcantara, it could claim to be the ideal material for car covers.
Cases are often made in combination, using two materials: the front side is made of Alcantara, and the back side is made of simple textiles. Foam padding is often used.
Lada 2109 Izumrud › Logbook › Repairing the driver's seat (detailed instructions)
I would like to tell you and show you how I disassembled, repaired and assembled the seat for a VAZ 2109.
And so I had a bent frame of the driver's seat, I have no idea how it bent like that. I also had another driver’s seat, which was slightly bent, but not as much as the first one. (You can do it without an additional seat, if there is a live joint on the back of the seat angle adjustment knob)
We will need the following things:
A 13mm wrench, definitely a 8mm small head, a 10mm wrench or a 10mm socket, pliers, a screwdriver - and a hammer, desire and approximately 6-8 hours of free time (approximately this is how long it took me to do everything)
I’ll start from the very beginning, and specifically from the stage
and
removing the seat from the car
:
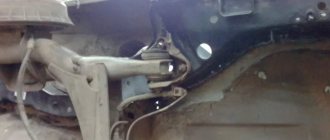
We take the handle, lift it up, roll the seat back, open the driver's door and look at the bottom of the seat, there we see that the seat is supported by 2 plastic pieces, secured with 2 bolts, either, as well as rails, which are also secured with 2 -any with small bolts
We remove two iron rods that act like springs, they are easily removed, just pull out the end of the rod from the plastic thing with a screwdriver or a wrench, that’s it, we removed it, put it in a place so that we can find them later, then with a 13mm wrench we unscrew the nuts that we see on the plastic ones pieces (the first time they were stained and rusty, but they still unscrewed), they unscrewed them, took out plastic pieces with nuts or bolts (for some reason I had three bolts unscrewed and a current from one nut, but not the essence, back anyway everything will be screwed in fine) put it in the same place as the iron rods
Then we lift the front of the seats up, see the bolts on the rails on one side and the other, take a small socket 8 and unscrew these two bolts, unscrew them and put them in the same place as the plastic things.
We lower the seat, sit on it and move forward all the way.
We sit in the back seat, remove the carpet, take a flashlight and see that we have two bolts in the back again, unscrew them with a small 8-point socket head, put the screws in the same place as the plastic things.
Correcting, the seat can be removed!
In my case, I took it home (because I don’t have a garage, and it’s simply not comfortable to do everything else in the car). The headrest was removed and left in the car.
The next stage is dismantling the seat
:
— I started by removing the upholstery of the upper part of the seat, for this I needed a minus screwdriver and pliers, before this we use a screwdriver to remove two plastic rivets from the top, then at the bottom of the seat there are sharp pins on which the upholstery is held, we bend them with a screwdriver or pliers, and carefully remove the rag and inside there are still snow-white rags that pass through the foam, so you need to pull it out more carefully, remove it and put it aside, carefully remove the foam, remove it, put it aside, before us is a bent frame screwed to the bottom of the seat.
Read
Now we need a 10mm wrench. We use it to unscrew the bolt, which is on the side where there is NO handle for adjusting the seat angle. We unscrewed the bolt, removed the plastic part, under it there is another 10-point bolt (you don’t have to unscrew it, because it has nothing to do with removing the upper part of the seat). Now we go to the side where there is a seat angle adjustment knob. We remove the handle; in my case, I came across two different types of handles (the handle in which the screw (1) was visible and the handle that covered the screw (2)). To remove the handle (2), you need to insert a screwdriver inside and pry off the plastic inside, then just remove it and the screwed part remains, unscrew the handle (1) or what’s left of the handle (2) with a 10mm screwdriver and don’t be afraid, pull it out myself. Unscrew the second screw by 10 and remove the plastic.
Now we look at this place where we just unscrewed and see that there is a spring there that goes to the hook, we lift the hook up on one side and the other of the seat, now our seat is held only by the inserted pins, we try to insert a screwdriver between the two parts of the seat, where this pin is, we press it out, if it doesn’t come out with a screwdriver, then we try it with a wrench or other objects, when we take the piece of hardware out of the pin, then we simply remove the upper part of the seat.
Repair and tuning of seats: lateral support, lumbar support and comfort, using the example of the VAZ-2110. PEACE
Watch the continuation, practical washing down of the seats
from Volga 31105: .
Do-it-yourself seat repair VAZ 2108, 2109, 21099. Do-it-yourself seat repair VAZ
Repair
DIY
seat 2108,
2109
, 21099.
DIY seat repair VAZ
.
In the removed state. The same pin sticks out of the seat, with a hook on top that needs to be pulled back.
Congratulations, the seats are separated from each other!
Now we are faced with the task of straightening it (I was faced with the task of swapping the frames and putting everything back together).
Lada 2108 Small 1.5l › Logbook › No. 30 Repair of seats on VAZ 2108
Good day to all drivers and subscribers! At the end of January I flew to Kursk for the Russian Women's Basketball Cup. The UMMC basketball players won, as usual, Nadezhda from Orenburg was in second place, and in the match for third place, Dynamo Kursk beat Sparta & K near Moscow by one point 68:67.
More details about the trip in the photos
Trip to Kursk
In Kursk I had the opportunity to ride in the rear passenger seat of a turbocharged BMW X3 with a 2.5 liter diesel engine with more than two hundred hp. I can’t express the emotions and impressions, everyone did with the traffic light! Upon arrival in Yekaterinburg, I drove a Volvo XC60, also an automatic, only with a 2L engine. The Volvo is less impressive; of course, I was impressed by the white leather interior and panoramic roof (the Beha has a black interior and no panoramic roof), but the power and aggression of the BMW is higher.
It was awkward to get into the Malaya after being in the BMW X3 and Volvo XC60, but it is part of my SOUL.
One evening I was reading the bulletin board of eights and other cars, in one bulletin board I found an advertisement for the sale of covers, “Maloy” hasn’t bought gifts for a long time, it needs to be fixed. I called the seller - we met - we looked - we bought them for a symbolic 500 rubles - I washed them at home with ammonia and warm water.
Since last summer, a non-working left door in the driver's seat has been bothering me. One fine warm spring evening I went out into the yard and began to try to dismantle the seat. Before this, I read a lot of rubbish on the Internet about repairing seats, which basically involved removing the entire seat and moving it to a brighter room. Naturally, I found out how to remove the seat trim...
2. From the bottom of the driver’s seat I saw metal brackets (common clamps, as it’s convenient to call them) and bent them with a screwdriver
Read
3. I removed the bottom layer of the skin, and then the top one.
4. I lifted the casing, as expected, the cable was broken.
5. Used pliers to connect it.
6. I wrapped the foam rubber around the seats with tape to prevent it from falling out.
Is it possible to restore leather car seats?
To restore leather car seats, you can use special repair compounds. They fill tears and defects. As a result, not only the holes are sealed, but also the texture of the skin is restored.
To get this effect:
- You first need to apply a special liquid to the entire part of the seat, which, after drying, repeats the texture of the leather upholstery.
- After this, the resulting patch is carefully removed and placed on the damage point previously filled with polymer mass.
- At the very last stage, an iron is used to iron the repair area through a special Teflon pad.
How and with what to repair a scratch on a car
Thus, by adhering to proven technologies and using high-quality repair compounds and materials, you can quite successfully repair seats on your own.
- Anton says: In order not to leave the skin in a dead state, I regularly apply skin lotions to it. I wipe down the interior and try not to leave it in the sun too much. It starts to wring due to dryness. When I sit in the warm interior, it also protects me. For skin lotions, I chose the German Liqui Moly, which works very well.
Do-it-yourself repair of the driver's seat on a VAZ 2109
The driver's seat is the most frequently used seat in a car, so it wears out very often. Over the course of a few years, the side support for the backrest falls apart, the foam comes out, and the metal pipe begins to put pressure on the back. The pleasure from the trip remains very poor, especially since the driver begins to get tired. With this question, you can contact car services and the price will be -50 dollars. For that kind of money you can buy a new seat. This article will help you carry out repairs yourself and thus save money.
In stores you can find a repair kit and replace the foam rubber, but these actions will not be enough. For this case, we need one more seat, so we get the following situation - from two old seats we create one normal one. Before starting work, you need to stock up on the necessary materials and tools. First you need several large tubes of superglue, a couple of pieces of thick fabric, a meter of soft wire, a piece of thin felt.
First you need to remove the old seat trim of the VAZ 2109, 2108, 21099. It is very easy to remove it from the back, but you will need to play with the seats a little. We bend the iron petals slightly, which are located on the body of the driver's seat. Now the casing is held on only by wire. There is no need to bend all the petals, you just need to bend a few. The foam rubber is most likely torn, but if it has its original shape, then there is no need to change it, the whole material will simply stick together. Foam rubber breaks in places where it comes into contact with sharp iron parts, at corners and where excessive stress is created on the chair.
From another old chair you need to remove the rubberized metal seals that are on the edge of the backrest, after which we move them to the first chair. Another method is to seal the edges with a damping material (felt, rubber, cloth), after which the springs must be connected to each other with a simple soft wire, thus giving the chair additional rigidity. We take a thick fabric prepared in advance, cut out strips 80 mm wide and glue it on the inside. In this case, the following results: if at this stage you stretch the foam rubber onto a metal frame, then the edges will fit perfectly onto the fabric. We carefully cut out additional strips and glue them to the places where there are breaks. The seat back needs to be repaired in the same way. Now you can move comfortably by car, you can even go on a long journey and not worry about being tired.
If we talk about the pipe itself, which presses the driver in the back, it needs to be completely wrapped in felt. Using soft wire you need to fasten it to the spring that is closest to it. Again, everything needs to be wrapped with felt on top. You need to glue several pieces of felt onto the back cushion, under which the pipe is located, because this material will completely cover it. The assembly process should only begin when the glue is completely dry. We put everything back together in reverse order. We stretch the fabric from the upholstery of the chair, then the metal staples in the cushion. Now you need to install the chair on the VAZ 2109, 2108, 21099 and enjoy the achieved result. The seat may be a little hard, but that's okay, the driver will get used to it.
Tuning elements
If you want to turn your regular interior into a full-fledged, complete project, in addition to the door panels and seats, you cannot ignore the other components.
Salon element
What can be done
By default, the rear parcel shelf serves as a luggage compartment delimiter, although in most cases, during modification, acoustic equipment is installed there. The standard shelf is weak and of poor quality, so there is no point in trying to remake it. Just make a new one from sheets of quality plywood. Don't forget to add a thicker pad to make the acoustics sound clearer. Plus, it’s not scary to put something weighing more than 5 kilograms on the modified shelf
You should not try to change the steering wheel yourself unless you are an expert in this field. The easiest way is to find a ready-made steering wheel in the required color and material. Today they offer a huge range of products for the VAZ 2109. But it is important to consider two main points:
Gearbox lever
The factory trim is far from perfect. Let's face it, she's disgusting. The available substitutes on the market have not gone much further, so it is best to sew the element. New sections are cut using the old casing, and the cover is placed on the lever. It is not necessary to change the lever head, since even in the stock version it is very good
The factory equipment does not include an armrest, although many motorists will agree that this is a useful element. So if you want, buy it and install it. Depending on the armrest you choose, you may have to make a couple of extra holes for installation.
You will see them only when the sun begins to hit your eyes. It’s not difficult to modify them - just change the trim, combining them with the front part of the cabin
Pads on the pedals
As a standard, rubber pads are put on the pedals. If you want, you can replace them with aluminum, special sports kits or similar ones. Just keep in mind that aluminum creates a rather slippery surface from which your foot can slip off at the most inopportune moment. This is not an isolated incident, so it is better to leave the old pad for safety reasons. Or install a new one on which the foot does not slip
Here you take an LED strip and install it wherever your heart desires. LEDs consume a minimum of electricity, so you definitely won’t have to buy a more powerful battery or generator to connect them
Pedal pads
There are a lot of ways to improve the interior of the VAZ 2109. Therefore, choose for yourself the method and what modification measures you use specifically for your car.
Article: 2108-6814232
Order code: 002918
- Buy with this product
- show more
- Passenger cars / VAZ / VAZ-21091 drawing
- » href=»/catalog/vaz-3/legkovye_avtomobili-30/vaz_2109-9/mehanizm_ustanovki_perednih_sidenii-51/#part31512″>Seat backrest adjustment knob / Front seat installation mechanism
- There are no reviews for this product yet.
Before driving, adjust your seat position so that you feel comfortable behind the wheel. An uncomfortable seating position increases fatigue, which can negatively affect driving safety.
The front seats are adjustable in the longitudinal direction (forward and backward), the angle of the backrest and the height of the headrests.
The correct seat adjustment is when the straightened left leg rests with the entire foot on the floor under the clutch pedal, and the arms, slightly bent at the elbows, lie on the steering wheel in the “10 minutes to 2 o’clock” position.
Sit on the seat and check how comfortable it is to drive.
Do not adjust the seat while driving: you may lose control of the vehicle.
| EXECUTION ORDER |
1.
If you need to move the seat forward or backward, lift the handle and move the seat together in the desired direction, then release the handle. Move back and forth slightly until the seat locks into place.
2.
If you need to adjust the seatback angle, turn the hinge handle. The backrest rises or falls when the handle is rotated in the appropriate direction.
3.
To adjust the height of the headrest, move it up or down. Spring clips will hold the headrest in the selected position.
2.2.2 Seat adjustment
The seat should be set in a position that provides the driver with maximum comfort when operating the pedals, steering wheel and instrument panel switches. In addition, good visibility through the windshield and reliable fixation of the driver’s body with a seat belt must be ensured. The seat position controls are located in front under the cushion (the fore/aft adjustment lever) and on the outside of the cushion (the backrest adjustment lever and two cushion position adjustment handles).
Seat adjustments must be made before driving.
The use of any additional pillows or other objects placed on the cushion or back of the seat is not allowed.
Remember that excessive seatback recline will significantly reduce the effectiveness of the seat belt!
Adjusting the seat position in the longitudinal direction
Manual drive
Pull the control lever located at the front under the seat cushion towards you and move the seat assembly to the desired position. After completing the adjustment, release the lever and make sure that the seat is securely fixed by moving it back and forth with the lever released.
Electric drive (if equipped)
On some models, the driver's seat may be equipped with an electric drive.
How to disassemble the seat of a VAZ 2109
The rear seats, unlike the front ones, have to be removed very rarely, and they need to be replaced even less often, since their wear in most cases is minimal. But if you need to do this procedure, but you have not encountered the practical implementation of this repair, then below I will try to provide a more detailed description of all the actions.
Firstly, it is worth noting that a minimum of tools will be required for this operation, namely:
- socket head 10
- crank or ratchet handle
I will show everything using the example of a VAZ 2109 car, since it is this that serves as a prototype for me. First of all, you need to recline the sofa itself by first pulling the lace:
Then unscrew one bolt securing the canopies on each side. This is clearly shown in the picture:
After they are unscrewed, you can remove the seat and take it out of the car:
Next we move on to the backrest, which is also fixed to the body from inside the cabin. First you need to move the lever at the top to the side, as shown below:
Thus making the seat movement free on canopies. Now all that remains is to unscrew the two bolts securing the canopies:
And we remove the back, since nothing else holds it. Next, you can proceed with the installation, and it is performed in the reverse order.
I haven’t written anything in the BZ for a long time. On the one hand, nothing special happened, on the other hand, it’s somehow not interesting to write about the fact that I changed the rear struts, springs, pads and GTZ in the service. Nevertheless, today, in my opinion, a rather interesting reason for writing has appeared. Well, friends, let's do some farming? =)
Not so long ago, my nine suffered from what turned out to be a fairly common disease among cars of the Samara family. The back of the driver's seat, which was supposed to be an indestructible support for my back, suddenly began to bend like a thin aluminum wire, if culturally speaking. Naturally, this state of affairs did not suit me at all, and the May holidays with the traditional trip to St. Petersburg were just around the corner. I began to look at options for solving this problem. Driven by the desire to save money, I immediately discarded the option of replacing the seats (well, I threw it away... who knows, maybe somehow I’ll be able to install it from some foreign car). All that was left was to open up the existing chair, level it, strengthen it, which is exactly what I did.
In order to select the desired profile, a preliminary calculation was made (in vain, or did the sapromat teach? =)), which showed that an aluminum corner of almost any thickness present in the assortment is suitable for our purposes. Armed with this knowledge, I went to the construction market, where I purchased a 1 m long corner and a bunch of all sorts of bolts and nuts. I sawed the corner in half right on the spot, so that later I wouldn’t have to struggle at home without a tool.
This morning I gathered my courage and went to remove the seat back. As it turned out, there is nothing complicated about it, you just need to unscrew two bolts on each side and lightly pry it with a screwdriver.
The front seats in the VAZ 2109 are not the most comfortable seating position; the backs and knees of the rear passengers feel stiff from fatigue and feel like a massage. An alternative to this torture could be seats from a foreign car or the restoration of relatives. Today we will talk about the second option.
1. The agony of choice. ______________________________________________ The decision to replace the front seats will most likely lead you to a fork in the road. What to do next? Install the same ones (the easiest way, but the torment will remain), buy from a foreign car (you can choose in our store) or restore your original ones beyond recognition. It's up to you to decide what to do. And today we will share with you the secrets of restoring stock seats. We will talk about a kit for self-assembly of an anatomical interior for a VAZ. You can find such a set using any search engine. Here is one of the sites that sells interiors and DIY kits. They also have an assembly manual on their website. We will share with you photos detailing the actual assembly and installation of such a kit.
2. Disassembly ______________________________________________________________________________ In principle, there should not be any special problems with disassembling the seats, but for many it will be useful to know the details. So, let's begin. We remove the seat, take it out of the car and start disassembling it. The disassembly report is based on the example of the driver's seat:
The back is disassembled. Now let's move on to the seat:
We are done with disassembling the front seat. As you can see, nothing complicated. Even a schoolboy can do it. Now the fun begins!
3. Assembly ______________________________________________________________________________ We present to your attention the SHS “Omega” kit for the restoration of the front seats:
Along with the kit came a bit of "fun". Firstly, there was a problem with delivery times. The boys sitting by the phone haven't quite figured out the order. Well, that’s okay, it happens. We confirm the order a week and a half after the last call. We are waiting another 3-4 days for delivery. Secondly, when the order arrived, there was no crown frame in it! Well, yes, that also happens. Still people. We pay for the next shipment. Everyone is happy, everyone is laughing. When assembling the seats, it turns out that the foam insert was also not included in the parcel. Well, there’s already a problem here, they didn’t call again and swear - they found foam rubber in the reserves. Thirdly, when welding the factory frame and the crown frame, the latter did not have enough length in two places. Manufacturer's assembly problem? Well, yes, that also happens. We get out on our own... In general, look at the assembly report, everything is clearly shown there. Taking into account the above, check the completeness.
3.1 Seat ______________________________________________________________________________ I’ll start by assembling the seat seat. In fact, it’s also nothing complicated. The most ordinary designer.
To work you will need: 1. flat screwdriver; 2. hammer; 3. knife (or scissors); 4. wire; 5. glue (type moment 88, ur-600, etc.); 6. glue brush; 6. foam rubber 10mm, 0.5x0.5m (if not included); 7. awl (optional); 8. electrical tape (optional);
Instructions from the manufacturer can be found here. We are posting detailed instructions for assembling the Omega seat from one of the buyers. Supplemented and with comments
Important! In the end, an operation was performed that was not described in the instructions for assembling the seat. It is not necessary to do this, but in order to achieve higher strength against abrasions and wear of the seat, it is recommended.
In general, some points during assembly, added on my own, oh. That is, if at the beginning of a comment under some picture you see this prefix, it means that the manufacturer did not carry out this operation - this is a pure gag
Next, we assemble the seat to the end:
The seat is assembled. As you can see, several points have been added regarding the standard assembly instructions. We think they won’t be superfluous. Let's keep working hard!
3.2 Back ______________________________________________________________________________ Well, this is where the second half of our movie begins. I hope there's still some popcorn left? No?! Urgently run to the kitchen and look for a replacement! ...but, although... wait! Never mind! Let's look further!
Jokes aside, let's continue. Upon arrival of the crown frame, it and the factory back frame were taken to the welder. He did his dirty work with them. Everything turned out great. Perhaps the design of the frame-crown itself let us down. In the central part it was not long enough to reach the back frame. Added bolts and studs and voila! The new backrest frame is ready for assembly. And now the pictures! Enjoy watching!