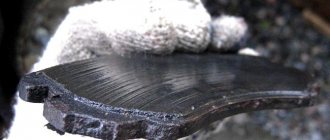
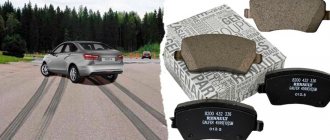
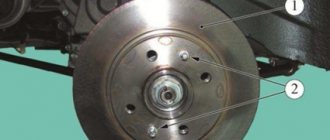
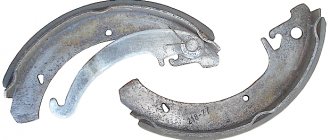
The pads also need to be replaced if the linings are oily, have deep grooves and chips on them, or if the linings are detached from the base of the pads.
We carry out the work on a flat area, inspection ditch or overpass.
Attention!
The brake pads of the rear wheels must be replaced as a set - all four pads. Replacing the pads of only one brake mechanism can lead to the car pulling to the side when braking.
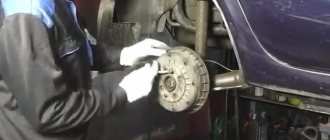
We show replacing the pads on the right rear wheel. Before removing the brake drum, lower the parking cable lever all the way - the car must be released.
We remove the rear wheel and securely fix the car on a factory-made support stand.
To remove the drum, the pads must be brought together.
2283-14-03-01
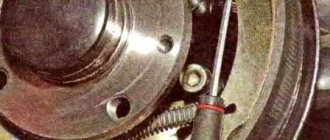
To do this, use a slotted screwdriver to rotate the ratcheting nut of the mechanism for automatically adjusting the gap between the pads and the drum through the threaded hole in the brake drum, thereby reducing the length of the spacer bar.
To do this, use a slotted screwdriver to rotate the ratcheting nut of the mechanism for automatically adjusting the gap between the pads and the drum through the threaded hole in the brake drum, thereby reducing the length of the spacer bar.
Don't delay repairs
Untimely replacement of components leads to accelerated wear and failure of new components. Thus, a handbrake cable that was not replaced in due time holds the shoe close to the drum.
When the lining wears off, the iron block damages the surface of the drum very quickly. After installing a new spare part, such a drum begins to intensively destroy the lining. A faulty block kills the drum, and vice versa.
But it's not just about wear and tear and increased repair costs. When iron rubs against iron, the braking distance increases, and the uneven distribution of braking forces leads to a deviation from straightness. Driving with faulty brakes is dangerous.
DSC_9324
Elements of the rear wheel brake mechanism.
Elements of the rear wheel brake mechanism.
The mechanism for automatically adjusting the gap between the shoes and the drum is made in the form of a composite spacer bar.
When you press the brake pedal, under the action of the pistons of the wheel cylinder, the pads begin to diverge and press against the drum, while the protrusion of the adjuster lever moves along the cavity between the teeth of the ratchet nut. When the pads are worn to a certain level and the brake pedal is pressed, the adjuster lever has enough travel to turn the ratchet nut by one tooth, thereby increasing the length of the spacer bar and at the same time reducing the gap between the pads and the drum. Thus, the gradual lengthening of the spacer bar automatically maintains the gap between the brake drum and the shoes. The same system maintains the parking brake in constantly working condition without any adjustments.
Pads and their articles for the disc mechanism of the rear brake system of Lada Vesta
AvtoVAZ installs TRW pads for rear disc brakes:
- Pad article number - GDB 1384, price ~ 1400 rubles per set
As such, there have been no complaints about these spare parts from Lada Vesta owners; we can also note the budget price tag and the relatively high quality of the pads from this manufacturer.
Therefore, we recommend purchasing pads installed at the factory. The pads on the disc brake mechanism are changed at ~20-30 thousand kilometers, this number is individual and depends on the driving style of a particular driver, so when replacing rear pads it is not recommended to focus only on mileage. When the pads wear out, you will definitely feel a deterioration in braking, and in rare cases, an extraneous sound may appear. In addition, pay attention to the operation of the hand brake; situations when the hand brake does not hold the car weakly indicate severe wear of the rear brake system.
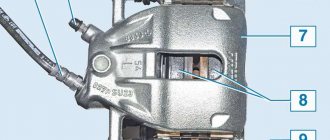
The procedure for replacing the rear pads is not much different from the front ones, so you can use the instructions from the article on replacing the front pads. The only difference is the handbrake cable connected to the caliper, but it does not in any way interfere with the work of replacing the brake mechanism.
Lada Vesta with a 1.6 liter engine is equipped with drum brakes, as a result of which the pads and part numbers will differ. In addition, replacing them will be labor-intensive. Pads on such a system last longer than disc ones, their average service life is ~100 thousand kilometers; again, this figure varies depending on the driver’s driving style. In some cases, the pads wore out only after 200 thousand kilometers.
DSC_9301
The spacer bar is a rather complex mechanism, which, if the elements are damaged or significantly corroded, is best replaced.
If the condition of the spacer bar is satisfactory, then it should be washed in any solvent and a thin layer of grease should be applied to the threads. The spacer bar is a rather complex mechanism, which, if the elements are damaged or significantly corroded, is best replaced. If the condition of the spacer bar is satisfactory, then it should be washed in any solvent and a thin layer of grease should be applied to the threads.
Analogues on calipers and drums
There are analogues for Lada Vesta drum brakes on the market:
- Fenox (BP53013). Cost 980 rubles; (BP53168) Price 1340 rubles;
- Hella Pagid (8DB355002-411). Price 2780 rubles;
- JP Group (1563900810). Price 1490 rubles;
- Mintex (MFR516). Price 2550 rubles;
- Patron (PSP8742). Price 730 rubles;
- Remsa (4137.00). Price 1110 rubles;
- Textar (91057300). Price 3130 rubles.
There is an analogue of Lada Vesta disc brakes. It is produced by TRW, article number gdb1384, cost – 1400 rubles.
DSC_9303
Before assembly, completely screw in the rear end of the spacer bar so that its length becomes minimal.
Before assembly, completely screw in the rear end of the spacer bar so that its length becomes minimal.
Install new rear wheel brake pads in reverse order.
Before installing the brake drum, clean its working surface with a wire brush to remove dirt and wear products from the pads.
Removing and installing front pads
Before starting work, prepare the following tools:
- Keys for 13 and 15;
- Brake system parts cleaner (a regular rag will not be able to completely remove dirt and used lubricant residues);
- Flat screwdriver;
- High temperature grease.
The procedure for replacing parts is as follows:
- Secure the vehicle in place by applying the parking brake. Turn off the ignition. Raise the front of Vesta with a jack;
- Proceed to remove the wheel. Remove the cap, loosen the bolts one turn. Continue this action in a circle with all the bolts;
- Remove the brake fluid reservoir cap and pump out a few milliliters. This will prevent the liquid from coming under pressure. Press the brake cylinder inward with a screwdriver;
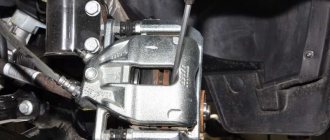
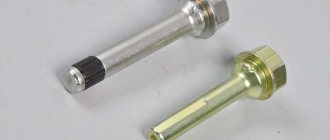
- Use a 15mm wrench to hold the caliper guide pin, and use a 13mm wrench to remove the two bolts. Do not let the free part of the caliper fall to the ground;
- Pry up the outer pad with a screwdriver and carefully remove it. In the same way, remove the inner block;
- The spring retainer, which is responsible for uniform wear, will have to be cleaned and then re-coated with lubricant;
- Install a new part - first the external one, then the internal one;
- Clean the guides and also coat them with lubricant;
- Put all the parts back;
- Tighten the fastening bolts, install the wheel, clockwise, one rotation at a time, secure all the bolts.
DSC_9261 (Copy)
When cleaning the brake drum, be careful with the ABS sensor reference ring.
When cleaning the brake drum, be careful with the ABS sensor reference ring.
After installing the brake drum, tighten the hub bearing nut to the prescribed torque of 175 N∙m.
It is advisable to install a new self-locking nut. On the left wheel this requirement is more critical than on the right.
Similarly, we replace the brake pads of the right wheel.
We check the brake fluid level in the hydraulic drive system reservoir and, if necessary, bring it to normal.
To adjust the position of the brake pads, press the brake pedal several times. We hold it down and then raise and lower the parking brake (when moving the lever, you must keep the parking brake release button on the lever depressed at all times so that the ratchet mechanism does not work). In this case, clicks will be heard in the brake mechanisms of the rear wheels from the operation of the mechanism for automatically adjusting the gaps between the pads and brake drums. We raise and lower the parking brake lever until the clicking in the brake mechanisms stops.
If necessary, adjust the parking brake.
Pads and their articles for the drum mechanism of the rear brake system of Lada Vesta
Original rear drum pads for the Lada Vesta are outrageously expensive, and besides, finding them in retail sales is not so easy:
- 8450076668 — set of Lada brake pads, price ~ 5800 rubles
Agree, the price does not correspond to the status of a budget car. Most often, when replacing the rear brake assembly, analogues are used:
- BP53168 – Fenox, suitable for Lada Vesta
- BS-5717 - Japanese manufacturer Lynx, installed instead of standard ones without modifications
The similarity of spare parts from Ford Fusion is also mentioned, but in this case you may have to resort to minor modifications to the mechanism.
Replacing rear pads
To replace the rear pads with your own hands, without resorting to the help of specialists, you will need about two hours of free time and a minimum set of tools: a hammer, a screwdriver, pliers and a 36 mm socket. All actions are performed in the following order:
- using a jack, the rear part of the car is raised - the wheel bolts are first loosened, and a stop is placed under the front wheel - and the wheel is removed;
- if the car is in a stable position, the handbrake goes down to its extreme position - you will need to loosen the handbrake cable;
- Using a screwdriver and a hammer, you need to remove the cap covering the hub nut;
- use a 36 mm wrench or socket to unscrew the hub nut;
- the brake drum is removed;
- Using a screwdriver, remove the handbrake cable from the shoe lever;
- springs are disconnected;
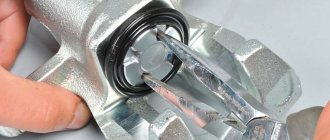
- use pliers to remove the spring clip;
- the support is removed from the opposite part in the same way;
- the spacer bar and the block in front are removed;
- the rear block is removed;
- the tip of the parking brake cable, which is attached to the lever from the rear side, is disconnected;
- By disengaging the adjustment mechanism is removed.
Before reassembling the unit in the reverse order, it is necessary to thoroughly clean all parts from dust and rust and lubricate the drum with a special lubricant.
Common problems
When using the pads, some problems arise. To check, you need to remove the rear pads on the Vesta and carefully examine them. By the appearance of the elements you can determine how worn they are:
- uniform abrasion of the friction layer indicates uniform wear;
- severe wear of the layer and the visibility of brake rivets indicate an excessively long service life;
- greater erasure of one of the sides of the circle indicates an incorrect distribution of force for braking one of the parts;
- the appearance of irregularities on the surface is a sign of a malfunction of the caliper guide pins.
- Uneven wear of the layer may indicate incorrect installation of parts; they should be replaced.
Other signs appear when moving. Usually, by sound, a car owner can understand that a particular part requires either replacement or major repairs.
Main signals about problems:
- A squeaking noise when braking occurs when the pad and disc are not mated correctly. This happens when installing an analogue or when dirt gets between the moving elements.
- The appearance of vibration at speed also indicates that the installed parts do not fit the discs.
Signs of pad wear
Before each vehicle departure, check the amount of fluid in the brake system reservoir. The level must be above the min mark. If it is lower, this is one of the signs of abrasion.
Another sign is that the pedal softens at first and then drops. The distance from pressing the pedal to stopping the car increases noticeably.
If such signs, knocks and squeaks are detected, the pads are inspected. Check whether their wear has reached the limit values. For overlays the thickness limit is 2 mm. The maximum size of the drum rubbing surface is 204.45 mm.
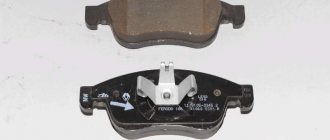
Review of manufacturer prices for front brake pads
| Catalog number/article | Price in rubles |
| Original from Renault 8200 432 336 TRW (with ABS) | From 1600 |
| Original LADA410608481R | From 1400 |
| Analogs | |
| FERODOFDB1617 | From 1680 |
| FORTECHFB1223F | From 1200 |
| KOTL22KT | From 1500 |
| ADR ADR011311 | From 1300 |
| Valeo 301641 | From 1350 |
| *prices are as of 04/07/2019. | |
Cheap and spacious inside
The door opened easily, with half a touch of the handle, and slammed just as pleasantly and easily. The front passenger seat is spacious for my height (181 cm) - my knees don’t rest anywhere, the belt is height-adjustable and doesn’t rub my collarbone. There are three-stage heated seats and cup holders. The cup holders are shallow and inconvenient to use: on strong bumps, hot coffee can fly out and scald your knee.
The interior was not surprising. A lot of cheap, “mismatched” plastic, some “childish” multi-colored inserts on the panel and door cards, an instrument panel with orange scales “a la sport”, which distract from the digital values. The location of the buttons, the convenience and range of adjustment of the seat and steering wheel do not raise any questions. By the way, even the lumbar support is adjustable here, which is rare for this class.
The rear seats are comfortable. There is a decent margin in front of the knees, as well as above the head. The seats are molded for two, but since there is a middle headrest, three can ride, the amount of space in the waist and shoulders allows this. But it’s still more convenient for two. The couple is provided with heated seats and a center armrest with cup holders. There are also USB and 12-volt charging ports to choose from.
The trunk caused admiration - there is no other way to say it. It’s not like in the “economy”, in the C-class I don’t remember anyone having such a carefully thought-out luggage compartment. Volume - 480 liters, regular rectangular shape. On the right is a closed niche for small items. On the left are several compartments for small items and a mesh. There are a bunch of hooks, a 12-volt socket, two niches in the raised floor and a sliding shelf. Low bow to the engineers!
Reviews of companies
| № | Positive |
| 1. | Vasily: six months ago I was serviced by TEKHINKOM, I liked it. The guys are smart, they know the structure of the machine, they know how to use digital equipment. My positive review. |
| 2. | Gennady: after buying a car, I chose a service station based on location so as not to have to travel far. Zelenograd-Lada employs qualified specialists who promptly fix the breakdown and take an integrated approach to solving the problem. |
| 3. | Dmitry: my comrades advised me to get service at the Filter Service Station on Krasnobogatyrskaya; before that there was another service station. I liked it, the quality is good, there are a lot of boxes, digital equipment is available. My recommendations. |
| 4. | Ivan: my positive review of the car service “Autoservice STO-Lublino”. Prompt work, comprehensive approach, parts and components always available. |
| 5. | Kirill: For car enthusiasts, I recommend the car repair shop “Dias-service, service station”. Convenient location, at the intersection of several districts of the city. I liked the quality of the work, modern equipment, objective approach to business. |
| 6. | Ignat: after purchasing the Lada Vesta, he preferred to be serviced at AUTOSERVICE PROFI-STO. The guys are smart, they know the structure of the technology, and their approach is objective. |
| 7. | Vladimir: my positive review of the TEKHINKOM service station. My friends advised me to get service from them. At first I was wary, but over time I changed my mind for the better. TECHINCOM are true professionals. |
| Negative | |
| 1. | Victor: last month I carried out diagnostics at the Auto Service Station-Lublino, I didn’t like it. There were no spare parts in stock, they suggested ordering them. The technician who was responsible for my car delayed the inspection for half an hour longer due to equipment failure. |
| 2. | Vasily: I previously had my car repaired at the Filter Service Station on Krasnobogatyrskaya, but I didn’t like it the last time. My technician was not there, and the “new guy” couldn’t identify the breakdown the first time. |
| 3. | Gennady: I’m looking for another service for maintenance, since I’m not satisfied with the quality of work at Zelenograd-Lada. There are no longer any spare parts in stock, the service station manager is constantly calling and offering promotional products. |
Other analogues for the front suspension
| Name | Price | Buyer Experience |
| Motrio LS-KTLL | RUB 1,015 | Medium hardness |
| MILES E100108 (China) | RUB 1,208 | Low dust level, do not creak, very hard, wear out the disc |
| FERODO FDB1617 | RUB 1,895 | Creak, slight dust formation, beveled surface provides 70% pressure to the disc |
| HI-Q Sangsin Brake SP 1564 | RUB 1,285 | They squeak a lot during grinding, soft braking, no dust, a huge number of fakes |
| Blitz BB0292 | 1,200 rub. | Small resource, after 2,000 km they begin to creak, easy installation in a regular place |
| Trialli PF1402 | 865 rub. | No squeaks, good braking, little dust, easy installation in a regular place |
| TSN 2.1.212 | Approximately 300 rubles. | They creak a lot |
| UBS Performance BP11-05-007 | RUB 2,335 | Excellent braking, heavy wear at high speeds |
| REMSA 0987.00 | 1,650 rub. | Good braking, occasional squeaking |
| ASAM 30748 (Romania) | 1,000 rub. | Good braking, strong creaking, high wear resistance |
| Hagen Sangsin Brake GP 1564 | RUB 2,079 | Sometimes they squeak, good braking |
| Galfer B1G10207412 | RUB 1,920 | Excellent braking in any weather, squeaks are observed at 0 degrees and below, high wear resistance, does not wear out the discs |
| Zekkert BS-1221 (Germany) | 878 rub. | Creak in any weather, moderate hardness |
| Intelli D204E | 592 rub. | Very creaking, normal braking |
