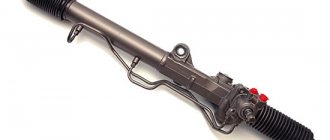
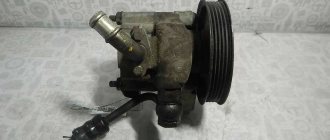
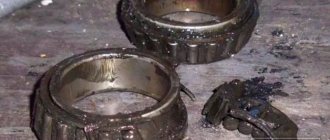
The purpose of power steering is to provide more convenient steering wheel control. Today, the power steering system is installed on Gazelle and many modern cars. You can learn more about the device, malfunctions and repair of the unit at home from this material.
Repair of Gazelle hydraulic booster
Gazelle power steering – facilitates the effort the driver makes when turning the steering wheel. Without it, it is more difficult to turn the steering wheel. Nowadays it is difficult to find a car without power steering. Cars without a power steering are a thing of the past; only those equipped with an electric power steering are found - this is an electromechanical analogue of a hydraulic booster. These can be found on some Gazelle models.
What should you pay attention to while driving?
If you turn the steering wheel with the car running or switched off, or overcome any obstacles while driving (curbs, holes, speed bumps) and feel feedback in the form of beating, vibrations, etc., you should think about a possible steering fault. control or amplifier units.
Signs of malfunction of steering and power steering units:
- Shocks, knocking and play transmitted to the steering wheel.
- Uneven force throughout the entire range of steering rotation.
- Inconsistency between the steering wheel position and the wheel rotation angle.
- Periodically appearing “bites” on the steering wheel.
- Knocks in the front axle area, transmitted by vibration to the steering wheel.
- The steering wheel returns to neutral at the end of a turn.
Which is more reliable: hydraulic booster or electric booster?
Power steering
The hydraulic booster operates via a pump that supplies oil pressure to the system. When the steering wheel is turned, the hydraulic drive creates oil pressure on the shaft in the same direction. This speeds up the rotation of the wheels in the desired direction and reduces the effort exerted by the driver. When the car is moving in a straight line, there is no pressure.
Has the following advantages:
- Power steering is more powerful than its electric counterpart, which allows it to be used for jeeps and trucks.
- Not sensitive to shocks and vibrations when driving on uneven roads.
- Allows you to feel the limits of the machine's capabilities.
- Cheaper to repair.
Electric booster
The electric power steering is an electric motor mounted on the steering shaft. Receiving signals from a sensor that monitors the rotation of the steering wheel, the electric motor turns on, increasing the movement of the shaft in the desired direction, just like the power steering.
Advantages and disadvantages of EUR:
- More compact and more economical to operate than power steering.
- It does not leak because there is no liquid in it.
- It is possible to adjust the responsiveness (sensitivity) to turning the steering wheel, according to the owner’s habit.
- Repairs are more expensive.
- Sensitive to shocks and vibrations, it may break when driving on uneven roads.
The conclusion is simple, power steering Gazelle will be more reliable in operation, especially on our roads.
Models and applicability of GAZ-3302 power steering pumps
Today, GAZelle-Business and Sobol vehicles use a wide variety of power steering pumps. This is due to the different characteristics of the engines installed on Gorky commercial trucks - each power unit has its own power steering pump. The choice of pumps is made based on the speed developed by the engine (gasoline engines are more revving than diesel engines, so the same pumps in them will work differently), connecting dimensions, installed steering, etc.
There are several main groups of power steering pumps used on GAZelles:
• Pumps for gasoline engines ZMZ and UMZ; • Pumps for diesel engines GAZ-560; • Pumps for diesel engines Cummins ISF 2.8; • Pumps for Andoria diesel engines.
Today there are a large number of models of power steering pumps, many of which are presented in several modifications (they usually differ in the diameter of the pulley and some characteristics). Each pump is used on its own engine and in certain modifications of Gazelle vehicles, so when replacing it, you must follow the operating instructions for the truck.
The most widely used are power steering pumps produced by BAGU (JSC Avtogidrousilitel, Borisov, Republic of Belarus), German ZF pumps, as well as original Cummins pumps. BAGU and ZF pumps are installed on ZMZ, UMZ and Andoria engines, Cummins pumps are installed only on diesel engines of the same name.
Device
The power steering consists of the following elements:
- Pump - creates oil pressure, attached to the engine. Powered by a drive belt.
- Distributor - regulates the movement of oil in the system: to the right or left cavity, depending on the rotation of the steering wheel, and back to the reservoir.
- Steering mechanism - transmits fluid force to the steering bipod mechanism, and from it to the wheels.
- Steering bipod - serves to transmit movement from the shaft to the wheel rods.
- Hydraulic hoses provide connection between system elements and oil circulation in it.
- The power steering reservoir is needed for the smooth operation of the system; the oil level in it either decreases or increases. Prevents air from entering if there is a sufficient level.
How to repair the power steering on a Gazelle
Basically, the power steering pump breaks down, but there are other faults:
- Worn or poorly tensioned drive belt. If worn, replace it, and the tension just needs to be adjusted.
- Low oil level in the hydraulic booster. It can be solved by adding oil to it and eliminating the leak, if any. Replacing hoses if necessary.
- Low pressure in the system can be caused by a clogged filter, air lock, or pump failure. Solved in order of repair complexity. First, replace the filter and bleed the system. If the situation does not improve, repair the pump.
- Mechanical failure of the pump or steering elements may be accompanied by creaking and other extraneous sounds. This is a serious matter; a complete diagnosis and repair will be needed.
Pump repair
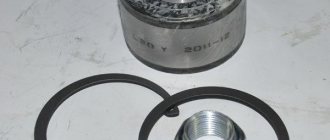
The biggest problem is the breakdown of the pump, this is the heart of the mechanism. Before repairing, you must purchase a repair kit. This kit is sold in almost any specialized store. Just check your car's manual for the make and model of your power steering, otherwise you may purchase the wrong kit.
The pump is removed and washed with gasoline; perhaps the condition of the housing will reveal the cause of the breakdown (for example, a crack). Then disassembly is performed:
- Carefully inspect the pump pulley; if it is threaded, it needs to be unscrewed. If it is planted, just knock it down.
- The easiest way to remove a mounted pulley is with a special puller, after first unscrewing the bolt from the shaft.
- If there is no puller, wooden blocks are placed under the pulley on both sides. They are knocked down with hammer blows through a soft (copper) adapter on the shaft.
- In the rear part, unscrew two bolts using a hexagon, all the insides are then easily removed.
- Remove the retaining ring (near the bearing), if there is one.
- After which, the housing is clamped in a vice, bearing down, and the bearing is knocked out by hitting the rod with a hammer, through the adapter.
- The bearing comes out along with the rod; now you can replace the oil seal located in the housing.
- Then, the bearing is simply knocked down in a vice, and a new one is pressed in.
- All damaged elements and gaskets that come with the repair kit are also replaced.
- Then reassemble in reverse order. Be careful that all gaskets are in place and the bearing stop is also in place.
- A complete replacement of all the oil in the system is required, this will get rid of dirt and chips that occur when parts break down and wear out.
Repair of the Gazelle hydraulic booster has been completed. All that remains is to screw the pump into place and bleed the system. At first, the pump may make a little noise, but then it will calm down.
TRUCKS GAZ, ZIL, KAMAZ, URAL, MAZ, KRAZ
GAZ cars
ZIL cars
KAMAZ vehicles
MAZ cars
KRAZ cars
URAL cars
Design and adjustment of the steering control of Gazelle GAZ-2705
The steering of the Gazelle GAZ-2705 car consists of an adjustable steering column with a shaft and wheel, a steering mechanism and a drive.
The design of the steering column (Fig. 19) allows you to change the position of the steering wheel in height and angle.
The steering mechanism of the Gazelle GAZ-2705 (Fig. 19), consisting of a screw with a ball nut 33 and a sector shaft, is mounted in an aluminum crankcase, which is attached to the left side member of the frame using a special bracket. The steering gear ratio is 23.09 (in the middle part).
Fig. 19. Steering Gazelle GAZ-2705
1 — steering wheel; 2, 25 — steering column switch; 3 - retaining ring; 4 — washer; 5 - bearing; 6 — plastic bushing of the bearing; 7 — ignition switch (lock); 8 - lower casing; 9 — steering column shaft; 10 — universal joint; 11 - wedge; 12 — nut: 13 — steering driveshaft; 14 — propeller shaft seal; 15 — cardan joint bearing; 16 — bearing needles; 17 — retaining ring; 18 — steering mechanism; 19 — bipod shaft with gear sector; 20 — universal joint grease fitting; 21 — steering column pipe; 22— bracket; 23 — handle of the steering column fixation mechanism; 24 — upper casing; 26 — steering wheel fastening nut; 27 — steering wheel pad; 28 — ball nut screw; 29 — top cover; 30 — adjusting gasket; 31, 39 — sealing rings; 32 - ball nut ball, 33 - ball nut; 34 - nut; 35 — bipod; 36 - cover; 37 — foam ring; 38 — retaining ring; 40 — bipod shaft bearing; 41 — shaft sector; 42 — ball nut screw bearing; 43 — bracket; 44 - crankcase; 45 — filler plug; 46 — oil seal; 47 — protective cover; 48 - wedge
A screw with a ball nut 33 is installed in the steering gear housing of the Gazelle GAZ-2705 on two angular contact bearings, the outer races of which are pressed into the crankcase and into the upper steering cover, and the inner races are pressed onto the steering gear screw.
The turning torque of the steering gear screw is adjusted using shims 30 installed under the steering gear cover.
When the screw rotates, the balls roll along a special channel, causing the ball nut to move. The balls are manufactured with high precision and differ from each other by no more than 4 microns.
The Gazelle GAZ-2705 steering mechanism assembly, consisting of a screw, a ball nut and a set of balls, cannot be dismantled. High quality processing and precision selected parts ensure easy and smooth operation of the steering mechanism.
With its teeth, the nut engages with the shaft - sector 41. The bipod shaft rotates on two cylindrical roller bearings, the inner race of which is the bipod shaft.
The sealing of the bipod shaft, as well as the steering mechanism cover of the GAZelle GAZ-2705, is carried out using rubber rings.
Fixation of the outer races of the bipod shaft bearings from axial movement is carried out using locking rings 38, and from angular movement - by coring the outer races into the crankcase holes, closed by plug 5.
The screw-ball nut of the Gazelle GAZ-2705 steering mechanism is connected to the steering column shaft using a propeller shaft. The hinge forks are fastened to the shafts using a wedge 48 (see Fig. 19).
The steering column is secured with four bolts to the clutch and brake pedal bracket. The steering column shaft rotates on two ball bearings. Adjustment of the steering column shaft bearings is not required during operation.
The steering wheel is mounted on tapered splines on the steering shaft and secured with a lock washer and nut.
The technical condition of the steering control of the Gazelle GAZ-2705 can be approximately determined by the amount of free play (play) of the steering wheel.
Maintenance of the steering includes its inspection, checking the fastening of the units, the free play of the steering wheel, checking and adjusting the axial play in the propeller bearings, the clearance in the meshing of the steering gear, as well as lubrication work according to the car’s lubrication map.
When inspecting the steering of Gazelle GAZ-2705 vehicles, it is necessary to check the fastening of the parts. All nuts and bolts securing the steering wheel, steering column, steering gear housing, steering shaft, bipod and steering linkage arms must be securely tightened to the torques specified below.
How to replace power steering on a Gazelle
There are two ways to replace the power steering on a Gazelle: by replacing the pump, or by completely replacing it along with the steering gearbox.
The second option is too expensive, is performed in case of serious damage to the steering gear, and is extremely rarely needed. Therefore, we will focus on the first option. First, you need to make sure that the problem is in the pump. Therefore, check the oil level in the hydraulics, then pump it to eliminate air pockets. If the performance of the hydraulic booster does not improve after this, then you will have to change the pump.
The replacement sequence is as follows:
- The machine must be raised and the front beam placed on supports so that the wheels are raised above the ground.
- Remove the engine protection.
- The drain plug is unscrewed and the power steering oil is drained into a substitute container.
- Remove the drive belt.
- The clamp on the upper pump hose is loosened, then this hose is disconnected.
- Unscrew the nut on the fitting of the lower hose, then move it to the side.
- Unscrew the pump mounting bolts, there are two in total.
- The pump is removed.
- If it is necessary to remove the bracket, unscrew the three fastening bolts and remove the bracket.
- Installation of a new unit is performed in the reverse order, after which you need to fill the oil reservoir and bleed the power steering system.
Preventive measures
Prevention and proper operation of the power steering system in this case can often significantly extend the life of the mechanism. The hydraulic booster is a fairly reliable and unpretentious spare part, and with proper operation it can last about 100...200 thousand kilometers. However, in order to extend the life of the hydraulic booster, you must follow simple rules, including:
- Monitor the power steering fluid level . This factor directly affects the normal operation of the pump. If necessary, it must be added to the required level. Moreover, it is advisable to use the same liquid that was poured in before; mixing them is extremely undesirable, and liquids belonging to different classes are completely unacceptable!
- Change power steering fluid according to regulations . You will find exact information for a specific car in the manual. However, for most modern passenger cars equipped with power steering, this gap is about 80...100 thousand kilometers. You can replace the fluid at routine maintenance that is close in mileage.
- Use recommended fluid . As mentioned above, there are currently a wide variety of them, but only the car manufacturer specifies in the service manual exactly what type of lubricant should be used for a particular car.
- Use power steering correctly . In particular, you should not hold the steering wheel in extreme positions for a long time. The maximum allowable time is 5...10 seconds (depending on the specific vehicle). Inverted wheels cause the pump to wear out, which significantly reduces its overall service life.
- Check the condition of the steering rack boots . This is a very important requirement, since the entry of dust and dirt into the system contributes to the wear of elements of both the rack in general and the hydraulic booster in particular. In addition, if the seals wear out, oil leakage may occur.
- When parked, the car must be parked with its wheels aligned . As stated above, this requirement is to avoid placing undue stress on the power steering pump.
- In cold weather, do not immediately turn the steering wheel after starting the engine . Instead, especially after being parked for a long time (for example, in the morning), allow the power steering system to warm up along with the engine before turning the steering wheel.
- Do not drive with inoperative power steering . This can kill all steering in the long run. Of course, you can get to a car service center or garage, but you can’t drive constantly.
- Timely diagnosis . If you detect the slightest suspicion of a malfunction of the hydraulic booster (the appearance of a hum during a turn or simply while driving, “heaviness” of the steering wheel), it is necessary to carry out diagnostics as quickly as possible in order, firstly, to reduce wear on parts, and secondly, to save for possible upcoming renovations.
Following the simple rules listed above will allow the car owner not only to significantly increase the service life of the power steering by avoiding malfunctions, but also to save on possible repairs.
Source of the article: https://etlib.ru/blog/1165-neispravnosti-gur
Main aspects of power steering repair in Gazelle
The purpose of power steering is to provide more convenient steering wheel control. Today, the power steering system is installed on Gazelle and many modern cars. You can learn more about the device, malfunctions and repair of the unit at home from this material.
Device
Both the electric power steering on the Gazelle and the power steering are designed for more comfortable steering. First, let's analyze the power steering device on the Gazelle. We are talking about both the Gazelle Business with the 405 engine and other models in this line.
So, what is the system device:
- Power steering pump. This circuit element ensures optimal circulation of consumables in the system, as well as pressure.
- Steering gearbox with distribution element. This device allows you to provide the air flow necessary to direct the oil into the desired cylinder cavity or back into the tank.
- Another component of the system is the cylinder. With its help, the pressure of the consumable material is converted into the movement of the piston, as well as the rod.
- The consumable material itself, that is, oil. The fluid transmits force from the power steering pump to the cylinder. In addition, the oil provides lubrication of all rubbing elements of the device.
The structure and features of the GAZelle steering control
GAZelle cars are a continuation of the “one and a half” concept, which has been proving its viability for more than eight decades. However, modern GAZ-3302 are technically far from the famous GAZ-AA, and these changes even affected such “little things” as the steering. It’s hard to imagine current models of gas trucks without power steering and modern steering mechanisms, which make the driver’s work more comfortable and simpler.
All models of trucks of the GAZelle-Business family (GAZ-3302, 3221 and 2705, produced since 2010) have fundamentally the same steering. It is built on the following components and assemblies:
The steering parts are located under the cab and in the engine compartment. So, the steering mechanism is mounted on the left side member of the frame, so the bipod and longitudinal rod are also on the left side of this side member. The reservoir for working fluid is installed in the engine compartment as close as possible to the steering mechanism. The power steering pump is mounted directly on the power unit, on the left in the direction of travel. A transverse steering rod is installed behind the front axle, it is connected to the levers on the steering knuckles via ball joints.
The pump plays an important role in the system, which should be described in more detail.
The procedure for adjusting the steering gear of a Gazelle car
The steering gearbox on Gazelle cars is installed regardless of the presence of a hydraulic booster. It increases traffic reliability, driver and passenger safety. Let's look at the signs of malfunctions and ways to adjust the Gazelle steering gear.
Signs of trouble
Control units wear out first because they are constantly under heavy load. The steering gearbox in this regard is the most risky unit. After a certain period of use, signs of wear appear:
- The occurrence of an extraneous knock or vibration felt by the driver through the steering wheel.
- Significant effort is required when turning the steering wheel.
- The presence of play is more than 20° for passenger vehicles or 25° for trucks.
- Oil leakage from the gearbox. To some extent, oil is always present on the body, but noticeable discharge is a sign of failure of the seals.
The presence of these signs indicates that the Gazelle's steering gear requires adjustment. You should not delay this procedure, as some malfunctions inevitably create the basis for even more serious problems.
Design and procedure for dismantling the control unit of a Gazelle car
Composition of the Gazelle control unit:
- A wheel mounted on a shaft and located inside a column that can be adjusted in height and tilt.
- Rotation mechanism.
- Drive unit.
Repair of the Gazelle steering wheel is carried out as needed, mainly when the first signs of a malfunction appear.
The gearbox mechanism is compact and quite simple. The work does not require high qualifications, but it should not be the first step in setting up.
The fact is that in order to remove the problem node, you will need:
- Loosen the front wheel mounts
- Raise the front axle and place a support.
- Knock out the traction.
- Remove the gearbox along with the bipod.
Since these actions are quite difficult, the process of adjusting the steering gear must begin after some preparatory operations:
- Checking the rod ends.
- Wheel alignment adjustment.
- Adjusting the position of the column and driver's seat.
Steering gear repair procedure
Adjusting the steering on a Gazelle begins with adjusting the play. The plastic casing is removed, the 4 mounting bolts are unscrewed with a 13mm head and the metal protection is removed. Under it there are adjusting shims, with the help of which the slack is eliminated.
One gasket is removed, the assembly is assembled, and the presence of play is checked. If it does not disappear, the procedure is repeated until the slack is completely eliminated. It should be checked with the steering wheel in the middle position, when it is at its minimum. The adjustment is made until maximum ease of rotation of the shaft with minimal backlash is achieved.
After eliminating the play, the repair of the Gazelle steering wheel continues. The gap between the ball nut and the shaft sector is adjusted. To do this, you need to put the bipod on the shaft, turn the steering wheel shaft 2.5 turns in any direction, and check for free play. If there is one, you will have to adjust the position of the bearings. They use angular contact bearings, so the gaps should be minimal (ideally, absent).
A noteworthy circumstance is that the ball nut and screw cannot be dismantled, which in the first years of operation of the Gazelle car was a significant drawback due to the lack of spare parts. Today this issue has been completely resolved, the market has a sufficient number of parts, which allows repairs or adjustments to be made at the first symptoms of a malfunction.
Related video: Gazelle steering column repair
Signs and causes of malfunctions
It is believed that the plate unit is a durable mechanism, however, if its operation is violated, various emergencies may occur. Failure of the power steering pump unit is possible for several reasons, such as:
- leakage of liquid and decrease in its level in the tank and pipelines;
- the working fluid does not change for a long time, and material that does not comply with the instructions for this unit is used;
- entry of foreign impurities into the system;
- lack of fluid movement and possible overheating of the hydraulic unit.
The failure of the power steering pump is determined quite simply. These signs are immediately identified by the car owner.
- At low or idle speeds, the steering wheel experiences increased forces when turning the wheels compared to normal driving. As engine speed increases, the effort disappears.
- An unpleasant extraneous sound occurs when the steering shaft rotates.
- A characteristic leak of working fluid is detected through its stains on engine parts or the road surface.
- The bearing whistles. When the belt is removed and the pump shaft is rocked, play is detected.
If such signs appear, the driver must carry out an external inspection of the entire power steering system and decide whether the power steering pump needs to be repaired, or whether it is necessary to deal with other parts of this structure.
Repair of power steering in Gazelle
Today we will pay special attention to power steering, intended for installation on Gazelle cars. In today's article we will take a closer look at repairing the Gazelle power steering. So, this article contains answers to these fairly common questions:
- What is a hydraulic booster?
- How does power steering work?
- What does power steering repair involve?
- How to properly replace power steering fluid on a Gazelle car?
- How to properly repair the power steering pump on a Gazelle car?
Basic information about the hydraulic booster
Power steering or, as it is abbreviated as power steering, is a vehicle’s hydraulic system, part of the steering mechanism, which is designed to facilitate the direction of movement of the vehicle while maintaining the necessary feedback, as well as ensuring stability of operation and unambiguity of the specified trajectory. In addition, the power steering is designed in such a way that if it fails, the steering wheel will function, but in this case the steering wheel will turn a little harder. Power steering is one of the most important steering components of any vehicle. The main purpose of power steering is to create lateral forces when turning the steering wheel due to the presence of an electric drive. Almost all modern vehicles are equipped with power steering.
Inspection and identification of defects
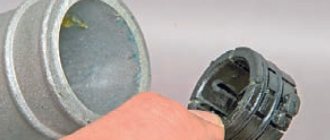
Carefully inspect the contents and remember (you can take a photo) what was placed where and how (more attention should be paid to the position of the cylinder). You can twist the power steering pulley and carefully use tweezers to check how the blades move in the grooves of the shaft.
All parts should be pulled out without effort, since they do not have any fixations, but the central axis is firmly fixed and cannot be removed.
We inspect the shaft from the reverse side, parts (power steering housing and cover wall) touching them, for burrs or grooves, everything is perfect for me.
Now we remove the entire internal economy onto “clean” rags and begin to study it.
We carefully examine the shaft; all its grooves have very sharp edges on all sides. One of the end sides of each groove has a pronounced sharpness inward, which, when moving the blade inside the groove with a constant slope towards this side, will greatly complicate its movement (this may be the first component of poor power steering performance). The side parts of the shaft grooves are also “sharpened”; this can be felt if you run your finger in different directions along the end (outer circumference), as well as along the side parts of the shaft in different directions. Otherwise the shaft is perfect, has no flaws or nicks.
7.1.4. Steering mechanism with hydraulic booster.
Removing the power steering mechanism
It is more convenient to work together. Drain the oil from the power steering system (see section “7.1.3. Maintenance of the hydraulic steering system”).
Remove the universal joint fork from the steering shaft. If necessary, move the steering column up (see section “7.1.1. Checking the technical condition of the steering and steering column”). We disconnect the longitudinal link from the bipod (see section “7.1.2. Steering shaft universal joints, steering rods and pendulum arms”). Disconnect the thin hose from the power steering reservoir (see section “7.1.3. Maintenance of the hydraulic steering system”).
Using a 19mm head we loosen...
...and using a wrench of the same size, unscrew the three bolts securing the steering mechanism to the bracket. At the same time, the assistant holds...
...and removes the steering gear. We clamp the mechanism in a vice...
...with a 22mm wrench we unscrew the bolt fitting...
...and remove the drain hose. We install the mechanism in reverse order.
Adjusting the power steering mechanism
Adjustment involves two operations: adjusting the propeller thrust bearings and adjusting the gearing. Adjusting the thrust bearings of the screw We work on the inspection hole. In order to determine the need for adjustment, set the steering wheel to the middle position. We disconnect the longitudinal steering rod from the bipod (see section “7.1.2. Steering shaft universal joints, steering rods and pendulum arms”).
Holding the propeller fork of the input shaft of the steering mechanism, we swing the bipod with the other hand. If the input shaft has noticeable play, adjust the bearings. To do this, remove the steering mechanism (see above “Removing the power steering mechanism”) and secure it in a vice.
We straighten the beaded collar of the adjusting nut.
Use a special wrench to turn the nut clockwise...
...while constantly shaking the bipod, we control the play until it is completely eliminated.
We lock the adjusting nut with a bead, placing sections of its flange into the grooves of the crankcase.
Gear adjustment
The gearing is adjusted only after the play in the screw bearings has been eliminated. On a mechanism mounted in a vice,…
...holding the input shaft with a 16 key,...
...we shake the bipod. The play should not be felt by hand (exceed 0.3 mm at the end of the bipod). Otherwise, remove the bipod from the sector shaft. We treat the connection with penetrating liquid.
We mark with a center punch the relative position of the bipod and the sector shaft.
Using a 32mm wrench, unscrew the bipod nut and remove its spring washer. We install the puller on the bipod and shaft.
By tightening the puller screw and applying sharp blows to the side of the bipod,...
...let's take it off. Done on the shaft.
...four double grooves,...
...and in the bipod hole there are four double slots.
Remove the plastic covers from the slotted...
...and the opposite end of the sector shaft.
Using a 13mm wrench, loosen the locknuts and using a 12mm wrench, unscrew the two locking bolts.
Using a thin beard with a blunt end, we straighten the holes on the covers of the outer rings of the sector shaft.
Using a special wrench, we turn the outer eccentric rings of the bearings in the crankcase holes clockwise from the side of the splined end of the sector shaft. At the same time, we wiggle the input shaft with a “16” wrench to determine the moment at which the resistance to its rotation increases, at which we stop adjusting. When adjusting, it is necessary to exclude the possibility of skew of the sector shaft, for which we turn both bearings alternately at a small angle until the gaps in the mesh are eliminated. Having placed the bipod on the splines of the sector shaft, we finally check that there is no play.
Elimination of power steering pump defects
The faults have been found, now we begin to eliminate them.
We will need rags, white alcohol, sandpaper with grit P1000/P1500/P2000, a triangular needle file, a drill bit of Ø12mm (or more) and an electric drill. With the shaft everything is much simpler, you will need P1500 sandpaper and with it we begin to clean all the edges of the grooves on the shaft (we clean the outer and side ones on both sides) in all possible ways. We work without fanaticism, the main task is to remove only sharp burrs.
For one thing, you can immediately polish both sides of the shaft a little on a flat surface, it is advisable to use P2000 sandpaper.
Next, we need to check the result of our work, we check visually and by touch, everything is perfectly smooth and does not cling.
The most difficult thing will be with the surface of the cylinder; personally, I couldn’t figure out anything simpler than how to make a spherical grinder from sandpaper, a drill and a thick drill (F12). To begin with, we take the P1000 sandpaper and a drill bit that can be inserted into the drill.
Next, you need to tightly screw the skin against the rotation of the drill, two or three turns, there should be no gaps.
Holding the tightly twisted structure, it needs to be inserted into the drill (the skin should also be clamped).
Afterwards, using the most convenient methods for you, we carefully begin to grind the cylinder, you need to grind evenly, press the cylinder tightly and move it relative to the axis of rotation (at maximum speed). As we eat the skins, we change them, eventually we reach the smallest skin P2000.
The desired result is obtained,
Now everything needs to be thoroughly wiped with a trail of white alcohol. The shaft itself with the blades can be rinsed in it.
After we begin the assembly, everything is put in the reverse order of removal.
Do-it-yourself power steering repair
Repairing power steering is a complex task and painstaking work. The article is intended for those car enthusiasts who are familiar with the structure of the main car systems.
Preparing for power steering repair
Many people probably know how to remove the power steering from a car and install it back after the work is completed. Where should you start?
1. Clean dirt from the power steering so that it does not end up in the cavities of the unit when disconnecting the hoses.
2. Pump out as much liquid as possible from the pump reservoir (preferably more).
3. Taking the hexagon “6”, unscrew the screws of the steering shaft coupling from the bottom of the car. Before doing this, do not forget to mark its position relative to the power steering shaft with a roll.
4. Slide the flexible coupling off the splines using a pry bar.
5. Disconnect the steering rods from the bipod using a puller.
6. Jack up the car and remove the left front wheel.
7. Taking a socket wrench set to “15”, loosen the three bolts securing the power steering to the side member from the side of the wheel arch, removing two of them.
8. Place a container under the hose fittings and disconnect them one by one to drain the liquid.
9. Seal the hoses and fittings with at least a rag.
10. Holding the hydraulic booster from below the car with one hand, unscrew the remaining bolt and do not drop the gearbox on your foot.
11. Before disassembling the gearbox, wash it thoroughly.
Power steering repair technology
Many experts strongly recommend re-reading articles about power steering specifically for your car. Some hydraulic boosters can be disassembled almost completely, with the exception of the “ball nut - steering shaft screw” pair, while others are better left alone. Although, even if you accidentally unscrew the screw from the nut and the balls fall into the cavity of the gearbox, just do not lose them.
Power steering repair steps:
1. To disassemble the part, take a very strong “6” hexagon, as well as a regular old tray into which ATP will begin to drain.
2. First remove the plugs from the fitting and lift the power steering above the bucket, rotating the bipod to drain the liquid.
3. Next, remove the bipod shaft and unscrew the four bolts that are mounted on the fixing mastic, and therefore are quite difficult to unscrew.
4. Unscrew the locknut of the adjusting screw, and then, turning the screw, screw it into the gearbox to push out the shaft along with the gearbox cover and bipod.
5. If you do not need to eliminate play in the bipod shaft or replace the cuff, then this bipod can be left alone and not removed. Unscrew the check valve plug.
6. Remove the spring and shake out the valve.
7. Unscrew the cover bolts and, carefully turning the shaft, make sure that it slightly pushes the cover out of the body. Be careful not to unscrew the shaft from the ball nut.
8. Pry up the resulting gap and pull the shaft along with the cover and piston out of the gearbox.
9. Remove the ball nut by unscrewing the shaft and collecting the balls.
10. Loosen the locknut and unscrew the bearing.
11. Remove the nut housing and bearings from the piston housing. Next, disassemble the nut by bending the bolt lock. Unscrew them, remove the bracket, as well as both parts of the ball guide channel.
12. We are looking for the cause of the breakdown. There can be several reasons for power steering play: gaps in the shaft-ball nut pair, in the shaft bearing unit (in the cover), as well as in the ball nut bearing unit in the piston body itself.
13. Adjust the gaps. They were formed, by the way, due to a banal loosening of the threaded connections that hold the bearing units. If play is detected in the shaft-cover assembly, then loosen the lock nut and tighten it so that the play disappears, but without fanaticism. Do not forget to carry out the “operation” cleanly, that is, the cleaned part should shine.
If you are doing this work for the first time, then do not be lazy to get detailed power steering drawings or take sheets of paper and lay out each spare part on a separate piece of paper, putting a number on it. It is ideal to work at a large table. This way you definitely won’t lose anything and will assemble the power steering without errors, and they don’t joke with the steering wheel, because this is your safety on the road, as well as your loved ones.
14. Reassemble the gearbox in reverse order, not forgetting to lubricate the parts with ATF.
Good luck, motorists, in repairing your power steering!
Disassembling the power steering pump
And so, first of all, we remove the pump, you need to drain all the liquid from it (I think everyone can figure out how to remove it and drain the liquid), and on the back cover of the power steering you need to unscrew the four bolts with a 14mm head.
After that, we begin to carefully remove the cover, try not to damage the gasket (this gasket has an internal rubber seal), in the power steering housing we leave the outer part of the “working ellipse cylinder” (hereinafter simply the cylinder). There is no need to be scared when the cover comes away from the body, it may seem that it is coming away due to the action of the spring, when reassembling it will seem to you that it does not fit into place, just continue to carefully and alternately tighten the bolts diagonally, then everything will fall into place .

