Timing belt 2108.10 - 8kl (slips and wears off, after tension there is extraneous noise)
Many have encountered such a problem as the belt slipping and being “eaten”.
Sometimes such a car is bought second-hand, or during scheduled maintenance when replacing a belt, rollers, or pump, this happens. Also, all this is overgrown with numerous myths: like the tension roller pin is bent, the timing gear is worn out - well, to manage to bend the M10 pin, of course you need to try (!); wearing out the timing gear with a rubber belt is probably(!) only possible in a million kilometers, but not in 100,200 or even 400 thousand km.
Let's figure out why this happens.
Belt slippage occurs:
1. poor-quality belt
(after replacement, it moves outward/inward) - you can determine by turning the belt over to the other side
2. Pump
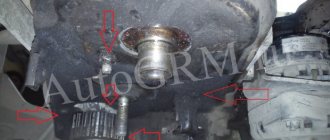
- misalignment and, as a result, the belt moves out (if the pump is worn out or when installing a new pump, the mating surface to the block was poorly cleaned of the old one gaskets, sand, dirt)
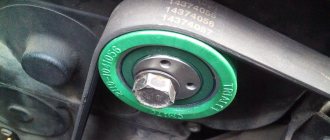
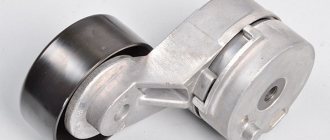
3. The tension roller wears out the bearing
and, as a result, the roller is skewed.
4. banal tugging of the belt!
A very common case - you may not even notice it. In the case of operations with the timing belt, when the belt begins to slip (and before that everything was fine), check the belt tension, barely tighten it and look - if it doesn’t slip, it means the belt was tightened too much!
When changing the pump and rollers, you need to thoroughly clean the mating surface on the block and on the mating mechanism (roller/pump); there should be no sand or dirt, otherwise there will be distortion.
Sometimes everything is simpler than it seems!
By the way, I can’t understand who came up with the story about the fact that timing gears need to be changed...even the factory doesn’t regulate their replacement - they are eternal; a rubber belt in life will not erase an iron gear; 9 cars from the 80s to this day have the original gears and nothing has worn off and it works with a bang (and they have mileage even under 400 thousand) - most likely this story came from crooked services where they usually change everything just to squeeze more money out of the client...
You do not need to tighten the belt too much so that its part from the timing gear to the crankshaft can be rotated 90 degrees with a little finger effort, but does not dangle. If you tighten the belt a little, the pump will start howling. You need to grasp this fine line.
By the way, there are those who pull the roller in the other direction - i.e. clockwise is not correct! Tension only counterclockwise!
All this information posted by me is based only on personal experience, trial and error + consultations with competent people. Miracles don't happen; if the mechanism doesn't work, then you made a mistake.
Naturally, all this is provided that your crankshaft/camshaft is not hanging out in bed!
Source
Replacing timing belt 2109
Still in the finishing stage.
It's time to change the timing belt on the VAZ 21093. The procedure is not complicated. It can be done without a hole and a jack, as they say - out of the blue. The alternator belt drive pulley must be removed. We put the car in gear and handbrake. The first step will most likely be to remove the engine fender liner and mudguard. It is necessary to remove the timing belt protective cover (attached with three bolts) - do not lose the bolt bushings when removing. Next, loosen the tension on the alternator belt. Turn the wheels all the way to the right. We take out the rubber plug from the inspection hatch of the gearbox and fix the flywheel, for example, with a large powerful screwdriver.
As I understand it, there is no proprietary flywheel lock for our car. So here we do what we can. Someone makes a retainer from an old flywheel. Having locked the flywheel and using a long, strong wrench and extension, unscrew (counterclockwise) the bolt securing the generator pulley to the crankshaft. Removing this bolt is one of the difficult tasks. Personally, I couldn’t unscrew it without fixing the flywheel. For some reason, no one left the air impact wrench nearby on the street :). Remove the generator drive pulley and generator belt. Screw the bolt back in. It should look like in the photo.
To ease the effort to further rotate the timing mechanism, unscrew the spark plugs. By rotating the bolt on the crankshaft clockwise, check whether the marks (circled in yellow) match according to the instructions. Photo from the repair manual of the Za Rulem publishing house.
Next, we do the following - without removing the timing belt, we mark with a marker, a felt-tip pen for writing on CDR disks, the relative position of the belt on the gears. Those. We put a mark in any convenient place on the gear and right there on the belt. I made two marks on the camshaft gear and one on the crankshaft gear. In total there are three marks on the gears and, accordingly, three marks on the belt. Using a special wrench, loosen the timing belt tension roller.
Remove the timing belt. Next, we transfer the marks from the removed belt to the new belt that we will install. For this purpose it is convenient to use (for example) a clamp.
It turns out like this:
The roller is usually changed along with the belt. If there is no desire to improve something, then we take the latest miracle developed by engineers on a single-row bearing and with a plastic (consisting of two halves) running part and install it.
Let's continue. The new video is worth it. The marks have been transferred to the new belt. We put on a new belt, making sure that the marks on the new belt and gears match. If adjustment is necessary, rotate the crankshaft gear clockwise.
Next, we tighten the timing belt with a roller, rotating the roller with a special tension wrench counterclockwise. Periodically loosen and tighten the nut clamping the roller. Those. tension the belt with a roller, tighten the roller nut. We made two revolutions of the crankshaft. We checked the belt tension using two fingers. And so on until we achieve the approximate required tension.
We check the coincidence of the marks according to the instructions from the book.
Do not use too much force when tightening the roller nut! You'll strip the threads in the cylinder head. Yes, about birds. The final belt tension should be checked on a hot engine. And when it’s cold, at least it shouldn’t hit the protective casing.
We assemble everything in reverse order. The protective cover can be put on later, after finally making sure that the belt is tensioned.
The belt was purchased by Gates 5521XS (they seem to praise it).
Buy a belt from a trusted place and check the production date. It is better to take a “fresh” belt. The shelf life of a belt from the date of production is usually 5 - 6 years. It seems like week 43 of 2012.
After replacing the belt, it is possible that it will run away from or towards the engine. But for some reason the old one didn’t run away. It’s as if a specially trained person is sitting on the VAZ and hitting the roller pin with a hammer. There can be a lot of options here and this is a topic for a separate discussion.
Source
EXECUTION ORDER
Using a 10mm wrench, unscrew the bolts of the front timing cover:
Step-by-step instructions for tensioning and replacing the timing belt on a VAZ 2109, 2108, 21099 with your own hands using a minimal set of tools. To get to the timing belt, you need to remove the protective cover. To do this, use a 10mm wrench to unscrew the two bolts on the side.
To replace the belt, turn the crankshaft counterclockwise so that the mark on the camshaft pulley moves down from the rear cover antenna by two teeth.
Remove the generator drive belt, the right wheel and the right mudguard of the engine compartment. Using a 19mm socket, turn the crankshaft clockwise using the pulley bolt.
until the mark on the camshaft sprocket aligns with the mounting lug on the rear timing cover.
After removing the rubber plug at the top of the clutch housing,
make sure that the mark on the flywheel is located opposite the slot in the clutch housing cover (the coolant supply hose to the radiator has been removed for clarity).
This is how the mark should be located on the engine flywheel (with the gearbox and cylinder head removed).
We fix the crankshaft from turning by inserting a screwdriver through the hole in the clutch housing between the flywheel teeth. Unscrew the bolt securing the generator drive pulley. Remove the generator drive pulley.
Using a 17mm wrench, loosen the nut securing the tension roller.
We turn the tension roller to a position in which the belt will be loosened as much as possible and remove the timing belt.
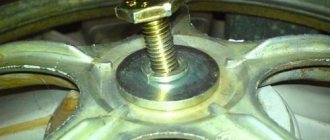
When replacing the tension roller, unscrew the nut securing it and remove the roller from the stud.
A spacer washer is installed under the roller.
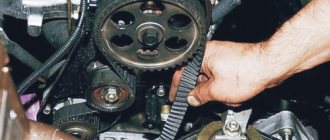
Install the timing belt in reverse order. We put the belt on the crankshaft pulley. Then we put the rear branch on the coolant pump pulley and place it behind the tension roller. We put the belt on the camshaft pulley.
By inserting a screwdriver between two screws or rods with a diameter of 4 mm installed in the hole of the tension roller, turn the roller counterclockwise, tensioning the belt. Tighten the tension roller mounting nut.
We screw the bolt securing the generator drive pulley into place and using the 19-inch head, turn the crankshaft two turns clockwise by the bolt.
We check the alignment marks of the crankshaft and camshaft.
With the generator drive pulley removed, it is convenient to control the position of the crankshaft by aligning the marks on the crankshaft timing pulley and the oil pump cover. If the marks do not match, repeat the operation to install the belt.
Replacing the timing belt VAZ 2109 1.5 liter 8 valves with photos and videos
Old VAZ 2109 with a 1.5 8 valve engine, timing belt replacement. In general, it could be a VAZ 2114 or 2110, there is no difference in operation, the eight-valve engine is the same everywhere. Together with the belt, we will change the pump, the tension roller and two pulleys, the camshaft and the crankshaft. If the timing belt breaks, the valves on this engine do not bend, but it is better not to let it get to that point. Changing the pump and roller is a prerequisite so that after a thousand kilometers you don’t have to disassemble everything again. But it’s up to you to decide for the pulley, the price is 150 rubles per pair. There were cars where a slightly bent pulley caused the belt to slip and gradually wear out, reducing its service life. On this car the belt was worn down in half.
We recommend that you periodically check the condition of the belt to avoid annoying consequences and not have to look for someone to take it to a repair shop. Replace every 40,000 kilometers.
And here is the patient himself.
To replace it, we need a key for the tension roller, the price is half a hundred rubles. You can buy it at any auto store. As well as a set of keys and sockets and two hours of free time.
Begin
Everything we need.
We unscrew the three ten bolts securing the protective timing cover and remove it.
Next, loosen the nut thirteen that secure the generator and unscrew the tension bolt ten.
We take the generator to the engine and remove the belt.
Remove the engine protection and drain the antifreeze. We set the camshaft mark by turning the crankshaft clockwise. The ebb on the pulley should be opposite the bend of the protective cover fastening.
Unscrew the crankshaft pulley mounting bolt. We put the assistant in the cabin and force him to engage fifth gear and press the brake. And at this time we easily and naturally unscrew the bolt using a 19 meter head and a pipe of one and a half meters. It must be screwed properly, and some craftsmen lubricate it with sealant and then wait for kind words addressed to them.
On the left side we see the crankshaft position sensor. We will need it to subsequently check the correct installation of the timing belt. We remove the crankshaft pulley and see that the marks match.
Unscrew the nut on the tension roller 17 and remove it along with the belt. Then unscrew the camshaft pulley bolt and remove the last one. Be careful not to lose the key. We unscrew everything that secures the protective metal shield, namely one ten-point nut and a bolt securing the cover, three bolts securing the pump.
Remove the protective cover and pump. Antifreeze remaining in the block may leak out if you have not drained it. Carefully, it's sweet.
We clean all the parts from oil and belt residues, as well as the pump seat from the old gasket and sealant.
Lubricate the gasket of the new pump with sealant and put it in place. We install the metal protection and tighten all the bolts and nuts securing it. We tighten the pump bolts evenly in a circle, then check whether the pump is spinning. Recently a client brought in an original pump, which turned out to have slightly larger petals and after installation it began to bite. I had to modify it with a grinder and take measurements several times. These are the spare parts we have.
We check if the key is lost on the camshaft and install the pulley. We tighten its bolt to seventeen.
Now comes the fun part - installing a new belt.
We check that all marks match. We first place the belt on the crankshaft and pump. Then we tighten the right descending branch of the belt and put it on the camshaft pulley and tension roller. We check all the marks again and tighten the belt with a roller. The tension is considered sufficient if, with the force of two fingers, you can twist the longest branch of the belt by a maximum of 90 degrees. It’s easier to take the right branch of the belt with two fingers and twist it, if more than 90 is not very bad, but less is very bad. An overtightened belt will wear out quickly and will also reduce the life of the pump.
We place the bottom protective plastic cover. And on the crankshaft pulley we mark the twentieth tooth after skipping two teeth. We count counterclockwise.
This mark corresponds to the top dead center of the first cylinder. We put the pulley in place and the mark should be against the crankshaft position sensor. More precisely, against the small iron core of the sensor. Sometimes it gets into the gap between the teeth, this is considered acceptable. We tighten the pulley in the same way as we unscrewed it, with the help of a partner.
We turn the crankshaft two turns and check the marks; this is where our mark on the pulley comes in handy.
If everything is in trouble, we collect everything that we took apart. As they say in smart books, install the parts in the reverse order of removal. Don't forget to add antifreeze.
We start the car, accept congratulations from family and friends and head off to adventure.
Installation
Now directly about how to return a new timing belt to its place. There is nothing complicated here either, but we still recommend watching visual videos and studying the instructions.
Reassembling the unit
The main difficulty in replacing a timing belt lies not in the complexity of the processes performed, but in the time that needs to be spent on repairs.
A competent approach, attentiveness and the use of a high-quality new belt will allow you to easily restore the operation of the gas distribution mechanism and save hundreds of rubles on visiting a car service center.
Main malfunctions of the timing belt of the VAZ 2109 engine
These include the following:
There are several factors that are also typical for malfunctions of the crank mechanism:
One of the most serious problems that can happen is the so-called stuck valves. Such a breakdown leads to complete engine failure and expensive repairs. There may be two reasons.
Factors that caused the malfunction
The first is operation on low-grade fuel, as a result of which resin is deposited on the valve stems. The second factor is resonance caused by broken springs. In this case, when the piston reaches TDC, the valve does not have time to fully seat itself. This kind of problem is extremely rare, but it doesn’t hurt to know about it.
A common malfunction with a violation of the thermal clearance occurs due to wear of the bearings or camshaft cams. Also possibly the camshaft pulley. Often the cause is incorrect adjustment of the gap or incorrect selection of the washer.
In fact, it is quite difficult to correctly diagnose timing belt faults, since signs may indicate other engine components and assemblies not related to the timing belt.
Therefore, diagnosing breakdowns of the gas distribution mechanism often involves removing the cylinder head cover for a visual inspection of the condition of the elements. A timing malfunction in any case leads to a violation of the valve timing, as a result of which unstable engine operation is observed, the inability to gain power, etc.
Signs of trouble
You can carry out diagnostics yourself if you pay attention to phenomena that clearly or indirectly indicate problems with gas distribution:
For an accurate diagnosis, the best option would be to contact a specialized center. You should not delay with such malfunctions, as the consequences can be serious.
Why does the belt need to be tensioned?
Because it operates under high voltage, over time the tire that makes up the belt begins to relax and stretch slightly. And when it stretches, problems begin with engine components, because without belt drive they cannot perform their functions.
A loose coil belt can not only jeopardize the performance of engine components, but it can also cause internal damage to the engine itself, and then you will have to completely rebuild your car's engine or, worse, buy a new vehicle.
How can you tell if a track belt is stretched?
Look at the warning light on your car's dashboard - most modern cars have a warning light that shows the battery voltage when you start the engine. If the belt is not tight, it will not be able to rotate the alternator pulley, causing a drop in electrical current to the car's engine, which in turn will cause the warning light on the dashboard to turn on. Attention! The light may be on not because of belt tension, but because of problems with the battery or alternator.
Pay attention to engine temperature - if the timing belt is too tight, it may not supply enough water to the water pump and this will cause the engine temperature to rise, which will not be able to cool effectively. Listen for unusual noises or squeaks in the engine area - Squeaks are one of the first signs that the belt is loose, and if you hear them when you start the car when the engine is cold, or hear them when accelerating, then it's time to think about tightening the belt.
Step-by-step replacement instructions
The VAZ 2109 car is designed in such a way that if repair work is necessary, it can be carried out by the car owner himself. The process of changing the tensioner roller is quite simple, and it will take no more than 1.5 hours.
Step-by-step instructions for carrying out technical work on the timing system:
hidden spring roller
roller with external spring design
If after the work carried out, the car owner has no complaints about the operation of the engine, then the process of replacing the timing rollers in the engine is over.
Malfunctions after replacing timing rollers
In most cases, after replacing the timing belt tensioners, the car owner does not encounter any problems. However, as practice has shown, malfunctions can manifest themselves after some time.
Malfunctions and solutions:
Fault 1: The battery does not charge well; after several hours of inactivity, the car does not start. Voltage drops are also observed in the on-board electrical network.
Solution: Most likely, when installing the timing belt, the driver incorrectly adjusted the position of the shaft gears in relation to the generator gear. As a result, malfunctions in the on-board network began to appear. They arise due to the asynchronous operation of the gears described above. To eliminate this problem, you just need to debug the position of the shaft gears and the generator. After additional configuration, the problem goes away.
Malfunction 2: After replacing the rollers, the timing belt cracked or even broke.
Solution: In most cases, this problem occurs when a modified timing panel panel is installed. Such breakdowns occur due to the fact that the position of the rollers was not calibrated, as a result of which the belt was overtightened. To eliminate this problem, remove one of the rollers, then put on the belt. After this, install the removed roller back on the panel. Then adjust its position. The adjustment itself must be carried out using a special wrench, which must be used to tighten additional screws on the tensioner. When adjusting the position of the roller, you should also rotate the belt to ensure that there is no excessive pressure on it.
If any other problems occur in the engine after replacing the rollers, a simple solution would be:
Despite everything, I would like to emphasize that the VAZ 2109 car, although it is the brainchild of the domestic automobile industry, can serve its owner for many years with proper care.
When do you need to change timing rollers?
Most motorists cannot determine in time that the timing belt rollers need to be replaced. It's not the motorists' fault. After all, most of them are accustomed to the fact that the on-board computer informs the driver about the need to replace consumables. It processes data received from various sensors. If necessary, displays a corresponding notification on the dashboard.
In most foreign cars, it is the on-board computer systems that monitor the general condition of the engine. But in this case, the car owner will have to monitor the technical condition of the consumables. The VAZ 2109 does not provide any kind of on-board computer. Everything is the old fashioned way here!
Timing belt for VAZ 2109 engine
Previously, the gear device was quite rare and caused some mistrust among car enthusiasts. In modern cars, such a drive is no longer uncommon. And there are a number of objective reasons for this:
But, as it turned out, the belt has many disadvantages. Firstly, it is fragile (it often breaks). Secondly, with prolonged use, sagging is observed, associated with squealing. Thirdly, if you tighten the belt, its teeth will “stick together” over time, which will lead to the need for replacement and unstable operation of the power unit.
Purpose of the timing belt
The timing belt is made of rubber and has teeth with serrations on the inside. Its main task is to ensure synchronous rotation of the crankshaft and camshaft drives. Thanks to the belt, a lower camshaft speed is achieved: it is two times lower than the crankshaft speed. Unfortunately, the part does not last as long as the chain, and wears out before 60 thousand kilometers. It is recommended to replace the belt, even if there is visually no visible damage or signs of wear.
A broken belt completely disables the engine, making it impossible to move the car. On 8-valve engines with a volume of 1.5 liters (the injector and carburetor have the same systems), a broken belt does not lead to the valves being deformed; in common parlance, the valves are bent on the valve cover.
There may be several reasons why the drive breaks.
In order to avoid the financial costs of eliminating problems when the timing belt breaks, it is necessary, if possible, to monitor the operation of the timing belt:
However, monitoring the condition of the belt and other drive elements is problematic due to the protective casing. To solve this problem, it is recommended to make a small inspection slot in the casing cover.
This way you can monitor the condition of the belt. And if there are cracks, scuffs and other damage, replace the drive in a timely manner, without waiting for it to break at the most inopportune moment.
How to tension the timing belt correctly
The optimal tension of the timing belt is very easy to check. Using a little force, you need to unscrew the belt. If the angle at which it is twisted is 90 degrees, then tension is not required.
After replacing any timing element, you will need to tighten the belt. To do this, you need to put it on the toothed pulleys of the crankshaft and camshaft drive and use a tensioner roller to make the tension optimal. After this, you need to crank the engine several times. This can be done with a wrench by turning the camshaft pulley mounting nut. Next, you need to look at the location of the alignment marks on the flywheel and gear - they must match exactly. If there is no match, the belt is removed again. And the pulleys are installed according to the marks, after which the tensioning procedure is repeated.
It happens that even a correctly tensioned belt begins to slip after starting the engine. The reason for this is deformation of the roller pin. It needs to be replaced.
In what cases is replacement necessary?
The timing belt is a rubber rim with a toothed inner side. It serves to synchronize the operation of the crankshaft and distribution shaft, and also drives the water and oil pumps. It belongs to consumables that need to be changed regularly. The replacement should be carried out according to the recommendations of the VAZ 21099 manufacturer, who recommends replacing the part after 50-60 thousand kilometers. But this is not the main criterion.
A belt break while driving can cause a major engine overhaul. If the belt breaks, the synchronization of the crankshaft and camshaft disappears. Then the valves begin to hit the pistons and bend, thereby damaging the pistons and cylinder walls. Therefore, the condition of the timing belt should be checked every 15 thousand km. If cracks are found during inspection, it must be replaced.
Timing device VAZ 2109
The mechanism consists of a camshaft or, more simply, a camshaft. Its job is to control the valve mechanism using pushrods that move the valve cams to open and close. In the socket of each pusher there is one or more adjusting washers, with the help of which the required thermal gap is set.
The valve group is located directly in the cylinder head. Intake and exhaust valves differ from each other in the material from which they are made. The intake valve is made of a steel alloy with the addition of chromium and silicon. The exhaust valve combines metals such as steel, chromium, molybdenum, nickel and manganese. Each valve has a special overlay made of heat-resistant material, which prevents its destruction under the influence of high temperatures inside the combustion chamber. The guide bushings are made of cast iron alloy, and oil seals with a steel ring are located on top. The purpose of the caps is to limit the possible entry of oil into the combustion chambers through the gaps between the guide sleeve and the valve.
With the help of springs resting on support washers, the valves are pressed against the seats. This fastening does not allow excessive wear and is considered quite reliable. Pushers in the form of cylindrical cups transmit the action from the camshaft to the valves via cams. When the engine is running, the tappets rotate around their axis, so wear occurs evenly. The coolant pump, or simply pump, is also involved in the timing system on the VAZ 2109 and is driven by the same toothed belt, which is tensioned using a tensioner roller rotating on the cylinder head axis.
Determining the correct location of the drive pulleys occurs by rotating the crankshaft.
It is necessary to turn it so that both valves are in the closed position. If the marks on the back cover and the camshaft pulley match, the belt is not tensioned correctly. You need to loosen it with a roller, tighten it properly and check the marks again. The camshaft is made of cast iron alloy and consists of a shaft on which there are five journals for support. An eccentric is also fixed on it, which drives the fuel pump. A groove is attached to the rear end of the camshaft for mounting the power plant ignition sensor.
About the VAZ 21099 car
The VAZ 21099 (Sputnik or Samara Forma) was the latest model of the plant of the well-known “ninth” Samara family. It was a nine that had been produced for a long time, only with a removed luggage compartment. Because of this, its length increased by 200 mm. In addition, the radiator grille, front fenders, and hood received changes. The dashboard, which drivers called “high,” received a tachometer. Before the plant began production of the tenth VAZ family, it remained the most popular domestic car for that time.
The VAZ 21099 car was equipped with an 8-valve power unit with a displacement of 1500 cm3, but some of them could have engines with a displacement of 1300 cm3. At first, the power system was with a carburetor, and later the plant switched to an injector. The timing mechanism drive for both types of engines was belt driven. The design of the 1.5-liter engine pistons was such that the possibility of the piston meeting the valves after belt damage was virtually eliminated. The use of such a drive scheme made it possible to reduce the weight of the engine.
This innovation simplified the replacement of a VAZ 21099 with an injector and a toothed belt carburetor. For correct installation of valve timing, special timing marks are provided on the rear bracket for plastic protection of the timing drive, as well as on the cylinder block in the area of the pulley on the engine crankshaft.
