Exhaust system VAZ 2107 (carburetor)
Let's figure out what the muffler consists of. In the photo above:
- pillow bolt (1)
- cushion securing the muffler (2)
- main muffler (3)
- belt on which the muffler is suspended (4)
- clamp bolt (5)
- clamp securing the main muffler (muffler) to the resonator (6)
- bolt of the second clamp (7)
- clamp securing the resonator to the “pants” (8)
- nut securing the exhaust pipe to the exhaust manifold (9)
- locking plate (10)
- “pants” gasket (11)
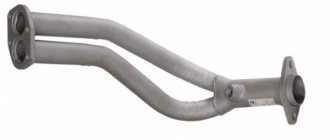
- exhaust pipe (pants)(12)
- resonator (13)
- bolt of the clamp securing the exhaust pipe (14)
- clamp securing the exhaust pipe (15)
Each owner of a VAZ 2107 car has to replace one or more parts of the exhaust system over time. The cost of replacing one spare part is not high, but you can save money by doing the job yourself. Repairs do not require special tools or special skills; an angle grinder and a “liquid wrench” (WD-40 or its equivalent) will come in handy . The figure above shows how the VAZ 2107 muffler works; replacement is the next step. For your information:
- The exhaust system of the VAZ 2107 with a carburetor consists of a downpipe (pants), main and additional mufflers;
- The flange of the pants on the VAZ 2107 is attached to the exhaust manifold using four studs. They are screwed with brass or copper-plated steel nuts. They are unscrewed in pairs and secured with special locking plates;
- The junction of the collector with the receiving pipe is sealed with a reinforced gasket made of metal asbestos. The pants are additionally attached using a clamp to the gearbox bracket;
- The VAZ 2107 resonator consists of front and rear mufflers. The front muffler pipe is put on the trousers, and the rear muffler is inserted into the main muffler pipe. At the joints they are fixed with clamps;
- The main muffler is suspended from brackets on the underbody by two rubber straps and a cushion.
It is not difficult to understand which part has failed - we drive onto an overpass or inspection hole and start the engine. Usually, the muffler itself most often burns out, because it is inside it that moisture accumulates and it rots. The resonator breaks down less often because water condensation does not occur in it, since the vapors are blown into the main muffler. The service life of the exhaust pipe exceeds the service life of other parts of the exhaust system by several times.
Attention: Any work related to the replacement or repair of the exhaust system must be carried out only after waiting for all its parts to cool completely.
List of tools:
- Key 13 (rozhkovo - cap);
- Driver or ratchet;
- Heads for 10 and 13 (deep);
- Wide flathead screwdriver or chisel;
- Hammer;
- Pliers.
Necessary tool
Replacing the exhaust pipe on a VAZ 2101-VAZ 2107
Welcome! The exhaust pipe of a car's exhaust system - not many, but still most people who have an idea of what a car is, know that its exhaust system is divided into three parts, which includes the exhaust pipe, as well as a resonator and the most important rear part of the muffler, its By the way, you see it on the street, you can even say every day (If you pay attention to it), because it sticks out from the back of the car, usually on cars of the VAZ family, this part of the muffler is located under the bumper, on expensive foreign cars such as Mercedes, etc. .
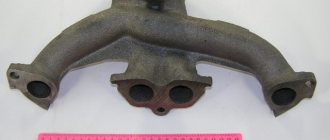
This part is located in the bumper itself, so that you at least have some idea about this part, then in this case, look at the photo below and you will understand what we are talking about, but still, now we are not talking about that, but about replacing the exhaust pipe on cars of the classic family, therefore Let's return closer to this topic. Note! To replace the exhaust pipe (by the way, it is also called the pants of the car exhaust system), you will need to stock up on: A basic set of wrenches, which should also include a “13” wrench, and if possible, then stock up on an extension cord with a “13” coupling head, because the intake pipe is attached very inconveniently and it is not so easy to get to it, so immediately take with you (If you have these tools) a wrench and it would be best to choose the so-called cardan joint, then the work will be done more or less easier!
By the way, we also recommend that you stock up on either a caliper or a straight (without bends) metal ruler, since the intake pipes at the moment are not always made with high quality, for example, there are counterfeits, etc. And with the help of these things, it will be possible to determine how smooth the mating surface on your pipe is, thereby it will be possible to determine in advance whether there will be a tight connection between the pipe and the exhaust manifold or not, in general, you will learn about this a little later!
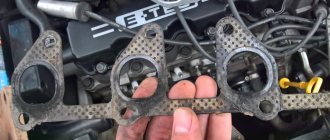
And in conclusion, let’s note one nuance: when replacing this pipe with a new one, always buy a gasket for the exhaust pipe of the muffler (that’s what it’s called) while standing in the auto shop, because the old gasket burns out and shrinks over time, and therefore when you start putting it on the new pipe, then you will no longer get a normal connection for this pipe, thereby the system in this place where the old compressed gasket will be located will be depressurized!
Summary:
Where is the exhaust pipe located? It can be seen in two places: namely, its beginning can be easily seen in the engine compartment of the car, and you can see the continuation and tip of this pipe only by looking under the bottom of the car in the front part; for a more detailed location of this pipe under the bottom, see the photo:
When do you need to change the exhaust pipe? It is replaced in different cases, but basically it needs to be changed when it burns out badly (through), when air begins to leak through the formed hole in a given pipe, and the changed sound of the engine will tell you about this, because as a rule, if one of the parts of the muffler If it burns out, the engine starts to work louder than it was before, over time it even starts to irritate.
This pipe also needs to be replaced if it is deformed, because due to its deformation, the exhaust gases do not have time to completely exit the car’s engine, as a result of which all that part of the exhaust gases that did not have time to exit returns again to the engine and ends up in the cylinders themselves, because of this, the car loses its speed characteristics because the exhaust gases go back into the engine.
How to check the exhaust pipe for so-called defects? In fact, there is nothing complicated about this, firstly, let’s clarify one detail, we will check this pipe not for defects (Although you can say so) but for the evenness of the mating surface of this pipe, because as we already mentioned a little earlier when -the rolling surface of the receiving pipe must be perfectly flat, and bending it can ultimately lead to the system losing its tightness and, as a result, the sound of your engine increasing when driving.
In general, to check it, pick up a caliper or a metal ruler and, applying the caliper or ruler to the mating surface of the receiving pipe, check it for evenness in at least two places, a deviation of more than 2 mm, or no traces of rough surface treatment are allowed.
Lada 2107 Marine › Logbook › Surprises, surprises... (replacing manifold gaskets)
Having completed the plumbing work, I decided to check the condition of the inlet pipe and exhaust manifold. Several reasons prompted me to do this: - engine tripping when warming up; - a gradual drop in engine speed when warming up (rarely - up to a complete stop) and then a spontaneous sharp increase in speed; - steam from the exhaust pipe when warming up (perhaps this is condensation, and I have paranoia :)) - engine shaking when starting - almost unnoticeable when cold and intensifying as it warms up (as with a crooked clutch disc); - excessive heating of the carburetor body; - traces of either oil or coolant with soot on the junction of the intake pipe and the block head.
In general, a number of symptoms could indicate a burnout of the head gasket, but at the same time: - there are no traces of oil in the expansion tank and the antifreeze is clear, like new; - there are no bubbles in the expansion tank either during or after warming up the engine; - there is no emulsion on the MZG cover, on the dipstick; - the oil is simply dark, with no signs of coolant getting into it.
Therefore, I decided to check these gaskets first, buying 2 pieces for 54 rubles. Moreover, the operation as a whole is simple. I unscrewed the starter shield mounting nut and the M6 bolt of the shield from the exhaust manifold studs (it’s inconvenient to turn, especially when putting everything back together). The heater tube was not yet screwed to the water pump and manifold after replacing the pump. I removed the air filter housing, disconnected all the hoses from the intake pipe and carburetor and crawled under the car to unscrew the clamp securing the exhaust pipe to the gearbox bracket. The first surprise awaited me there:
The speedometer drive seal no longer holds
Okay, we'll deal with this problem later...
I disconnected the exhaust pipe from the exhaust manifold flange and removed the old gasket. More precisely, there were 2 gaskets there. Apparently, last time I put together an issue this way due to inattention - here’s another surprise
There's nothing wrong with the seal here.
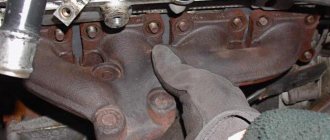
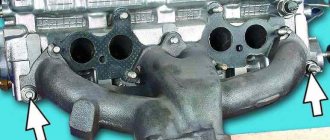
Unscrewing the manifold nuts - 7 pieces - a pair of nuts that were closer to the engine shield moved very easily, almost by hand. First I removed the intake pipe with the carburetor on it:
And I discovered this “gift”:
Who is there?
Something similar to the remains of a pad and some kind of wool
I carefully removed this nasty thing. It seems that the channel in the head remained clean. Then I removed the exhaust manifold. Oops:
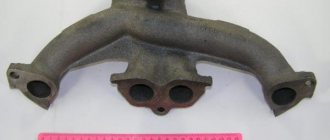
I wonder how it was possible to install the gasket like that?! Well, here’s the mark on the manifold flange:
You can see where the gases were breaking through
And finally, evidence that the valve seals of the 2nd cylinder are not doing their job:
Black brittle carbon deposits on the walls of the exhaust channel of the cylinder head of the second cylinder
The carbon deposits were fairly easily chipped off with a slotted screwdriver, and were cleaned off both in the cylinder head and in the manifold. I ran the blade of a utility knife along the flanges of the pipe and the manifold to clean off any remaining gasket, rust and carbon deposits, and wiped it with a degreaser. No matter how I applied the new gasket, it was impossible to achieve precise alignment of the holes with the manifold.
I found a position in which the displacement is minimal and the metal edging of the gasket holes does not protrude beyond the edges. Before installation, I lubricated the gasket with CV joint super-4ML lubricant with (graphite) and let it sit for about 30 minutes.
During assembly, I replaced 4 studs of the exhaust pipe flange (this is recommended to be done at every opportunity, since the metal in this place is very thermally loaded), as well as all the studs for fastening the manifolds (this is more for peace of mind). By the way, from the catalogs it is not entirely clear which studs for the intake pipe and manifold should be screwed in where. And there are 4 different sizes! Here is the arrangement of the studs in order, starting from the engine shield to the front, maybe it will be useful to someone: No. 1.5 - 13543621 Stud M8x30 No. 2,6,7 - Stud 2101-1008082 No. 3 - 13543521 Stud M8x25 No. 4 - 13544621 Stud M8x80
I replaced the washers for fastening the intake pipe and manifold with thicker and stronger ones - I used washers for fastening the camshaft bearing housing of the VAZ 2108 engine (2108-1006036) measuring 8.0x16.0x3.5mm:
I recommend using the same ones to mount the carburetor, especially for Solex models
And, of course, there are no better nuts for fastening the “pants” flange than brass nuts for 2108
Reception pipe: what is it and what are its functions
The exhaust pipe of the muffler is an important element in the exhaust system of a car. It performs a complex and important function, removing exhaust gases that accumulate in the exhaust manifold of a car engine. Having passed through it, the exhaust gases end up in the muffler catalyst. If the vehicle's exhaust system is not equipped with a catalyst, then the exhaust gases end up directly in the front (additional) muffler.
The exhaust pipe is an important part of the car exhaust system, the strength of which is subject to increased requirements.
Replacing the neutralizer
As you can see, the exhaust system of the VAZ 2110 car is designed quite standardly, its repair is not difficult even for a motorist with little experience.
When changing the muffler and resonator, it is likely that you may need to replace the converter. This operation is simple and can be done in a few steps.
The neutralizer serves to dampen vibrations from the engine and prevent them from occurring in the exhaust system of the domestically produced VAZ 2110 car.
If it needs to be replaced, it is done like this:
- If the old springs and bolts are intact and have no obvious damage, you can continue to use them. They show characteristic signs of wear, be sure to buy new elements.
- The ring should be replaced in any case, no matter how well the old one is preserved. If gases begin to leak through the old ring, this will lead to very rapid wear and damage to the converter flare and the exhaust pipe.
- After installing the neutralizer, new bolts are put on, they are carefully but firmly tightened. Moreover, the first thing you need to do is tighten the bolts that secure the resonator.
Removal process
In the process of removing an element of the exhaust system from a VAZ 2107 (injector) for its subsequent replacement. The following tools will be useful to you:
To figure out how to remove the muffler from your VAZ correctly and replace it. Please read the following instructions carefully:
After this, the product can be freely removed to be replaced with a new one, which is installed in the reverse order.
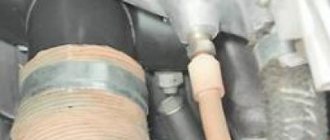
Please note that the connection between the muffler pipe and the resonator pipe is located in front of the rear axle. The ends of the pipe with slots and female-male fasteners are tightened using a coupling. Removal of the product can be complicated by corrosion, which develops under the influence of temperatures and lubrication.
For this reason, moisten corroded parts with an anti-corrosive agent in advance (motor oil or brake fluid will also work). If you are planning to install a new muffler, it would be a good idea to purchase new suspension rubber bands (1 for the rear and 2 for the center location).
Let's figure out what the muffler consists of. In the photo above:
It is not difficult to understand which part has failed - we drive onto an overpass or inspection hole and start the engine. Usually, the muffler itself most often burns out, because it is inside it that moisture accumulates and it rots. The resonator breaks down less often because water condensation does not occur in it, since the vapors are blown into the main muffler. The service life of the exhaust pipe exceeds the service life of other parts of the exhaust system by several times.
Attention: Any work related to the replacement or repair of the exhaust system must be carried out only after waiting for all its parts to cool completely.
How to adjust the gap between the valve and the cylinder block?
- We use a probe with a thickness of 0.15 (mm). It should fit under the valve with a slight tension (neither strong nor weak). If the dipstick falls into the gap or, on the contrary, does not fit, then from this moment the adjustment of the valves on the VAZ 2105 begins.
- We loosen the lower lock nut with one key, and with the second key we turn the valve stroke screw (up or down, depending on the result of checking with the feeler gauge).
- Tighten the locknut without much fanaticism.
- We do a control check with a feeler gauge at 0.15 (mm).
I hope the instructions are clear and understandable.
Related material: Replacing engine oil and oil filter on Lada Priora. Which oil to choose and how often to change
Additional Information
After adjustment, we assemble all the engine elements into place (valve covers, timing belt cover, air filter housing).
We make a test drive and listen to the sound. At this point, independent maintenance of timing valves can be considered successfully completed.
Please note that the VAZ 2105 is a classic of the bygone Soviet automobile industry. The classic line also includes the VAZ 2101, VAZ 2102, VAZ 2103, VAZ 2104 and VAZ 2106. Starting with the VAZ 2107, cars use an injection system for preparing the combustible mixture
That is, seven is no longer a classic. The procedure for adjusting valves 2105, as well as 2101, 2102, 2103, 2104 and 2106, is completely the same. That is, the classics are configured according to the same principle.
Starting with the VAZ 2107, cars use an injection system for preparing the combustible mixture. That is, seven is no longer a classic. The procedure for adjusting valves 2105, as well as 2101, 2102, 2103, 2104 and 2106, is completely the same. That is, the classics are configured according to the same principle.
Starting from the VAZ 2107, you need to configure the timing in a different way. Valve adjustment on the VAZ 2107 is carried out at a more subtle level. Only a properly qualified car mechanic can handle this work. Without solid experience in handling vehicles, it’s better not to go into the timing belt of VAZs, starting with the seven. It’s easier to take the car to the nearest service station.
I hope the article on how to adjust valves on a VAZ 2105 was useful. Have smooth roads and fewer breakdowns.
- Necessary tool
- Signs of poor valve clearance
- Procedure for checking valve clearance
- Adjusting valve clearance
- Video on the topic: Do-it-yourself valve adjustment on a Zhiguli
A feature of VAZ cars belonging to the “Classic” category, namely the VAZ-2101-2107 model, is the use of power plants that are structurally very similar. The engines of these models differ mainly in some technical characteristics. Thanks to this, many perform maintenance and repair work themselves.
For stable operation of the power unit of these cars, periodic adjustment of the valves is required. It is worth noting that this operation for VAZ “Classic” engines is performed by adjusting the gap between the valve drive lever and the camshaft cam. Since this operation is performed in the same way for different models on the Classic, let’s consider the sequence of work using the example of one model - VAZ-2105
The adjustment can be carried out both on a cold engine and on a warm one; for this, a 0.15 or 0.20 mm probe is used, respectively.
But for more precise adjustment of the valves, work must be carried out on a cold engine.
see also
Comments 9
Is there any gasket between the resonator and the catalyst?
it seems no, there is a metal-graphite one before the catalyst, if I’m not confused
I'm fine, it doesn't stick, mostly on asphalt. I didn’t even know about 6s
And there are holes on the asphalt))). On the Euro-3 jig, where the kat was not thrown out, the loaded one moved over a particularly prominent speed bump, and was hit by a can of kat so much that the middle steering rod had to be changed. Another friend of mine had the same problem. And when I took my four, at the first opportunity I threw out the cat and inserted the pipe.
“The donkey trampled and trampled, which should not have been done, because the trampling attracted Shai-Hulud, may the World be purified by his deed!”
>the article comes from the “six” My friend, “article”. >lubricated all the bolts with copper grease, and on top of that with graphite grease, just to be sure. It’s not worth it, really, it will be fine even with graphite... It looks like I seasoned the salad with sunflower oil, but I still dropped a little olive oil. In general, such cracks can be cooked and cooked, and you don’t need a new one, but it costs much less. Of course, if they’re brewed by weirdos, it won’t work for long... Thanks for the report!
The exhaust also needs to be changed, the resonator has holes...
Yes, it’s better to change in the summer than to freeze in winter or spend money on services
Replacing the muffler on a VAZ 2107 injector
Differences between the exhaust system of VAZ 2107 cars with injection engines:
Replacing a VAZ 2107 muffler on an injection engine is not much different from replacing a muffler on a carburetor engine; if anything remains unclear to you, we recommend watching the video.
The Seven, like all cars, includes an exhaust system. The main purpose of the exhaust system of the VAZ 2107 is to not only remove exhaust gases to the rear of the car, but also to reduce the noise level. The fact that there are problems in the system is indicated by such signs as the appearance of extraneous noise under the bottom of the car.
What materials are they made from?
Silencers of all types can be made from:
- Of stainless steel;
- Aluminized (alloy of aluminum and steel);
- Regular black steel.
A stainless steel product can last, during active vehicle use, from 6 to 10 years, as it is least susceptible to corrosion.
They are sold on the market in a high price range, their big advantage is that despite the high price, they are mass produced and can be matched to most car brands.
Products made from aluminized steel are sold in the middle price range, they are also quite durable, but they are difficult to match to a specific car brand, since the choice on the market is not large (only a few companies produce them).
It is problematic to make such a muffler in a garage. The main advantage is a long service life of up to 6 years, and are less susceptible to corrosion.
Products made of black steel are mass produced because they are the cheapest. They can be made in a garage for any brand of car, but they will serve for 3, maximum 5 years, then the aggressive environment and rust will do their dirty work.
The nuances of muffler repair
The muffler of “classic” VAZ cars, according to the manufacturer’s recommendations, cannot be repaired.
If a malfunction occurs in any element of the exhaust tract, the part must be replaced with a new one.
In fact, motorists often prefer to repair holes burned in the muffler - the most common defect - by welding.
The occurrence of “fistulas” is indicated by a change in the sound of the engine and the appearance of smoke from under the car. To troubleshoot, place the machine on a platform and inspect the elements of the exhaust system.
If the cause is a burnt gasket, remove the muffler and replace it. When you have an assistant, you can do without removing all elements of the system. Proceed in the following order:
Replacing a burnt muffler gasket eliminates extraneous sounds from the engine
A welded muffler usually lasts less than a new one.
But welding is also cheaper than buying. Usually, if it is necessary to repair a muffler by welding, they turn to professionals. If you have the equipment, you can do the work yourself. For this you will need:
To repair the muffler, follow this sequence:
Photo gallery: muffler welding
If there is damage at the joints of the pipe and the muffler body, weld the repaired pipe to the muffler with a continuous seam. From the workpiece, cut a patch larger than the damage. Weld the damaged pipe with a continuous seam.
Video: repairing a VAZ muffler by welding
Replacing and repairing a muffler is a dirty and time-consuming job. But there is nothing complicated about it. You never know what you can do till you try.
The resonator of any car is an additional muffler that reduces the noise level of the engine. In addition to the main “can,” the resonator, or as it is also called, receiving pipe can be equipped with an additional one.
It is worth noting that the resonator operates at high temperatures. Exhaust gases at high temperatures are supplied to it, which gradually cause the heat-resistant metal to wear out. In addition, the resonator on the VAZ 2107 is too close to the road surface, which causes mechanical damage to the exhaust pipe.
Ultimately, holes appear on the surface of the resonator, which disrupt its operation. Exhaust gases escape through these defects, creating an unpleasant sound of the engine, which is not only unpleasant to others, but will certainly not leave traffic inspectors indifferent. That is why a damaged resonator must be replaced immediately.
Malfunctions
Any driver experiences an unpleasant feeling when the clutch pedal sinks to the floor.
This can happen if the clutch cable breaks; it is also possible that the release fork breaks (this case is discussed in another article). The cable breaks more often on older cars that are used in extreme conditions or all year round. The cable may become frayed, which affects the smoothness of the pedal and the operation of the clutch. This cable also requires replacement.
If the clutch cable is broken, you can drive your car to the repair site. You need to start the car in first gear and shift while driving. The following situation is possible: the cable broke while the gear was engaged, and the car stalled.
There is a possibility that it will be difficult to engage the neutral position. Then your car won’t even be able to roll off the roadway. The transmission is disengaged by rocking the car forward and backward and disengaging the transmission at the same time. You can jack up one of the wheels and spin it by hand, this will also help.
Even if the cable is not replaced, gear shifting is possible. It is possible to get to the service station, but such driving has a negative impact on the service life of the gearbox.
The cost of the spare part is low, about 300 rubles. The cost of replacing a cable in a car service is 400 rubles.
Seven exhaust system design
The exhaust gas system of the VAZ 2107 is designed to perform a number of the following actions:
The design under consideration includes the following elements of the exhaust system:
A downpipe is a device that connects directly to the exhaust manifold. From the exhaust pipe, the gases are immediately sent directly to the resonator, which is often called an auxiliary muffler. The resonator is designed to reduce noise levels and also extinguish fires coming out of the cylinders. The exhaust process ends with a muffler, which is designed to absorb the rest of the noise. However, it is almost impossible to make the motor operate completely silent.
In addition to the main components of the exhaust system, the diagram also includes:
The exhaust on the VAZ-2107 is realized due to the above elements, and the exhaust manifold is not an integral part of it, since it belongs to the engine.
Differences in carburetor and injection VAZ models
VAZ 2107 cars were produced in two types - carburetor and injection. They differ in fuel mixture injection systems. Differences in the injection system made some changes to the design of the exhaust system. The exhaust system of the VAZ 2107 carburetor models is described above. It differs from the VAZ 2107 injector system in the following ways:
Design and purpose of the exhaust gas system
The gas exhaust system of the VAZ 2114 consists of various functional parts. Folding into one solid chain, it contributes to the normal operation of the car. The system regulates the release of harmful chemicals concentrated in exhaust gases into the surrounding atmosphere. Schematically, this system looks like this, as shown in Fig. 1. The exhaust system of the car model in question includes the following main functional components.
- Exhaust manifold VAZ 2114. Serves to combine gas flows emanating from each cylinder into one common pipe. To withstand increased dynamic loads, the collector is equipped with the most rigid and durable fastening.
- Catalyst. This component of the system significantly reduces the level of toxicity of exhaust gases. To do this, highly toxic emissions are converted into less toxic gas impurities using a chemical reaction.
- Reception pipe. Designed to connect the VAZ 2114 exhaust manifold and the catalyst.
- Resonator. By means of several “acoustic mirrors” built into the body, it reduces the level of noise that occurs during strong exhaust.
- Silencers. Even more than the resonator, they enhance the noise absorption of the entire exhaust system of the VAZ 2114.
- Corrugation. Thanks to its elastic structure, it suppresses vibration transmitted from the engine to the exhaust system.
How are knocking and muffler position related?
If the muffler suddenly starts knocking on some parts of the car, find the source of the extraneous sounds. Usually the reason lies in stretched rubber fasteners. After replacing them, the knocking will stop.
Sometimes a knock appears after work related to removing the muffler. In this case, extraneous sounds are a consequence of installation errors. Round pipes at the joints with clamps can be slightly rotated relative to the correct position: more or less than required, pushed into each other.
To eliminate knocking, restore the optimal position of the exhaust system elements.
Sagging mufflers can be “treated” using similar methods—by replacing rubber bands and correcting the position of joints.
Video: repairing a sagging VAZ 2106 muffler
Troubleshooting - identify and eliminate
At an average speed of 80–100 km, this car consumes 6.5–7 liters per 100 km. This flow rate was achieved using an injector. An injector is a device that completely replaces the operation of a carburetor. It consists of injectors and a fuel rail, as well as electronic sensors that give a signal for fuel injection. Fuel is injected into the engine using injectors, so it is very important to monitor and clean them on time so as not to interfere with the operation of your car’s engine. It is also worth refueling with high-quality octane fuel.
As a result of untimely replacement of fuel and air filters, as well as the use of low-quality fuel, the injector may fail. Don’t rush to a car service center - first, make sure that the reason for the poor performance of the car and the decrease in power lies not in these spare parts, but in something else. One of the main reasons for poor injector performance is incorrect operation of the control unit, the so-called computer. To identify the causes, you need to undergo service diagnostics; in some cases, you will need to completely flash the unit.
During poor injector operation, the VAZ 2107 significantly increases fuel consumption, and the corresponding indicator should light up on the instrument panel, indicating the presence of an operating error. Problems in operation are also indicated by a decrease in engine power, and failures are also possible when pressing the gas pedal. Complete cleaning of the injector can be done at a car service center, or, after purchasing the necessary chemical fluid, you can do everything yourself.
These procedures will cost you much less, but they require technical skills and care. Before repairing or cleaning the injector, all electronic sensors must be checked. This action can be performed by turning off the chips on them, and a characteristic sound should be heard on the instrument panel and one of the indicators should light up.
Differences between the exhaust systems of carburetor and injection VAZ models
Installation of an injection system on a VAZ 2107 required modernization of the exhaust system. Two additional details were added to it:
In connection with the installation of the catalyst, the VAZ 2107 resonator (injector) was moved a little back.
The new exhaust system has become a little more complicated, but it allows for a reduction in the toxicity of the VAZ 2107 exhaust and ensures that the car complies with EURO-2 standards.
Advantages and disadvantages of the injection modification of the VAZ 2107
The “Seven” in injection version and with a modernized exhaust system has a number of advantages over the old “carburetor” model. They are as follows:
Design and principle of operation of the exhaust pipe
Structurally, the intake unit consists of one or more pipes, some options may have four pipes, with a connecting flange in the upper part for its connection to the exhaust manifold, which below are combined into one pipe intended for mounting with a resonator or catalyst of the exhaust system. At the junction of the pipes, there is a rigid corrugation, which is designed to dampen vibration from the operating power unit of the car.
The receiving part of the exhaust system is made of metal alloys that are resistant to elevated temperatures, which must have good resistance to mechanical stress due to their location. The most popular manufacturing materials are:
This exhaust system assembly, made of the above alloys, has different prices, where the highest price is for the exhaust pipe made of aluminum alloy.
The main task of the downpipe is to combine several streams of exhaust gases coming from the exhaust/exhaust manifolds into one, for subsequent movement through the rest of the exhaust system.
In modern cars, in accordance with environmental requirements, a lambda probe sensor is installed next to the exhaust pipe, which analyzes the amount of toxic substances in the exhaust gases and transmits a signal to the power unit control unit.
What does the price depend on?
To manufacture the body and tubes of high-quality components, special stainless and heat-resistant steels are used, designed to operate under constant thermal load with sudden temperature changes. These mufflers last longer, but they are the most expensive. Spare parts made of aluminized steel or aluminum-zinc will also last a long time. To reduce the cost, “ferrous” alloys are sometimes used.
The larger the muffler volume, the better. Other factors that increase the service life and increase the cost of the unit are thicker walls and complex internal design, as well as additional thermal protection.
Resonator
Replacing the exhaust pipe (“pants”) of a VAZ 2107
When replacing the exhaust pipe, be sure to replace the gasket between it and the exhaust manifold. It is also better to change the nuts securing the “pants” to the manifold. The procedure is as follows:
Important: unscrew the nuts carefully so as not to twist the fastening studs. Otherwise, you will have to drill out and replace the studs.
If, after installing a new exhaust pipe, the exhaust system sags or hits the bottom, the following options are possible:
In the first case, it is enough to loosen the clamps and install the parts correctly. In the second case, the engine mounts will have to be replaced.
Tips for replacing the intake manifold
Also, do not neglect the procedures for repairing and cleaning the intake manifold. The stability of the VK is very important for the normal functioning of the car. A certain vacuum is formed in the intake manifold, which is the source of drive force for many systems: cruise control, windshield wipers, vacuum brake booster. In the event of a collector malfunction, this threatens the failure of one or more of the above systems.
To avoid the appearance of cracks and distortions, you must use a torque wrench to tighten the nuts on the manifold and follow the tightening order of 20.9-25.8 (2.13-2.63) N_m (kgf_m). As a rule, it is recommended to start tightening the nuts from the center and gradually move towards the periphery, alternately tightening the nut on one side or the other.
When installing the receiver, it is necessary to replace the sealing gasket.
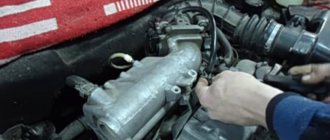
To work on removing and replacing the VAZ 2114 intake manifold on an 8-valve engine, we will need:
- keys “for 8”, “for 10”, “for 13”, “for 17”;
- “cardan” type nozzle and socket heads “17”, “19”;
- magnetic screwdriver;
- screwdrivers, pliers;
- new intake manifold.
By the way, the price for an intake manifold from a VAZ (article 21110100801420) will be 1,350 rubles.
The cost is indicated for spring 2022 in Moscow and the region.
1
Loosen the clamp and disconnect the crankcase ventilation hose.
2
Drain the coolant. Remove the hose from the cylinder head cover pipe.
3
We remove the air filter housing from the car by disconnecting the mass air flow sensor.
4
Remove the supply hose to the vacuum fuel pressure regulator.
5
Unscrew the two nuts securing the fuel pipe bracket to the receiver and remove the bracket.
6
Disconnect the vacuum booster hose from the receiver.
7
In order not to confuse the connection of the fuel pipes, we mark one of the fuel lines with a marker.
8
Using two 17mm wrenches, unscrew the fuel line fittings.
9
We unscrew the six nuts securing the receiver to the intake manifold and the stud on the receiver, and then remove the receiver itself.
10
Disconnect the wiring harness connector from the crankshaft position sensor.
11
Unscrew the two bolts and remove the fuel rail.
12
We unscrew the seven nuts in front securing the manifold to the thermal shield...
13
... and one at the back.
14
Unscrew the two nuts securing the thrust rods, first on the left side...
15
...then on the right side.
16
To avoid losing the washers from the manifold studs, remove them using a magnetic screwdriver.
17
Let's remove the intake manifold and replace it with a new one. We assemble everything in reverse order.
Exhaust System Mounting Parts
The clamps and suspension elements of the exhaust system are exposed to moisture and salt during machine operation. In addition to corrosion, metal “fatigue” accumulates in clamps. The clamps begin to loosely hold the connection, as a result of which exhaust gases begin to break out, creating noise. Old suspension cushions may break off, which can damage exhaust system parts. Therefore, it is advisable to change the mounting parts; whenever large parts are replaced, the mounting elements on which they are attached should also be changed. This will avoid unnecessary problems and expenses.
Source
