⭐ ⭐ ⭐ ⭐ ⭐ During the installation of a new speaker system, the owner may have the following problem - how to connect tweeters (tweeters) so that they work efficiently and without problems?
The essence of the issue is the complexity of modern stereo systems. For this reason, in practice there are often cases when installed tweeters either work with distortion or do not work at all. By following the installation rules, you can avoid possible difficulties - the procedure will be as quick and simple as possible.
Types of speakers for cars
Any speakers intended for use inside a car belong to one of the following types:
- broadband - manufacturers usually equip their cars with such speakers at the factory;
- coaxial (coaxial);
- component.
The single speaker of a wideband speaker reproduces the entire spectrum of sound frequencies. This is the cheapest solution, usually used in standard audio systems.
The single speaker of a full-range speaker is capable of reproducing a wide range of sound frequencies
The sound quality will improve if you divide the sound spectrum into several bands and entrust the reproduction of each of them to a separate emitter.
The coaxial speaker has several sound emitters installed in a single housing, which significantly improves sound quality
In a coaxial speaker, several (2–5, usually 3) emitters are installed in a single housing, usually on the same axis, along with filters that highlight the audio frequencies that are optimal for each head.
The speakers of the component system are spaced throughout the vehicle
Component speaker systems have the widest range of high-quality reproduction capabilities. In them, as in coaxial speakers, the sound signal is reproduced by several emitters, but each is made in the form of a separate speaker.
Two-component systems: tweeters and crossovers
Tweeters or tweeters are high-frequency speakers whose task is to reproduce the frequencies of the upper band of the sound spectrum. Conventional tweeters are flat or slightly convex. Horn tweeters are slightly larger than usual ones, as they are equipped with an element that forms a clear polar pattern - a horn.
Tweeters or tweeters are called high-frequency speakers
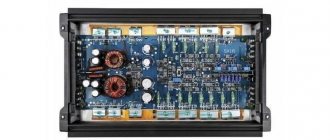
To highlight bands in component systems, crossovers, audio frequency separation filters made in the form of separate blocks, are used.
Crossovers can have from one to four stages: the more stages, the better the sound quality
Component sound systems are the most difficult to install. However, the separation of speakers in space provides the highest quality and surround sound.
Other Features
Today, the most common tweeter option is the electrodynamic system. Structurally, it consists of a housing, a magnet, a coil with a winding, a diaphragm with a membrane, and power wires with terminals. When a signal is applied, current flows in the coil and an electromagnetic field is formed. It interacts with the magnet, mechanical vibrations occur, which are transmitted to the diaphragm. The latter creates acoustic waves, and sound is heard. To increase the efficiency of sound reproduction, the membrane has a specific dome shape. Car tweeters usually use silk membranes. To obtain additional rigidity, the membrane is impregnated with a special compound. Silk is characterized by its ability to more effectively cope with high loads, temperature changes and dampness. In the most expensive tweeters, the membrane is made of thin aluminum or titanium. This can only be found on very prestigious speaker systems. They are found quite rarely in a typical car audio system. The cheapest option is a paper membrane.
In addition to the fact that the sound is worse than in the two previous cases, such equipment has an extremely short service life. And this is not surprising, since paper cannot ensure high-quality tweeter performance in conditions of low temperature, high humidity and high load. When the car increases engine speed, an unusual sound may be felt.
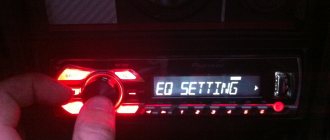
Don't forget that you can also set up the tweeter using the radio. Even the cheapest models have the ability to adjust the high frequencies. In particular, mid-price models have a built-in equalizer, which greatly simplifies the task.
After installing the tweeter, you need to configure the audio system, and how to do this, read the article “How to configure a radio.”
Choosing the right speakers and radio
First of all, specialized audio equipment is intended for installation in the car interior. Manufacturers of car speakers take into account not only sound quality, but also difficult operating conditions: vibration, dust, temperature changes, etc.
Is it possible to install household or variety speakers in a car?
Computer and concert speakers are designed for more gentle conditions. They most likely won't last long in a car.
In addition, computer speakers usually require not only a sound source, but also a separate power supply, without which they will not work, while car speakers are connected only to the output of an amplifier or radio.
As a rule, it is advisable to buy speakers where it is possible to evaluate the sound quality. Appearance does not play a special role, since in the car's interior the speakers are usually covered with a decorative mesh or grille.
Choosing suitable speakers for a car consists of determining the basic requirements for them and comparing the technical characteristics of several models of the same price category
Car radio installation steps
It is no secret that the battery is the main source of power for the on-board grid of a car, but a battery malfunction can lead to damage to the car radio. To prevent equipment failure, you need to know how to properly connect the device yourself. During installation of the system, do not allow the positive contact of the battery to touch the negative or the speaker terminal. Experts do not recommend powering the device with plus or minus from the cigarette lighter or ignition switch.
Before connecting the speakers, it is necessary to take into account that the system connection will be optimal only to the battery. Thanks to this, you will be able to rid your speakers of various interferences and speakers, and it will be possible to operate them at full power. To make the connection, it is better to use a short copper stranded cable; its cross-section should be at least four mm2. On this wire, if it goes to the speakers or amplifier (not important), you need to install a fuse, which should preferably be located 50 cm from the battery. The wiring should be installed away from energy consumers; the wires should not be twisted - first of all, they are connected to the speakers, and then to the radio.
Installation of car speakers
In household speaker systems, the right and left speakers are usually located at the same distance from the listener and approximately at the level of his head. It is unrealistic to meet such conditions in a car, therefore, when installing a component speaker, the need to achieve possible approximation to the ideal comes to the fore.
Speaker placement options: where to install speakers
It was experimentally established that for front acoustics, the optimal placement of speakers is on the edges of the dashboard and the adjacent part of the A-pillars. In this case, you need to ensure that the speakers are brought forward as far as possible.
Experts also advise placing speakers of different frequencies belonging to the same channel in close proximity to each other. This will ensure sound integrity and consistency. The speakers can be oriented in opposite directions: one should be directed at the driver, the other at the windshield of the car, so that sound waves are reflected from it.
Unfortunately, large speakers are difficult to place along the edges of the dashboard. Therefore, many car owners choose a compromise option.
It makes sense to place the woofers and midrange speakers in the lower front corner of the door, and the tweeters on the A-pillar or in the same corner of the dashboard. This scheme provides acceptable sound quality with less time and money.
Only the most desperate music lovers will appreciate such a creative option for placing speakers on a car door.
Do-it-yourself replacement of standard speakers
The least expensive way to improve the sound inside a car, both in terms of money and effort, is to replace the standard wideband speakers with two- or three-way coaxial ones.
The standard place for the “native” speakers is the lower front corner of the doors. For replacement, it is advisable to select speakers of the same size as the standard ones. Larger speakers generally sound better, but they will require a larger mounting hole in the door.
Installation Tools
To replace the speakers you may need the following tool:
- jigsaw,
- electric drill,
- Phillips and flathead screwdrivers,
- knife,
- soldering iron,
- pliers,
- set of car keys,
- panel puller,
- file,
- insulating tape,
- plastic clamps for fastening wires.
Video: learning how to independently connect speakers to a car radio
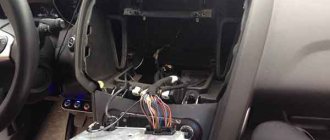
Preparatory work: how to remove the trim
Before carrying out work, turn off the ignition and disconnect the negative cable from the battery. Then do this:
- Often there is no speaker panel, and the speakers are hidden behind a non-removable mesh (grid) of the door trim. In this case, remove the door handles that interfere with dismantling. If there are fastenings with self-tapping screws, remove the protective plugs and unscrew the screws. Then remove the trim.
Slowly rocking, remove the panel, releasing one fastener after another.
- If the standard speakers are covered with a separate decorative panel, carefully pick it up in the least visible place and pull it, roughly identifying the attachment points. Slowly rocking, remove the panel, releasing one fastener after another.
Remove door handles and other body parts that interfere with dismantling
- If fastening with plastic clips, hook the trim in a less visible place, being careful not to leave scratches on the surface. Remove it, releasing the latches sequentially around the perimeter of the door.
How to remove a standard speaker and attach a new one
Further work will require patience and attentiveness from you. Only compliance with the sequence of actions below guarantees correct installation of the speakers.
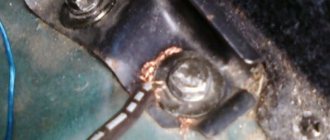
- Once you have access to the speaker, unscrew the fasteners and pull the speaker out towards you. Disconnect the connector with wires.
Unscrew the fasteners and pull the speaker towards you. Disconnect the connector with wires
- If the standard speakers are attached with plastic rivets, do not drill them out, but pick them up with a screwdriver, grab them with pliers and pull them out of the mounting sockets. In this case, the rivets will most likely be broken.
- After removing the stock speaker, try on the new speaker. Ideally, it can be installed on the old seat. Assess whether the column will interfere with the operation of mechanisms hidden behind the casing.
It is advisable to cover the door (the area of the door near the speaker) with sound insulation, vibroplast or something similar
- Before attaching the speaker, it is advisable to cover the door (the area of the door near the speaker) with sound insulation, vibroplast or similar material. This will significantly improve the sound of the speakers.
How to connect speakers to the front or back door
It happens that the new column, coinciding with the old one in diameter, does not “sit” on the standard podium (ring or protrusion) or turns out to be thicker and begins to stick out too much. Sometimes the stand is completely missing. In this case, proceed as follows:
- Install a new podium: it is necessary in order to raise the speaker if the latter rests on the door mechanisms. It also plays the role of a rigid and elastic support for the diffuser, improves the radiation pattern, preventing sound from “escaping” under the casing. You can buy the podium in the same place as the speakers, or make it yourself.
- Use suitable plastic housings from faulty speakers as a base, or use a jigsaw to make a podium out of plywood. If necessary, cut out several rings and glue them together.
It is advisable to impregnate a wooden podium with a protective compound and cover it with a sealant
- Before installation, it is advisable to impregnate a wooden podium with a protective compound and cover it with a sealant. The column is attached to the base through a thin rubber gasket.
- If the diameter of the new column is larger than the old one, first widen the mounting hole using a jigsaw, drill and file.
- Connect the connector, secure the column with screws or bolts and nuts on the podium. Reassemble the door in the reverse order of disassembling it.
Video: how to install acoustics on a car
Learning to distinguish between plugs
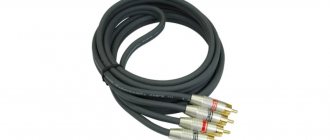
How to install an audio system in a car, how are the wires connected and is an amplifier needed? Let's figure out which plugs can be used for installation. Plugs may have different markings depending on the standard. ISO marking is typical for multimedia systems and wiring in cars; if such a device is used for other purposes, it may break. Most manufacturers make their own adapters for the ISO standard, so there are many different plugs available commercially.
Before you install speakers in your car, you need to understand which plugs to use. Each individual car is characterized by original adapters with which the speakers must be connected to the radio in the car. If standard wiring is installed, it is possible that the audio system can be connected to it. To connect the speakers in the car to the new radio yourself, use a Euro standard adapter.
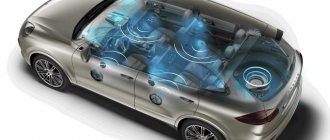
Component Audio Source Locations
The sound quality of coaxial speakers satisfies most motorists, but not all. The design disadvantage of coaxial sound is that high-frequency tweeters are placed in inaccessible places along with the front speakers. To overcome this disadvantage, component systems with speakers spaced apart in space are used.
The peculiarities of high-frequency sound propagation require that, firstly, the tweeters be oriented towards the listener, and, secondly, that there are no obstacles between them and the ear.
Due to the layout of car interiors, it is difficult to choose the ideal location for tweeters. The most acceptable compromise between price and quality is to place the low- and mid-frequency speakers in their standard place and move the high-frequency drivers to the dashboard or the A-pillar.
Connecting tweeters
The installation procedure for component speakers is given below:
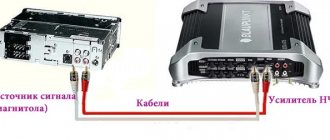
- With the battery turned off, install the crossovers in a place protected from dust, moisture and vibration. Connect the crossover filters directly to the output of the radio. Place the wires under the casing.
When installing crossovers, make sure that they are reliably protected from dust, moisture and vibration
- Connect the tweeters to the crossovers using a temporary circuit without fastening.
- If there are no crossovers, connect the high-frequency speakers in parallel with the main ones through a capacitor connected to the open circuit (do not use an electrolytic one) with a capacity of about 1–1.5 μF.
- Apply power and select the most suitable location for mounting the tweeters, based on sound quality. Disconnect the battery.
- If necessary, drill holes in the panel for tweeters. If using cabinet speakers, mount them in the chosen location, route the wires and connect them to the crossovers.
If you decide to use cabinet speakers, securely attach them to the corners of the dashboard
What are tweeters or tweeters?
If you have not used speakers before or made do with the classic versions, then most likely you are not familiar with the equipment called Twitter. Before buying it and installing it, you should understand the main purpose, advantages when listening to music and the operating features of this system.
From the name itself it is clear that during operation the equipment reproduces characteristic sounds of a certain frequency, similar to squeaking. This is achieved by incorporating high-frequency sound vibrations into the work. Since standard models have a wide range of usable frequencies, they make the music sound monotonous and desaturated. Therefore, special variations have been developed that can be used to emphasize high-frequency sounds, providing volume and expressiveness to audio recordings.
Twitter is a small speaker that is installed together with the main speaker system in order to improve the parameters and characteristics of the audio recordings being played.
ATTENTION! Depending on your preferences, you can install the desired number of such devices. For comparison, you can try listening to music through different speaker options to choose the best sound configuration.
How to connect speakers in two-piece systems
Approximately 80% of car enthusiasts who install component sound systems are limited to installing additional tweeters. For some, this is not enough, since achieving the highest sound quality is impossible without “drawing” the lower frequencies of the sound spectrum to the point of the limits of human hearing.
Obstacles to the propagation of vibrations of the lowest frequencies degrade the quality slightly. Therefore, huge subwoofers operating in the lower sound band are placed in the trunk or on the rear parcel shelf.
A component car audio system can contain from 2 (including tweeter) speakers per channel to 4, 6 or more
Thus, a component car audio system can contain from 2 (including tweeter) speakers per channel to 4, 6 or more. Practical implementation depends on the aesthetic requirements of the car owner, his desire to spend money and time to achieve them.
Connecting to an audio system
After the location of the tweeter has been determined, you need to make a small hole in the casing under it for the wires. Wires from tweeters and other speakers connected to the audio system should also be hidden under the interior plastic. To do this, you will have to carefully disassemble it, test the car audio, and then reassemble the interior trim in reverse order. The tools needed for this work are: figured and flat-head screwdrivers (and best of all, special plastic spatulas for removing interior trim), side cutters, wires, heat shrink or electrical tape (if you have a soldering iron, then it won’t hurt to use it), double-sided tape and a flashlight.
The radio emits sound waves in the range from 5 Hz to 25,000 kHz. Tweeters have little inertia and are able to perceive sound from 2,000 Hz. Low-frequency waves are destructive for them, and when they enter the “ether,” they significantly spoil the sound. Therefore, connecting the high-frequency speakers directly to the radio would be a big mistake.
In order to filter out low-frequency waves, you can route the tweeter wires through a crossover. It comes complete with component acoustics, or can be purchased separately.