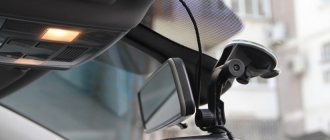
According to the requirements of the traffic rules, any changes in the configuration of the external lighting devices of the car are a direct violation and entail fines or administrative sanctions (clause 3.1). However, additional interior lighting is not directly prohibited by the rules, which makes it possible to decorate the car, increase comfort, give the opportunity to look at a map or read the text in a guidebook without stress. The most popular type of lamps are LED lamps, which are durable and do not drain the battery even after prolonged use. There are several options for installing interior lighting, which should be considered in more detail.
Principles of approach to solving the problem
Decorating the car interior with your own hands
Before starting installation, it is worth considering the task at hand:
choose a color scheme for the system that is harmonious in style; decide on the areas of space that you plan to attract attention to with the help of lighting; familiarize yourself with the interior diagram from the specifications for the car, and then clarify all the details directly on site; solve the issue with the principle of connecting the power supply. Most often, the luminous line is attached to the dashboard, the lower contour of the seats, and on the doors.
The entire path where the LED line is planned to be laid, namely: air ducts, armrest cavities, glove compartment, etc., must be examined, checked and cleaned of dirt, rust, etc.
Most often, the luminous line is attached to the dashboard, the lower contour of the seats, and on the doors. The entire path where the LED line is planned to be laid, namely: air ducts, armrest cavities, glove compartment, etc., must be examined, checked and cleaned of dirt, rust, and the like.
The laying plan is largely determined by the design of a particular car interior. The most popular LED backlight triggering schemes are:
The advantage of the first and second options is automation. The disadvantage is that there is no need for lighting during the day.
The LED line is powered by a line running under the floor and through the fuse box.
Lamp brightness and color
In addition to the external shape and size of the LED lamp, it is also necessary to take into account its purpose, that is, where exactly the LED lamp will be installed and what it should illuminate.
Navigation light lamps are designed for reading, for example, a road map in the cabin. This means that there should be enough light in them for reading, but at the same time, the light should not be excessive so as not to blind the eyes. For reading, it is better to choose a white or naturally white glow color. The optimal luminous flux in this case is 100-150 Lm.
The central interior light creates general lighting inside the car. It is logical to install a white LED lamp with the maximum luminous flux in it, so that there are no dark corners in the cabin. But if you are not a fan of classic solutions, then you can install colored LED lamps, for example, or make blue, red, green or even pink light in your salon, which looks very unusual.
The light in cosmetic mirrors located in sun visors should not be too bright, because when using the mirror the lamp will shine directly into your eyes. Comfortable luminous flux in this case is 25-70 Lm. In this case, the lamps should illuminate the face well, which means the light should be pure white.
The lighting of the footwell area, glove box and trunk should be such that not a single detail gets lost in the depths of the car. Here you can not skimp on the light and put the brightest LED lamps in these usually small lamps:
The bright light of these LED lamps will be especially useful when searching for a dropped phone or lipstick in the glove compartment.
LED lighting for doors or thresholds
performs two important functions. Firstly, it illuminates the space in front of you when you get out of the car, and secondly, it indicates an open door in the dark, making it more visible to other road users. In the lamps located in the doors, you can install LED lamps of any color and brightness to suit your taste.
Installation option without interfering with the electrical network
You can install and connect LED lighting in your car yourself without interfering with the vehicle’s electrical network. Let's look at this method using the example of connecting a waterproof RGB strip to four contacts. Here you will need:
- four connectors or terminals;
- controller designed for 12 volts (for passenger cars). It is installed to make it possible to control the backlight;
- stranded wire. It should have the same colors as the controller;
- silicone sealant.
The installation process will be discussed using the example of installing the tape under the dashboard inside the cabin. All subsequent actions look like this:
The tape is cut into the required fragments and then soldered using a soldering iron. You can also use connectors for connections, this method will be many times more expensive;
Tape soldering process
- then all places that have been soldered should be treated with silicone glue;
- we install the tape where it should be to illuminate the required area;
- all wiring must be carefully soldered and then hidden under the skin of the car;
- the ends of the tape should be connected to the controller. To do this, you can follow the following diagram;
Controller connection diagram
To connect a lighting product to the cigarette lighter, you can simply upgrade your car charger for your mobile phone. To do this, one of its wires needs to be soldered to the fuse, and the second to the right metal ear. As a result, the stabilizer will be bypassed. After that, close the charging case and insert it into the controller;
Then we insert the charger into the car's cigarette lighter.
Ready backlight
Now you can control the light and music using the remote control.
Installation on small parts
For tuning small parts, it is more convenient to use single diodes.
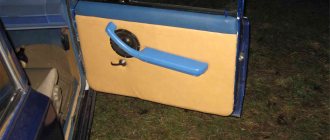
We prepare the diode for installation and connection. We take a diode, solder a resistor to one of its legs, then solder the wires and insulate the exposed wires with regular electrical tape. Somewhere at a distance of about 20 cm you need to make a terminal connection. So, the LEDs are ready for installation. Next, prepare the installation site. Let's consider, for example, how the lighting of the interior handles is installed. To do this, remove the casing and make holes near the handle in the place where you want to install the diode. They must be small so that the diode fits tightly into it. You can additionally secure it with glue. Next, stretch the wiring under the trim into the interior so that it can be connected later. In the same way, single diodes are installed anywhere in the cabin.
Main components
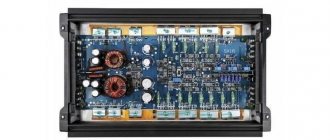
All flashing lighting is assembled from individual LEDs and LED strips and control units for them. A microphone is installed in the control unit, which picks up the sounds of music and transmits them through an amplifier to a signal level stabilizer. A stabilizer is needed for equally smooth operation of color music, despite the volume level. The signal then passes through frequency filters (usually three, high, medium and low) and is fed to groups of LEDs, divided by color or line, and causes the LEDs to flash to the rhythm of the music.
Put the soldering iron aside, control units for LED strips are sold in the same place as the strips, so you don’t have to assemble the printed circuit boards yourself. LED strips are available in different colors, sizes, glow intensity, ask for a catalog in the store and select the desired characteristics.
Space inside the lamp
Once the required type of lamps has been determined, it is necessary to inspect the interior lamp itself. When choosing C5W LED soffit lamps
Pay attention to the length of the lamp, as well as the space inside the interior lamp. If there is not much space around the standard lamp, as in this case:
then it makes sense to choose a narrow lamp.
If there is enough space and a wider LED lamp can fit into the interior or trunk lamp, then you can install wider and much brighter lamps.
Larger LED lamps provide uniform light over the entire area of the lamp, good illumination of the entire area of the diffuser, that is, they solve the familiar “light point” problem.
A luminaire in which a W5W baseless LED lamp
, can be of different shapes and sizes. The first thing you need to pay attention to is the location of the lamp inside the lamp. If the lamp inside the lampshade is located parallel to the plane of the diffuser, i.e. in other words, sideways, as in these photographs:
It’s better to stick to side-illuminated LED lamps, for example:
In this case, the entire luminous flux of the lamp will be directed in the right direction, and will not illuminate the walls of the interior lamp in vain, as in this photo...
In addition, it is important here to evaluate the space inside the lamp and, if possible, choose a larger LED lamp for better illumination of the entire diffuser. A good example of choosing bright LED lamps for interior lighting:
In the case when the lamp in the lamp is located perpendicular to the surface of the diffuser, and the space inside it is very limited, as, for example, in this interior lamp:
And if there is enough space in the interior lamp, then you have the opportunity to choose: install small LED lamps of a more or less standard size, as shown above, or install larger, slightly unusual LED lamps like these:
possessing high brightness and giving a magnificent effect of bright, diffused light.
Installation of combined lighting
For those who really like the glow of neon, you can make a complex lighting option. For example, neon lamps can be used instead of LEDs to illuminate the feet of the driver and passengers. There is less risk of mechanical damage.
For installation you will need: neon lamps, self-tapping screws, nylon clamps for fastening, an aluminum corner.
Often, many neon lamps have a connector for connecting to the cigarette lighter. You won't need it. Cut it off and clean the contacts. Next, take an aluminum corner and saw off a piece the same length as the lamp. Screw the corner under the dashboard, attach the neon to it using clamps. Do the same under the glove compartment and below the rear seats to illuminate the space under the passengers' feet.
All wiring must be hidden and routed to the dashboard.
Why is it convenient to use smart light?
The use of smart light gives not only an aesthetic, but also a purely technical effect. Such lighting is well perceived visually, provides those inside the cabin with good psychological relief due to the light that is pleasant to the eyes, and at the same time performs several additional technical functions. For example, it eliminates such a “trifle” that irritates many people, such as the sudden turning off of the light inside the cabin immediately after closing the door, that is, the time of its illumination is extended. This is done using a special electronic board, which is mounted in the car’s lighting system according to a special scheme, which is not difficult to find.
Classification of diode strips
LED strips are characterized by high versatility. They can be given any shape you like, and you can also adjust the lighting angle and brightness at your discretion. The location of the installed backlight depends solely on the imagination.
The lighting device can be mounted in the most difficult to access place. In most cases, the tape is installed on the dashboard, on the ceiling, on the front seats; quite often, drivers use tape to highlight the bottom of the car, the trunk or its license plates.
If you want to install the strip on your car yourself, you should study not only the question of how to properly connect the LED strip, what are the features of this process and what is the sequence of actions, but also the types and classification of these modern accessories. There are quite a lot of varieties, and each of them is characterized by its own individual properties and qualities.
Based on the color of the LEDs
First of all, LED strips are classified according to the color they produce. Modern industry offers two categories of devices of this type:
- monochrome – producing one color;
- universal RGB – endowed with the ability to change color.
The first ones are quite easy to use. As for the latter, to control them you need to purchase a control panel, controller and power supply as an addition.
By LED sizes
At the moment, the following letter marking of LED strips is in effect. On them you can find the designation DIP, which means a package with two leads, or SMD, the case of which is surface mounted. The second option is more modern and impressive. Experts advise using just such tapes for car decoration.
This category includes such types of tapes as:
- SMD3010 – is generally used for tapes that have a side glow. The LEDs here are made in size 1x3 mm and are characterized by a power of 0.08 W;
- SMD3528 - this category of LED strips is used most often. They are designed for a dramatic horizontal glow. The size of the diodes here ranges from 2.8 to 3.5 mm, and the power is 0.08 W;
- SMD5050 - in this category there are quite large LEDs, the size of which is 5x5 mm, the brightness is high, and the power level is 0.24 W.
Each driver has the opportunity to choose the most suitable type of lighting device for himself, based on personal preferences and goals in car design.
By LED density
This characteristic determines how many diodes are placed on one meter of tape. Modern manufacturers offer the following options and types of tapes:
- type 3028 – available with 60, 120, 240 LEDs. In an extreme case, the diodes are arranged in two rows;
- type 5050 – can be purchased with 30, 60, 120 LEDs per meter. In this case, 120 is characterized by a double-row arrangement of diodes.
This is interesting: Rating of the fastest cars in the world for 2018
When choosing the density level of the device, it is worth understanding that the higher the density of the lamps, the brighter the strip will shine, that is, the better and more efficiently it will illuminate the interior of the car or its outer sides.
By protection class
To reflect the level of resistance of the tape in relation to the influence of the external environment, manufacturers use the internationally accepted IP indicator, after which a number is indicated. The first indicates the level of protection of the device from mechanical impact and dust, the second - from moisture.
Here are the main types of LED strips depending on the type of protection.
- IP20 – tape with weakly protected diodes. It can only be used inside the car, in places where moisture and solid particles do not penetrate.
- IP65 – medium protection tape. In this case, a layer of special epoxy resin is applied to the device. Such a device can be mounted not only inside the cabin, but also outside.
- IP68 is the highest level of protection. Here the tape is securely hidden under a layer of high-quality colorless silicone. Such tapes can be installed on cars that are operated in fairly unfavorable weather conditions.
Based on these values, the car enthusiast can choose an LED strip directly depending on the conditions in which the vehicle is planned to be used.
Legality of outdoor lighting and fines
In our country, laws are interpreted in favor of the interpreter. The wording is vague and can be interpreted in two ways. What you need to know.
There is no direct ban on installing underbody lighting . But there are a number of points that allow us to find fault with you and, unfortunately, there is nothing to oppose them with.
Making unforeseen changes to the vehicle design
Decree of the Government of the Russian Federation of October 23, 1993 N 1090 (as amended on August 27, 2018) “On the Rules of the Road.” Appendix: List of faults and conditions under which the operation of vehicles is prohibited. Clause 7.18.
Changes were made to the design of the vehicle without permission from the State Road Safety Inspectorate of the Ministry of Internal Affairs of the Russian Federation.
It is impossible to obtain official permission to install lighting (uncertified element). Punishment for violation: warning or fine of 500 rubles .
This is the most loyal point on which they can find fault with you. You will often get off with a warning.
Violation of the rules for installing lighting devices
You will fall under this clause if you install LED car lighting in prohibited colors.
According to the Russian Federation Traffic Regulations, section 3.6. External lighting devices. Installation is prohibited:
In front - lighting devices with lights of any color except white, yellow or orange; At the rear - reverse lights and license plate lights with lights of any color other than white, and other lighting devices with lights of any color other than red, yellow or orange.
In short, the following is allowed:
- The front is just white, yellow and orange;
- at the rear - the license plate is illuminated only in white, the rest - only in red, yellow or orange.
Violation of this clause of the traffic rules entails deprivation of a driver's license for a period of 6 months to a year .
Installation without permission of devices for supplying special light signals
Code of Administrative Offenses of the Russian Federation Article 12.5. Driving a vehicle in the presence of malfunctions... point 4.
Driving a vehicle on which, without appropriate permission, devices are installed to provide special light or sound signals (with the exception of a security alarm).
This is the most dangerous point and, if the evil inspector wishes, any additional lighting of the car can be adjusted to this wording. In practice, it is used very rarely (unless you put a red flashing tape in the radiator, this option will definitely be regarded as a special signal). It is difficult to challenge in court, but it is possible by replacing the punishment with a fine of 500 rubles.
Violation provides for deprivation of rights for a period of one to one and a half years , with confiscation of devices for signaling.
Please rate the article. We tried our best:)
Did you like the article? Tell us about her! You will help us a lot :)
How to install an LED strip in a headlight
In fact, this process is quite complicated; to do this, you need to completely remove the headlight. It is clear that in this case the result will be better, however, if something happens to the lamp, you will have to remove it again to replace it.
- First of all, you need to remove the headlight from the car.
- Next, we disassemble the sealed headlight unit; to do this, the sealant needs to be heated, this must be done carefully.
- We install the tape in the headlight, there are no difficulties here.
- We close the headlight unit, you can’t make a mistake here. If the headlight is not sealed, moisture will immediately get into it and, most likely, the lamp will burn out.
- We put the headlight in place.
You can install the tape in this way on the front and rear headlights. The result is excellent, such lighting looks gorgeous. It will be interesting to know: how to make LED lighting with ceiling tape.
Instrument panel lighting
The instrument panel is also very often the subject of design in a car. Some people are not satisfied with the standard backlight color, others think the brightness of certain icons is insufficient, others want to make the dashboard multi-colored, for example making the speedometer area above a certain speed red. Upgrading the instrument panel has now become much easier. To do this, just order a set consisting of 40 LEDs of different colors, and the instrument cluster of your car will sparkle with new colors.
The LEDs already have a corresponding base, so you don’t need a soldering iron to install them in the instrument panel. You will only need to remove the corresponding light bulb and insert a new light source in its place. However, it should be borne in mind that before putting the instrument panel in place, you need to make sure that the LEDs are lit.
If they are inserted incorrectly, that is, the polarity is not observed, they will not burn. Although they are light-emitting, they are still diodes, and a diode only passes current in one direction. The set costs about 500 rubles.
The editors recommend:
Quiz!
Blackvue DVR for knowledge of traffic rules Alternative to a scraper: how to clean car windows without scratching them
Hyundai Elantra or Skoda Octavia: what to choose? We compared and were surprised
3 million is not a luxury: transport tax in Russia will be calculated in a new way
Which cars do dealers make the biggest markups on: list
Discussion Cancel
Connection
Depending on how and when the backlight will light up and work, choose the method of connecting it.
To interior lighting
Most often, the footwell lighting in the car is connected to the interior lighting. It will only work when the doors are open or the lights are on.
In order to connect the backlight to the interior lighting, you need to remove the lampshade (most often it is on clips, although you may need a screwdriver to remove it). Next you need to connect the wires. Connect the plus to the white and the minus to the red. You hide the reasons under the casing. The easiest way is to stretch them along the side rack. After this, connect the wiring of the LED strips at the feet of the driver and passenger and connect everything to power. Then you check the lighting operation again, and only after that insulate all contacts and install the lampshade back. If you wish, you can additionally install a controller, then the light will fade out smoothly rather than go out abruptly.
From the cigarette lighter
If the lighting is connected from the cigarette lighter, the footwell lighting will light up exclusively from the side of the open door. This is very convenient, because often lighting is only needed when getting a passenger into a car. The plus of the diode must be connected to the cigarette lighter, and the minus to the door limit switch. The wiring on the door can be routed through the same passage through which all wiring to the door goes. However, in most cases, to do this, you will have to dismantle the panel.
From dimensions
When connected to external lighting, the light in the cabin will always be on when the dimensions are on, that is, during trips in the dark. In order to be able to turn it off, you should immediately provide for this possibility and add a switch to the backlight.
In order to connect, you power the positive wire from any light bulb on the instrument panel, and throw the negative wire onto the body of the car.
Where is the best place to install?
Standard places for installing additional light in the car interior are considered to be under the dashboard and glove compartment, car seats, doors, door handles. Although in principle you can highlight anything, it all depends on your imagination. To tune door handles, ignition switches and other small elements, single diodes are most often used, but to illuminate everything else, it is more convenient to use diode strips.
With pulse stabilizer
The pulse stabilizer differs from the one described above in that it is more powerful, does not overheat and is characterized by the following set of parameters:
- Large range of connected voltage - from 4 to 36 volts and set output voltage - from 1 to 36 volts.
- The ability to adjust the current value - from 0 to 5 amperes.
- Automatic protection against short circuit and heating.
- Operating temperature – from -40 to +80С.
- Conversion rate – up to 95%.
- Low price – from 3 to 4 $.
- It is based on the LM2596 chip.
One of the significant advantages of a purchased switching stabilizer is its compactness - it is about 10 times smaller than its linear analogue.
Materials used
Most often, experts advise acquiring a standard mini-set of parts, which includes five resistors with a resistance of up to 220 K, capacitors with a capacity in the range of 50–100 μF and a voltage of 16 volts, transistors of various formats, a stranded wire, an SR5100 diode, which can be purchased at any modern radio market. It goes without saying that the work will require a soldering iron, rosin and solder, which are indispensable in such cases, and the installation of the smart light itself, if you strictly follow one or another chosen scheme, will take no more than an hour. Of course, when making an innovation in the salon, it is necessary to strictly follow all technical safety rules.
How to make interior lighting with your own hands?
The lighting of the lower part under the feet of the driver and passenger can be made neon, and the ceiling can be illuminated with LED lamps.
Neon lighting installation
First you need to install special emitters, for which you will need the following materials:
- nylon clamps;
- aluminum corner;
- neon emitters;
- self-tapping screws
Dismantling the lower part of the dashboard
You need to saw off a corner to fit the size of the emitter and screw it with self-tapping screws under the dashboard. The light should fall down directly under your feet. After this, you need to fix the emitter with clamps to the corner.
The same operation must be performed with all passenger seats in the car. On the rear seats, screw the corner with the edge up, protecting the emitter from mechanical damage.
Carefully lay all the wires under the floor and pull them out to the dashboard on the driver's side. If necessary, they must be extended and insulated at the connection points.
When connecting, the wires should be connected to the door opening sensor and the interior lighting switch so that when the door is opened and the lights are turned on, our additional lighting comes on.
Installing LED lighting
LED foot lighting in a car can be done according to a standard scheme, which is the same for all cars. To work you will need:
- heat-shrink tubing;
- wire cross-section 4x0.5 mm;
- LED strip and single diodes (you can take a ready-made factory-assembled strip like SMD 5050, but it costs more, so you can buy an RGB strip sold by the meter).
LED lighting kit
The backlight can be installed on the instrument panel, in the places of interior lamps and in those places where standard lighting elements are installed. You can replace all this with LEDs. Single LEDs have the same base as standard lamps, so if necessary, you can easily replace everything.
After this, you can determine where to install the backlight. Traditionally, it is installed in the foot area and along the perimeter of the roof along the racks. First you need to measure the required length of the tape and cut it to the required size.
The tape should only be cut in special places where solder contacts are located. The wire should be measured so that it is enough to reach the ignition switch (always allow some margin).
Cut, strip the ends and solder to the tape, and then stretch the heat-shrink tube and heat it with a regular household hair dryer or lighter until it shrinks.
The same should be done with other pieces of tape. After this, you need to remove the protective film from the back of the tape and glue the tape in the right place. All wires must be hidden under the pillar covers and brought under the dashboard on the driver's side.
Connection options:
- connect the container via RGB block;
- connection in the same way as neon lamps.
We described the second option above, but we will add that when connecting, you must be careful not to confuse the polarity indicated on the tape at the soldering points. When the do-it-yourself interior lighting is ready, you need to turn it on and check its functionality
When the DIY interior lighting is ready, you need to turn it on and check its functionality.
Preparing for installation
Before proceeding with installation, you must purchase everything you need. If you are going to tune small parts, then you will need single diodes. To create lighting for the ceiling, the space under your feet, the instrument panel, etc., you can take an LED strip by the meter.
Before buying a tape, you must decide for yourself where you will install the lighting, take measurements, and only then calculate the required amount of material. If you decide to buy LED strips by the meter, then in addition you will need to buy wires (3-5 meters), heat-shrink tubing, or at least regular electrical tape, glue and a dimmer. There are also ready-made tapes for sale for tuning the interior with wires soldered around the edges for connection. Then you won’t have to worry about taking measurements, soldering wires and insulating them. Here you just need to secure the finished tape in the right place and connect it to power.
Varieties
Let's start with the fact that the backlight can be automatic or manually controlled. The last option is objectively not the most convenient, since hardly anyone will want to turn it on and off every time.
You can also divide all lighting options into 2 large categories.
Conventional lamps based on LEDs or LED strips. There are no logos here. Just an additional glow that can turn on during a trip, or when you open the doors
Some people need it purely as a tuning, while others need to see what’s under their feet when getting out of the car. Moreover, these functions combine perfectly; Laser projection lighting
Implementing it yourself is more difficult if you assemble it from scratch. Typically a wired or wireless system is purchased. Aliexpress also has a huge selection for all brands of cars. Displays a logo on the surface of the ground when doors are opened. It looks impressive, and at the same time works just as effectively as additional lighting.
Base type
Choosing LED lamps for car interior lighting is not difficult. On the main page of our store, select the make and model of your car, then open the “interior lighting” subsection. If you did not find your car in the catalog, or the “interior lighting” subsection for the car model you are interested in is not filled in, then choosing LED lamps for interior lighting yourself will not be difficult.
The most reliable way to find out the type of lamps used in the lamps of your car is to open the lampshades and remove the standard lamps. If you see that the lamp is entirely glass with a flat base about a centimeter wide with metal tendrils, then you have a W5W baseless lamp:
The power of this small incandescent lamp is 5 Watts, and its luminous flux is approximately 50 Lumens (data on the characteristics of incandescent lamps are taken from the Osram automobile lamp catalogue). To replace this outdated incandescent lamp in all respects, you can choose a modern, brighter and more efficient LED lamp in the section.
If you see a lamp with two metal cones at the ends, then this is a soffit (aka double-ended) lamp.
For this lamp, it is important to measure the distance between the extreme points of the bases. If the length of the lamp does not exceed 37 mm, then it is a lamp marked C5W, the power of such an incandescent lamp is 5 Watts, and its luminous flux is approximately 45 Lm. If the length of the lamp is more than 37 mm, then it is a C10W lamp, its power is 10 Watts, and the luminous flux is about 100 Lm. On our website, the length of C5W lamps is indicated by the last number in the name of the LED lamp. That is, for example, the F-4s50f31 lamp has a length of 31 mm, and the F-6s50f42 lamp has a length of 42 mm. You can select lamps of this type in the section.
If the lamp is a glass body with a cylindrical metal base, then it is a T4W lamp:
The power of such a lamp is 4 Watts, the luminous flux is about 35 Lm, you can choose a replacement for it in the section.
How to properly install an LED strip for car interior LED lighting?
Installation of a car with LED strip is carried out according to the standard scheme. First of all, you need to purchase a set of wires, heat shrink tubing, and tape.
It, like individual diodes, is purchased at automobile markets and/or in specialized automobile stores. You should not skimp on the quality and length of the tape; experts advise stocking up on good LEDs. It’s better to buy more diode strip than to realize at the last moment that you don’t have enough.
In addition to interior design, diode strips are actively used to illuminate car wheels.
Step-by-step instructions for diode connection of car interior lighting
Arrangement of lighting in the car, with your own hands, should begin with the instrument panel of the vehicle. To do this, standard equipment is removed: instruments, panel lighting, and diodes are installed. The installation process is very simple, since the diodes have bases similar to factory equipment.
Then you need to determine the installation locations. Many people prefer to mount diodes along the entire perimeter of the ceiling, parallel to the car body pillars. The summer is laid gradually, and the remains can be cut off.
The cut points are clearly visible: they are marked with special membranes. After the procedure, do not forget to clean the ends of the cut and solder them together. We close the connections with bushings and heat them with a hairdryer. In this case, it is better not to use an industrial hair dryer, since there is a high risk of overheating; an alternative is a regular household appliance.
Switching on is carried out similarly to the circuit of neon lamps. You need to be especially careful at this moment and not confuse the polarity points that are indicated on the tapes at the cut points.
Essentially, this is where the workflow ends. There is nothing complicated. Only the installation must be carried out sequentially and be careful about small elements when connecting them.
An important aspect when working is the combination of lighting aesthetics and its functionality, which will be discussed below.
Why do you need additional lighting?
The feeling of comfort inside a car largely depends on the quality of interior lighting. The need for a soft, non-irritating backlight is especially important when traveling at night, when you need to check a map, write something in a notebook, remove important small items from the glove compartment, or find objects that have fallen on the floor.
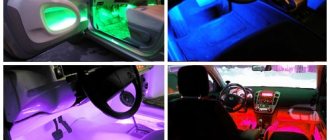
Additional lighting is of great aesthetic importance. It creates a unique design for the interior of the car and makes it stand out among similar vehicles. Such lighting can be synchronized with a subwoofer, as a result of which the LEDs will pulsate and change colors to the beat of the music. Despite the important role played by car interior lighting, the standard lighting system in some car models leaves much to be desired, so you have to redo it yourself.
Car lighting
Car interior lighting
Among the ways to distinguish a car from the crowd of the same ones and make it more impressive, car interior lighting occupies a special place. Modernization of this kind is ideal for both foreign and domestic cars. Which lighting means are better and how to do the tuning yourself?
Price for backlight installation
- Foot area lighting (2 seats) for 2500 RUR
- Illumination of the foot area (4 seats) for 4500 RUR
- Trunk light RUB 500
- Door lighting RUB 2000
- Setting the projection of the logo 1600
- Underbody lighting 6500 RUR
Interior contour lighting
- The average cost of a B, C class car is 13,000 rubles.
- The average cost of a D class car and crossovers is 15,000 rubles.
- The average cost of an E class car is from 20,000 rubles.
You can find out more about the service here
We will make interior lighting in Podolsk
What kind of interior lighting is there? The devices can be turned on when the doors are opened or controlled by the driver using a special remote control. But the best option is a combination of devices. If we do the work wisely, we will get neon floor lighting that turns on when the door is opened and diode lighting for the rest of the interior, powered by a switch unit.
Car interior lighting with LED strips
The LED backlight can be customized depending on your preferences. For example, you can make it turn on simultaneously with the standard lighting when you open the doors, or you can control it using an electronic unit... The installation locations for additional light sources are quite varied. Most often, tuners prefer to highlight the feet, as well as the instrument panel. Do-it-yourself interior lighting is done especially carefully and painstakingly. To begin with, you can replace all standard backlight lamps with colored LEDs. For ethical reasons, the color scheme of the instrument panel, buttons and footwell lights should be the same. But this is not a rule, especially for people who like to show their imagination.
Car interior lighting can be:
- LED. The main advantage of this option is ease of installation. In this case, the emitters do not require a fixing device. Individual LEDs are miniature, so they can even be installed in sockets for standard lamps. The LED strip is shockproof and sealed.
- Neon. The light from neon lights is bright and saturated. The lighting is difficult to install, and the lamps in the installation are quite capricious. They are afraid of mechanical damage...
Car underbody lighting
Underbody lighting is probably the most common lighting tuning option. Of course, this is a very expensive way to stand out, but the result can make a person forget about all the costs of such improvements. If the light sources are installed correctly and the vehicle's ground clearance is not too high, then the underbody lighting creates the effect of a flying car
An optical illusion is created; a person does not see the wheels of the car, since all attention is focused on the scattered light under the bottom. The most important thing when installing such lighting is to hide the light sources, since if they are visible, the entire effect will be lost
Illumination of rims and wheel arches
This type of lighting is not so common, but still has a right to exist. The illumination of the wheel arches looks especially impressive together with the underbody illumination, but as an independent tuning element, it copes with its task quite well. Automatic arch lighting and Borbet LV5 wheels - this combination will be liked and remembered by many. Implementing such a modification is not difficult, and it does not cost much.
Machine contour lighting
Contour lighting is one of the most expensive options when purchasing a new car. This type of lighting has a purely decorative effect. The appearance of the front panel, instrument panel and other interior elements, illuminated along the lines of the ribs and plane transitions, is very attractive and favorably emphasizes the interior trim. Luminous lines divide the interior into zones, separating sections of the dashboard, door trim, gearshift unit and other departments.
There are kits that can be installed in any brand of car. They are produced in the countries of Southeast Asia, so their price is affordable for any car owner. The standard kit consists of the following components:
- powerful LED;
- power driver;
- set of connecting wires;
- light guide
The LED is inserted into the end of the light guide, which fits into the joint lines of the dashboard panels or other interior trim elements. The driver power is connected to the side lights. Installation is not particularly difficult. In addition, you can choose the most preferred color of the LEDs, there are about 10 options in total. The cost of the kit depends on the length of the light guide (2-5 m), the presence of a wireless remote control and other design features. In any case, independent tuning will cost several times less than the standard option with which the car is equipped at the factory.
Installation Precautions
When installing an LED strip in a car, it is recommended to observe a number of the following precautions:
Before starting work with auto electricians, be sure to disconnect the battery by disconnecting the wires from the terminals. The ice strip must be selected strictly according to the operating conditions in terms of the degree of protection from dampness. It is necessary to place the lighting in the car interior so that it does not blind the driver. During installation, LED strips should be bent only within the limits established by the manufacturer, so as not to damage them. For soldering, it is permissible to use a low-power soldering iron. The total length of the serially connected sections of the ice strip should not exceed 5 meters, otherwise a parallel connection must be used. When connecting tapes, it is important to maintain the polarity of the contacts. The use of a stabilizer in the circuit will make the backlight work better and extend its service life. If a power supply is used in the circuit, its power should be higher by 25% of the total similar indicator for all led elements. There must be an insulating gasket between the tape and the metal body of the machine. All holes for fastening the lighting in the car body must be treated with an anti-corrosion compound. Before starting the power system, you need to make sure that the assembled circuit is correct.
Option No. 2. LED backlight powered by battery.
For installation you will need:
- LED strip for 2 contacts;
- a wire consisting of two cores, for example red and black, about 5 meters long;
- soldering iron and soldering material;
- sealant;
- toggle switch with “on” and “off” positions.
We cut the tape and wires as in the 1st option. We solder the wires to the contacts of the tape, each to its own pole indicated next to the contact. We solder the red wire to the positive contact of the tape, and the black wire to the negative contact. Terminal clamps can be used, or you can do without them. We already know how to use them. It is better to install them anyway, since in the future it will be easier to replace failed sections rather than changing the entire tape.
Then the black wire must be pulled to , stretching it under the carpet and trim of the car. We connect it to the battery. We connect the red wire to the toggle switch and then pull it to the positive terminal of the battery and connect it to it. We place the toggle switch in a convenient place where it is easy to reach with your hand. This backlight option will work as long as the toggle switch is in the “on” position.
LED interior lighting is more popular today than ever. There are many different light sources in the interior of any modern car. At a minimum, the cabin has a central light located on the ceiling, as well as a “navigator’s” light located at the front of the ceiling, in front of the windshield. In addition, in the car interior there may be lamps in the lamps located in the cosmetic mirrors, in the illumination of the glove box (glove compartment), in the trunk lighting, thresholds, footwells, etc.
For all these lighting devices, 95% of cars use two types of lamps:
- baseless lamps marked W5W (or, according to other classifiers, T10)
- soffit lamps marked C5W/C10W (or, according to other classifiers, festoon)
The remaining 5% falls on lamps labeled T4W, the selection principle of which is the same as for W5W lamps.
But even with the two most common types of lamps, it’s not surprising to get confused, since our catalog of LED car lamps contains more than 20 models of each type. Let's try to figure out which models of LED lamps are suitable for the interior of your car.
1. 2. 3. 4.
Technology and features of installing lighting in a vehicle interior with your own hands
Interior lighting is not only a practical solution for illuminating a car at night, but also a modern type of tuning and decoration of a vehicle. Initially, you need to set the right tasks for yourself so that the result meets your expectations. The set of tools and the specifics of the work depend on exactly which areas of the interior you want to tune - these could be the car's sills, handles, dashboard, driver's foot lighting, and how the lighting should work - when you open the door, when you turn on the ignition, or on a special button. .
And also decide which lighting devices you want to use to illuminate the car interior. Most often, LEDs or neon glow elements are used for these purposes.
Car door illumination using LEDs
You can decorate the interior of a vehicle using LED strip. The tape is easier to install with your own hands, as it has a special self-adhesive coating and therefore does not require additional fasteners. It is also shock-resistant and can withstand different weather conditions well.
Purchasing special LED strips for car lighting can greatly facilitate the work of installing them, but their price category is much higher than LEDs per meter. It is necessary to improve and adapt the meter tape to the vehicle using a soldering iron.
To work, you will need to purchase heat-shrinkable pipe, LED strip and electrical wires. First, we try on the LED strip to the threshold of the car and cut off the required piece, it is better to take it with a small gap. To one end of the LED strip you need to solder two wires, minus and plus. For convenience, you can install female terminals on their ends. Separately, it is necessary to prepare four electrical wires with male terminals.
https://youtube.com/watch?v=YCHvc3irFzk
We insulate the soldering areas using heat-shrinkable tubing. The modules are ready to use. Next, you need to remove the trim from the doors and sills of the vehicle and install the developed blanks.
Two wires with male terminals on each door must be routed through the hinge, so they will stick out from it. We tighten the negative wires to the ends of the right and left doors, respectively. This will ensure that the threshold is illuminated exactly from the side where the car opens.
We connect the negative electrical wires to the diode modules, and connect the positive wires to any permanent positive in the vehicle. This could be a car's standard light source, a cigarette lighter, or a battery plus
It is important here not to confuse the polarity of the electrical wires. Checking the operation of the installed LEDs
If everything is done correctly, they will light up every time the car is opened. We put the casing in place and enjoy the result.
Similarly, you can illuminate the dashboard of a vehicle, the driver’s feet or door handles. And also the negative ends of the wires can be brought out to a separate button. In this case, the backlight will only work when you turn it on yourself.
Installing neon lighting in the car interior
Neon lighting fixtures have a diffused glow, which greatly attracts the attention of car enthusiasts. Although, on the other hand, if we compare LED and neon devices in terms of service life, the former are distinguished by a long period of operation
If you want neon lighting for the car interior, then the easiest way to work is with a neon cord. It is sold similarly to LED strips by the meter and is installed according to the same principle. For installation, it is necessary to remove the threshold covers and lay out neon cords of the required length along the outer edge. Ideally, when installing the casing in its place, it should be flush with the neon cable. Similarly to the previous method, we bring out the electrical wires to the ends of the doors and to the power supply.
Neon lamps are a more difficult lighting material to install, as they are prone to mechanical damage and are demanding in terms of operating conditions. To install neon lamps, you will need clamps, screws and aluminum corners. The aluminum corner is cut to the size of the neon light sources and attached in places above the dashboard using self-tapping screws. The same is done in the rear passenger seats. Neon light sources are attached to the installed corners with clamps. Wires are supplied to the door opening sensor and power supply to ensure that the lighting devices are turned on when the door is opened.
Option No. 1. Multi-color lighting, powered by a cigarette lighter.
The method of generating electricity from a conventional one is the simplest. With this option, you do not have to interfere with the electrical circuit of your car.
The video shows what the car's LED lighting looks like:
What you will need for this type of connection:
- RGB LED strip 4 pins;
- a controller of such a tape with a control panel, it is with the help of these devices that you can;
- 4-color wire, stranded, about 5 meters long. It is better that the wiring in it has the same color as on the controller;
- 4 connectors (terminal clamps);
- soldering iron and soldering material, such as solder and rosin;
- silicone transparent sealant.
Before purchasing everything necessary for installation, you need to carefully measure the places where the LED strip will be attached, as well as the entire perimeter along which the wires will pass. First, we measure the distance under the dashboard, on the passenger side, where the tape will be attached, then the distance under the front seats. Then we measure the perimeter along which the stranded wire will pass, starting from the glove compartment, then through the right passenger seat to the driver's seat and, finally, to the car pedals. We leave a little in reserve.
The result should be 4 pieces of tape and 7 pieces of wire. The lighting connection diagram on both the left and right sides, starting from the glove compartment, will look like this: tape - wire - connector - wire - connector - wire - tape. Such a circuit is connected to each other by a wire passing between the upper connectors. The upper pair of terminal clamps is located under the instrument panel, the lower - under the seats.
The video shows multi-colored LED interior lighting:
When buying a diode strip, you need to remember that you can cut it into pieces only in certain places, strictly along the line running between the metal flat contacts. You also need to remember that the controller can withstand no more than 12 watts, so you must first calculate the total power of all the bulbs in the strip and, if necessary, reduce its length .
When everything you need has been purchased:
- we cut the tape and wire into the pieces we need;
- We clean the wire sections from plastic about 1 cm on both sides;
- solder the required section to the tape, each wire to a separate contact;
- then we insulate the soldering areas with silicone glue so that the wires do not break or touch.
We fasten the tape with wires into place using double-sided tape or other material. We start in the place under the glove compartment. We pass the wires through the terminal clamp, attach the controller to it, and make sure that each wire matches the color on the controller. We are finishing the installation of lighting under the car pedals.
We try to hide all the wires under the casing. All that remains is to connect the controller to the cigarette lighter. We use a regular car charger for a mobile phone. We disassemble it and run the wires along the way, bypassing the voltage stabilizer, this is necessary in order to increase the charging voltage from 4 to 12 watts. We solder one of its wires to the fuse, the other to the leg of the right metal ear, bypassing the stabilizer, i.e. to the “minus”. and plug its plug into the controller, and the charger into the cigarette lighter. Having learned how to connect the LED, all that remains is to master the remote control and enjoy the light and music.
When using this option for connecting light in the cabin, you need to remember that the backlight will only light when the ignition key is turned or when the car is running.
Precautions during operation
Since installing an LED strip requires contact with electricity, take precautions and do everything carefully
- Carry out the work on a lift or in a special inspection pit in good lighting;
- If possible, use glasses and gloves;
- get down to business only if you are well versed in electronics;
- Use tools as intended.
If you follow all the nuances and installation rules, you are unlikely to be fined or deprived of your license. However, an experienced traffic police officer will definitely find your creativity inappropriate when using a car and may turn out to be intractable. To avoid this, do not exceed the restrictions established by the rules, study the issue carefully, but be prepared for the fact that you may or may not be allowed to use this accessory.