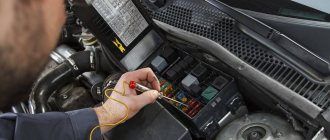
A battery is a special device that provides voltage to the devices and electrical systems of the machine.
If the power supply is not properly maintained, its lifespan may be reduced, resulting in additional costs.
The battery diagnostic regulations stipulate a test with a load fork.
What is this device? What parameters can be measured with it? What should you consider during the application process? These issues require detailed consideration.
How to properly test a battery using a load fork
The battery is considered an important component of any car.
In addition to performing the main task of starting the engine, the battery plays a number of additional roles. During operation, it is periodically necessary to check the condition and performance of the battery. Most often, in garage conditions, a conventional multimeter is used for this. But it is also recommended to check using a load fork.
For some car enthusiasts, this is a not entirely clear device, which is unknown how it works and for what purposes it is used.
What can you check?
Using the load fork, you can determine the following battery parameters (depending on the capabilities of the specific device):
- battery charge level;
- how long does the battery hold a charge;
- identify the presence of closed plates;
- assess the condition of the battery and the degree of sulfation;
- battery life.
The load plug also allows you to measure current in other electrical appliances. The main difference is the resistance spiral. The resistance value of each spiral is 0.1-0.2 Ohm. One spiral is rated at 100A. The number of coils must match the battery capacity. If it is less than 100A, then one is enough, if more, two.
Concept of load fork
In practice, diagnostics using a load fork (LB) gives an accurate and correct result, displaying the current state of the battery. And the first question that should be answered is what it is, why a motorist may need a so-called load fork when diagnosing a battery.
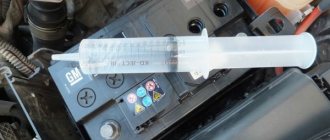
A load plug is a device used to measure the charge of car batteries. They interact with 12 and 24 V batteries.
If you need to regularly check your car's electrical system, a plug will be a useful addition to your tool kit. It is not difficult to purchase an NV. Plus, some people do it themselves.
Before checking the batteries with a load fork, it would be a good idea to understand this device in more detail and understand its purpose.
Structurally, the NV consists of a high-power load resistor, probes, a built-in voltmeter, and a pin.
In its simplest form, it includes:
- metal casing;
- voltmeter built into the housing;
- spirals (resistors/resistance).
A wire with a sufficiently large cross-section is connected to the positive output, and a special metal pin is connected to the negative NV output. It is usually located at the back of the case. On the reverse side there is a clamp for connecting the NV and the car battery. Nuts are mounted on the rear panel, which are needed to connect the resistance coils.
If we talk about the operating principle on which the load fork for diagnosing a car battery works, it is as follows. The plug clamps are connected to the battery terminals and the short-term load is turned on. Depending on the specific voltage produced by the battery when the resistance is connected, conclusions can be drawn about the condition and serviceability of the battery.
Having previously figured out why a motorist may need a load plug when diagnosing a battery, it is worth answering a number of other important questions.
Design
The battery plug has a simple design that includes several elements. The most important thing is a voltmeter, which has a certain measurement range, which, in turn, corresponds to the battery voltage. The second important element can be considered a low-resistance resistor. It can be replaced with a homemade one.
To connect the load to the battery terminals, clamps with wires are used. Since many tools today are becoming convenient to use, a switch and a key for connecting the load are installed on the plug.
Many people do not understand why the measuring device is called a fork. Perhaps this name was assigned at a time when the devices looked like objects with protruding contacts. The appearance of the structure resembled a plug that was inserted into a battery for testing.
Common types and types of load forks
In specialized stores and markets you can find a large number of load forks, which differ in design, measurement range and level of measured current.
In addition, such measuring instruments are classified according to the type of battery being tested - for alkaline and acidic power sources.
The main feature is the difference in load (most often from 1 to 12 Amperes).
There are also plugs that allow you to test individual battery banks, if the product design allows this possibility.
The most popular types of load forks include:
NV-B is a device that allows you to measure voltage in the range from 0 to 3 Volts. The maximum current load is 100 Amps. The device is used to test acid-type batteries (voltage 2 V) and alkaline batteries (1.2 Volts).
E 107 UHL4 - type of load plug for testing 12-volt car batteries. The measurement limit in this device is from 0 to 20 Volts. Current load limit is 100 Amperes.
BH-01 is a device that allows you to measure voltage in the range from 0 to 15 V. The operating temperature is from 1 to 35 degrees Celsius. The test should be repeated after 15 seconds. HB-01 is a device characterized by an accuracy of 2.5%, as well as a measurement range from 0 to 15 Volts. Load size - 100 or 200 Amperes. Temperature range from 30 degrees below zero to 60 degrees above zero.
NV-03 is the most popular product among car owners, the distinctive feature of which is the presence of an electronic voltmeter with an LCD indicator. The kit comes with two loads that can be connected to the plug separately. The maximum current load is 200 A, the voltage is from 0 to 16 Volts, and the capacity of the tested batteries is from 15 to 240 A*h. The product is used to test batteries for a standard voltage of 12 Volts. If one load is connected, the current limit will be 100 Amperes. In this case, you can test batteries with a capacity of 15-100 Ah. If you install two loads, the maximum current increases to 200 Amperes. In this case, it is possible to check the battery for 100-240 Ah.
HB-04 is a more powerful device that allows you to test 12 and 24 Volt batteries. In addition, using the device, you can test individual elements of a 2 V battery. Measurement accuracy is 0.5%, voltage range is 0-32 V. In addition, the product operates in a wide temperature range - from -20 to +60 degrees Celsius .
Non-standard solution to the issue
In this case, the load fork is made in an even more interesting way, using a sewer pipe carefully cut in the longitudinal direction.
Here is a diagram of the plug design, designed to test the resistance indicators of 12-volt batteries with a capacity of several tens of ampere-hours:
- constant wire , 12 turns with an internal winding diameter of 38 mm,
- M8 studs are welded to the ends of the wire ,
- all this can fit perfectly into a sewer pipe if its diameter is 50 mm ,
- the gap is closed with a second piece of the same pipe,
- are installed on the sides , and the structure is ready.
When checking is performed using HB
There are several options when you can use a load plug when checking the condition of a car battery. Namely:
- battery charge level;
- battery level;
- battery health;
- charging capability;
- checking on-board electrical components.
Although the NV can be used to diagnose various components of the on-board network, most often the plug is used precisely as a tool for assessing the condition of the battery.
What to consider when checking
If the car battery has a small capacity, then the test is performed using only one load spiral. For high-capacity batteries, an additional coil is connected.
The task of the load fork is to create an imitation of the battery load from the starter when starting the internal combustion engine. The load current generated in this case ranges from 100 to 250 A.
Special tables for testing car batteries with a load fork allow you to navigate the results obtained. Based on them, the motorist draws conclusions about the condition, serviceability and other characteristics of the power source.
If this is the first time you are taking readings from your battery with a special tester load plug, such a check should be carried out taking into account some important points. Pay attention to the design features. Simple models are equipped only with a voltmeter and allow you to evaluate the degree of charge. Improved models are equipped with an ammeter. This allows you to read much more information during testing.
When starting diagnostics, pay attention to the following nuances:
- Work is carried out in compliance with established temperature standards. Optimally it is from 1 to 35 degrees Celsius. Although there are also models that function and perform their tasks in a wider range, including sub-zero temperatures down to -30 degrees.
- Before connecting the load plug, carefully read the manufacturer's instructions. Always follow the manufacturer's recommendations. They are written specifically for your device.
- The load coils become very hot during operation. Therefore, you should take care of your hands and avoid exposure to high temperatures.
- Be sure to check the condition and quality of the contact fastenings before turning on the load. If the contact is poor, the correctness of the data will be in doubt.
- Test your battery with a standard load current, as happens when starting an engine.
- The measurement duration is limited to 10 seconds. This is enough to read the necessary information. If you keep the battery under load for longer, it can become severely discharged and the tester resistance will overheat.
Otherwise, the instructions for all HB models look approximately the same, although they may have some distinctive features. That's why it's important to work based on the manufacturer's instructions.
Instructions for verification
The greatest difficulty for car owners is checking the battery with a load fork.
But there is nothing complicated here - just follow the instructions below:
Test without load.
Before taking measurements, disconnect the battery from the charger or remove the machine terminals.
At least seven hours must have passed since the last trip. It is best to check the battery in the morning, after the car has been idle overnight.
Make sure the battery electrolyte level is sufficient. Otherwise, add distilled water.
The load fork is a portable device, so it can be used without removing the battery from the vehicle.
The main thing is that the battery is not cold - the optimal temperature of the device is 20 degrees and above. If it is less, it is necessary to dismantle the power source and bring it into a warm place.
During the inspection process, the plugs on the battery must be tightened (if the product is serviceable).
Then proceed like this:
- Connect the positive wire (with the load plug terminal) to the “plus” of the power source being tested.
- Connect the metal pin (the "negative" terminal) to the negative terminal.
- Pay attention to the indicators that are reflected on the voltmeter display.
During the verification process, you should focus on the following parameters of the device (measurements are made at XX):
- At a voltage of 12.6-12.9 Volts, the battery charge level is 100% (full charge).
- 12.3-12.6 V - 75%.
- 12.1-12.3 V - 50%.
- 11.8-12.1 V - 25%.
- 11.5-11.8 V - full discharge.
If the test shows the battery is 100 percent charged, you can proceed to the next step - taking measurements under load.
Table.
Test under load.
As noted above, this work can be resorted to if the voltage level on the voltmeter is 12.6-12.9 Volts.
First, you need to read the instructions, which contain detailed recommendations from the manufacturer.
The load is connected taking into account the information in the manual, after which the load plug is switched.
Here the algorithm of actions is the same as in the previous case. Please note that when the plug pin touches the “minus” pole, sparking appears due to the flow of large current at the point of contact.
In the test discussed above, the time at which the load plug is connected to the battery does not matter. This nuance is important here.
In the case of measurements under load, the parameters should be taken at the 5th second of the test, after which the plug is immediately turned off.
Keeping the measuring device connected for more than five seconds is prohibited.
During the measurement process, a voltage is displayed on the load plug device, from which one can draw a conclusion about the serviceability and charge level of the power source.
In the case when the voltage is more than 9 Volts, we can talk about the serviceability of the power supply. If this parameter is less, it is worth checking again. If the results are unsatisfactory, you can conclude that the battery has failed.
If the battery is not completely discharged, you can use the load plug to determine the charge level of the power source:
- If the voltage is above 10.2 Volts, this indicates the maximum battery charge;
- At 9.6 Volts, the battery is 75% charged;
- 9.0 V - 50%;
- 8.4 V - 25%;
- If the voltage is less than 7.8 V, the battery is completely discharged.
After the load test, a first test must be carried out. If in this case the voltage does not return to 12.4-12.7 volts, there is a problem with one or more battery banks.
Table.
You should not overuse checking the battery under load, because frequent discharge under high current leads to a decrease in the service life of the product.
During the measurement process, it is forbidden to touch the metal pin, because under the influence of high currents it becomes very hot.
After each subsequent measurement, it is worth pausing for 3-5 minutes to cool the pin.
You can buy a load fork in a store or make it yourself. Moreover, every car owner should have such a product in his garage, because it is impossible to overestimate its capabilities and benefits.
Preparing the battery for load fork testing
Before testing, you need to perform a number of actions and meet the necessary conditions:
- Disconnect the battery from the on-board network. You can conduct testing without even removing the battery from the car.
- Before checking, the battery must be idle for at least 7-10 hours. It is most convenient to take measurements in the morning, when the car has been sitting overnight since its last trip.
- The ambient temperature and battery temperature should be within 20-25°C. If the temperature is low, you should bring the device into a warm room.
- The battery plugs must be unscrewed before testing.
- Check electrolyte level. If necessary, add distilled water.
- Clean the battery terminals. Contacts must be dry and clean to avoid stray currents.
If all these conditions are met, then you can proceed to verification.
Operation and external factors
To correctly test a car battery with a load fork, you need to connect the terminal of the device to the “plus” of the battery, and the measuring pin of the device is connected to the “minus”.
Despite all the ease, it is necessary to study the rules for operating the device, which comes with the equipment.
When using, you must remember that the plug has a minimum temperature of +20 o C, and the battery should not be cold. Failure to comply with the requirements may result in a “deep discharge” of the battery. Taking into account the above criteria, you need to remember that checking a car battery with a plug without removing it from the car (but this is highly not recommended, and it is better to remove the battery) is possible only in a warm climate. If the temperature does not match, it is better not to try to take the readings without removing the battery from the battery.
Important: you must follow all precautions and safety precautions when operating the device - failure to comply can lead to injury! It must be remembered that the pin may heat up when applying a load!
How to use a loading fork - brief instructions
Before you independently check a car battery with a purchased load fork, we recommend that you familiarize yourself with the algorithm of actions using the example of the popular Orion NV-01 device. The sequence consists of the following steps:
- at the first stage, measurements are taken at idle, with the load spirals removed from the chain;
- We attach the alligator clip to the negative terminal;
- Using a measuring probe, touch the positive terminal of the battery;
- We record the current voltmeter readings and compare them with the values from the table.
The second stage of measurements should be carried out with a connected load in the form of resistance spirals. Let's find out how to use a load fork in such circumstances:
connect the probe marked “H” to the positive terminal; hold in contact for about 5–8 seconds; quickly disconnect the connection to prevent overheating and fire; We record the voltmeter value and compare it with the table values.
It would be correct to use a table for load tests.
| Voltage | Approximate charge level |
| more than 10.2 | 100% |
| 9,6 | 75% |
| 9 | 50% |
| 8,4 | 25% |
| less than 7.8 | 0% |
We draw conclusions about the condition of the battery based on the obtained parameters. In some cases, the charge level will be below standard values. The result of this may be a short circuit in the banks. When measurements under load differ significantly from the unloaded state, there is a high risk that the plates are already damaged, and the result is the inability to deliver large currents.
Popular fork models
Russian car stores offer customers a large selection of plugs. But there are a number of models that are more popular due to their quality.
Autoelectrics T-2001 is a device in demand among drivers, which is familiar to all salespeople in a car shop. The tester works great, but has one drawback. To switch to load mode, you need to heat the tip. It closed the contact on the spiral. As a result, the device broke down.
In this regard, another model with the same name, but with the prefix “mini”, entered the market. This device was cheaper in cost than the previous one, but worked better, since the manufacturers took into account the shortcomings of its “brother”. We can say that although the device turned out to be primitive, it works well.
Mastak 122-0001 is considered a good and high-quality option due to the presence of a scale with measurements. Additional advantages include “bracket ears” that help prevent wire tangling.
Orion products are very popular among motorists. These are budget tester models that differ from each other in their set of characteristics. For example, the Orion NV-01 plug, compared to Autoelectrics, costs 5 times less. It is due to its low price that almost every car owner has this device. For 500-600 rubles, the buyer receives a simple device without a warranty card or instructions.
Using Orion NV-03, the level of charge and serviceability of 12V batteries is determined. It can be used to diagnose the generator and on-board network equipment. In terms of its design features, the device is similar to the previous model. However, it has a built-in digital voltmeter.
As for the Orion NV 04 model, this device was created to test power supplies with high voltage and capacity. The voltage range is up to 32V, the accuracy of operation is 0.5%.
How to check correctly
There are 2 ways to check the condition of the battery using a load plug. Below we will describe each of them in detail.
Without load
The essence of this method is to measure capacity without connecting an additional load. Measurements can only be taken when at least 7 hours have passed since the engine was turned off. During this time, the battery should not work either. The longer the period of time, the better.
Let's start measuring:
- Before you begin testing the battery, it must be completely disconnected from the vehicle.
- The plug must be connected to the battery terminals (plus to plus, minus to minus).
- We look at the voltmeter and remember the readings.
To understand how much the voltmeter should show if the battery is working properly, you need to look at the table below.
Under load
This testing method is rarely used, as it can harm the battery, and is used only when the maximum charge data was obtained in the first case.
Measurements are carried out as follows:
- Connect an additional load to the plug that corresponds to the parameters specified in the instructions.
- Disconnect the battery from the car's electrical system.
- Apply the probes of the plug to the battery terminals of the corresponding polarity. Use the button to apply additional load.
- At the 5th second of measurement, remember the voltmeter readings and immediately turn off the device.
You can compare the obtained data with the battery capacity using the table.
when contacts with a minus sign come into contact, sparks may appear (no need to be alarmed, this is a normal phenomenon); repeated measurements can be carried out only after 5 minutes; Do not apply a load for longer than 5 seconds; If, even after recharging the battery, the voltage on it drops under load, then the battery is considered unsuitable for use.
Description and principle of operation
A load plug is a device that is used to measure the charge of a battery. The charge is measured both under load and when the electrical circuit is open. This device can be easily found in any auto store.
Load fork
The purpose of the plug is that it creates a load on the battery, simulating engine starting. That is, the battery works in the same way as if it provided current to start the starter. The fact is that the battery may show a full charge, but not start the engine. A load fork can help determine the cause. A simple model will be enough to test most batteries.
Testing should only be done on a fully charged battery. First, the open circuit voltage is measured. If the indicators correspond to 12.6V-12.7V and higher, then measurements can be taken under load.
Faulty batteries cannot withstand the load, although they may show a full charge. The load fork provides a load that is twice the battery capacity. For example, the battery capacity is 60A*h, the load must correspond to 120A*h.
The battery charge level can be assessed by the following indicators:
- 12.7V or more – the battery is fully charged;
- 12.6V – normal battery charge;
- 12.5V – satisfactory charge;
- below 12.5V – charging is required.
If, after connecting the load, the voltage begins to drop below 9V, this indicates serious problems with the battery.
How to make your own battery fork
Motorists make many attributes from improvised materials in the garage. Since you can make a load fork yourself, we will consider its most popular option.
The load is a coil from a burnt-out heating device of a couple of kilowatts. This will be a nichrome wire with high resistance. Using the formula U=I*R, we calculate that in practice the spiral will give R=0.12 Ohm. A dozen parallel-connected heater wires will give the required parameters of 1.2 Ohms.
Switch the multimeter to Ohmmeter mode and measure the required length of wire, not forgetting about a margin of a couple of centimeters. We twist everything into a tight bundle and put ceramic insulation on top. For the body we use a U-shaped building profile. We solder the connecting insulated copper stranded wire to the crocodile.
The load output probe should be copper with a diameter of 5–6 mm. We select a digital voltmeter with a button. We put it on the sealant and put a window under it. It is advisable to insulate the handle.
How to care for your battery
To ensure that the battery lasts longer and does not fail prematurely, it should be maintained regularly. To do this, the battery and its terminals must be kept clean and discharged/charged during prolonged inactivity. In severe frosts, it is better to take the battery from under the hood to a warmer place. Some manufacturers recommend charging the battery once every 1-2 weeks, arguing that sometimes the consumption exceeds the self-charging of the battery. Thus, checking the battery is a completely feasible task and necessary for the proper operation of the car.
Methods for diagnosing a car battery
Let's consider the main methods for checking the technical condition of a car battery:
- Terminal voltage. A multimeter is a device for measuring current and voltage. Can be used at home.
- Diagnostics using a Postolovsky oscilloscope. USB Autoscope is a professional device for checking electrical signals in the engine and additional equipment, including the battery. For this purpose, Andrey Shulgin has developed a special ElPower script that can detect battery faults and charge level.
- Checking with a load fork. The most informative device for measuring voltage under load.
- Checking the electrolyte level. It should be 10-15 mm higher than the plates.
- Electrolyte density measurement. A hydrometer is used for this.
- Check battery capacity. On the case there is information about its capacity. The year of issue is written in the passport.
The average check price varies from 300 to 500 rubles, depending on the make of the car.
Battery diagnostics using a Postolovsky oscilloscope
Check the car battery charge with a multimeter
If the starter turns poorly or the car does not start, the first thing you need to do is check the battery charge. This service is available at a car service center, but to do this, the car will have to be transported on a tow truck. If you have a tester at hand, you can check it yourself at home.
A multimeter is a universal device. It is used to measure leakage current and battery voltage. We set the regulator knob to 20 Volts DC voltage and measure the health of the battery. Red probe for the positive terminal, black probe for the negative terminal. The readings should be from 12 volts when the car is not started and up to 14.7 volts while the engine is running. Depends on the brand of the car, and accordingly on the generator and the general layout of the installed equipment. The charge level is checked an hour after stopping the engine.
If the battery is running low
There are times when a car is parked and the battery dies overnight. First you need to check the battery itself with a load fork. If it is ok check the leakage current as follows:
- We switch the tester to DC measurement mode.
- We set the range to 10 A.
- Turn off the ignition and remove the key from the lock.
- Disconnect the negative or positive terminal of the battery, whichever is convenient. We place the device's pliers in the gap. That is, one probe is on the terminal of the battery itself, and the second is on the wire from the car.
- On the device we will see the leakage current consumed by the car and its systems at the moment.
Tester connection diagram
It must be borne in mind that many modern cars have a power supply system that falls asleep 10-15 minutes after the ignition is turned off. Therefore, you have to wait until the electronics fall asleep. The normal value for leakage current is about 0.01 - 0.08 A. If the value exceeds, you need to look for the reason for the high consumption.
Do not connect the multimeter in current measurement mode to the plus and minus of the battery at the same time, the fuse or the board itself may burn out inside.
In order to find equipment that consumes increased current, it must be excluded from the general circuit of the car. We find the mounting block and one by one disconnect the fuses and relays from the consumers. As soon as the leakage current has decreased, we look at which fuse was removed and what it is responsible for. If this check does not help, disconnect the plus from the starter and generator.
Battery capacity: how to check, test device
The capacity of the battery is the time during which it provides energy to operate the car. The unit of measurement for amperes is hours (Ah). Has nothing to do with battery charge. For example, a glass is a container, and water is a charge.
In most cases, battery capacity is needed when purchasing and selecting for your car. Each brand needs its own capacity, which depends on many factors:
- Type of engine installed in the car: volume, power.
- Type of starter and its current consumption.
- Generator: the power of the supplied charge.
- Amount of additional equipment: alarm system, radio, various comfort systems.
The fundamental factor in choosing a battery based on capacity is the engine. The larger its volume, the more powerful the starter is installed, and accordingly a larger battery capacity is required.
It is not possible to check the battery capacity with a tester or multimeter. There are special tests for this, which are based on the discharge of the battery and determining the time during which it will discharge.
At home, you can take a car lamp as a load and time the battery discharge time by clock. The method is not accurate, since as the discharge progresses, the voltage drops and the current decreases. Accordingly, it will not be possible to determine how much current the battery will produce over time. Also, you should not completely discharge the battery, as this can lead to complete breakdown, beyond repair.
Below is a diagram of the capacity testing method. You can assemble it yourself or entrust it to a professional. The circuit includes a specific load selected for the brand of battery. The measurement duration is about 20 hours.
Battery capacity testing circuit
There are special battery capacity testers. The test is done using probing pulses processed by a microprocessor. Next, based on the data received, the tester determines the battery capacity. One such device is SKAT-T-AUTO. Takes a measurement within 15 seconds. Fully automatic.
Thus, having measured the readings, we compare them with the nominal value indicated in the passport or on the battery itself; if the value is about 50%, replace the battery.
SKAT-T-AUTO
External inspection of the battery
You met the seller and have already walked around the car, seeing how clean and beautiful it is. It's time to look under the hood, you lift the lid and see the usual contents of the engine compartment, the engine and numerous systems that keep the car running.
In most cases, here, in the engine compartment, there is also a battery - a rectangular box with electrolyte inside, to which two wires are connected - positive and negative. These wires go to the distribution block, and from this massive electrolytic “battery” the entire machine and all its systems are powered with electricity.
Even if you don’t understand anything about cars and went for an independent inspection rather as part of a formality, you can still determine by the appearance of the battery what condition it is in.
During an external inspection, attention should be paid mostly to the integrity of the elements, and whether the battery itself and contacts are clean. There are a number of external factors, the presence of which immediately indicates the need to replace or at least clean the battery.
- Dirt on contacts. In order for the battery to work, both contacts connected to it by wiring must be clean. If the contacts are dirty, this indicates that the battery is not new, and dirt will interfere with the correct operation of the contacts.
- Oxidation of the terminals - foreign deposits can be seen on the battery terminals with the naked eye - this is oxidation, which in most cases is associated with electrolyte leakage. Electrolyte is an acid that is found inside the battery. If it spills and gets on the contacts, it can lead to poor battery performance and a reduction in the contact area.
- Cracks on the case - the battery itself should be intact. The plastic box containing the electrolyte must not be damaged. This is also clearly visible without additional equipment and in good lighting.
- Dirt, dust, electrolyte leaks - all this is removed with a rag, and the car should not be allowed to drive with a dirty battery, since the conductive deposit will contribute to its rapid discharge and deterioration of performance.
In addition to the external inspection, you can start the car engine. A cold start will be especially indicative if the engine has not been started for a long time and it is cold outside. If the car starts easily, the battery is in order, but if it does not start or starts with difficulty, the headlights shine dimly, and the instrument panel is also not brightly lit, then the battery should be changed. Or, at least, check it with instruments, which we will discuss below.
Checking the electrolyte density in the battery
The density in a battery depends on the concentration of sulfuric acid in the electrolyte. Measured in g/cm3. The concentration of sulfuric acid depends on the degree of charge, temperature, and the presence of defects in the jars. When the battery is discharged, part of the solution penetrates the plates and the density decreases.
The test can be carried out at home at a temperature of 25 ° C and a fully charged battery. The electrolyte density should be 1.28±0.01 g/cm3. The dependence of density on voltage, charge and temperature is presented in the table below.
Electrolyte density at different temperatures
Before checking the density, you need to look at the electrolyte level in the battery. It should be 15 mm higher than the separators.
Method for checking electrolyte level
To measure the density of the electrolyte in the battery, a special device is used - a hydrometer. The verification process consists of several stages:
- Unscrew all the lids from the jars.
- Squeeze the hydrometer bulb.
- We lower the battery into the jar and collect the electrolyte.
- The float on the scale will indicate the density of the electrolyte.
The density value in all battery banks should be the same. If the total value is lower, then this indicates low charge. With different densities in jars below 0.10 g/cm3, we can talk about a short circuit in one of the plates.
Hydrometer readings
The battery does not hold the load: what to do
To start an internal combustion engine in a passenger car, the minimum value for the battery is 12.5 V. Lower values will give a high probability of starter rotation failure. Provided that the battery is used regularly, it should be practically trouble-free for the first three years from the moment of its installation.
When idle, the battery from the car should hold a charge for at least a month (with an initial full charge).
We recommend checking the condition of the battery terminals. They must interact tightly with the connected contacts from the generator. Otherwise, oxidation will form, blocking the passage of current. Also, for maintained batteries, it is necessary to monitor the level of electrolyte, which can evaporate when boiling.
When the liquid level in the banks drops below critical, the charge will not hold, and the battery will quickly fail. It is necessary to add electrolyte or distillate.
Plates may also crumble due to lead sulfation. They create a short circuit inside, so this battery needs to be changed.