Audio
Front speakers
Having configured the radio receiver, as well as connecting sound sources, you can focus on sound quality.
- After adjusting the volume, press the knob to get to the settings menu.
- Here they look for the “Audio” item.
- By pressing the handle, you enter this menu.
- After looking through it, they find the Fader instruction.
- Click on the knob to get to this submenu.
- As usual, select the Fader menu (it should blink).
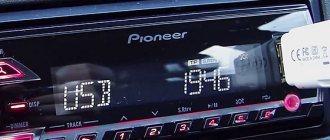
- Turn the knob and set the value to 15 units.
- Swing the knob to the left once to return to the “Audio” menu.
- Now you need to find a high-pass filter - HIGH PASS FILTER (HPF).
- Included in the menu.
- On the screen, most likely, the HPF is also zero.
- Twist the handle and set it to 50.
- Swing the handle to the left to exit the menu.
Rear speakers
The front speakers work cleanly, now it’s time to switch the rear speakers on the shelf into subwoofer mode - fortunately Pioneer can do this too.
- Turn off the radio.
- Press and hold the power button (as if you were going to set up the “demo” mode).
- Once in the menu, look for the inscription in the form of SW Kontrol.
- By pushing down the handle, you enter this menu.
- By rotating it, the parameter is set to SW.
- Confirm by pressing the handle again.
- Press the power button to save parameters and exit the menu.
- Then they return to the “Audio” menu (press the volume knob and rotate to select).
- By pressing the handle, you enter the menu.
- Here they look for the inscription SW SETTING1. Click on the handle to enter.
- Of the three options presented in the menu, you need to choose one of two - Normal or Rev.
- Having chosen, swing the knob to the left - return to “Audio”.
- Turning the knob clockwise will highlight the SW SETTING2 menu.
- They enter it by pressing the handle. The factory setting will show 80 HZ 0. Rotate the knob to decrease the first value.
- Having chosen what you want, swing the knob to the right to change the second parameter. This is the power level. The range here is from minus six to plus six. It will not be possible to give optimal parameters - it all depends on the quality of the speakers used.
- Press Band to exit the menu.
Before moving on to the next settings, check at different volumes how the selected settings work. If you don’t like something, repeat the steps described, trying other values.
Loudness compensation
This option is hidden in the same “Audio” menu.
- Enter the menu, find the Loudness parameter.
- Select by pressing the knob.
- There are three values available here - High, Middle, Low (respectively high, medium, low).
- This parameter is responsible for adjusting frequencies at low volume levels. It is also impossible to give optimal settings here - they are set experimentally.
- Swing the knob to the left to go to “Audio” or from settings by pressing Band.
Equalizer settings
For advanced music lovers, here are a few more equalizer settings. They are hidden in the same “Audio” menu.
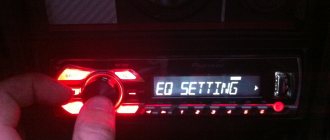
- Once in the menu, rotate the knob to select the EQ SETTING parameter.
- Enter this menu (depending on the model, you may need to enter another menu here). The three parameters offered in this menu are responsible separately for the settings of the low, mid, and high frequencies.
- Set according to your preferences. On some models, you can select several preset settings here. Depending on the speakers and your own preferences, adjust these parameters.
The settings here are no different from others - select by pressing, change by rotating, going to a higher level by swinging the knob to the left.
Lada 2109 › Logbook › Adding bluetooth audio to Pioneer mvh-150ub
Not for the sake of showing off, but just for convenience Adding bluetooth audio to the Pioneer mvh-150ub
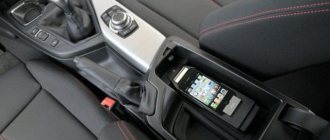
Although I came across the car 21093I The instrument panel in it turned out to be from the fourteenth, and a tablet is perfectly inserted into the opening where the tachometer and speedometer look, DEXP S470
You can almost comfortably watch a movie from YouTube
But the sound of the tablet is not very loud. And as luck would have it, it didn’t connect to the AUX amplifier input, Pioneer mvh-150ub
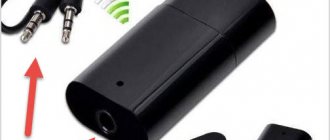
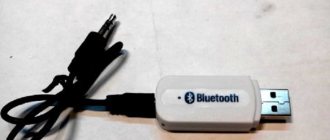
I also had a speaker, with a radio and mp3 player and a bluetooth audio profile, such a black cylinder. On the phone it was identified as TH-S10U
When it was working, it blinked with multi-colored lights and when switching modes, it was disgusting and, most importantly, it very loudly announced which mode it had switched to. Which in general didn’t interfere with watching YouTube videos?
But something just happened to the speaker, a magical flight. Of course, not like Gagarin, but she didn’t survive him. An autopsy showed the failure of one internal organ, namely, the battery fell off. A trifle in general, but the methods of resuscitation, or rather the attempt to solder it back, led to a very interesting result.
Apparently, inside the energy source, from heating with a soldering iron, a short circuit occurred. The source hissed slightly and even became very hot.
So, in order to avoid increasing troubles, the battery was placed under a layer of water, because observing giblets and alkali flying around the kitchen was not part of my plans that day
And so a bluetooth audio donor was found for the Pioneer mvh-150ub. And it should be noted (and how timely!) something bad happened to this Pioneer: the USB connector for the flash drive with music was damaged.
And on this site there was a description
there was a diagram of where to solder the wires to the panel connector
And continuing my research, I also found where on this block the contacts from the AUX input are located. A slight hitch arose from the fact that the bluetooth speaker had only one speaker
and therefore it sounded in monophonic mode. But the cunning Chinese also installed a mono amplifier in it!
Well, okay for a movie it will work that way. So that the sound in the speakers is still in both. the signal from the bluetooth module is supplied through a capacitor and 1 kohm resistors to the inputs of both channels, and these are the first two contacts of the panel block. Solder the capacitor to any wire that previously went to the speaker speaker
Power for the device is taken from the front panel connector, as suggested by the diagram previously published here www.drive2.ru/l/7729325/ and soldered to the micro USB connector of the Bluetooth speakers
Power is supplied to the Bluetooth module only when the front panel is installed on the radio (as they are also called) Pioneer. And so that the settings, volume and mode do not go wrong, I still had to install a battery from an old cell phone on the Bluetooth device. Subsequently it was turned off as unnecessary, but it was preserved in the photos
A hole was made from the bottom of the metal body of the pioneer to provide access to the mode knob of the younger player
When there is no signal from the Bluetooth sound source and the added volume on the Pioneer, extraneous squeaks are heard, but with the appearance of normal sound they are not heard
Before all these manipulations, it was planned to use another Bluetooth player
paired with an amplifier
But the Pioneer mvh-150ub has one undeniable advantage: When using a USB flash drive, you can flip through not only tracks but also folders. I have never seen such a service before
Source
Radio in the car
Stations in the radio can be tuned in three ways. Depending on the model, 18 or more stations can be memorized.
Method one is the easiest
- Knowing the frequency of the station, briefly press the left and right buttons to dial it on the display.
- Then hold one of the six buttons (1–6) below the display. The dialed station will be stored in memory, and a corresponding indication will appear on the screen in the form of a number repeating the button number.
- Dial the next frequency and press the next free button.
- Wait for indication on the display.
This is repeated 6 times - for six different stations.
Method two
- While in receiver mode, hold down the right button for one second.
- The radio will begin searching for a station.
- Having found the first one, it will go into playback mode.
- If you are satisfied with the station, save it by pressing the buttons below the display.
- Then repeat steps 1–4 to select further stations
Storing the station and selecting banks is the same as in the first option.
Method three
- From the main menu you go to the functions menu.
- Scrolling through it, you find the BSM parameter.
- Select by pressing the up or right arrow.
- They wait for a while.
- The radio will check the entire range, find stations and arrange them according to signal strength.
- Then it will play the first one.
- You can save stations in the same way as in other methods. You can scroll through the selected ones by single short presses of the buttons under the display.
There is one thing about this method - not all domestic radio stations are included in the list of those found for various reasons. If you have gone through the entire list, but have not found the desired station, you can proceed as follows:
Exit to the main menu of the radio receiver (exit is carried out in the same way as to the main menu of the entire device - see above). Having looked through it with the volume knob, they find an inscription like FM:... Instead of dots there will be some numbers, usually 100. After playing with the left and right buttons, select FM:50 and confirm the choice. After exiting the menu, start the search again. Since the frequency step has just been halved, you need to be patient here. Maybe this option will find the right station.
You can experiment with the search step, but if there is still no station, it will be faster to select it using the first of the described methods.
About Wi-fi and more...
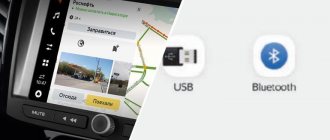
Yes, radios can be connected to Wi-fi. To do this, you need a built-in Wireless interface (REALTEK 8188EUS moodle, for example). If there is a built-in wireless data transfer interface, the user will be able to connect to the Internet by distributing a Wi-Fi connection from a smartphone, or by gaining access to the nearest point (for example, near McDonnalds).
You can also use special adapters, of which there are a lot. They use any USB input in the car and “distribute” a Wi-fi point. Such devices hold a charge for about 4-5 hours. Here you can read about a method that will explain how to connect a modem to a radio on Android.
- We buy an adapter on Aliexpress or ebay;
- We connect it to the USB input (cigarette lighter turned into USB or the output on the front panel of the radio itself);
- Turn on the modem and wait until the device operation indicator lights up;
- On the car radio, turn on the search for a wireless network and look for an adapter;
- After finding the adapter, you need to enter the password (standardly it is 12345678, if it doesn’t work, look at the instructions for the modem) and connect to it;
- We use the Internet.
Further in the article, the reader will be able to find information on how else you can connect the Internet to the radio on Android.
Method using a 3G modem
To implement this method you will need:
- Actually 3G or 4G modem;
- USB input available.
Sometimes difficulties arise with modems; they do not want to perform their functions. This is possible with the new 4G modem from Megafon, and old modems from Huawei or ZTE work perfectly in such conditions.
- And again the instructions:
- First you need to find the USB input from the radio;
- Then connect the modem to the Android head unit;
- After this, you should go to the radio settings and enter the necessary information on the telecom operator.
Example: MTS; APN:internet.mts.ru; Login: mts; Password: mts. The setup is complete. Now you can use the Internet, Yandex and Google maps and other applications that require an Internet connection.
We can only hope that after reading this article, users of Android radios will not have any difficulties connecting to the Internet or smartphone. The main options have been discussed here, although each car radio requires an individual approach.
If not, write the phone and radio model in the comments. We will try to help.
I have an htc one, and there is a radio in the car, with USB, aux, bluetooth, etc., is it possible to connect my phone via USB to the radio? I can't connect. Are there any instructions specifically for this model?
Tell me, if the Pioneer PI 803 NEW GPS has a USB output on the front side, then only the music and video flash drive is connected to it? Or you can connect a mobile phone. telephone? In the radio menu there is a phone connection service. When I connect via BT, this connection service does not work. The answer is that no connected devices were found, although the VT works fine, music and phone. I don’t understand what kind of connection service this is and how to use it. Maybe via USB? But I'm afraid to connect without consultation.
Pioneer AVH-X1500DVD radio, Samsung Galaxy A5 phone 2015. Honda Fit car, with built-in USB output from the glove compartment
Download the pioneer application in the play market, and you will be happy. I also tried to connect it as a USB drive, it didn’t work - error 19, but it started playing through the application. Pioneer MVH 180ui radio. And in the radio settings you need to select system * android * application control
On the trumpet, Phillips could not put his music on either the alarm clock, the sys, or the call. And I also didn’t see the radio on USB. So, there it was necessary to create a folder in the root (I don’t remember the name) and then the alarm clock, SMS, call folders, in English. Reboot and everything worked. And I started seeing the mafon after I created the music folder and added muses there. And here you are writing some kind of heresy. And now mafon doesn’t want to see my other pipe at all..... Who would write something sensible....
help me how to connect the drive to 2 din with android 7.1
AVH 8600BT 2DIN SAMSUNG J3 WHEN THE APPS MENU IS ON THE BALALAYKA, THE APPS MENU DOES NOT RESPOND.
Please write how you can play mp3 music from a Huawei Mate 10 smartphone on a Kenwood kdc-w7534u car radio. There is a USB on the car radio, perhaps this is possible, but I don’t know how to set it up correctly. It plays from a flash drive via a USB cable immediately as soon as I select USB in the car radio menu. But I didn’t understand how to do it from a smartphone. Help me please.
Hello everyone, please tell me I have an AVİC MRZ007 question: what kind of cables are needed?
Samsung galaxy j3 2006 phone with android5.1.1. Philips cem 2101g/51 radio. When you connect the phone to the radio, the first one emits a beep and lights up the charge level indicator. It does not show any connection type items.
In modern vehicles it is difficult to imagine the absence of a car radio or other device that produces sound. But product manufacturers do not limit the functions of their devices to this. The Japanese company Pioneer connects the car radio to the linear input, providing the ability to connect many devices from external sound sources. The article suggests learning how to properly connect a Pioneer car radio in order to expand its capabilities.
Setting up the subwoofer mode
To configure the mode, we will have to work with the preliminary settings, which Pioneer, fortunately, has available. Finding yourself in the menu for these settings is easy. To do this, you need to turn off the radio and then press the power button (top left) and hold it in that position until the display lights up. Fired up? That's all, now you are in the preliminary settings menu. As a digression, let's say that almost all the options discussed below have always been on such radios, with the difference that these settings were entered differently. This is either holding the joystick in a recessed position, or holding the “function” button. But at the same time, the radio must be turned off - otherwise you cannot enter the preliminary menu. Let's move on. So, here is a list of preliminary settings. Turn the knob to find out what options are available. There you can see the language settings, search for radio stations, enable additional inputs, etc. But you need to find the name SW Control. To find this name, turn the knob. Found it? Very good. Next, press the joystick and look at the screen. The inscription REAR SP FUL should pop up on it, which will inform you that all the sound is going to the rear speakers, and we need the system to enter subwoofer mode. Turn the knob further until FUL changes to SW. Leave it like that. The preliminary settings are all done. Now turn on the radio by pressing the power button
As soon as the sound appears, you will immediately notice that the rear speakers cannot be heard at all. Don't be alarmed because this is completely normal. After all, using the preliminary settings, you just entered the rear speakers into the desired mode, and now you still have to configure them. Go to “Audio” again, fortunately now you already know how to do this
In this menu, rotate the joystick to find SW SETTING1. After this, press the joystick briefly, and as a result you will see the SW item on the left side of the display, and as many as three items may appear on the right side: NORMAL, REV and OFF. Well, with OFF everything is clear - this is turning off the mode. You will not need this function for settings. But the NORMAL command means that the speakers operate in normal mode with the diffuser working upward. The inscription REV means that the speakers operate in reverse mode with the diffuser working downwards. Rotate the handle to stop at any of these modes. By the way, experienced car enthusiasts know that the reverse mode is best suited for sedan-type cars. After you have launched the selected mode, turn the joystick to the left and exit the settings. Now turn the joystick to find the SW SETTING2 menu. You will find it by turning the handle to the right. This will be the next menu that you have to work with. Press down the joystick and thus light up SW 80 HZ 0 on the display. Let’s give the explanation: 80 – frequency filter. That is, this is the frequency that goes to the speakers. If you have an oval shape, then the frequency range can be limited to 50 hertz. With this cut, you get a nice rich bass in sub mode. But if something doesn’t suit you, then here you can experiment with different options. By turning the knob to the right, you will find the mode power level indicators from -6 to +6. Using the verification method, select the indicator at which there will be no distortion on the speakers. That's all. Setting up the subwoofer mode is complete. Exit the menu using the same BAND button. After this, monitor the rear at different volume levels and adjust the sound power if necessary.
6) Select your car's speakerphone from the list of detected Bluetooth devices
After the phone has detected the hands-free system of your car, on the device screen you will find a “Hands Free” system or the like in the list of detected equipment available for connection.
In our example, the phone detected the “Hands Free” system of the Toyota Camry. After this, in our example, you had to click on the “Hands Free” inscription to begin the process of connecting the phone and the car.
Once you select the device you want to pair on the phone screen (or after the infotainment system detects your phone), you must enter a password (PIN) on your phone to pair the devices.
As a rule, all cars equipped with a speakerphone or a system for listening to music from wireless devices come with a password generation system for pairing the car with a phone.
If your car is equipped with an infotainment system screen, then after the devices find each other, a password should be displayed on the car screen, which you must enter on your mobile phone to finally pair the devices.
If your car is not equipped with a screen, but has a hands-free option, then refer to the vehicle manual, which should indicate what password you need to enter to connect the phone to the car.
For example, many cars often use simple passwords set to , “1111”, etc.
You can also set a password manually if you search for devices directly from your phone.
Methods for connecting a car radio
For a VAZ 2110 car, in order to reduce the price, connections can be made not to the ignition switch, but to the fifth contact on the BSK block according to the diagram below.
Connecting a car radio in a VAZ 2110 car
But, with this scheme, there are also some disadvantages. For example, power consumption increases when the ignition is on, and for a passenger, if he wants to listen to music, the key must be left in the ignition. You can get away from this by twisting the yellow and red wires together and connecting them to a permanent positive. Then the operation of the Pioneer car radio will not depend on the ignition, but there will be a constant current consumption, which can lead to a discharge of the battery if the car is parked for a long time.
It would be more correct to connect the radio in other ways
First option:
An on/off button is inserted into the cut of the red wire and the product is connected through it. In this case, the radio can always work, and if necessary, simply press the off button. supply of current to the device.
Second option:
The switch button is inserted after ignition between the constant plus. The hazard warning button is used so that you can switch the power mode of the car radio:
- When you press the button, the radio is powered through a constant plus.
- The button is released - power is supplied from the ignition through the plus.
An example of such a connection diagram:
- Car radio illumination wire to the cigarette lighter illumination wire.
- After ignition, a “plus” is inserted from the clock block, this is the orange wire.
- Plus constant from the cigarette lighter or ABK.
- From the cigarette lighter minus ground.
Third option: This is a simple circuit according to which the plus will be supplied and automatically disconnected from the alarm. If there is a two-wire solenoid in the car, with opening and closing operation, changing the polarity for each operation, it works like this:
- from the solenoid to relay P1, a positive pulse is supplied when the doors are opened, the relay is activated and actually goes into self-retrieving mode, power from the battery is provided through relay P2 and the terminals of its contacts, and the radio is connected to the power supply;
- during closing, with a positive impulse, relay P2 will operate, the power supply circuit of the radio and relay P1 will break, the car radio will turn off, the relay will be de-energized.
The disadvantage of the circuit is the increased power consumption, due to the power supply of the additional relay P1, it always remains on with the radio running. You can see in the video how to take into account all the details and correctly connect the car radio.
Types of devices
Signal transmission from the phone to the standard radio can be organized in several ways, each of which has its own type of device. Each option has its own strengths and weaknesses, knowing which anyone can choose a Bluetooth adapter for their car that suits them.
FM transmitter
The FM transmitter is quite popular among motorists in Russia, despite many shortcomings. It is a device that is inserted into the cigarette lighter to play music from the radio or receive calls from the phone. Since the transmitter is powered through the cigarette lighter, it will be busy all the time. And this is not the only drawback of the FM transmitter.
The transmitter itself is quite large and rarely looks neat, so many people consider it not aesthetically pleasing. But the main disadvantage can be considered the possibility of crossing FM waves. Cars in the next row may accidentally (or deliberately) listen to the same wave by tuning into it through their car radio. And if there are 2 cars nearby that use similar devices and try to listen to the same wave, then interference, hissing occurs, and the sound disappears.
Ordering an FM transmitter on the Internet is not the best idea, since manufacturers often send models with limited functions, for example, they can be used for talking while driving, but you will not be able to connect audio files from your phone.
The popularity of transmitters is due to their low cost and wide distribution. You can buy such a device at almost every gas station and in all auto supply stores.
bluetooth flash
Bluetooth flash is externally indistinguishable from a conventional flash drive. It is designed to be connected via a USB port and allows data transfer via Bluetooth. The device has a limited amount of internal memory, like a simple flash card. Information from external devices is loaded there. The car radio reads this information as if a simple flash drive is connected to it.
The advantages of such a device:
- low cost;
- small size;
- wide range of colors and designs;
- ability to connect to any player with a USB port.
- Average connection quality, possible loss or stuttering of sound;
- some radios completely refuse to read such devices;
- If the car owner uses a USB charger for the phone, then he will have to buy an adapter from the cigarette lighter for USB to the car.
This adapter option is best suited for those who do not have an audio input in their car radio. It is recommended to give preference to models with a built-in receiver, which will improve the sound quality.
How to install a Pioneer radio
So, the choice fell in favor of the Pioneer car radio. It is worth noting that such audio systems have gained enviable popularity among our compatriots, largely due to their good technical performance and ease of installation.
The presented radio tape recorder meets all the requirements and standards for modern audio systems.
Let us consider in more detail all the features of self-installation of a radio in a car.
Wire marking
In order to simplify the installation of any electrical equipment, the insulation of the wires is painted in a certain color. Thus, each color corresponds to specific functional features of underwater pipelines.
When connecting the radio, you must first of all follow the connection diagram included in the kit.
In addition, the Pioneer radio usually includes 2 contact plugs, commonly referred to as “chips”. Each chip contains 4 pairs of contacts.
One of the chips is designed to supply power, the other is used to connect the speaker system. If the so-called “trick” is missing, do not despair. It can always be purchased at any auto store.
Before you begin directly connecting the radio to the car network, you need to understand the purpose of each wire.
For the most part, the color range of the underwater lines of the radio is limited to the following colors:
The red wire is usually referred to as the power line that supplies voltage to the radio when the ignition is on.
The blue insulation indicates the positive terminal going to the receiver antenna.
The yellow terminal is the power terminal, supplying voltage directly from the battery through the fuse.
Black color indicates a mass hatch.
All other wires, depending on the type of radio, are responsible for powering the speakers. Purple, white, black and green are all feed lines.
A similar color of wires with a black stripe indicates that this wire is negative.
Connection diagram
Connecting the radio yourself should not cause serious difficulties. It is enough to be guided by the diagram presented below and adhere to a number of instructions and recommendations.
Despite the ease of installation, so-called emergency situations often arise when it is not possible to understand the location of the corresponding contacts on the radio plug.
In such cases, it would be most advisable to refer to the visual diagram of the Pioneer plug, where all contacts are sequentially indicated. Each digital pin designation on the diagram corresponds to the color shade of a specific wire.
It is important to remember that when fixing the wires, care must be taken to ensure they are properly insulated. Adjacent wires must not touch each other with conductive surfaces
Working with 2 din car radios
The process is similar, but there are a few nuances.
It is advisable to install such radios on battery power, as this will make it possible to use it at full power and reduce interference. It is not recommended to connect the device to the cigarette lighter or ignition switch.
- If the car does not have standard wiring from the battery, you will need a copper stranded wire with a cross-section of approximately 4.2 mm 2. Those that come with the radio are not suitable - they are test ones and do not have a sufficient cross-section. The length of the wire should be equal to the distance from the installation site of the radio to the battery. Install a 20 amp fuse at a distance of approximately 50 cm from the battery.
- You cannot twist the wire for a 2 din car radio - this will lead to interference and loss of power.
- The wires are connected to the batteries only at the final stage, when everything is assembled and insulated.
Check your equipment for Bluetooth compatibility
To use your mobile phone in a car using a hands-free system, you need to:
- – Bluetooth enabled cell phone
- – Infotainment system or car audio system with Bluetooth support
- – PIN number for infotainment or audio system
In addition, when connecting a phone in a car, it is useful to have the following things:
- – Car phone mount
- – 12 volt charger for cell phone
Malfunctions and their elimination
The list of the most common problems includes the following.
Pioneer car radio does not turn on. If the head unit does not work, there may be several reasons (a fuse has burned out, the wiring has failed, the acoustic equipment has broken down). In any of these options, it is better to contact a specialized center. There they will carry out diagnostics and determine the exact reason why the power button on the car radio goes out.
The radio does not turn off completely. This may be caused by poor grounding. Difficulties in disconnecting also occur if the device does not fit tightly to the socket. In this case, it is enough to securely fasten the device and the problem will be resolved.
Problems connecting your phone to your car stereo
- The radio does not “see” the smartphone when connected via AUX. A headphone icon appears in the corner of the phone screen for a second and then disappears; sound is reproduced only through the speakers of portable equipment; music sounds both from the phone and from the radio speakers. In order to solve this problem you need to: download special applications, like SoundAbout, which make it possible to choose the “direction” of sound to the cable or headphones. You can also buy a 3.5 mm Jack double. One of its sockets connects to a smartphone, the second to an audio device. True, this will reduce the volume.
- The smartphone does not “see” the radio via Bluetooth. Bluetooth is turned on on both devices, but the phone cannot find the audio device. Most likely the problem is in the settings. One of the devices may be using an outdated Bluetooth protocol. In order to solve this problem you need to: Check the protocols. Explore the settings. Be sure to turn on the “Available to everyone” option. In some cases, updating the head unit firmware helps. An exotic option that can be used by owners of some JWC radios is to remove the terminal from the battery for 30 minutes, then connect it again.
- No USB connection. When connected via a USB port, nothing happens, or the smartphone is charging, but the radio does not “see” it. The problem is almost always a damaged cable or broken port. It is also possible that you have not enabled the Data Transfer function on your smartphone. Try a different cable. If everything is fine with it, go to the USB settings on your phone and check if the connection is allowed.
Direct connection
So, if you properly understand the connectors and wiring, it will be difficult to make a mistake. Everything should be clear here: take the connector and connect it to the answer. But people love complexity and choose a labor-intensive procedure. Disconnect the wiring from the detachable plugs and connect it, guided by the functionality of the wiring.
Radio chip diagram
In all interiors, there are places for mounting a radio on the consoles or on the instrument panels. In some cars, such places are hidden under a decorative panel. And, before you begin installing the car radio, the panel should be removed by unscrewing it with a screwdriver.
You will get a compartment. From it you need to remove the mating wires, which are necessary to connect the Pioneer car radio to the system. After this, connect the wires or connectors as shown in the photo of the diagram. And only now should the Pioneer be installed in the lot, in its seat.
The best versions of car radios with a sound processor from Pioneer, Alpine, Kenwood
The most technically advanced models of car radios are produced by three companies that occupy leading positions in the market. We are talking about Pioneer, Kenwood and Alpine. These brands are preferred by professional audio enthusiasts, since each of the proposed modifications has excellent sound characteristics. Look at the photo to see how the described car radios look in design, this will help you make your choice.
Pioneer car radio
Pioneer, Alpine and Kenwood models use a sound processor to adjust the distorted sound stage in the car interior. JVC also has interesting offers. With such an audio model, you can finely control the sound stage by adjusting the sound output parameters.
If you have questions about how to set up the same Alpine, it is better to contact an experienced technician and only over time do this work yourself. It is better to do this at a dealership of the same JVC, Alpine and Kenwood. Setup is quite expensive, but affordable. In this case, you can get 100% results. You can find a list of available models in the relevant sections.
Alpine processor radio
5 processor radios with an affordable price (list of models) that are worth buying, setting up and learning how to use all the features:
- Kenwood KDC-BT53U, the cost of this version is about $200 for the 1din version;
- Pioneer MVH 580BT, in the same form factor the cost will be slightly less than the previous version;
- The pioneer DEH 5900BT is another high-tech audio system that supports video display and synchronization with Apple devices. Pioneer makes affordable, professional-grade devices that go beyond 2 din;
- Alpine UTE92BT is fully compatible with the modern familiar set of functions, supports screens, and is not inferior in class to touch media systems. Synchronizes, without requiring you to configure anything, with mobile devices that support connection parameters, that is, it duplicates the functionality of a 2 din car radio;
- Alpine CDA-9887R is a car stereo with professional sound.
Kenwood KDC-BT53U
The advantages include a digital processor. There is support and synchronization with iPhone, iPod, including wireless BlueTooth. The device has a built-in amplifier with 50 W channels (4 channels), a subwoofer, and an amplifier cutoff frequency and balance control. In addition to disks, it also supports music search, etc. Despite the relatively outdated form factor, in terms of its total functions in the 1din format it surpasses its eminent counterparts.
Kenwood KDC-BT53U
Pioneer MVH 580BT
The Pioneer processor radio is one of the best and most cost-effective, not only in professional performance. It is a fully professional version with a progressive sound processor and is in great demand among drivers who are well versed in this topic. The set of characteristics guarantees the highest possible sound quality, there is a low-pass filter and a 12-band graphic equalizer.
Pioneer MVH 580BT
Alpine UTE92BT
In addition to the listed set of features, which are best read in the specifications, the audio device supports saving settings and sharing with other users. Alpine processor radios can be purchased for an average of $200. They are more expensive, but in some cases they are superior in elemental base to Pioneer processor radios.
Alpine UTE92BT
To understand the parameters of media centers for beginners, it is worth contacting a service bureau for professional setup, as well as resources that describe in detail the functionality of car radios with a sound processor.
Transmitters
Another way to connect a phone with a radio is through transmitters, that is, transmitters. There are many types of transmitters, but we will consider only a few.
FM transmitter for mobile phones
The FM transmitter is quite interesting in its essence and easy to use. The principle of its operation is simple: it transforms the data received from the phone into FM radio waves and transmits it to the radio receiver of the radio. Externally, the transmitter is a small device that plugs into the AUX connector of the phone.
After connecting, we launch the player on the phone, and on the transmitter we set the desired wave for broadcast. Then you just need to turn on the receiver on the radio and detect this FM wave - and now music from your mobile phone is already playing from your speakers.
This connection is wireless, and this is already convenient. The transmitter is capable of interacting with absolutely any radio that has a radio receiver. The disadvantage of such a transmitter is low sound quality (radio interference). This is noticeable in cases where the device is inexpensive. You can only manage tracks from your phone.
Bluetooth transmitter
To connect such a transmitter to a radio, you will need an AUX connector on the radio, since the transmitter will be connected to it. As soon as you connect to the radio, launch the player on your phone and set the music signal to be broadcast to a Bluetooth headset, the role of which is played by the transmitter.
Other types of such transmitters can even provide the opportunity to conduct negotiations. For these purposes they have a microphone. However, it is not recommended to use transmitters for communication, since the quality of their reception leaves much to be desired.
Bluetooth devices transmit sound in higher quality than FM transmitters, but they also drain the battery much faster. To prevent your phone from completely discharging, purchase a special charger that runs from the cigarette lighter.
Video: “deep” settings menu + disabling DEMO mode + disabling time
Turn off the demo
To disable the demo mode, turn off the car radio, and then turn it on again by long pressing the SRC button (maybe the SOURCE button), after which we get to the start settings menu, where using the joystick or the right-left buttons we find the DEMO ON sub-item, and then change it parameter to OFF.
How to adjust the bass
To adjust the bass level, you need to switch the rear speakers to subwoofer mode, which is described in detail in subparagraph 1. Also, to obtain richer bass, correct adjustment of low frequencies through the equalizer, as well as activation of the BASS BOOST function, which is disabled by default, can help. To do this, turn off and then turn on the radio using the SRC (SOURCE) button, and go to the preset menu, where we look for the BASS BOOST sub-item, after which we activate it.
Depending on the Pioneer audio recorder used in the car, there may be other parameters, which you can familiarize yourself with by carefully reading the instructions for the device, which is included in the kit or can be downloaded via the Internet.
Sound settings
On Pioneer you can adjust the sound settings based on several parameters:
- high frequencies;
- low frequencies;
- mid frequencies;
- balance between left and right speakers;
- balance between the front and rear sides.
You can also configure your Pioneer radio for a subwoofer if there is an output for it.
Connecting a subwoofer
Connecting the active subwoofer and amplifier to the Pioneer radio is carried out through the rear outputs, if available, after which the audio device is configured to work with the subwoofer. You can connect the subwoofer via a crossover to the front or rear speakers.
Switching the operating mode of the rear speakers when connecting a subwoofer to their outputs is carried out in the special settings menu. You must select the SW Control parameter and set its value to SW. Then you should turn on the radio and make additional settings for the subwoofer. You can select forward or reverse phasing, low-pass filter, and overall woofer power.
Equalizer
Some Pioneer radio models have an equalizer that allows you to achieve the desired sound quality through finer adjustments across frequency bands. You can set the gain and width for each of them. There are several equalizer presets stored in the non-volatile memory of the radio, in contrast to user-specified parameters that are reset when the power is turned off or demo mode is turned on.
High pass filter
This sound control option is present in older Pioneer radios. To adjust the treble tone, press the Audio button until Tre appears on the display. This setting can be changed by turning the volume knob or pressing the up and down buttons. If the radio is equipped with an equalizer, then the frequency band above 5 kHz should be adjusted.
Low pass filter
You can adjust the sound at low frequencies using an equalizer or tone control, or using the loudness function. The latter is turned on and off by a button located on the front panel of the device. Through the settings menu, you can adjust the degree of loudness compensation so that a properly configured radio provides high-quality and undistorted sound.
bluetooth adapter
Designed only for radios that have a Bluetooth function, but do not have a standard adapter installed. It is required to be selected individually for each radio model and is a small unit connected to the audio system. Most models have a USB input, AUX, a memory card slot and built-in memory, which expands its functionality and allows you to use it not only for Bluetooth communications, but also as a storage for data and music.
Bottom line: to connect a smartphone on the Android or iOS operating system to a car audio system, no special knowledge is required - just pair it once, and in the future there will be no problems with the connection.
This will allow you to play music from your phone or use the hands-free system, which will provide additional safety for the driver and passengers.