Many car owners prefer to be accompanied by high-quality music on the road. To do this, they buy special devices that can improve the sound. Having installed the equipment, due to their ignorance, they are faced with the following problem: how to connect speakers through an amplifier in a car . How the audio devices are connected will determine the lifespan of the entire system, the overall enjoyment of listening to audio files, and ensure the smooth functioning of the components.
Connection diagram for an amplifier in a car
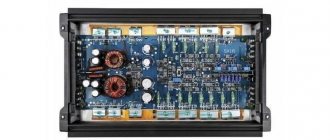
Connecting car speakers to the amplifier is carried out with copper stranded wires, which can be laid in the lower part of the car or on top under the decorative upholstery. The top connection is considered more reliable. The subwoofer is usually placed in the trunk of a car, so it should be securely mounted. The amplifier output is implemented in the form of screw terminals or via RCA connectors (Tulip). In the second case, it is better to purchase a ready-made set of connecting cables.
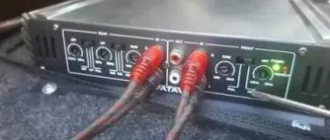
It is not difficult to connect a car amplifier to the radio, since its outputs and inputs of the amplifier are equipped with RCA connectors. The outputs of the left and right channels of the car radio are connected to similar input connectors of the terminal device. All screw connections should be tightened to maximum torque to ensure reliable contact when driving on any road. If you do everything correctly, according to the descriptions and drawings, then there will be no problems connecting a sound amplifier in the car.
Selecting wires to connect the amplifier
Now let's look at how to connect an amplifier in a car. Nowadays there are entire kits for connecting acoustics on sale. However, the quality of the wires in the kits is rather questionable. The best option is to purchase special speaker wires.
Important! Household wires are not suitable for connecting the speaker system.
For the rear and front speakers, a PVA cable with a cross-section of 2x2.5 mm is suitable, for high-frequency (tweeters) a wire with a cross-section of 2x1.5 mm is suitable, for a subwoofer 2x4 mm.
Important! Rule: the longer the conductor, the thicker it should be.
The amplifier is powered from the battery using wires of type KG-25 or 35.
Wires
On sale you can find ready-made sets of wires for amplifiers. They are usually made in China and are of low quality. If you are installing an amplifier for the first time, purchasing such a kit will be the best option for you. To achieve better sound quality, purchase wires separately.
You can connect the amplifier using ordinary stranded copper wires. Please note that single-core household wires will not suit you - only multi-core is needed. A wire marked PVA, sold in hardware stores, is suitable for connecting acoustic devices.
For rear and front speakers, buy a 2x2.5 PVS cable, and for tweeters, 2x1.5 is enough. The subwoofer requires thicker wires - 2x4 cross-section. The thickness depends on the length of the wires and the power of your speakers. The longer the wire, the thicker it should be.
Everything is similar with the power wires for connecting the amplifier. If your music is simple, a simple wire will do, which you can connect to the one that powers the radio, and the minus to the body of the car. This is not very correct, since losses in the form of deterioration in sound are possible.
The best option is to connect the power wires from the amplifier to the car battery. The wire should be chosen thick enough. For example, KG with a thickness of 25-35 is suitable. The longer the wire and the more powerful the acoustics, the thicker the wire you will need.
The positive wire must be connected through a bulb with a fuse, the rating of which will correspond to the fuse on the amplifier. Place the flask itself at a distance of no further than 30 cm from the battery.
To connect the power wire to the radio, you can use any single-core wire, as it will not have any effect on the sound of the acoustics.
In order not to buy KG and PVS wires for the amplifier, you can buy wires for cutting at an auto store. They are not of the best quality, but they are suitable for not very powerful audio systems.
If you find mounting kits with different wires on sale, choose the option with the thickest wires - this way you will achieve high sound quality and be able to connect several amplifiers to the power wires. Use power wires with a cross-section of 21 square meters or more. mm with a length of no more than five meters. The negative and positive wires must have equal cross-section.
Do-it-yourself installation of an amplifier in a car
And now about how to install the amplifier in the car.
- We fasten the amplifier with self-tapping screws or bolts in the selected location.
- The next step is to connect the amplifier to the radio. If the device is four-channel, then two interconnect wires are required, if it is two-channel, then one wire is needed.
- After this, the amplifier is connected to a power source. The mass can be found on the machine body.
- We connect the control wire.
- It is recommended to install a capacitor between the battery amplifier. It will prevent battery discharge and equipment failure.
- Then we connect all the speakers and the subwoofer to the device. When connecting, observe the polarity, and also ensure that the wires are securely fastened, as vibrations cause them to move away and contact is lost.
General view
Ratio between amplifier and speaker power
In the old days, a lot depended on the power of the amplifier, and buyers relied on this parameter when making their choice. The price of the acoustics also depended on the power of the amplifier (see How to connect an amplifier and subwoofer to a car radio: you are your own master), its quality. Technologies began to develop and power eventually ceased to be a fundamental criterion. Playback quality comes first.
Why do you need power?
Amplifier to speaker ratio
Below is information that will be useful for every connoisseur of good sound to know:
- The power of the amplifier directly affects the volume, but not only that. The device itself and its power cannot directly influence the volume of sound emitted by the speakers. And this component depends on the ratio of acoustics and amplifier.
- The acoustic component known to everyone today, called “sensitivity,” is measured in decibels and indicates what sound pressure a certain acoustic system can develop (at a distance of 1 meter from it).
- The usual sensitivity of modern speaker systems ranges from 83-105 decibels. A person during a quiet conversation emits a sound of 60 dB, loud rock music - 110 dB, but 120 dB or more already creates a real situation of complete loss of hearing for a person.
It is very important to measure the ratio of acoustics and amplifier at a distance of one meter, and not more or less. For example, a 3 W device paired with 105 dB acoustics will sound as loud as a 384 W amplifier with an acoustic sensitivity of 84 dB. When choosing this element of the system, you need to remember one more important rule: it must always have a power reserve. This will deprive the user of the inconvenient situation when it is necessary to turn the volume knob to the maximum, as a result of which, on some amplifiers, quite large sound distortions can be observed. If you imagine a rotator in the form of a clock (many modern devices do this), then a comfortable volume level should be achieved when rotating the rotary until 10-11 o’clock. All acoustic models can be divided into 2 large groups
This is a group where 4-ohm systems are collected and a group where 8-ohm systems are collected.
If you imagine a rotator in the form of a clock (many modern devices do this), then a comfortable volume level should be achieved when rotating the rotary until 10-11 o’clock. All acoustic models can be divided into 2 large groups. This is a group where 4-ohm systems are collected and a group where 8-ohm systems are collected.
Acoustics 6 ohm amplifier 8 ohm
For owners of 8-ohm acoustics, the ratio of parameters will not be particularly important. In this case, it is much better to concentrate your attention on the sound. On the contrary, those with 4-ohm systems would be wise to look at amplifiers that can double the power as the ohm drops. For example, such a device should output 100 W at 8 Ohms, and 200 W at 4 Ohms. At the same time, we must also not forget about the sound quality of the amplifier
Acoustics for marcantz amplifier
- Typically, 4-ohm acoustics are chosen by connoisseurs of bass and rhythmic music. When playing low frequencies, 8 ohm acoustics make the bass a little vague and indistinct.
- On the other hand, among amplifiers that do not double the power, there are much more devices worthy of attention in terms of build quality.
- All types of acoustics can also be divided into simple and complex, from the point of view of their relationship with the amplifier. This depends not only on the above factors, but also on such components as the size of the speakers, their design, etc. Complex types of speaker systems complicate the process of controlling the speakers for the device (see How to choose speakers for a car radio on your own). As you know, a good amplifier not only instantly sets the speaker cone in motion, but is also obliged to stop it when the signal stops.
Amplifier 8 ohm acoustics 6 ohm
Damping factor is the name given to an amplifier's ability to drive speaker cones. In more powerful devices, this parameter is usually better and has good current output.
In short, choosing the right amplifier is a real art.
What you need to connect speakers to an amplifier
To create a passive playback circuit complemented by a subwoofer, you will need a two-channel amplifier. When connecting a larger number of reproducing elements, it is worth selecting four-channel or even more advanced devices.
The connection of the speakers to the amplifier is realized using RCA or “tulip” speaker wires. These cables are colored red and white, so you can easily identify the desired channel.
Cable thickness is determined by the American Standard (AWG) index. The smaller it is, the thicker the wire. Thick wire has less resistance to current, which affects the sound quality and playback features.
speaker cable calculation table
For powerful amplifiers with low-impedance acoustics (4-6 Ohms), it is better to select thick 12 or 14 gauge cables. Moreover, the length of such wires can exceed 15 meters without loss of quality or sound distortion.
If the run length is less than 15 meters, 16 gauge wires designed to work with 8 ohm speakers will do. This approach seems to be economically feasible, and it is also easy to interact with the cable at the stage of installing the acoustics.
Sometimes you need to connect an amplifier to speakers without using special connectors. Here you will need to use a stripping tool. It is required to remove 1 cm of insulation at the end of the cable, twist the wire, and then connect it to the amplifier in a suitable way.
banana connector
A homemade banana connector seems to be a good option. Guarantees reliable contact with the receiver through a screw terminal built into the device. This connector can then be quickly connected or disconnected.
Multi-way speaker systems.
Speaker systems differ in the number of frequency bands into which the amplifier's output signal is divided.
In single-way speaker systems, the entire output of the amplifier is sent to one or more identical speakers.
In two and three-way speakers, the amplifier signal is separated using passive filters that are located inside the speaker housing. Such systems use dynamic heads designed to reproduce a certain audio frequency band.
Speakers are divided into four groups: high-frequency, mid-frequency, low-frequency and full-range. By their name you can guess what frequency range they reproduce.
There are also multi-band speaker systems that do not contain bandpass filters. Such systems require a signal already divided into bands corresponding to the sound heads. In such cases, multi-band amplifiers or external filters (crossovers) are usually used.
Setting up the amplifier
Traditionally, several settings are used.
The sensitivity on the amplifier is designated as Level, possibly Gain.
LowFrequency (LPF) – low pass filter. This adjustment allows you to cut off as much of the subwoofer's low frequencies as possible.
HighFrequency (HPF) – cuts off the low end of high frequencies. Designed to adjust high and mid frequency speakers.
Crossover or x-over is a switch between high and low pass filters.
- Turn the sensitivity to minimum.
- On the radio, set the volume to maximum or almost maximum. Until distortion begins to appear in the sound. Now we begin to rotate the sensitivity control on the amplifier until significant sound distortion is heard. Turn it to a slightly lower level and leave it.
- Reduce the volume on the radio.
This kind of simple theoretical knowledge will help you choose a good amplifier and correctly place it in the cabin.
How to connect
Connecting a two-channel amplifier using a bridge circuit is carried out in different ways depending on the radio, speakers and subwoofer used.
The connection method is also influenced by the number and characteristics of the components.
Radio tape recorder
The choice of the required method is determined by the connection diagram printed on the device label. Connecting the radio to a two-channel amplifier in bridging mode is carried out in the same way as to a standard one. There are 2 ways to transmit sound from the head unit.
In the first case, the connection is made using linear outputs. In the second case, the radio terminals intended for speakers are directly connected to the amplifier. If 2 amplifiers are used, then the linear output of the left channel is connected to the first, and the output of the right channel is connected to the second. The blue wire with a white stripe from the radio is connected to the input of the amplifier(s) power control relay.
Subwoofer
Before connecting a subwoofer to a two-channel amplifier, you should check its resistance. If the operating resistance of the amplifier is 4 ohms, then the subwoofer connected in bridging mode must have a resistance of 2 ohms. If these recommendations are not followed, the car audio system may become unstable.
To connect an amplifier to a subwoofer, connect its positive lead to the positive terminal of the left channel. The negative wire of the subwoofer is connected to the negative output of the right channel. As a result of this operation, the power of the sound reproduced by the subwoofer becomes higher. If you have a low-pass filter control, set the value from 100 to 250 Hz.
It is necessary to ensure that the speaker cones move in one direction. This provides the necessary sound quality at low frequencies. To carry out phasing, the subwoofers are connected in series.
After this, a AA battery is momentarily connected to the free wires. If the cones move in different directions, then the leads of one of the low-frequency loudspeakers change places. If it is necessary to connect both full-range speakers and a subwoofer, then a crossover is used for this.
Columns
Each bridged two-channel amplifier can only connect one speaker. It is worth considering that the sound of a car audio system in bridged mode will be monophonic due to channel combining. To get stereo sound in a car using the bridge method, there are several ways to connect 2 or more speakers to an amplifier.
One of them is to use another amplifier. Another is to connect the desired number of speakers in series to the bridged output. Full-range speakers are connected in the same way as a subwoofer. The high and low pass filter settings do not change. Thus, connecting a 2-channel amplifier via a bridge circuit will not cause any particular difficulties if the work is carried out correctly.
What is an amplifier for?
The sound quality will depend on how well the connection is made. There are various options for installing a stereo sound or audio system in a car. So:
- If you are not satisfied with the power of your car radio (see Compare car radios and choose the best) or the quality of the sound it produces, you can solve this issue with the help of an amplifier. Of course, this is not at all the same equipment that is used in sound systems that operate on a 220-volt power supply.
- There is only one battery in a car, and two in a truck or bus - 12V each. Amplifiers for cars are designed for such a low-power network. How do they increase the existing voltage?
- The fact is that a voltage converter is built into the car amplifier. Depending on the technical characteristics of a particular device, the converter, using a pulse, can increase the voltage from 12 to 100 volts. So, the amplifier independently provides itself with the required voltage.
Scheme development
The connection diagram depends on the number of amplifier inputs, the location and power of the speakers, and the presence or absence of a subwoofer.
Power amplifiers are:
- two-channel, designed to connect only a pair of speakers;
- four-, used to connect two speakers and a subwoofer or four (there is also a daisy chain connection scheme for four speakers and a subwoofer);
- six-, used for a standard connection of four pieces and a subwoofer.
It is also important to consider the rated power (W, W) and the resistance of all connected equipment (Ohm). They can be found either on device labels or in technical documents
The total connection resistance should not exceed the maximum permissible standard.
There are three ways to connect speakers to an amplifier.
- Sequentially—speakers of the same type are alternately connected to each other and then to the device.
- Parallel - performed by a polar connection directly to the outputs of the device, while their resistance and power may differ.
- Series-parallel - used in cases where it is necessary to connect two columns with the same resistance and additional ones with other parameters.
How to connect
If you expect to be told to connect only in parallel or only in series, you are in vain. The connection diagram is selected individually. There are two main points to take into account:
- Amplifier power.
- Amplifier load resistance.
Implementation of parallel connection
If you have an amplifier of a certain power and there are speakers suitable for it, this is good. But it happens that for the amplifier you need to select a load from several available speakers of different power. This is where you need to understand how to connect speakers in series, parallel or mixed so as not to exceed the parameters.
How to connect speakers - in series or in parallel? And so and so. Depends on what speakers you have. Or rather, with what power and resistance. What is also important is the output power of the channel and how many speakers you want to “hang” on each channel.
Determine the power and resistance of the speakers
It’s quite simple here, but we’ll still give a few examples. These markings are usually marked on the back of the case or basket. The photo shows the parameters of the speakers.
Designation of power and resistance on the speaker
Typically, long-term power is indicated, that is, the value at which the dynamic head is able to operate for a long time. At the same time, MAX POWER is indicated on the ALPHARD head - maximum power. This is peak power, its speaker can withstand, for example, a second.
On old domestic speakers the designations are slightly different. For example, in the figure below 2GDSH-3.
Designations on Soviet speakers
The first digit indicates the power of the product. Further, the head is dynamic broadband and its resistance is 8 ohms. So, we’ve sorted out some parameters, let’s move on.
Correct speaker connections
The peculiarity of connecting speakers is that they have positive and negative inputs. They need to be somehow connected to the inputs of the amplifier, and also somehow connected to each other.
Proper parallel and series connection of speakers
Connection
After studying the types and types, we move on to the question of how to connect a subwoofer to a car radio without an amplifier:
To start connecting an active subwoofer, first we find two inputs on the back panel of the car radio, then using a linear wire we connect the input of the head unit to the subwoofer input. Then we connect the power - to do this we stretch the power wire from the “plus” terminal of the battery to the subwoofer A “negative” » we connect the subwoofer and the battery with a wire. When connecting an active subwoofer to a car radio, it is necessary to install an additional (very important) component - a fuse. It should be installed near the battery itself. The installation diagram of a subwoofer without an amplifier is shown in the first picture of the article. When low-frequency sounds are played, the subwoofer's electrical power consumption increases significantly , as a result of this, the load on the elements supplying the on-board network of the machine increases. Therefore, for the safety of the power circuit, an additional capacitor is installed in the subwoofer power circuit
- After connecting the subwoofer to the car radio, we proceed to setting up our speaker system
- As a rule, the whole setup comes down to creating a limit for the upper limit of operation for the woofer, then choosing the correct oscillation phase for the speaker
Now, how to connect a subwoofer in a car without an amplifier, you usually have to completely redo the audio power system, so here is an approximate list of necessary purchases:
- 5 meters 8AWG power cable(red)
- 1 meter of cable 8 AWG black
- 5 meters of control cable (thin) with a cross section of 0.75 mm
- Fuse holder FH58
- 40 Amp fuse
- Interconnect cables
- 2 meters of tubing
- Terminals and ties
The circuit of the sound system is simple, so there is no point in describing it in full, see the first photo of this article:
- The fuse is placed 10-15 centimeters from the battery, throw the power cable into the tube
- All cables inside the cabin are laid under the carpet
Subwoofer terminals
How to connect a subwoofer in a car without an amplifier - see the designation of the outputs on the subwoofer:
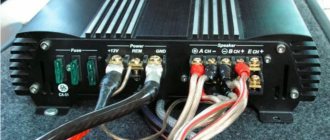
- +12V output is power (supplied only to the battery through a fuse)
- REM is the control wire, it comes from the radio, and connects to a blue/white wire (for Pioneer car radios, if you have a different one, then see the radio connection instructions), which usually sticks out of the bundle of wires coming from the radio
- The GND terminal is ground (negative wire)
- LOW INPUT contact (under tulips) - RCA wires are connected (to the subwoofer from the radio, if any)
- HI-INPUT contact - connect here if there are no RCA outputs on the radio
Now it’s clear how to connect a subwoofer to a car without an amplifier, all that remains is to wish you success in this matter; to better understand the topic, we recommend watching our training video.
Setup Instructions
The amplifier is configured in accordance with the recommendations set out in the operating instructions. To adjust the parameters, buttons and rotary switches are used, covered with a protective panel. Rotating correctors are recessed into the body, which reduces the likelihood of accidental position changes. To rotate the element, it is recommended to use a flat blade screwdriver.
A control diode of the power supply is installed on the equipment case; further adjustment of the device is allowed only when the green lamp is turned on. When using standard factory settings of the equipment, the sound picture is blurry. Adjusting the parameters allows you to highlight low and high frequencies, as well as reduce sound distortion.
Amplifier setup for four speakers without subwoofer
After completing the connection of the four-channel amplifier and checking the operation of the electrical circuits, you need to configure the acoustics according to the following method:
Setting up an amplifier for a subwoofer and speakers
The adjustment is made by analogy with the adjustment of a system with standard acoustics. To ensure an improved sound picture, it is recommended to relieve the speakers from broadcasting low frequencies. This action allows the diffuser stroke to be reduced and improves the reproduction of mid frequencies. The HPF corrector is used for adjustment; the position of the potentiometer is determined by the user by ear. Some car owners do not turn on the HPF adjustment due to distortion of the sound picture.
The use of bass boost for a subwoofer is not recommended since it affects the band above 40 Hz. When using a subwoofer with a bass reflex, the subsonic filter is turned on, which is adjusted to a frequency 2-5 Hz below the bass reflex value (indicated on the equipment).
Source
Stories from our readers
The advantages of the speakers include ease of installation - every car owner can connect the tweeters correctly. Holes are made in the door and body for rubber corrugation, which will prevent chafing and breaking of wires. Pull the acoustic wire into the corrugation using steel wire.
The location of the amplifier and equalizer on an additional shelf under the glove box allows you to minimize the length of the power cable.
Tools To connect the tweeters to the radio or crossover you will need: cable;. Subwoofers of the closed type, having a sealed housing closed Subwoofers of the bass reflex type vented, are characterized by the presence of a bass reflex - a slot or pipe that serves to adjust the frequency response in the low frequency region Subwoofers of the bandpass type - differ from the above in that the speaker itself is retracted inside the subwoofer housing, and the sound radiated through a bass reflex subwoofer with a passive radiator have an additional diffuser or speaker without a magnetic system, which serves to lower the overall resonant frequency of the loudspeaker.
Choosing a location Initially, you will need to decide on a location for the future speaker system. Another option is to route the wires using a crossover frequency filter. We strongly advise you to do this so that your passengers are not irritated by rattling plastic, which will react this way to loud music coming from the speakers.
Related article: How to restore electrical equipment on
To help car enthusiasts
It is enough to use the correct connecting cables and not make the wrong polarity when connecting. In order for the sound from both sides to be perceived at the same volume, you can use balancing to increase the sound volume of the right speakers. The driver of the car sits on the left, and is closer to the left speakers.
Bridged connection of amplifier channels is a connection in which 2 amplifier channels operate on 1 speaker. Compared to the previous class, the efficiency of this is almost 2 times higher, but high distortion in the output signal makes it rarely used. The photo shows a cross-section of a classic low-frequency electromagnetic loudspeaker.
There is one more problem. A subwoofer is a large-sized element, very labor-intensive to manufacture and install. First, let's look at the characteristics that are indicated in the passport.
These can be the following components: Amplifier Speaker systems Subwoofer This set of technical means allows you not only to increase the sound volume, but to significantly improve the quality of music playback. Rated electrical power is the power that the speaker can reproduce for a long time without distortion. How to connect an odd number of speakers
How to properly connect an amplifier in a car
There are three main problems related to the layout of automotive audio equipment. This is the wrong choice of connecting wires, their illiterate laying and poor-quality grounding, or rather the connection of equipment to the car body. Connecting the amplifier to the car must be done with wires of the appropriate cross-section. Any metal wire has a certain resistance. The thinner the wire, the higher its resistance, so you cannot install it with SHVVP wire, which is widely used in everyday life. Many companies produce copper-plated wire containing steel conductors coated with a thin layer of sputtered copper. It is unacceptable to use such wires to connect a car amplifier. This will not only greatly reduce the sound quality, but may also cause a fire. To work, you need to purchase special cables designed for such installation.
To understand how to connect an audio amplifier in a car
, you need to calculate the current in the circuit. To do this, you need to divide the amplifier power by the supply voltage. Since the device is powered by a car battery, the total power of the channels must be divided by 12 volts. A two-channel device with a power of 60 watts per channel has a total power of 120 watts. It is customary to increase the power by 1.5-2 times due to uneven consumption, so in this case a power of 240 watts is considered. 240 watts/12 volts = 20 amps. Based on this value, the wire cross-section is selected. The power of a four-channel system with a subwoofer reaches 800 watts or more, so all connecting cables must have the appropriate cross-section. The thin wire will heat up, which may cause a fire. When choosing a cable, it should be chosen with a reserve in terms of power and length. It is not recommended to wire the wires under tension. To reduce distortion, you often have to look for the correct position of the wires relative to each other. The diagram for connecting speakers through an amplifier in a car does not allow parallel laying of power cables and wires going to the speakers. This leads to interference in acoustic systems.
How to install
Before installing the device, it is important to familiarize yourself with some of the nuances on which the safety of the car and the effectiveness of the audio system depend.
Choosing an installation location
The choice of installation location for the device depends on several factors.
The amplifier gets very hot during operation, so it is important to choose a location where there is the best air circulation. It must not be mounted on its side, upside down, or under sheathing.
This will cause the device to overheat and, at best, stop working. The worst-case scenario is a fire. The further away from the radio it is installed, the greater the resistance will be. This will cause the speakers to sound a little quieter. The wiring must be laid under the interior trim, so it is important to take correct measurements taking into account turns. It should not be mounted on the subwoofer housing, as it does not tolerate large vibrations.
Where is the best place to install this audio system element? Here are four more common locations.
- In the front of the cabin. It depends on the car model. If there is free space under the dashboard and it will not interfere with the passenger. This location is considered optimal, as maximum sound purity is achieved (short signal cable length).
- Under the front passenger seat. There is good air circulation (cool air always spreads along the bottom) and free access to the device. If there is a large space under the seat, there is a possibility that rear seat passengers will push the device with their feet.
- Rear shelf. A good option for sedan and coupe bodies, because unlike hatchbacks it is motionless.
- In the trunk. This will be especially practical if you connect two amplifiers (one in the cabin and the other in the trunk).
Wires for connection
Some motorists mistakenly believe that the usual thin wires that come with the speakers are sufficient for the audio system. However, you will need a special cable to power the amplifier.
For example, a driver bought a device with a power of 200 W. To this indicator it is necessary to add 30 percent (losses at low efficiency). As a result, the power consumption of the amplifier will be 260 W. The cross-section of the power wire is calculated using the following formula: power divided by voltage (260/12). In this case, the cable must withstand a current of 21.6A.
Auto electricians advise purchasing wires with a small cross-section to prevent their insulation from melting due to heating. After such calculations, many are surprised how thick the wiring for the amplifier will be.
Fuse
A fuse must be present in any electrical circuit, especially if it carries a current with a large amperage. This is a fusible element that breaks the circuit when overheated. It will protect the car interior from fire due to a short circuit.
The fuse for such systems often looks like a glass barrel with a fusible metal core inside. Such modifications have a significant drawback. The contacts on them oxidize, causing the device to lose power.
More expensive fuse options are equipped with bolt clamps that secure the fuse plate. The contact in such a connection does not disappear due to constant vibrations during engine operation.
This protective element must be installed as close to the battery as possible - within 30 centimeters. Modifications that greatly exceed the wire capacity cannot be used. For example, if the cable can withstand a voltage of 30A, the fuse in this case should not exceed a value of 50A.
Interconnect cable
This is not the same as a power cable. The interconnect wire connects the audio outputs of the radio and amplifier. The main task of this element is to transmit an audio signal from a tape recorder to the input node of the amplifier without loss of quality.
Such a cable should always have strong insulation with full shielding and a thick central core. It should be purchased separately, since often a budget option is included with the device.
We select and buy all the materials and the amplifier itself
Purchasing equipment is an incredibly important step that will determine the quality of all work performed afterwards. If you give preference to an amplifier of unknown origin, which does not even have normal technical characteristics, there is a risk of ruining expensive acoustic equipment. The speakers simply may not be able to handle a bad signal.
When buying an amplifier, think about the actual power. As indications on the case, almost all manufacturers use an increased parameter, which is also present in the equipment, but only in potential terms. If the power in the technical data says 1000 Watts, then in reality such an amplifier delivers from 100 to 130 Watts. The following purchases are also important:
- if you buy acoustics, subwoofers, then take care of their maximum compatibility with the amplifier;
- you need to buy only the highest quality and most reliable wires - choose the most expensive options;
- It is better to solder and crimp all connectors using professional equipment, otherwise you will have to frequently repair the system;
- You should also think about purchasing special cable ducts for laying wires through the car;
- at specialized retail outlets you can find specific fastenings for such channels;
- if the sound system uses a subwoofer, you should also purchase a capacitor to connect in front of the amplifier;
- If you are buying an amplifier for a ready-made speaker system, select the most suitable option.
The main problems of motorists who independently install amplifiers and other automotive equipment are expressed in the incorrect selection of equipment. Only the superficial parameters of the acoustics, radio and amplifier are compared, and then the speakers unexpectedly break due to the supply of too much power.
Problems are also possible if the equipment is connected incorrectly. Mixed-up outputs or bad wiring can even cause the entire system to overheat and catch fire. Therefore, be as careful as possible when connecting the system and use professional advice. When choosing equipment, also take help from specialists in stores.
Parallel connection diagram
When connected in parallel, the load resistance drops and the output power increases in proportion to the number of speakers
Here you should pay attention to the maximum permissible load on the amplifier and the number of channels
Most models are designed for a load of 2 ohms, less often 1 ohm, but for high-quality sound and longevity of the equipment, it is advisable to create an optimal load for the device. So, for example, when connecting two speakers with R = 4 Ohms and two speakers with R = 8 Ohms to an amplifier with R = 8 Ohms, we get the permissible resistance of all speakers (4+4+8+8=24 - total; 24: 4=6 - total resistance per device).
- The negative channel of speaker 1 and speaker 2 is connected to the positive terminal of the device.
- Positive - to the negative contact of the same channel.
- All others are connected according to the same principle.
Daisy chaining of speakers
A daisy chain connection is when they are switched on one after the other, like carriages. If you look at the diagram, the wires are connected like this. We feed the minus from the output of the amplifier to the minus of speakers A, and the plus to the plus of loudspeaker B. And we connect their free inputs (plus at A and minus at B) to each other.
Connecting speakers in series: resistance adds up, output power drops
Please note that the impedance of the speaker chain increases. It is summed up from all components. In the example, two 2 Ohm speakers are connected in series. The total resistance is already 4 Ohms. This connection is good if the amplifier cannot operate with a low-impedance load. Low resistance is 2 ohms and below. In this case, either speakers with a higher resistance are connected, or low-impedance ones are connected in series.
How to connect three or more speakers in series
How to connect three speakers in series to one channel? Yes, everything is the same - one by one. Minus, apply to minus first (A); plus - to the plus of the third C (or last). We connect the free plus from element A to the minus of element B. Then we feed plus B to minus C. So we get a chain of three speakers connected to one channel.
How to connect 3 speakers to 1 channel in series
If you need to connect four or more fragments in series to one channel, simply insert them in the middle. Don't forget that circuit resistance adds up. With each new element in the chain it becomes larger.
Power in series connection
As the resistance increases, the output power will drop. How many watts will each speaker receive when connected in series? And you can count. There is a formula - it is in the picture.
Input power is the power that the amplifier will put into the channel, that is, what we are trying to calculate. The measured power is that indicated in the characteristics (what goes into the channel according to the passport data). And Zr is the resistance at which the power was measured. It is usually written in the characteristics as the minimum load on the channel. And the total resistance is the resistance of the speakers that you plan to “hang” on this channel.
Formula for calculating the actual power supplied to the amplifier channel
Let's apply the formula with an example. Let us have a 2-channel amplifier that outputs 100 W (2*100 W) to each channel. It cannot work with low-resistance loads (2 Ohms and below). Therefore, it was decided to connect two speakers with a resistance of 2 Ohms in series for each channel. We substitute the data into the formula: 100 W * (4 Ohm / 8 Ohm) = 100 W * 0.5 = 50 W. This is what will go into each channel.
The power of the speakers must be selected so that it is 10-20% higher than the power that will be received by it. In this case, any loudspeaker will work for a long time. And if you take the power “back to back”, then even the highest quality speaker will very soon wheeze and will need to be replaced .
Since there will be two loudspeakers on the channel with the same parameters, the channel power will be divided in half. So we get that each speaker will receive 25 watts. If you add the desired power reserve, you will have to look for speakers with a power of at least 30-35 W.
Amplifier or receiver?
A receiver is essentially the same amplifier, only improved. It contains a radio receiver and a device for decoding and distributing multi-channel signals of different standards. For watching movies, the receiver will be the best choice, although you can use a separate decoder and separate amplifiers for each channel
If the speakers will be used to listen to high-quality music, on which attention is concentrated more intensely, higher-quality equipment that creates less distortion may be required. Here the choice is based on financial capabilities and ear sensitivity - a standard system is quite enough
In order for all equipment to have an adequate cost, the price of the receiver should be no more than 100% of the cost of the speakers themselves.
Amplifier Vincent SV-700
List of required components
To begin with, let’s decide on a general list of parts, namely their name and function, and then give a recommendation for selection.
- Power wire. Supplies power from the battery to the amplifier. For a medium-sized sedan you will need 5 m of “plus” and 1 m of “minus”. You can get more accurate dimensions by measuring your car yourself.
- Bulb with fuse. An important component. Serves as protection in the event of a short circuit in the power cable.
- Terminals. Allows you to simplify the connection of power wires to the battery and car body. You will need 2 pcs. ring type. If the connection to the amplifier is on the blades, you will need 2 more pieces. fork type.
- Tulips and control wire. Transmits an audio signal from the radio to the amplifier. Can come complete with interconnect cables or be purchased separately.
- Speaker wire. Transfers an improved signal from the amplifier to the subwoofer. You will need 1-2 m. If you have an active subwoofer, this wire will not be needed.
- Additionally, a distributor may be needed if two amplifiers are installed.
Installation work
So let's begin. From the battery positive we extend the power wire to the amplifier. It is usually red. Before the amplifier, this cable must be broken by the same fuse that we mentioned above. Actually, you connect the power cable to the amplifier; Now let's worry about grounding. From the negative we extend the wire to the connector marked GRD on the amplifier body. If possible, route the two wires in different places and be sure to check their insulation for damage. This is a very critical moment. Let's proceed to the procedure of connecting, in fact, the radio to the amplifier. This is done with the same audio cable, which we should not have skimped on. It has a “tulip” connector at the ends, and on the amplifier we connect it to INPUT. As for the radio, depending on its model, the name of the connector may be different. The idea is that this should be the audio output from which the sound is supplied to the speakers. The amplifier is built into the car audio system circuit as an interceptor device through which the entire signal passes before reaching the end devices. To find out the exact name, read the instructions for your radio, where the manufacturer must clearly write which connector to use.
Connect the remote switch wire from the radio (usually blue) to the REM connector. Actually, this completes the connection to the standard radio of the amplifier as such. Now you connect speakers, speakers, a subwoofer, etc. to the amplifier. But! Never connect both speakers and a subwoofer to a two-channel amplifier at the same time! In the best case, the fuses will burn out, but in general, under such conditions, the amplifier is doomed to a quick, albeit very bright death. That's why we said that you should decide from the very beginning what you need an amplifier for.
Connecting the amplifier to the radio
Connecting the amplifier to the radio is quite simple. It connects with two types of cables: RCA interconnect and Remote.
Make all connections on a de-energized system (positive wire folded away from the battery)!
Interconnect cable
To avoid interference, lay acoustic and signal cables on the opposite side of the power cables; if intersection cannot be avoided, do it at a right angle.
Interblocks or RCA connect to the linear outputs of the radio and transmit the audio signal to the amplifier. Line outputs have a left and right channel (can be mono for a subwoofer), do not confuse them when connecting to an amplifier, so as not to disrupt the balance adjustment on the radio (left/right).
Remote
The minimum cross-section wiring that transmits the signal to turn on the amplifier when the radio is turned on is the same when it is turned off. Usually the radio has a separate wire for this; if it doesn’t exist, you can connect to the active antenna control or connect it to a permanent plus by installing a toggle switch to independently control the amplifier. It is highly not recommended to power it from a constant +12 directly - this way your amplifiers will be constantly on, which will be an unnecessary load.
Installation and connection steps
Most often, the amplifier is connected using wires directly to the battery. The external amplifier will be located in the trunk or interior of the car, and the wiring runs through the holes in the engine compartment. The wires must be well insulated with electrical tape.
The positive wire, almost always red, is connected to the positive terminal of the battery and plugged into the corresponding connector in the amplifier. And the negative wire, black, is connected to the body and inserted into the connector designated GND (GROUND). The remaining two sockets are used to connect the radio and signal cable. Almost all radios have outputs for connecting an amplifier and supplying sound to it.
For a four-channel amplifier, you need to use special adapters, and if the receiver does not have linear outputs, then the wire is laid directly to the speakers, where special inputs must be provided.
Another important factor when choosing the location of the amplifier is the distance from it to the acoustics. It is advisable to reduce it to a minimum so that the wires are as short as possible. In this case, the likelihood of interference occurring during music playback will be minimal. With the correct selection and installation of an external amplifier, you can significantly improve the quality of the sound reproduced by the radio, eliminate interference and increase the power of the radio.
To install the amplifier, be sure to choose only high-quality wires; they should not have any damage. Be sure to follow safety precautions while working. Before installing the amplifier, you must read the operating manual and the instructions for the car radio.
How to connect a sound amplifier in a car
Organizing four channels, crossovers and a subwoofer poses some difficulties. The abundance of connecting wires imposes certain installation requirements. To connect the amplifier to the speakers in the car, use standard sets of connecting cables, which can be purchased in specialized stores. Connecting four speaker systems is carried out according to a similar principle, since all the necessary markings are on the device body. The main thing is not to confuse the polarity of connecting the speakers. Many car enthusiasts equip the interior of their car with a subwoofer. This is a powerful speaker system that allows you to reproduce low frequencies in the range from 20 to 120 Hz. Most models allow the connection of a subwoofer. This output of the final stage is organized using a bridge circuit.
Proper connection of the amplifier in the car guarantees high quality sound reproduction without interference or distortion. When connecting car audio equipment, it is very important to select a grounding point.
All components of audio equipment must be grounded at one point in the body. Otherwise, ground loops may occur, causing severe noise. The correct option is to ground the audio equipment to the negative terminal of the battery or to the point where it connects to the car body. For grounding we use stranded copper wires. The grounding point “under the bolt” must be thoroughly cleaned of oxides and degreased. To connect wires, it is best to use gold-plated terminals and connectors. Such connection of the amplifier in the car will provide
the most reliable contact, which will not depend on vibration and shaking. The housings of all elements included in the sound reproduction system must be reliably isolated from the car body. The wires leading to the speaker systems should not be parallel to the power cables.
Step-by-step instructions for serial connection
In this embodiment, the resistance is summed up and calculated using the formula:
R1 - first speaker,
R2 - second speaker.
In this case, R1 must be equal to R2, otherwise the speaker system will quickly wear out and the expected sound effects will not live up to expectations. Using this scheme, you can connect as many speakers as you like, but their R value should not exceed the maximum permissible R of the amplifier. It is also worth considering that the more speakers are connected in series, the less sound power will be output.
- Negative 1 is connected to the positive channel of column 2.
- Positive 1 is connected to the negative terminal of the device.
- Negative 2 is connected to the positive output.
The serial connection of three or more speakers is carried out according to the same scheme, where each subsequent one is polarly connected to the previous one, and their outermost contacts are polarly connected to the terminal of the device.
Theory. Connection types
In electrical engineering there are two types of connections - series and parallel. With a series connection, the resistance is summed up; with a parallel connection, it becomes lower than the smallest of the connected ones. This is something worth remembering and will come in handy in order to connect your speakers correctly.
Basic formulas for parallel and serial connections
There is also a mixed connection. This is when serial chains and parallel connections are “mixed”. In this case, calculation formulas are used, gradually arriving at one of the “pure” circuits - parallel or sequential.
Mixed compound and its conversion to "simple"
The figure shows the sequential transformation of a complex mixed connection into a simple one.
How to properly connect speakers through an amplifier in a car
To prevent various kinds of interference from interfering with your music, you should connect the speaker connection system to the battery. To do this, you need a multi-core cable with a cross-section of 4 mm. The fuse is installed at a distance of half a meter from the battery.
The order in which the wires are connected cannot be ignored; first they are connected not to the radio, but to the speakers. Sound quality depends on insulation. Using silicone for this, you can be sure that it is able to protect the surface from cracks.
Care must be taken to ensure that the cable does not become tangled or twisted. To do this, the wires are laid under the threshold, in the door pillar, where they will be closed.
