I didn’t warn you, they drove you into the appropriate place - it’s your own fault. Moreover, you will have to pay not only for your car, but also for the restoration of the car that carried out the collision, since it is its owner who will be considered the injured party. And such a development of the situation in a city with heavy traffic is very likely.
Heavy traffic does not contribute to maintaining a distance of 5 m, as provided for in the traffic rules. Cars move one after another during rush hours: any carelessness can lead to an accident. Moreover, both warning lights may not work, or only one may fail - and in this case, you can consider yourself lucky, there is still a partial warning of the threat from behind. The brake lights on the VAZ 2109 do not light up for various reasons, from the most trivial to those requiring a thoughtful and more serious examination. Methods for identifying such a malfunction and ways to eliminate it are described in our article.
Brake lights (stop lights) do not work on VAZ 2108, 2109, 21099
Either two brake light bulbs (in two rear lights) or just one (in one rear light) may not light up at once. Let's look at the causes of this very common malfunction on VAZ 2108, 21081, 21083, 2109, 21091, 21093, 21099 cars.
Causes of the malfunction - brake lamps (stop lights) do not light up on VAZ 2108, 2109, 21099 cars and their modifications
— The fuse has blown
No. 6 for mounting block 17.3722, F3 for 2114. If it burns out, replace it with a new one. Subsequently, it will be necessary to find out the reason for the blown fuse, perhaps a small short circuit somewhere.
Fuse No. 6 for brake lights (stops) VAZ 2108, 2109, 21099 with mounting block 17.3722
— The contacts in the brake light lamp holders have oxidized
Rotate the lamp in the socket several times to knock off the oxidized layer. To enhance the effect, you can remove the bulbs and clean the contacts with sandpaper.
Contacts in the brake light socket on the rear light board (socket removed for clarity)
— The brake light bulbs in the headlight have burned out
In appearance, the lamp may appear to be in good working order. Two lamps can burn out at once. Therefore, we replace the non-burning paw with a known good one and see if it burns or does not burn.
Brake light (stop) lamp in the rear right lamp of VAZ 2108, 2109, 21099 cars and their modifications
— The contacts in the wiring block, which is placed on the terminals of the tracks on the headlight board, have oxidized
We remove and put on the block several times or clean the contacts on the board and in the block.
— The tracks in the headlight circuit board are burned out
We take out the board and visually inspect the tracks. Burnt out ones can be restored by soldering wires to them.
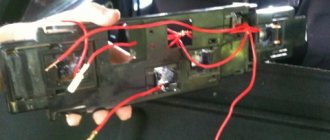
Tail light board tracks 2108 for brake light
— Brake light switch faulty
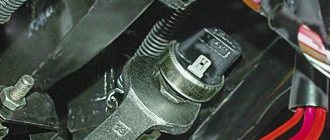
It is located under the brake pedal. We remove two wires from it - white and red and connect them together with a piece of wire. The brake lights are on fire - we change the sensor, no, then we check the electrical circuit.
Brake light switch VAZ 2108, 2109, 21099
— The electrical circuit of the brake lights is faulty
It is necessary to identify an oxidized contact, a burnt-out wire or a failed connection in the mounting block. To do this quickly and efficiently, you need to know the electrical diagram for connecting brake lights and its features: “VAZ 21083 (21093, 21099) stops, connection diagram.”
Stops (brake lights) of the VAZ 21083 (21093, 21099), connection diagram
Plus, the brake lights come from output 30 of the generator to block X8 (Ш8) (far left in the engine compartment, pink wires) to the mounting block. Next, through the fuse (No. 6, F3) in the block to block X4 (Ш4) inside the passenger compartment to the white wire going to the brake light sensor. That is, current is supplied to the sensor through the white wire. Next, from the sensor along the red wire to block Ш2 (Х2) (second from the right inside the cabin) and through the mounting block to block Ш9 (Х9) (the large transverse one in the cabin) to the red wire going through the entire cabin to the rear left block, and then to the rear right headlight.
Minus - black wires coming out of the blocks to the headlights. Mounts to the body next to the rear lights.
"Ground" of the rear light of VAZ 2108, 2109, 21099 cars - if the bad foot contacts do not work
You can check the presence of current in the circuit elements using a test lamp - connecting one end to the terminals and the other end to ground. Or by supplying current with a separate wire from the battery positive to the elements of the electrical circuit.
Read more about finding a “break” in electrical circuits: “How to find a break in a car’s electrical wiring.”
Source
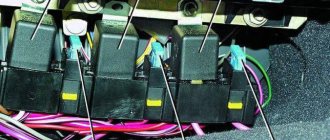
Mounting block VAZ-2113, 2114, 2115. Location of fuses and relays.
New model mounting block VAZ-2113, 2114, 2115. Location of fuses and relays.
Relay Description:
K1–relay for turning on headlight cleaners; K2–relay-interrupter for direction indicators and hazard warning lights; K3 – windshield wiper relay; K4 – lamp health monitoring relay; K5 – power window relay; K6 – relay for turning on sound signals; K7 – rear window heating relay; K8 – headlight high beam relay; K9 – relay for turning on low beam headlights; F1–F20—fuses; X11 – terminals of the wiring harness block
Table of circuits protected by fuses on the VAZ 2114
Fuse number
Circuits protected by a fuse
Rear fog lamp switching relay. Rear fog lamp lamps. Rear fog lamp switching indicator
Direction indicators, relay-interrupter of direction indicators and hazard warning lights (in hazard warning mode) Hazard warning lamp
Front interior lamp. Central interior lamp. Luggage compartment lighting. Illumination lamp for the ignition switch. Lamp for monitoring the engine management system. Brake light bulbs. Trip computer (if installed)
Socket for connecting a portable lamp. Relay for turning on the heated rear window (contacts). Rear window heating element
Sound signal. Horn relay. Cooling fan electric motor. Fan fuse.
Direction indicators, relay-interrupter for direction indicators and hazard warning lights (in turn indication mode). Reversing lamps. Relay for monitoring the health of lamps. On-board control system display unit. Instrument cluster. Insufficient oil pressure indicator lamp. Parking brake indicator lamp (brake light fuse). Brake fluid level indicator lamp. Low battery indicator lamp. Trip computer (if installed). Generator excitation winding (in engine starting mode). Front windshield wiper. Seat heating control.
Numbering of plugs in the connecting blocks of the VAZ 2113, 2114, 2115 mounting block
Diagram of the VAZ-2113, 2114, 2115 mounting block Option No. 1.
Relay Description:
K1–relay for turning on headlight cleaners; K2–relay-interrupter for direction indicators and hazard warning lights; K3 – windshield wiper relay; K4 – lamp health monitoring relay; K5 – power window relay; K6 – relay for turning on sound signals; K7 – rear window heating relay; K8 – headlight high beam relay; K9 – relay for turning on low beam headlights;
Diagram of the VAZ-2113, 2114, 2115 mounting block Option No. 2.
Pinout of connectors of the VAZ-2113, 2114, 2115 mounting block.
Complete set of mounting blocks VAZ-2113, 2114, 2115.
Date added: 07/14/2014
Author: Dmitriev Alexander
- Electrical equipment
- Engine
- Brake system
- Other
- Steering
- Transmission
- Suspension
- Tuning
- VAZ 2110
- Other
- Engine
- Steering
- Electrical equipment
- Transmission
- Brake system
- Suspension
- Tuning
- VAZ 2114
- Electrical equipment
- Engine
- Brake system
- Other
- Steering
- Transmission
- Suspension
- Tuning
- Lada Priora
- Steering
- Engine
- Suspension
- Electrical equipment
- Tuning
- Brake system
- Transmission
- Video publications
- VAZ tuning photo stream
- Operation and repair manuals
Tail lights for VAZ 2108, 2109, 21099
The functioning of the rear lights of any car is necessary for road safety reasons. These devices at the rear of the car perform a lighting and information function (warn road users about the movement of the car).
On VAZ 21099 and other models, the lights turn on automatically when changing gears and moving the car backwards.
Structurally, the lights at the rear of the car combine the following components of the lighting system:
The structure of the lighting devices is as follows:
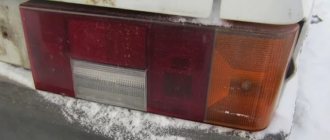
The following types of rear lights can be installed at the rear of a VAZ 2108 or 2109:
Causes and actions in case of breakdown
Among the reasons for the breakdown of the rear parts of the lighting system on a VAZ 21099, 2108 or 2109, the most common are:
The most common and easiest fault to solve is a lamp burnout. The product must be replaced with a new one by turning off the light sources, opening the trunk and disconnecting the column of wires.
To do this, you will most likely have to remove the trunk trim of the VAZ 2108 or 21099, which is located behind the lamp. After this, squeezing the latches (they are located on the sides), you need to take out the panel and unscrew the lamp, after pressing on it. To install a new rear lamp, reverse the process.
Types of panels
Instrument panels on the VAZ 2109 are of at least three types:
- Low panel;
- High panel;
- Electronic panel on nines with Europanel.
Europanel
On versions with a low panel, failure of the entire panel is extremely rare. This is due to the fact that here the speedometer and econometer are equipped with mechanical drives. Therefore, it is unlikely that they will fail along with the electrical component.
Dashboards with a high panel do not have an econometer, but the speedometer is also based on a mechanical cable drive.
Why don't the brake lights on the VAZ 2109 light up? Simple breakdowns and simple solutions
A fairly common problem is that the brake lights on the VAZ 2109 do not light up. And it is difficult to call it insignificant: they send a signal to drivers driving behind that your car is braking.
Thus, road users are warned, and they themselves, accordingly, reduce their speed. I didn’t warn you, they drove you into the appropriate place - it’s your own fault. Moreover, you will have to pay not only for your car, but also for the restoration of the car that carried out the collision, since it is its owner who will be considered the injured party. And such a development of the situation in a city with heavy traffic is very likely. Heavy traffic does not contribute to maintaining a distance of 5 m, as provided for in the traffic rules. Cars move one after another during rush hours: any carelessness can lead to an accident. Moreover, both warning lights may not work, or only one may fail - and in this case, you can consider yourself lucky, there is still a partial warning of the threat from behind. The brake lights on the VAZ 2109 do not light up for various reasons, from the most trivial to those requiring a thoughtful and more serious examination. Methods for identifying such a malfunction and ways to eliminate it are described in our article.
How to detect a short circuit
Sometimes all the research and measures taken do not achieve the desired result - the brake lights of the VAZ 21099 still do not light up. Then most likely there was a short circuit in the car's wiring. Constantly changing the fuse probably indicates a short circuit. Occasionally, the durability of the fuse is not an indicator, but current will still flow due to the contact of the positive and negative terminals. You can notice this by the ever-dead battery.
To find the cause, it is necessary to detach the connection section from the suspected current leak. To do this, you need to unplug all its connecting blocks, but do not touch the damaged wire itself, in accordance with safety regulations. Touch one edge of the *Multimeter* device, and the other end to the *ground* of the car (this can be any edge of the iron body). The device will detect a short circuit and ring, indicating the corresponding parameter.
The desired section of the wire should be carefully examined, identifying abrasions, oxidation and possible creases. Places of the wire in contact with the body, or having increased tension, are most likely the cause of the short circuit. A damaged cable needs to be replaced or at least insulated as a temporary measure. Use a multimeter again to check the questionable section of the circuit; if there is no *bell*, then the circuit is working.
Often the cause of a short circuit is excessive oxidation of the wires in the lugs. In this case, sanding paper can help to remove any existing corrosion or oxidation. If you don’t have a multimeter at hand, you can use a regular light bulb; it will light up when there is a short circuit.
Using electrical circuit inspection methods, you can actually start repairing sidelights in your garage, achieving almost professional skill. A car enthusiast will use these tips to save the family budget.
Taillight tuning ideas
To highlight the car and make it unique and unique, that is, tuned, you can use several tips. You can use alternative optics.
These lights are much more reliable and beautiful than regular headlights. Among other things, tuning the rear lights can protect the VAZ 21099 from some problems. You can resort to modernization, and then the glass will not fog up and the contacts will not oxidize.
In addition, the rear lights on a VAZ can be painted from the inside. Of course, you need to use a special mixture, because the usual one becomes deformed when heated. In order for it to last as long as possible, the headlights must be disassembled and the additional turn signal reflector removed. Then, using sandpaper, remove the chrome from the lamp and then apply a primer to the surface.
The primer should dry for about 1 hour, in addition, the mixture must be applied in several layers. The dye must also be applied in several layers, and wait about an hour until it dries completely. After completing the work, you can assemble the lantern. When applying sealant of an identical color, the old one must be removed and then the surface of the lantern must be degreased. If the procedure is carried out incorrectly, it will create new problems.
In addition, you can resort to the following methods of independent tuning:
Photo gallery "Modernization of rear lights"
In the photo below you can find out how to upgrade the lights.
Main reasons
Almost all problems related to automotive electrical systems can be solved in approximately the same way. You need to look for a potential or probable cause of malfunctions in the problematic object itself, or understand the system responsible for supplying power.
The situation is exactly the same with devices called brake lights. If they stop working, then you should look for the reason in one of the following points:
We recommend: The clutch on a VAZ-2107 has gone missing - what to do and how to fix the problem
Based on the stated reasons why the feet may stop working, we can draw a completely objective conclusion. A truly serious malfunction concerns only wear or damage to the electrical wiring. Solving such a problem with your own hands is not always correct.
When the rear brake lights (left and right) or the additional central brake light repeater fail, do not rush to look for an auto electrician and offer him money to fix the problem.
Causes of failure of the rear parts of the lighting system and driver actions
You can find out what the breakdown may be and how to solve the problem below. We will talk about modified nines.
Possible malfunctions of brake lights and their elimination
Removing the brake light switch sensor In the case of the problems listed above, the easiest way, of course, is to install a new lamp. This happens without any difficulty: you just need to turn off the lights, open the trunk and remove the wiring block. After this, holding the fixing elements that are installed on the sides, remove the panel and unscrew the lamp. In its place, install a new light device and assemble the assembly in the reverse order. If we talk about stops, both lamps and one of them may not work, that is, only in one headlamp.
Removing and replacing rear lights
- It is best to make the replacement before wiring problems begin.
- To work you need to remove the lights. On the VAZ 21099 it is hidden by a plastic decorative trim in the trunk.
- Now unscrew the fixing screws on the trim and remove them.
- Disconnect the block with wires and carefully remove it, being careful not to damage the board, because it sits tightly in place.
- Now, using a 10mm wrench, unscrew the 4 nuts securing the headlight housing. Remove the part from the machine. Now you can install the new part and calmly begin the replacement.
- The collection is done in reverse order (the author of the video is Automaniac1994).
Popular faults
If we talk about the dashboard of VAZ 2109 cars, then they are characterized by certain problems. We will tell you about them, and also tell you how to act correctly in a given situation.
We recommend: Checking and repairing the xenon ignition unit: 4 signs of a device malfunction
| Fault type | Your actions |
| Gasoline level and temperature indicator does not work | In most percent of cases, this situation occurs due to breakdown of devices, sensors of these devices, or an open circuit of the power supply. Therefore, first check the circuit for continuity, make sure that the fuses have not blown. If this is not the case, check whether the gas level and temperature sensors are working. Only if none of the actions allowed you to get rid of the breakdown, you can begin to replace the devices themselves. No options, the problem lies in them |
| When the fuel tank is full, the arrow points to zero | If you have worked on the fuel level sensor, the fault most likely lies with you. When manipulating this device, the float limiter is often knocked down. Either the limiter is installed incorrectly or adjusted, causing the resistor winding to end. To resolve the problem, remove the sensor and then adjust the limiter again |
| The fuel gauge needle regularly jumps and ends up at zero | Here, most likely, the resistor has weak contact with the current collector. Another possible option is that there is a break in the resistor. To resolve this situation, we recommend replacing the hot level sensor with a new measuring device |
| The fuel level lamp is constantly on | If this lamp is constantly on, there is probably a short circuit in the fuel level sensor supply wiring to ground. Another option is that the sensor’s flexible bus is shorted to the fuel intake pipe. You will have to disassemble the device to align the bus and get rid of the resulting short circuit |
| Indicator lamps do not work on the dashboard | There is a high probability that the light bulbs have simply burned out, or they are poorly held in their seats due to loose contact. Replace the bulbs, but first try tightening the contacts. Traces of oxidation may be detected. When cleaned, the light bulbs can work normally again. Also, do not exclude the possibility of wiring breakage or oxidation of the tips of the supply wiring. Try going over the wires with a tester, cleaning the contacts if necessary. |
| The speedometer does not work, the flexible shaft is noisy | In such a situation, you will have to change the speedometer drive cable or replace the entire speedometer assembly. But before you bother so much, check that the fastening nuts of the tips are tightened correctly and properly. The flexible shaft may make noise during operation due to deformation or violation of the permissible bending of the shell of less than 10 centimeters during installation |
Last resort - complete dismantling
The instrument panel of the VAZ 2109 is not so complicated that you cannot figure it out on your own. But in the absence of experience, it is better to entrust the repair to specialists, or to enlist the support of a partner who understands this matter.
Replacement process
The rear lights are attached to the body of a VAZ 21099, 2108 or 2109 car using 4 nuts. To dismantle the lighting system you will need:
- head at 8;
- extension.
The operating algorithm is as follows:
- To access the nuts, remove the 21099 luggage rack at the appropriate location (if the rack is installed).
- Disconnect the power plug that is attached to the board.
- Unscrew the 4 nuts using a wrench.
- When removing the last nut, hold the taillight outside to prevent it from falling and breaking.
- After removing all 4 nuts, remove the light.
When installing a new headlight on the rear of model 21099, do not forget to connect the wiring to ground, which is attached to one of the studs.
Author: Baranov Vitaly Petrovich
Education: secondary specialized. Specialty: car mechanic. Professional diagnostics, repair, maintenance of passenger cars of foreign production 2000-2015. Extensive experience working with Japanese and German cars.
4 comments
- Rustem says: My taillights on my "nine" don't work - tell me, what could be the problem?
Vitalya Ts. says:The most obvious thing is to check the lamps, perhaps they have burnt out? If intact, the plug may still be in fuses F10 and F11 - it would be good to test them too.
Rustem says:
I looked at the light bulbs - they are intact, I thought from the very beginning to test them, everything is clean here. Following your advice, I also checked the fuses - everything is fine with them, nothing suspicious. Any other ideas?
- Stanislav Vyacheslavovich says: Good afternoon. Take a test lamp and connect one contact to body ground, the second in the connectors, try to see if there is power on the yellow wire in the right headlight and the yellow-black wire in the left. And look at the light bulb health relay with a circle crossed out with a cross.
