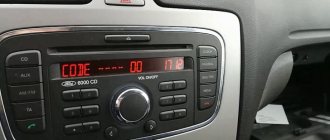
!Attention! The generator is not displayed on Yandex turbo pages. Go to the full version of the site. The radio unlock code generator is located under the instructions on how to find the pre-code.
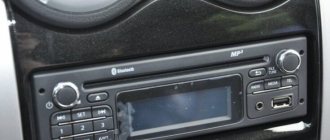
Owners of popular models Renault Duster, Logan, Sundero, Clio, Scenic, Simbol, Megane, Laguna and Lada Largus are familiar with the problem of how to unlock the car radio.
The Chinim Ru website allows you to generate an online code to unlock your radio for free and without registration.
The standard radio is blocked every time the battery is disconnected and when the battery is low.
If there is no secret code to unlock the audio system in the service book, then the search for information and online code generators begins. In my practice I had to solve this problem. I decided to post all the available information in one place. For free and without registration, you can independently generate an unlock code for your Renault radio at Chinim ru online.
Step-by-step complete instructions for unlocking and obtaining a secret code from the standard radio of Renault and Lada Largus.
Use it, but only for legal purposes.
In order to receive the unlock code for the head unit, you need to know the preliminary code.
How to find out the pre-code of the radio:
- turn on the radio
- simultaneously hold down buttons “1” and “6” for 4-5 seconds
- The message “pre code xxxx” will appear on the display.
LETTER_NUMBER_NUMBER_NUMBER
Example of precode d290 (letter and 3 digits)
- enter this code into the online generator window and click the “Generate” button
- A 4-digit code for your radio will appear in the window.
Add a leading zero to the number (345 = 0345 or 45 = 0045)
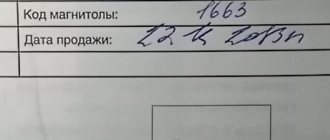
If the radio does not produce a pre-code, then take out the radio and find the Pre-code on the sticker. It is very easy to remove a radio in Renault, and there is more than enough information about this on the Internet. Therefore, I won’t waste time, but let’s find a precode.
The precode is necessary to obtain the unlock code, apparently the manufacturers thought that this was a sufficient measure against radio thieves, but for now it is an excellent measure to blow the brains of the owner. As always, not on time. So we are looking for precode.
In the photo there are possible options for finding the precode on stickers:
Look carefully for the analogy, the code is definitely there.
How to enter the Renault radio code?
To enter, you need to dial it using the radio joystick or keys. After entering, press and hold the “6” button.
When the secret code is completely entered, in order to save it in the radio’s memory, hold down button 6 on the panel until a characteristic sound signal sounds.
Blocking of modern radio tape recorders occurs after a complete power outage. The power outage time after which the prompt to enter a code is displayed depends on the make and model of the player. Typically, drivers find themselves in this situation after removing the battery terminal. Let's look at how car radios are decoded and whether you can unlock the device yourself.
Separate modules of Lada XRAY electrical circuits
Battery charging circuit
The diagram shows the battery, instrument cluster, central control unit, computer and generator.
Engine starting system
The diagram shows: battery, mounting block, starter, starter relay, ignition switch, etc.
Cooling system electric fan diagram
Wiring diagram for Lada XRAY with air conditioning. In addition to the electric fan, it contains: a fuse box, an ECU, etc.
Cooling fan diagram without air conditioner
Wiring diagram for Lada XRAY without air conditioning. On the diagram you will find: electric fan, fuse box, fan relay, etc.
Low and high beam diagram
For Lada XRAY Optima. The diagram shows: headlights, steering column switch, central control unit for electric headlight adjustment, etc.
Diagram of dimensions, DRLs and rear PTFs
For Lada XRAY Optima. The diagram shows: headlights, lanterns, central control unit, ignition switch, etc.
Fog light diagram
For Lada XRAY Optima. The diagram shows: PTF, steering column switch, mounting block in the passenger compartment and engine compartment.
Reversing light diagram
The electrical diagram shows: lights, fuse box, parking system control unit, etc.
Diagram of turn signals and emergency lights Lada X-RAY
It indicates: headlights, lanterns, side mirrors, mounting block, TsBUE, etc.
Brake light diagram
Contains: lights, mounting block, central control unit, AMKP control unit and brake pedal position sensor.
Cigarette lighter circuit
In addition to the cigarette lighter, it shows: a socket in the luggage compartment, an ignition switch, a mounting block, etc.
Sound signal, heated rear window and mirrors
Electric mirror drive diagram
Electric window diagram
Diagram of wipers and windshield washer
For Lada XRAY Optima. Presented: front and rear wiper motors, washer pumps, etc.
Central locking diagram
H4M engine management system diagram
This is a Renault power unit with a volume of 1.6 liters and a power of 114 hp.
VAZ 21179 engine control system diagram
This is a 1.8-liter power unit with a power of 122 hp.
VAZ 21129 engine control system diagram
This is a 1.6-liter power unit with a power of 106 hp.
Lada XRAY immobilizer diagram
Front seat heating circuit
Viewing fault codes for a Lada XRAY car is possible using the Grade-X diagnostic tool in the “Fault Codes” mode. For each detected malfunction, the following is stored in the CBKE memory: fault code; DTC status status (active or inactive).
- The DTC is stored in memory with the status "active" if the last diagnostic test completed with a negative result.
- The DTC is stored in memory with a status of "inactive" if the last diagnostic test completed with a positive result, but previous ones were completed with a negative result. This manifestation is possible if the car has an intermittent fault.
The cause of an intermittent malfunction may be damage to the wire insulation, damage to the contacts in the connecting blocks, or unreliable connection of the blocks.
Easy way
If the car is fairly new, especially under warranty, and you don’t have an hour of free time and the desire to save a couple of thousand, you can put the problem on the shoulders of servicemen. It will be a great success if the employees of the dealership agree to provide assistance for free (usually the price starts from 2,500 rubles). Before you find out the radio code, you will need to tell the specialists the serial number of the player (where it is located and what it looks like - we’ll look at it later).
It is likely that the former owner of your car also wondered how to unlock the radio. Having his contact information will be a real salvation for you in this case. Since the code is unchangeable information, to prevent repetition of an unpleasant situation, car owners often write it down with a marker or stick a sticker on the body of the radio. In any case, if the previous methods did not help you, the device will have to be removed from the panel.
Serial number
How to decode a car radio:
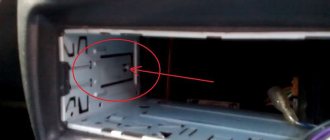
- remove the player from its standard seat. It is held on by special latches that need to be pushed aside by inserting a long, flat object (like a woman's nail file) into the cavity between the radio and the instrument panel. Detailed information on extraction can be found in the repair and operating manual for your car model;
- Find the marking sticker on the case on which you have applied the barcode, as well as other identification numbers. You need a combination of letters and numbers after the Serial No. – this will be the serial number;
- Next, on the Internet you need to find a service that, using Serial No., generates an unlock code. Eg, . In the left corner there is a catalog of car brands. After this, you need to select the player type. You will receive a list of models from which you need to select your car radio. The convenience of this resource is that most types of devices are photographed. After clicking on the “View as gallery” tab, the list will be displayed in the form of pictures. Selecting a model will redirect you to a page with a field for entering the serial number (“Enter serial number”). All you have to do is enter the data and click “Search”. Radio-code.lt is not the only one of its kind, so you can use another code calculator. Most resources of this type will require you to follow a standard registration process before decoding your radio.
Never send SMS when creating an account. Most likely this is a scam site. Therefore, it is not a fact that after withdrawing funds you will be able to decode the player.
Entering the code
When typing a combination, be careful, as the number of attempts is limited. In some cases, to activate the code entry mode, you need to hold down two specific keys. The number is dialed using the radio station selection keys. Pressing the button once adds one to the corresponding number on the display. Sometimes after entering you need to press an additional button (for example, SC on Mercedes).
PRE-Code
Many Renault owners do not need to remove the player from the panel before unlocking the car radio. Standard devices are marked with a special Security code (a four-digit code with a first letter and three numbers). After turning on, hold down keys 1 and 6 for a few seconds. If “PRE-Code-ХХХХ” does not appear on the screen, the car radio will still have to be removed.
Unlocking is carried out using a code generated by a special script. To calculate, you can use an online resource or a special DOS program.
- Entering the PRE code.
- The program generates a four-digit number, which will be the code for self-unlocking (4702).
- After dialing, press and hold button 6 until the decoded device emits a characteristic signal.
Reading the chip
Decoding the radio using an alternative method will require the basic skills of a radio engineer and additional equipment:
- soldering iron, rosin, flux for desoldering. It is most convenient to use special clothespins for microcircuits;
- programmer (universal or homemade);
- special software for reading memory dumps.
After manually entering the code inside the car radio, identification occurs. Of course, for this to happen, the correct set of characters must be “hardwired” inside the device. The essence of the method is to solder to a non-volatile microcircuit on which the code is written and read the information.
To decode you need:
- remove the cover of the car radio, if necessary, the CD drive;
- find the memory chip. Usually it is small in size, with 8 “legs”. The photo shows a radio tape recorder with a Honda CR-V;
- The circuit can be unsoldered and connected to the programmer. To work with BR9010, you can use UPA USB Programmer. As you can see in the video, you can actually assemble something like a programmer with your own hands from improvised means. The Chameleon programmer can be used as reading software. It is important that the device supports operation with the type of microcircuit that is installed in the radio;
- reading memory dump. Among the received data, you need to find a four-digit number. This may take time as the manufacturer tries to protect the code.
Don't be alarmed if your first entry attempt is unsuccessful. The combination in memory can be written in reverse order. To check, it is not necessary to solder the circuit back. You just need to connect power to the car radio. The player will operate normally, but without a memory function (for example, the selected radio station).
Once upon a time, the theft of car radios became a serious problem: standard audio devices were standard and easily installed in almost any car. In the 80s and 90s, a stolen system could be freely sold. Trying to solve the problem, developers came up with their own connectors, increasing and decreasing the size of the devices, but this was of little use. Finally, factories producing radio tape recorders began to code each product. The boom in thefts has subsided, but another problem has arisen: how to decode the radio if it was disconnected from the battery? The locking usually works 10 minutes after, for example, removing the battery. Theoretically, this protects against theft, but in practice it causes inconvenience to the car owner when repairing the car.
Decoding the car radio by serial number
If you have the Internet at hand, you can unlock the audio device yourself. The action plan is described below.
Removing the radio
Correct decoding of a car radio by serial number begins with removing it from its original location. Most often, it is fixed with special latches: to move them away, insert a thin, long flat-head screwdriver between the body of the product and the dashboard. If something doesn’t work out, don’t use force - it’s better to read the instructions for the radio: it should indicate how to install and remove the device.
Removing the radio from its original location
Where is the serial number located?
Look for a barcode sticker on the case where identification numbers will be printed. You will need the one after the Serial No. The sticker is most often located on the top, less often the back, of the product.
Radio serial number for Ford
Radio unlock code calculators
Go to the Internet and find a service that can unlock it using the serial number of the car radio. For example, Here in the upper left corner is a catalog of car brands. Find yours and select the type of radio (if necessary, use a photo, which is very convenient on this service). Next, you will be redirected to a page where you need to enter the serial number. Select a radio unlock code calculator using the Search button, for example, it could be Radio-code.lt or some other.
Before decoding, the service will ask you to register. The procedure is free. If suddenly they start asking you to send SMS, most likely you have visited a fraudulent web resource.
Having received a combination of characters, type it: be careful, because the number of attempts is limited. Usually it is suggested to alternately press several keys: selecting radio stations or others. One press adds one to the number on the screen.
Micom test media nav
Renault MediaNav
MEDIA NAV is an integrated multimedia navigation system from Renault. NORMALLY installed in Renault Duster, Sandero II, Logan II, Dokker, Lodgy, Clio IV, Captur
With MEDIA NAV you can:
— listen to audio recordings from mobile devices via Bluetooth or USB/jack connectors;
— listen to the radio and save stations;
— communicate on the phone using the hands-free function;
— get where you need to go along the route laid out by the navigator;
— determine your location.
touch color display screen size - 7 inches (18 cm) resolution - 800x480 pixels AM-FM radioMP3 player Built-in navigation based on the stripped-down Igo Primo control using the steering column joystick large touch buttons clear and understandable menu easily recognizable action buttons
Processor NetLogic Au1320 667 MHz MIPS architecture RAM - 256 MB Built-in memory - 4 GB Operating system Windows CE 6
Attention! If you do not want to kill the radio, do not change anything in the upgrade.lgu firmware file! The radio 100% does not have any backup startup modes! If you kill the contents of the Storage Card, only resoldering the memory will help
Guys, how to buy Menavrus and not fall for a scam
Post edited by aameleshin
— 27.01.15, 17:28
Mowchik,
The window with the logo is hanging or in constant reboot. Software version 4.0.2. Is there a solution (via CN400) or dancing with a tambourine? )))
Post edited by gera7im7
— 27.09.16, 15:47
Hello everyone. Tell me, I have the same MMS on HRAY, I noticed on the flash drive:
I made 2 folders on a flash drive, pushed 37 mp3 files into one, 160 into the other. I push it into the radio, from the first folder it finds 16 songs and plays, from the other 56 and also plays.
The question is - why is this so?
I tried throwing them into a shared directory without folders - it finds about 3 times fewer songs in number (he writes in the list there)..
I couldn’t find the answer. So how’s it going? the same or not? (this question has been removed) Still wondering how to get to work at her desk?
Post edited by kalimit
— 15.11.16, 17:41
I remember you talked a lot in the topic about MMS Kalinagrantspriors, do the authors of the alternative menu have plans to create something similar with medianav? In specialized forums, the shell was slightly updated, alternative navigators and videos were made, but in terms of diagnostics and route guidance, it was similar to what they did not do for MMS Prior. Standard programs such as hobdrive work only via bluetooth, while the phone naturally does not work. But there is a CAN bus in the media, although it is output only to the diagnostic connector, where there is a common connection for the car. It seems to me that if you put jumpers there, then the GU will be connected to the main connection of the car, which accordingly makes it possible to add both the shuttle bus and diagnostics, similar to those available in the alternative or single menu. Or maybe this topic is already being developed somewhere? Thank you.
Example of entering a code for Toyota
Radio tape recorders for cars of this brand use a 3-digit code. Turn on the device and wait for Security to appear on the display. Then press the top arrow and, while holding the button, dial one. Another word should appear - Code. Now enter the correct code by pressing numbers from 1 to 3. To confirm, press T1. If everything went well, Security will appear on the screen again and the radio will turn off. Turn it on and use it!
For Ford
The input method is suitable for most models. Turn on the car radio and wait until a mark appears prompting you to enter a code. Indirect method: press one and wait for the first digit to appear. Further input is made using buttons 2 to 4. At the final stage, the “5” key confirms the code.
For Nissan Note
Entering a code in the radio for Nissan
For Audi (Symphony, Concept Plus models)
Check your vehicle's owner's manual. The serial number of the car radio and the unlock code are indicated on the 1st page, below the contents. Store the data in a place protected from prying eyes. If there is no information, use the code search using one of the methods described in the article. Once you receive the code, enter it:
- turn on the audio system, on the display of which you will see the word SAFE;
- press and hold the RDS, TP button at the same time and make sure that the number 1000 appears on the screen;
- enter the code numbers by pressing keys 1 to 4;
- Confirm the correctness of the entry by pressing RDS, TP, holding the keys for 3 seconds: the radio will turn off, turn it on and use it.
For models Delta, Beta, Gamma, the algorithm of actions is slightly different. To unlock the car radio, press and hold the F1/2 and DX buttons. The resulting code must be entered by alternately pressing buttons 1 to 4. To confirm the code, press F1/2 and DX again with a three-second hold.
Radio in Audi
For VW
Here, as in the case of Audi, you need to look at the first page of the car’s instructions. On it you will find the radio identification number and PIN code. If the device has touch controls, you need to enter the code numbers by pressing the monitor buttons. If the device is normal, press the buttons for fixed radio stations. When the code appears on the display, confirm it by pressing OK or Enter. If entered incorrectly, the radio will be temporarily blocked. To try again, leave the device alone for 2 hours. Then you can enter the code again.
Entering a code in the Volkswagen standard radio
Using PRE-CODE
In some cases, you will not need to remove the car radio from its socket. This applies to Renault owners. In cars of this brand, all audio devices have a Security code, which is a 4-digit combination of a letter and 3 numbers. After turning on the device for a couple of seconds, simultaneously press keys 1 and 6. If the display does not display Pre-Code-XXXX, you will have to pull out the radio to read the necessary information on its back wall (as shown in the photo below).
To unlock the code you will need a special script. The calculation can be made through an online service or a DOS program.
- enter the letter and numbers found on the back wall of the radio (PRE-Code);
- the program or online resource will generate a 4-digit number, which will become a code number;
- dial it and hold button 6 until the radio makes a characteristic squeak, sound, etc.
Reading the chip
This alternative method requires practical experience in the radio engineering field, as well as special equipment:
- a soldering iron with solder and (preferably) “clothespins” to help solder the microcircuits;
- programmer (can be homemade);
- a computer program that allows you to read memory dumps.
When its “native” code is entered into the car radio, identification is carried out. The correct set of characters is “hardwired” into the device. The problem that needs to be solved is to solder a code to a non-volatile chip in order to read it.
- remove the player cover, and if necessary, the CD drive mechanism;
- find a memory chip, which most often has 8 pins (as an example in the photo, a radio from Honda);
- unsolder the chip and connect it to the programmer: you can read the code using the Chameleon software or something similar (the software needs to be “skillful” in working with this chip);
- Find a 4-digit number in the information received.
You will have to spend time searching: the manufacturer is trying to protect the data. If after entering the result is negative, do not despair: try entering the numbers in reverse order. When testing, there is no need to solder the part back: just connect the radio to the on-board network. The device will work, but without remembering, for example, the frequencies of radio stations.
Cost of service in car services
If you're lucky, the operation at the dealership center can be done for free, especially if the car is still under warranty, unless, of course, it involves disassembling the radio and soldering work. They will simply help you find out the radio code by the serial number. Usually the price for the service starts from 2500 rubles.
A radio is a device integrated into the car panel with the function of broadcasting a radio signal and playing audio, and on the most modern models, video files from various external sources: USB flash, SD, CD, DVD, Blue-ray, etc.
Review of Yandex.Auto for Lada X-Ray
In the review, we will look at the features of this infotainment system for this model. Let's discuss the functions, characteristics and principles of operation. You can also watch a video on the topic of multimedia from Yandex, it will clarify some points.
Specifications
- Processor: 4-core Allwinner T3 1.2 GHz
- RAM: 2 GB
- Built-in memory: 16 GB
- Display: 8″, 1024×600 pixels
- FM radio
- Internet: via Wi-Fi, support 3G/4G via modem
- Navigation: GPS and GLONASS
- Possibility of control from steering wheel buttons
- Speakerphone via Bluetooth
- Inputs: Aux, USB, microSD
- Formats: WMA, AAC, MP3
Modern radios
The manufacturer provides for the possibility of replacing the radio, but factory models are given priority. The fact is that different radios can be installed on the same car model, depending on the originally ordered configuration of the car. If the most modest devices only allow you to listen to the radio on all frequencies received in the range, and insert several cassettes or disks, then advanced versions of radio tape recorders have a liquid crystal monitor, which displays all the procedures carried out by the driver. Including, some vehicle performance indicators have built-in navigation, the ability to broadcast a TV signal and play video in various formats, a built-in hands free function, etc.
It is natural that many car owners want to enrich the interior and functionality of their car and install advanced versions of radio models. On the other hand, drivers often replace the radio with a similar model due to some technical problems with the previous version.
One way or another, the process of dismantling the old radio and installing a new one is half of the problems ahead. The second half is the need to enter an unlock code. The fact is that factory radio models, regardless of the car brand, are equipped with a system of protection against unauthorized use and access - a software encoder. After the radio is installed in the desired slot and connected to a power source, before you start using it, the owner will have to enter a set of letters of the Latin alphabet and numbers in the correct sequence. Such a system is provided for a reason; protection allows you to reduce the risk of theft of the radio from inside the car, since, without knowing the code, the thief will not be able to use it.
The unlocking process on different brands and models of cars may differ slightly, due to the fact that the radio interface itself is different. Below are descriptions of the decoding process for radios for different models:
Yandex Auto price for Lada X-Ray
The cost of the system is 29,900 ₽. But there is a special price for Sberbank clients: from 1081 rubles per month.
What do you get for this amount without additional payment:
- Delivery and installation
- Six months of subscription to Yandex.Music
- Six months of free internet
How does the multimedia system work?
Voice control is one of the main features. Also interesting is the typical Yandex interface, which is maximally adapted to the psychology of users. You won’t need to get used to the Yandex.Auto multimedia system for Lada X-Ray for a long time, since it is built like widgets from a computer desktop. It is possible that you run several applications at once that work simultaneously without problems.
Which voice assistant do you think is the best?
AliceSiri
The main thing that captivates us about the Yandex.Auto system is the emphasis on the convenience of drivers. It is for them that the development was made. Let's look at the main functions and services built into the on-board computer.
Navigator
Allows you to see the optimal routes on a large screen. You won't have to strain to figure out where to go and ask the neighbor on the right for help. The system takes into account traffic jams and even repair work. It warns about the presence of cameras and road signs. Read more about the features of Yandex.Navigator.
Voice control with Alice
The well-known assistant Alice is a convenient alternative to managing services. Previously, it was necessary to take your attention from the road and adjust the necessary functions manually, which to some extent created the risk of an accident. Now it will be enough to give the voice command “Listen, Alice” and interact with the robot as quickly as possible. For example, you can dictate an address, give a command (find the nearest gas station or parking), or search for something on the Internet.
Music and radio
Convenient tuning of music and radio stations. It is even possible to select it to suit the mood or style of a certain era.
For everything to work well, you need an Internet connection, but routes can be easily built without it. You can always connect from your mobile device. However, in the future, in some cases, routers will be built in during production. Updates are downloaded while driving on the road.
The company is constantly working on updates. This fall (2019) innovations will appear that make interaction with the car even more comfortable.
The following options will open.
Transfer route from phone
You can create a route in Navigator on the way to the car. To do this you need to use your mobile device. The display will show it immediately after you start the car.
See where the car is parked
If the car was left far from the place where you were going, it doesn’t matter. Searches will no longer waste precious time. The app will tell you where the vehicle is located.
Open a window or trunk
If you don’t want or have the ability to get the keys, give a voice command to Alice or use the corresponding function of your smartphone.
Start the engine from a distance
To save time on warming up your car in winter, you can now start the engine right from home while you're still getting ready to go out. However, the function is relevant at any time of the year. Cooling or heating is done via a smartphone and the Station.
Pay the parking fee
Yandex.Auto eliminated the need to worry about paying for parking. The system fully automates the process, accurately determining the location, price and writing off the required amount.
Find out about evacuation
If the car begins to be towed or moves for some reason, the system will send a corresponding notification.
Pay for refueling
Paying for fuel at gas stations has also become easier. This is especially nice in cold or rainy times, since you don't even have to leave the vehicle.
Determine location without GPS
If there is no signal, Yandex.Auto will not stop “understanding” the location of the car. The data will come directly from the wheels.
Unlocking the radio on Lada cars
Let's look at the example of the Lada Largus car radio. The standard code consists of 4 digits, each of them is entered as follows:
- you must first hold down the digit on the keypad that corresponds to the number of the digit being entered (for example, the first digit of the code - press “1”, etc.),
- after which you need to press the same number until the analog display shows the number that the code should contain (for example, you need to press the number “2” four times, since the second digit of the code is “4”).
- After entering, you must press and hold the button with the numeric designation “6” until a sound signal is heard, which indicates unlocking.
Functions
The radio tape recorder installed in the LADA Largus car provides the following functions:
- search, save and listen to radio stations in the FM and AM frequency ranges;
- displaying the names of radio stations and tracking them by genre (RDS function);
- playback of audio recordings recorded in MP3, WMA, AAC and WAV formats;
- listening through the car speakers to audio recordings from other sound-reproducing devices connected to the radio using USB and Jack connectors, as well as via Bluetooth;
- connection of a hands-free wireless kit, which makes it easier to communicate on the phone while the car is moving.
In addition, the radio, which does not have a removable front panel, is equipped with a security coding function. According to the car manufacturers, this will protect it from simple theft.
Unlocking the radio of VAG cars
To enter a code on radios in Audi, Skoda, Volkswagen and other single-platform vehicles, after connecting the radio to the network, you need to hold down the power key or some combination of 2 keys (on each car model of a certain brand individually) until until the field for entering the code appears on the screen.
The code is entered in a manner similar to that for cars of other brands. Confirmation of the entered code is carried out in the same way as the transition to the unlocking process - by pressing the desired button or a combination of them.
Features of unlocking radios on other cars
Unlocking the radio with your own hands is not difficult and does not require, despite such assurances from the manufacturers themselves, contacting an official dealer and spending money.
It turns out they are all different, and my husband and I spent a long time wondering how to do it on our radio. This is very important and necessary information for us, we have an Audi, and we found a lot of interesting things about it.
You can adjust the screen brightness to your liking. You are offered three modes:
To improve the visibility of the navigation screen during the day or at night, you can change the map color settings
“Auto”: GPS displays map screen Switches to day/night display mode automatically when the headlights turn on and off
Day: Map screen always displays in vibrant colors
Night: Map screen always appears in dark colors
This function allows you to turn on/off the display of information about the air conditioning system when changing settings
This feature allows you to select the dark or light display mode.
See section “Creating/deleting connections with Bluetooth® devices”
To change the time manually, press Hours/Units and select Time Settings
With this function you can set the distance units for the multimedia system. You can select "km" or "miles"
Rice. 88. System setup
This function allows you to reset all parameters and return to factory settings
All: Resets all parameters to factory settings.
Phone: Resets all phone settings
Navigation: Resets all navigation settings
Audio/Media/Radio/System: Resets all audio settings, media device settings and radio settings
This function is intended to turn the navigation system on or off.
This function allows you to change the language used in
system and language of voice instructions
To change the language, select the desired language and confirm your choice by clicking “OK”
This function allows you to select the time display format (“12 hours” or “24 hours”)
Note. The time is set automatically via GPS. In this case, to obtain local time, you must have a map of the country in which you are located.
This function allows you to check the system version
Rice. 89. USB flash drive
Using a USB flash drive and a computer connected to the Internet, you can:
updating cartographic content;
purchasing new cards;
updating POI content
Note. In some countries, downloading and activating the Hazardous Area Warning option is illegal and may be considered an offence.
Software installation
Install Naviextras Toolbox on your computer Toolbox software can be downloaded from the manufacturer’s website
After downloading the installation file from the website, simply double-click it to start the installation Follow the on-screen instructions
Create an account
Rice. 90. Create an account
To log in, click the “Not logged in” icon on the toolbar at the top of the page or click the “Login” button on the Toolbox main screen. If you are not registered on the Naviextras com website, you can do so from the Toolbox by clicking the “ button Register" on the login page
Map update guarantee
To independently update map data, you have a free period of no more than
90 days from the date of purchase of the car. After this period, updates become paid
Note: Screens presented in this description may differ from actual ones
To register your multimedia system to your user profile, first insert a blank USB flash drive into the multimedia system connector.
Note. To install a USB flash drive, see the chapter
"Navigation System" of this manual in the "Installing a USB Flash Drive" section
USB storage is not included with the system
The USB flash drive used must be FAT32 format, with a minimum memory capacity of 4GB and a maximum memory capacity of 32GB
Saving system data to a USB flash drive
Rice. 91. Update
Once the USB storage device is inserted into the multimedia system's USB port, select Navigation > Options
> “My Updates” > “Options” > “Update” on the second page
Note. To register the system to a USB flash drive, start the engine and do not turn it off until the data is loaded
The update procedure starts automatically. No actions are allowed while your system is being updated.
Once the update is complete, the multimedia system will reboot with new settings and functionality
Insert the USB flash drive into your computer (connected to the Internet) Once your system is connected and Toolbox detects it in the list of supported systems, the name of the system (or software) will appear at the top of the Toolbox window
If you followed the instructions correctly and connected your USB key, once connected your system will be registered in your user profile
Downloading updates to a USB key
After receiving paid or free content, you need to click the updates button on the menu bar located on the left side of the Toolbox
The updates button displays a screen with all available updates, including:
purchased but not yet installed items (updates or additional applications);
free updates and additional applications added by you during installation from the catalog;
system update (if a newer version is available);
free special updates
All available updates are presented as a list by region and on the planisphere
By default, all elements related to regions are selected for installation. If you want to skip a certain region for a while, you must uncheck the box at the beginning of each row of the table corresponding to the region. After viewing the table, to begin the installation process, click on the “Install” button at the bottom of the screen
Toolbox will begin downloading and installing the selected updates. Wait for the message that the operation is complete.
Note: Toolbox will issue a warning if the size of the selected items exceeds the maximum memory capacity of the multimedia system. In this case, you can select items to install or remove from the system so as not to exceed the memory limit
Even after removal from the system, the elements remain your property, and you can subsequently install them for free
When updating, do not remove the USB key from the system or disconnect it.
In some countries, downloading and activating the radar alert option is illegal and may constitute an offence.
System and cartography update
Downloading updates to the vehicle system
Once the boot process is complete, the USB drive can be removed from the computer. Insert the USB drive into the USB port of the car's multimedia system.
Note. To update the maps, start the engine and do not turn it off until the data is downloaded
When turned on, the system automatically detects updates available on the USB key and prompts you to update the system or card according to the updates available on the USB key. Do not turn off the multimedia system while installing the update.
Note. Downloading and installing a system update is only possible if you have a newer version of the system.
Rice. 92. System update
Screen A appears automatically when a USB flash drive is connected;
press 1 to start updating;
press 2 to return to previous screen
The update procedure starts automatically. No actions are allowed while your system is being updated.
Note. The system may reboot automatically during the update Wait until the radio screen turns on
If the update procedure is inadvertently interrupted, it must be repeated from the very beginning.
Once the update is complete, the multimedia system will reboot with new settings and functionality
To obtain the source code for the GPL, LGPL, MPL and other free software licenses contained in this product, visit
In addition to the source code, you can also download all applicable license terms, warranty exclusions, and copyright notices
LG Electronics will also provide you with open source software codes on CD-ROM upon payment of distribution costs (such as advertising, postage and service) upon request by email to [email protected ] com
This offer is valid for three years from the date you purchased this product.
No image on screen
The screen is in sleep mode
Make sure the screen is not in sleep mode
The temperature inside the car is too high or too low
Minimum volume or muted
Increase volume or unmute
Incorrect system source selected
Check the selected system source and ensure that the output source for it is the multimedia system
No sound from left, right, front or rear speakers
The balance or fader parameters are incorrect
Set the balance or fader sound correctly
The wrong time is displayed
Automatic time setting is enabled and the system has stopped receiving a GPS signal
Continue driving until you receive a GPS signal
Minimum volume or muted
Increase volume or unmute
The volume level is set to minimum in the Navigation menu or the silent mode is turned on
Increase the volume ("Options" in the menu
"Navigation") or turn off silent mode
Volume in GPS mode can be adjusted during navigation messages
The position of the car on the screen does not correspond to its real location
Incorrect vehicle position due to GPS reception
Drive your vehicle until you receive a good GPS signal.
The display on the screen is incorrect
System version is outdated
Install the latest version of the system
Some menu sections are not available
In the selected mode, some menu sections are not available
Voice instructions not available
The navigation system does not contain information about this intersection Voice instructions are disabled
Increase the volume Make sure voice guidance is turned on
Voice instructions are not correct
Voice instructions may vary depending on the environment
Drive the car according to real conditions
The suggested route does not start or end at the desired destination
The destination is not recognized by the system
Specify the road closest to your desired destination
Mobile phone does not connect to the system
Sound level is set to minimum or silent mode is enabled
Make sure your mobile phone is turned on and connected to the system Increase the ringer volume or turn off silent mode
Can't make a call
Mobile phone is not connected to the system
The phone keypad is locked
Make sure your mobile phone is turned on and connected to the system Unlock your phone keypad
Video on the topic “Lada Xray. MULTIMEDIA SYSTEM SETTINGS»
Let's analyze multimedia in XRAY (player, radio, navigation, settings) Lada Xray entering code into the car radio. Logbook Lada Xray - update of standard MMC navigation maps.
Advantages and disadvantages
The radio on the Lada Xrey is equipped with an excellent navigation system that distinguishes road signs at a long distance and notifies you in advance which speed mode to choose. The top location of the device is very convenient when operating the device.
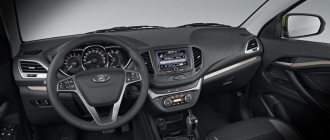
Car interior Lada Xray
The only disadvantages include a small viewing angle and low contrast. All this makes it difficult to control the media device. This is especially pronounced on a bright sunny day.
Six large icons displayed on the screen imply:
- Turning the radio on and off, as well as searching for the required wave;
- Playback of audio files via USB port, iPod, BT, AUX output;
- Talking on the phone in hands-free mode;
- View maps;
- Navigation system. View or follow a route including all necessary options;
- System settings.
The head unit, made in Korea from LG, was almost completely borrowed from Duster and Logan, taking into account all the built-in functionality. The only difference is the screen saver - instead of Renualt, Lada is displayed.
Radio in car interior
The advantage of such a radio:
Radio panel
Among the shortcomings, the following points stand out, which may seem insignificant:
- Lack of analog (round) regulators.
- You can control the volume from the steering wheel. But you can only switch tracks from the monitor.
- The maximum support size for flash drives is 32 GB, subject to FAT32 formatting.
- Free updating of maps in the navigator is possible only once and no later than 3 months from the moment of activation.
- Inability to connect a subwoofer due to the lack of line outputs.
- Doesn't play video.
LADA Xray
All of the above shortcomings will be solved by the new firmware of the Xrey radio.
Head unit Lada Xray
The standard radio on Android 7th generation differs from others in that it acts as a gadget. You can connect a computer keyboard and mouse to it via Bluetooth. The built-in 4G LTE modem allows you not only to use uninterrupted Internet, but also to distribute it. Supports any SIM card. Relatively low price.
