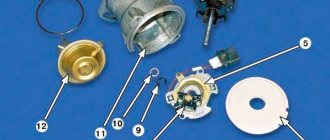
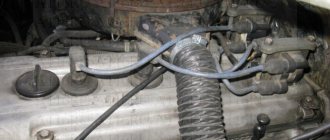
The structure of a car ignition switch
- Locking rod
- Frame
- Roller
- Contact disc
- Contact sleeve
- Block
- Protrusion of the contact part.
The lock mechanism is connected to many wires. They continue from the battery, connecting all the electrical devices of the car into a single chain. When you turn the ignition key, the electrical circuit is closed from the “-” terminal of the battery to the ignition coil. As a result, the current passes through the wires to the ignition switch, through its contacts it is directed to the induction coil, after which it returns back to the “+” terminal. As electricity passes through the coil, it generates high voltage, which it transmits to the spark plug. Therefore, the key closes the contacts of the ignition circuit, thereby starting the car engine.
Where to start setting the ignition
- Spark plug. Make sure they are in good condition. If there is carbon deposits on their surface, remove it. Also, do not forget to adjust the spark plug gap.
- Breaker contacts. Check the contacts; if they show signs of metal burnout or corrosion, replace them. It is not recommended to repair these segments; they do not cost much money and new ones will last much longer.
- Capacitor. To check, you need to use a special charge-discharge tester. The most optimal would be a pointer device; it will allow you to determine as accurately as possible the strength of the current flow, which should pass smoothly and slowly.
- Ignition coil. Test the contacts with a tester, but first thoroughly clean the coil, distributor cap and distributor from dirt. If the lid has carbon deposits, it must be replaced with a new analogue.
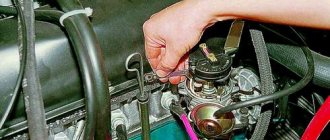
Carburetor. Test the carburetor; if it is not in working order or minor malfunctions were discovered during the diagnostic process, it is recommended to repair it before proceeding with the ignition adjustment.
Repair of generator on VAZ 2104
In fact, repairing a car generator is not the most difficult task.
It is important to properly remove and disassemble the device, and replacing burnt out or worn parts is done intuitively. That’s why car enthusiasts say that repair work on the G-222 is quite feasible even for a driver who has never disassembled generators
Removing the generator from the car
To work, you will need to prepare a minimum set of tools in advance:
- open-end wrench 10;
- open-end wrench 17;
- open-end wrench 19.
After the car has cooled down, you can begin dismantling work. The procedure is relatively simple and does not require specific knowledge in the field of electrical equipment:
- Remove the wheel from the right front side of the vehicle.
- Make sure the car is securely on the jack.
- Climb up on the right side and find the generator housing.
- Loosen the lower mounting nut, but do not unscrew it yet.
- Loosen the nut on the stud from the top side, also without unscrewing it yet.
- After this, you can slide the generator housing onto the engine - this way the belt is loosened and can be removed from the pulley without damage.
- Disconnect the wire coming from the generator terminal.
- Disconnect the wiring from the winding.
- Remove the wire from the brushes.
- Unscrew the lower and upper nuts.
- Pull the generator towards you and remove it from the engine bracket.
Video: dismantling instructions
The device can be very dirty, so it is recommended to wipe the case before disassembling it. After all, during disassembly, dust can get on internal parts and lead to a short circuit.
How to disassemble a generator
The next stage of work requires changing tools:
- open-end wrench 19;
- socket wrench 19;
- ratchet (you can add an extension);
- head at 8;
- head at 10;
- small hammer.
Before disassembling the generator housing, you must also prepare containers in which you will put small parts (nuts, washers, screws). You can even sign from which mechanism certain parts were removed, so that later it will be easier to put the generator back together:
- The first step is to unscrew the four nuts on the back cover.
- Next, remove the pulley; to do this, you will need to unscrew the nut securing it.
- Afterwards the body can be divided into two parts. One part comes out easily from the other. As a result, the generator breaks up into a stator with a winding and a rotor.
- Remove the pulley from the rotor - it usually comes out easily. If you have any difficulties, you can tap it with a hammer.
- Remove the rotor and bearings from the housing.
- Disassemble the stator into parts, being careful not to touch the winding.
Video: instructions for disassembling the device
How to repair a generator
After disassembling the device, you will need to carefully inspect every part. The part needs to be replaced if:
- it is covered with a coating of burning and soot;
- heavy wear is visible;
- there are cracks and nicks on the surface;
- There is a deformation in appearance.
Accordingly, in order to carry out a full repair, it is necessary to replace the failed generator mechanisms with new ones. It is now quite difficult to find suitable elements on the VAZ 2104, so it is worth immediately assessing the feasibility of repair work. Maybe it’s easier to buy an original generator than to waste time searching for the necessary spare parts?
In most cases, it is advisable to replace rather than repair the generator.
If you have chosen to repair the device, you will need to make sure that all components are identical to the standard elements. Even a slight difference between a part and the original one can lead to incorrect operation of the generator and even to its breakdown.
Replace the mechanisms while assembling the device in the reverse order.
How to repair a car
How to properly connect high-voltage wires with a detailed connection diagram
Reasons for replacing the ignition switch on a VAZ 2101, VAZ 2104, VAZ 2105, VAZ 2106, VAZ 2107, VAZ 2109, VAZ 2110, VAZ 2114:
The ignition switch is broken (the ignition key gets jammed when turning, the key turns with difficulty or does not turn at all). In this case, some craftsmen advise spraying with WD-40. but, as a rule, this does not give much result, and if it does, it is a temporary result, then all that remains is to replace the ignition switch. Although there are exceptions.
The contact group has burned out (this means the contacts on the chip, it happens that they burn out) In this case, difficulties arise in starting the starter.
The ignition system is designed to create and supply a spark discharge to the spark plugs.
READ Installing central locking on a VAZ 2109
It is better to carry out this type of check with an assistant. To check the contact group of the ignition switch, you should use a “control”. We connect one end of the “control” to the battery negative, and the other to the starter solenoid relay. Well, as mentioned earlier in the article, you will need the help of a friend to turn the ignition key all the way. And at this time, keep an eye on the “control” lamp, which should light up. If the lamp does not light up, therefore, the command from the ignition switch is not given. This indicates that the contact group needs to be replaced, but many motorists prefer to replace the ignition switch assembly.
But it doesn’t matter whether your ignition switch or its contact group is broken, you will still have to remove the ignition switch.
Surprisingly, this is all the tool you need to replace the ignition switch on a VAZ 2101, VAZ 2104, VAZ 2105, VAZ 2106, VAZ 2107, VAZ 2109, VAZ 2110, VAZ 2114.
How to replace the ignition switch on a VAZ 2101, VAZ 2104, VAZ 2105, VAZ 2106, VAZ 2107, VAZ 2109, VAZ 2110, VAZ 2114.
We fix the ignition key in the zero position.
Remove the steering column cover (by unscrewing 5 screws).
Remove the ignition switch (by unscrewing the 2 fastening screws).
Using a thin screwdriver, press the latch and pull the ignition switch towards you.
We remove the chip and wires from the ignition switch.
We change the lock to a new one, rearrange the wires to the new ignition switch.
How to replace the ignition switch contact group on a VAZ 2101, VAZ 2104, VAZ 2105, VAZ 2106, VAZ 2107, VAZ 2109, VAZ 2110, VAZ 2114.
We carry out the same operations as when replacing the ignition switch, only after removing it, pry off the retaining ring and remove the contact group and the rod on the ignition switch secret.
After this, it is enough to simply connect the wires to the ignition switch correctly using the VAZ ignition switch connection diagram.
After this, all that remains is to correctly connect the wires to the ignition switch.
Why won't the engine start?
Checking the ignition elements for maintenance:
1) To ensure that the contacts are closed correctly for different key positions, follow these steps:
First, take the voltage from the battery and generator, and then apply it to the contacts in accordance with the table:
The note! The free "INT" card is for connecting the radio and pins "30/1" and "30" are used to connect the battery and alternator wires as above!
2) Now check how the steering lock works, it is also an anti-theft device for this:
Insert the key into the lock and turn it to the “III” position and mark the locking rod (o) that should be removed at this time.
Then turn the key in the lock to the “0” position and again mark the locking rod, which should be immersed at this moment.
A couple of notes and the price of reinstallation
Sometimes it happens that a car owner changes the ignition switch, but the car does not start. Most likely, such a nuisance occurs due to incorrect connection of the wires, especially in the classic VAZ.
However, if the car enthusiast still does not rely on his own strength, he can carry out the above operation at a car service center. How much it will cost is indicated in the following table.
| City | Price |
| Moscow | 1000 rub. |
| St. Petersburg | 1000 rub. |
| Ekaterinburg | 900 rub. |
| Samara | 800 rub. |
| Krasnodar | 900 rub. |
Average data is shown here. In reality, the price will differ; it greatly depends on the level of complexity of the work and the make of the car.
Throughout the article, various methods for reinstalling the clip, which is responsible for turning on the vital organs of the car, were described. This information will certainly benefit car enthusiasts.
#2 [email protected]
- Users
- 131 messages
- Car make: VAZ 21043
- From: Leningrad region
View Garage
Good day everyone! People, can you please tell me how to remove the ignition switch on the 2105? I unscrewed 2 screws on the sides of the lock, it began to play in all planes, but it doesn’t come out, it feels like it’s because of the standard steering wheel blocking! I tried to take it out with it inserted with the ignition key - hell, turn it this way, that way - no way. (((who knows the answer??
#3 Maniac_
- Car make: 2115
- From: St. Petersburg
Hm. Thank you! I’ll try it this weekend, then I’ll write how it goes!
ZY I think I looked, but didn’t see the hole in the lock.
Replacing the ignition switch of a VAZ 2105
I will change the ignition switch 63900247 9002236759 - about the development of the Sberbank Maestro channel.
But this is also not a problem, you can take something at hand and use it as a lever to push. The article presents the sequence of replacing the VAZ 2105 ignition and ignition. Detailed instructions in the pictures for replacing the ignition on a VAZ 2101, VAZ 2102, VAZ 2103, VAZ 2104 , VAZ 2105, VAZ 2106, VAZ 2107. I used a screwdriver and a regular screw. Replacing the ignition lock cylinder on a car. After I turned it, the lock was removed and the lock was no longer held, allowing it to be pulled out of its socket.
The new lock on the VAZ 2105 is the easiest to install.
Once the lock is in place, tighten it. lock. Replacement of the ignition switch for VAZ 2107, 2106. Replacement of the ignition switch with tips VAZ 2105. If the lock is installed correctly, the holes will line up in this position.
Now for the final replacement of the do-it-yourself VAZ 2105 lock, you need to connect the lock to the ignition system. Mom and dad are on plugs, so you can't connect correctly. Replacing the ignition switch on a VAZ 2101-VAZ 2107. Therefore, we should not have problems with a short circuit.
Now we check that everything was installed and connected correctly, then everything works like mine.
Now we collect all the plastic camouflage that we had to remove to get to the castle into a pile.
This is how we learned how to replace the ignition switch of a VAZ 2105. Replacing the contact group and cylinders (core) of the ignition switch of a VAZ 2101, repairing the ignition switch. Good luck!
How to remove and replace the ignition switch on a VAZ 2101. VAZ 2107. Yellow penny. Part 20
How easy it is to take off and replace such as the ignition switch on a VAZ 2101. Other classic models LADA VAZ 2107. Yes.
READ Replacing the VAZ 2109 heater motor
5) Then remove the key from the bracket by pulling the key out.
The note! Installing a new lock is done in reverse order!
#6 RomaSZ
- Car make: VAZ-21104
- From: St. Petersburg
[email protected] , thank you, everything worked out, I took out the lock, it turned out to be very simple, and I unknowingly spent 30 minutes tinkering with it. ))) But upon further disassembly, another problem arose: I can’t remove the steering wheel! I unscrewed the nut in the center, but the steering wheel stood as if welded! I decided: screw it, I’ll unscrew the bolt lower on the shaft and pull out the steering wheel with the shaft. I unscrewed it, and again it was disappointing, the steering wheel with the shaft also does not come out, it only moves 20-30 mm towards itself, and rests against something, I don’t understand what. what to do, tell me!!
PS In general, I decided to change the binoculars, they were cracked everywhere and the steering wheel began to wobble a lot!
Change binoculars. Look at the iron under binoculars.
Remove the steering wheel by hitting your forearms. Protect your forehead. Spray with WD. Good luck.
Larva
The cylinder is the internal part into which the key is inserted and which interacts with it. This element in the lock design has a movable locking pin, which moves when the key is rotated in a clockwise direction. When the key is turned in the opposite direction in the lock ( the ignition ), the finger moves out.
When the car owner leaves the vehicle, removing the key from the lock, the finger enters a special recess in the steering column, blocking the steering wheel from rotating in one position. This is an anti-theft system that prevents the car from being stolen without a key. If the larva fails, it can be replaced separately, without a contact group, but using a new key. To replace, you will need to dismantle the lock and remove the cylinder.
Device Features
Let's start with some basic things you should be aware of before embarking on a replacement or repair.
- The ignition switch (IZ) is the main element of the car's starting system. You will not be able to start the engine without it.
- The lock has a built-in anti-theft system. Therefore, if the protection does not work, the risk of becoming a victim of car thieves increases significantly.
- The ZZ is capable of blocking the starter from being turned on again, but without initially turning off the ignition.
- For tens, the key can be removed from the lock when it is in the “zero” position. By taking it out, you will thereby extend a special rod, which is responsible for the anti-theft functions.
- If the key moves from position zero to “one”, then the locking rod goes away and the ignition contacts close.
- When the car is started, all electrical equipment receives power and is energized. This applies to the dashboard, headlights, generator, windshield wipers, power windows, heater, turn signals, etc.
- By turning the key to position “two”, you thereby close another group of contacts, which makes it possible to apply voltage to the starter relay. This will start the engine and you can drive.
Connection
Now about the connection. If the wires are assembled into a chip, then there will be no difficulties - we install the chip correctly on the contacts and that’s it.
If each wire is connected separately, then you need to follow the diagram:
- To pin 50 – red wire (responsible for the operation of the starter);
- To pin 15 – blue with a black stripe (ignition, interior heating and other devices);
- Pin 30 – pink wire;
- Pin 30/1 – brown wire;
- INT – black wire (dimensions and headlights);
After connecting the wiring, everything is assembled, the terminal is connected to the battery and the functionality is checked. First you need to check whether all electrical appliances powered by the lock are working. Then check the functionality of the starter.
If something does not work, you need to remove the lock and once again check that the wiring is connected correctly, since this alone determines the operation of the devices when you turn the key.
Installing the "Start" button
Some car enthusiasts install a separate button in the car in a convenient place to start the engine. It is connected to the starter circuit by breaking the red wire going to terminal 50 on the ignition switch. The car is started as follows:
- The key is inserted into the ignition switch.
- The key is turned to position "I".
- Pressing the button turns on the starter.
- After the engine starts, the button is released.
In this case, you can turn off the engine only by turning the key in the opposite direction.
In order for the button to turn off the engine, it must be connected according to a slightly modified circuit
In order to use a button to stop the motor, that is, to turn it into a “Start-Stop” button, you need to use two additional relays:
- headlight relay RS 711;
- starter relay 113.3747–10 or 90.3747–10.
When you press the button, current from the battery goes to the headlight relay, closing its contacts, and then to the starter. When the engine starts, the button is released, opening the contacts of the starter relay and breaking its circuit. However, the positive wire remains connected through the headlight relay for some time. When you press the button again, the headlight relay contacts open, breaking the ignition circuit, and the engine stops. To delay the activation of the starter, an additional transistor is included in the circuit.
Thus, even a novice car enthusiast can replace the ignition switch of a VAZ 2107. To do this, you need a minimum set of tools and following the recommendations of specialists
Particular attention should be paid to the correct connection of wires to the lock contacts
Why does the ignition switch fail?
Jamming of the device is possible due to wear of the “larva” itself or due to problems with the contact group. When faced with such a problem, you should not use force to turn the key in the right direction! There is no need to “tear” the steering wheel if it is impossible to unlock it. It is better to carefully disassemble the lock and find out what the reason is. But more on that a little later.
Having noticed that the ignition in a car can be turned on with any key or foreign object, hurry to replace the “cylinder” or the complete device. This way you will protect your car from possible theft.
If the ignition switch on a VAZ-2114 car works normally, but when you turn it, the instrument panel does not light up, the starter does not start, and electrical appliances do not work, then most likely the contact group has failed. A similar problem may arise due to its natural wear and tear. After some time, the contacts are erased, which leads to a break in the electrical circuit. It is also possible for them to burn, caused by power surges, constant overloads, due to the use of additional electrical appliances and their incorrect connection.
Important: if you want to install additional electrical equipment in your car, connect it to the on-board network only through a relay!
Changing the contact group
Exploded view of the lock
Based on price considerations, replacing one contact group is less expensive:
- All our actions are repeated in principle, as in the case described above with removing the lock, you will have to remove the casing, and so on
- To avoid the widespread problem associated with mixing up contacts, it is recommended to number them before disconnecting (or mark them in some other way)
- This measure will save your nerves and time.
- Some models of locks have a locking ring in their contact group, and here we need an awl to pull it out
- It’s important not to forget to stick it in place later
- Then everything is put back together and screwed to the control column
That's all, all that remains is to finish watching the video and relax and change every part of the lock.
Schematic electrical diagrams, connecting devices and pinouts of connectors
The ignition switch in cars of the VAZ family fails from time to time due to weakening of the contact posts or burning of the contacts inside it. It also happens that the cams of a plastic roller are produced. You can disassemble the lock and clean it, but it’s better to just replace it with a new one, considering that it costs pennies compared to imported locks.
But if connecting the wires together did not result in the starter operating (or it did not turn on the first time), check the solenoid relay on the starter. The contact spots on it may also burn out, which will prevent the circuit from closing normally. Alternatively, you can use a screwdriver to short-circuit the two large terminals on the solenoid relay (before doing this, put the car in neutral and use the handbrake). When closed, the starter should begin to spin vigorously. If this happens, remove and change the solenoid relay. If the starter rotates “sluggishly” when it closes, you will have to remove it and check the condition of the brushes.
The ignition switch is designed not only to start the engine - it performs several functions at once:
- supplies voltage to the vehicle’s on-board network, closing the circuits of the ignition system, lighting, sound alarm, additional devices and instruments;
- at the driver’s command, turns on the starter to start the power plant and turns it off;
- turns off the power to the on-board circuit, preserving the battery charge;
- protects the car from theft by fixing the steering shaft.
Illumination of the instrument panel - how is the panel arranged?
Any modern car must have lighting for both the instrument panel and other buttons and switches located on the car’s dashboard. Illumination of the ignition switch is a very common occurrence in imported cars. Our manufacturers have not thought of this, so many drivers improve their iron horse on their own. Such lighting will give your car a special charm at night, and it’s convenient to see where to insert the key.
Photo of the ignition switch illumination
It is not difficult to install, and its service life is very long. The most important thing is that when choosing such lighting you don’t need to invent anything. Car dealerships, as a rule, sell standard types of backlights that have only one bulb and can only shine at a point. For VAZ cars, they began to produce ready-made elements for illuminating the ignition switch, which are conveniently mounted and do not require alterations or cutouts in the plastic of the car’s steering column.
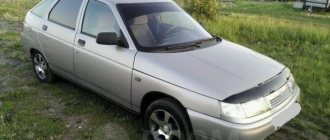
VAZ 2106 car and its ignition switch
Unit for car ignition system
Sometimes when operating a domestic VAZ car, the following situation arises: you get into the car, insert the key into the ignition, turn the key to position I, but the indicator lights on the dashboard do not light up. If you don't notice this and try to start the engine, the starter doesn't turn or even click. Experienced drivers in such cases immediately check the serviceability of the lock.
The VAZ classic ignition switch consists of two parts: a mechanical (secret) into which the key is inserted, and a contact group to which the wires are connected. The mechanical part is inseparable from the body, and if it fails, the lock must be replaced. The contact group is removable; it is inserted into the back of the device and secured with a spring ring. Due to the simplicity of the design, the ignition switch of a VAZ 2106 car breaks down extremely rarely, almost as rarely as the engine or gearbox.
There is only one malfunction that may require replacing the VAZ classic ignition switch assembly - a breakdown in the secret part mechanism. You can perform the operation of replacing the device yourself, even in an open field, in 10 minutes.
Removing a faulty device
To remove the ignition switch of a VAZ 2106, the following tools are required:
- positive screwdriver;
- slotted screwdriver;
- awl.
Replacing the ignition unit
If you do not have an awl, to dismantle the device, you can use a long thin nail with a cross section of 1.5-2 mm with a wide head or a screwdriver to unscrew small screws from the body of mobile phones.
Before carrying out the main procedure, it is necessary to remove the negative terminal from the battery
Despite the fact that a 12-volt current is practically harmless to the health of an adult, when removing the device, you can accidentally short-circuit the wires, which, in turn, can lead to the failure of important electrical equipment of the car
Step-by-step instruction:
- To begin, insert the key into the ignition switch and turn it 90 degrees to the “0” position. This is necessary so that the pin holding the steering shaft from turning fits slightly into the secret part and does not interfere with dismantling.
- Next, you need to remove the plastic steering column cover. To do this, sequentially unscrew the 5 screws connecting the lower and upper parts of the casing.
- Then carefully lift the upper part of the steering column housing and pull it up. After this, remove both parts of the casing to the side.
- Next, find and unscrew the screws securing the device itself. There are two of them, they are located at the bottom of the switch, on the right and left.
- Then disconnect the wires from the ignition switch contacts.
- Next, find a flat slot on the bracket to the left of the device, insert an awl there and forcefully press the latch with it.
- After this, you can remove the device from the bracket by prying it with a slotted screwdriver.
If, despite all the efforts made, the switch “refuses” to come out of the bracket, it means that the latch is not pressed all the way. You need to press the latch with an awl, and then move the key slightly left and right without turning it. The latch will compress completely, and all that remains is to pull out the switch.
Replacing the contact group and installing the ignition switch
Often the cause of a malfunction of the ignition switch is the burning of the contact group. Replacing the contact group is very easy. It is enough to remove the spring ring using a slotted screwdriver, and the contact group will fall out on its own. After this, you need to insert the new part into the device body so that the groove of the contact group fits exactly onto the rod of the secret part, and secure it in the device body with a spring ring. After this, you can install the ignition switch in place.
Installation algorithm:
- First you need to insert the key into the lock and turn it to position “0”.
- Press the latch and insert the switch into the bracket.
- Then you should connect the wires correctly.
- Install the casing on the steering column, fasten the upper and lower parts of the casing with screws.
Where should the wires be attached?
The hardest part about installing the switch is connecting the ignition switch to the wiring. Lucky are those VAZ 2106 owners whose wires to the switch are connected through a special block. This block can be connected with your eyes closed.
If your car does not have a special block, a colored wiring diagram will help you correctly connect the wires to the switch.
The color of the arrows shown in the diagram corresponds to the color of the wires. Please note that the wiring of older cars may have an orange wire instead of a pink one. Good luck with the renovation!
Ignition installation methods
Next we will look at how to set up the ignition on a VAZ 2105 . There are no difficulties in the installation process; in principle, anyone can do it themselves. Which tool you need depends on how you plan to make the adjustments.
There are several options for setting the ignition on the “five”:
- using a special device - a strobe light;
- using a 12V light bulb;
- experimentally with the engine running;
- according to the available tags.
When carrying out the installation themselves, almost none of the motorists use a strobe light. Firstly, its cost is approximately 600-700 rubles, and, secondly, installing the ignition on the “five” is so simple that purchasing a special device is not advisable. The price of performing work in an ignition adjustment service is approximately 100-200 rubles, and therefore it makes more sense to seek the help of professionals - they have everything necessary to complete everything quickly and efficiently.
Operating principle of the ignition system
The VAZ ignition system is used to ensure ignition of the air-fuel mixture to start the engine. If the VAZ ignition does not work correctly, then most likely the car owner will face the problem of poor engine starting. To prevent this, all elements of the safety system must always be in working order.
The VAZ ignition circuit, in particular, the principle of its operation is as follows:
- the first stage is the accumulation of the charge necessary to start the internal combustion engine;
- the second stage is the conversion of this charge into high-voltage voltage;
- charge distribution along the wires;
- spark formation in spark plugs;
- ignition of a flammable mixture (video author - Mikhail Nesterov).
At each of these stages, the precise operation of all components and mechanisms is important.
In order for the operation of the VAZ engine and its cylinders to be optimal, from time to time you need to pay attention to system diagnostics
At different positions of the regular or flip key in the lock, different processes occur in the on-board network:
- When the conventional ignition switch is positioned at mark I, the ignition switch on the VAZ actually starts working. This position is fixed; the instrument panel, optics and side lighting, as well as other equipment, operate in it.
- In position II, the device supplies voltage to the starter, which is necessary to start the internal combustion engine. This position is not fixed as the driver moves the switch key into it to start. When the motor starts running, the key should return under the action of the spring.
- III - this position is a parking position, in which all equipment does not work, and the steering column is locked with a latch.
Firing order
VAZ ignition switch connection diagram
An equally important nuance is the ignition order. Every car owner should know the ignition procedure so that in the event of a malfunction of the power unit, he can take action to repair or diagnose it. In classic VAZ models, the ignition order is as follows: first, the spark is supplied to the first cylinder, then to the third, fourth and second.
The firing order should be marked on the breaker cover. Number 1 indicates that the wire goes to the spark plug of the first cylinder. If you look at the VAZ ignition module, you will see that there are numbers on its outputs that will help you connect the wires correctly after disconnecting. The ignition order must not be violated.
Central lock installation
So, the doors of your car close no louder than in a foreign car, but you have to lock them separately with a lock. To simplify this point, let's move on to installing the central lock. In addition to the fact that this option will make driving your car even more convenient, it will to some extent protect your car from theft.
Installing a central lock on a VAZ will allow you to close and open the doors by pressing the key fob button, turning the keys in the driver's door lock, or from a special button on the instrument panel, if you wish to install one.
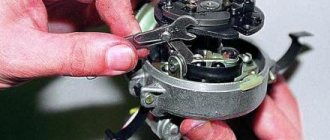
Installation of the mechanism
First, we remove the trim from all the doors and the panels that are located between them, and we also dismantle the lower protective curb of the rear doors.
Now we need to drill holes in all the doors to mount the motors
Please note that if you plan to protect the wires with special rubber tubes, then the holes you will make for the wiring will need to be slightly wider.
Important! Before you start drawing wires, disconnect the negative terminal of the battery!
Important! Before you start drawing wires, disconnect the negative terminal of the battery!
When installing motors on doors, do not forget that three of them have two terminals, and one has four. It is mounted on the driver's door.
Having stretched all the wires to the central unit and connected this entire system to the battery, you can install the door trim and panels in place. Check the entire system in operation. When connected to the battery, the locks should work immediately, so keep the keys in your hands or do not leave the car. If the circuit does not work correctly, there is a possibility that the plus and minus were mixed up when installing the wiring.
And, of course, do not forget that you can connect both the alarm and the trunk lock to the central locking of your car, thereby making it also automatic.
How to install the ignition switch?
When installing the device, it is important to correctly connect and connect all contact components of the product. Before connection, a lock is installed
What will you need?
To connect and connect all components of the device, you will need the same tool that was used to disconnect. The procedure will be performed almost in reverse order.
Pinout (diagram) of the ignition switch VAZ 2106
To correctly complete the wiring diagram for the VAZ 2106 ignition switch, you need to understand the pinout of the device:
- Position 0 - contact elements numbered 30 and 30/1. The components are designed to shut down the power system. When the key is in this position, the system activates emergency operation.
- Mode I - contact components 30/1-15, as well as 30-INT. They are used to activate lighting devices, both external and internal, as well as a number of other devices. This refers to the windshield wiper system, washer motor, generator unit, heater fan, control panel devices, turning lights, ignition system, sound devices.
- Regulation II. These are contact elements 30/1-15, 30-INT, and also 30-50. When the key is turned to this position, all devices turned on in mode I remain activated. The exceptions are the generator set, control panel and ignition system. The starter circuit is activated, which leads to the start of the power plant.
- Regulation III. This is a standby mode and only activates contact components 30-INT and 30/1. The starter circuit is disconnected. Only the lighting system, windshield wipers, washer motor and cooling unit remain switched on.
Separately, we should talk about the classification by color:
- 30 — pink contact;
- INT - black contact, intended for connecting side lights and external lighting;
- 30/1 — brown contact;
- 50 - red contact, used to start the starter device;
- 15 - contact element is blue, has a black stripe.
The Auto Repair and Maintenance channel talked about the nuances of connecting the ignition switch and presented a visual diagram of the product.
Step by step steps
Device installation algorithm:
- The key is inserted into the hole in the lock and turned to mode 0.
- The latch is pressed, and then the device is mounted in the bracket.
- The next step will be connecting the electrical circuits. If the car is equipped with a chip, then the connection procedure will not cause difficulties. But in its absence, the connection of electrical circuits will be carried out one by one. To do this, the terminal connector is mounted so that one of the double-type contacts is installed on the right and located vertically. The black cable is connected to the upper component group.
- Then the work is carried out in a clockwise direction of movement. After connecting the black contact, the pink circuit is connected, then the blue, brown and red. On the back of the connector, next to the terminals, there are numbers that correspond to a specific electrical circuit. The lower part should remain intact.
- When the contact elements are connected, the plastic casing is installed on the column. The upper and lower plastic components are fixed to each other using bolts.
Fuse and relay diagram 2105
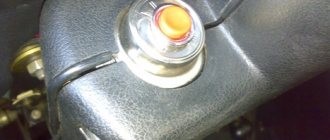
Until 1988, the fog lamps in the rear lights and the fog lamp warning lamp were protected by fuse 17 of the mounting block. Since 1988, they began to be protected by a separate fuse, which is located in a plastic case in the wiring harness near the car's fog light switch.
Mounting block 2105-3722010-02
Mounting block 2105-3722010-08
Mounting block diagram 2105-3722010-08
K1 Relay for turning on the heated rear window K2 Relay for turning on the headlight washer cleaners K3 Relay for turning on the sound signal (jumper) K4 Relay for turning on the electric fan motor K5 Relay for turning on the high beam headlights K6 Relay for turning on the low beam headlights
Circuits protected by fuses
F1 (10A) Reversing lamps. Heater electric motor. Rear window heating indicator. Rear window heating relay (winding). F2 (10A) Wiper motors. Windshield washer pump motors. Windshield wiper relay. Relay for cleaners and headlight washers (contacts). F3 (10A) Reserved. F4 (10A) Reserved. F5 (20A) Rear window heating element. Relay for turning on the heated rear window (contacts). F6 (10A) Cigarette lighter. Watch VAZ-2105. F7 (20A) Sound signal. Horn relay. Radiator cooling fan electric motor. Radiator cooling fan motor activation relay (contacts) F8 (10A) Direction indicators (in hazard warning mode). Turn signal indicator (in hazard warning mode). Relay-breaker for direction indicators and hazard warning lights. Hazard warning switch with warning lamp. F9 (7.5A) Rear fog lamps. Indicator for switching on the rear fog lamps. F10 (10A) Direction indicators (in turn indication mode). Turn signal interrupter relay. Turn signal indicator. Tachometer. Fuel indicator. Fuel reserve indicator. Parking brake indicator. Indicator of insufficient oil pressure in the engine lubrication system. Coolant temperature gauge. Voltmeter. Indicator of emergency condition of the working brake system. Battery charge indicator. Electric fan relay. Generator excitation winding (generator 37.3701). F11 (10A) Interior lamps. Brake light bulbs. Luggage compartment lamps. F12 (10A) High beam headlights (right headlight). F13 (10A) High beam headlights (left headlight). High beam indicator. F14 (10A) Front side light (left headlight). Rear marker light (right light). License plate lights. Indicator for turning on side lights. F15 (10A) Front side light (right headlight). Rear marker light (left light). Cigarette lighter lamp. Instrument lighting lamp. Glove box lighting lamp. Clock (lighting lamp). F16 (10A) Low beam headlights (right headlight). Headlight wiper relay (relay coil). F17 (10A) Low beam headlights (left headlight).
In the old-style VAZ 21053, the unit is located directly under the dashboard next to the left door, that is, inside the cabin. In the new VAZ 21053, the safety block is located outside under the hood, closer to the windshield, on the driver's side. The latest models of the “five” are most often equipped with an external fuse block. To open the unit, you need to remove the cover by pushing it upward. On any cover there is a diagram of the VAZ mounting block, which reflects the location of the fuses with a description of the electric current for each of them. In older VAZ 2105 models, the most precise installation of each fuse in accordance with the required current strength is important.
How to replace the ignition switch on a VAZ 2101-VAZ 2107?
Replacing the ignition switch:
Removal: 1) At the beginning of the operation, remove the upper and lower casing from the steering column. (For information on how to remove the cover, see the article: “Replacing the instrument panel”)
2) Next, using a marker or something else, mark the wires that are connected to the back of the lock, and only then disconnect all the wires.
3) Next, using a Phillips screwdriver, unscrew the two lower screws that secure the ignition switch.
4) Then insert the key into the lock cylinder and turn it to position “0”, thereby disabling the anti-theft device that locks the steering wheel. At the same time, use a thin awl or screwdriver to press the latch that holds the lock in place... (Continued in point 4)
5) And then pull the key to remove the lock from the bracket.
Note! Installing a new lock occurs in the reverse order!
Checking the ignition switch elements for functionality:
1) To check the correct closure of the contacts at different key positions, do the following:
• First, take the voltage from the “Accumulator – Rechargeable Battery” and the generator and thereby apply it to the contacts in accordance with the table:
Occurring faults
The design of the lock is quite simple and reliable, but the lock may well break. There are only two malfunctions that can happen to this element: mechanical and electrical.
A mechanical failure includes a problem with the secretion. Due to debris that gets inside the secretion and moisture, corrosion is formed, which prevents the movement of moving elements inside the secretion. As a result, the lock begins to jam when you turn the key, jams, or stops rotating altogether. This problem can be eliminated by pouring WD-40 or at least brake fluid inside. However, if it is possible to restore the functionality of the secret in this way, it will not be for long. The secret itself is not repairable, and in the event of such a malfunction, the VAZ-2101 ignition switch will eventually need to be replaced.
An electrical fault is the burning of the nickels of the contact group. Because of this, there will be no or insufficient contact between the runner and the nickel. Electrical appliances on the car will not work, and there may be no power supply to the starter. If the burning was minor, then you can try to restore the functionality of the lock by cleaning the nickels with a diamond file, followed by wiping with alcohol or gasoline. But if the nickels are badly burnt, then you will need to either change the contact group or the lock assembly.
An interesting article about biofuel produced from ordinary sawdust, read more here.
Ignition switch VAZ 2104 wiring diagram
| Interface | Russian English |
| License type | Free |
| Number of views | 257 |
| Number of downloads | 132 times |
| Update: | 12-04-2019 |
VAZ 2104 ignition switch wiring diagram - VAZ 2101 ignition switch diagram, device and connection remont-avtovazrushema-zamka-zazhiganiya-vaz-2101 Cached This feature will greatly facilitate the installation of a new element, since such a VAZ -2101 ignition switch does not require a wiring diagram Lock ignition VAZ 2106: wiring diagram cars-bazarruvse-o-prodazhe-avtozamok-zazhiganiya-vaz-2106 Cached The ignition switch on a VAZ 2106 car is not too complicated, and the wiring diagram for all wires is simple and clear. Therefore, independent replacement, without contacting a service center , performed Ignition Switch VAZ 2104 Wire Connection Diagram - Image Results More Ignition Switch VAZ 2104 Wire Connection Diagram images Replacing the ignition switch or contact group on a car wwwautoezdacomremauto948-zamena-zamka-zaguganiahtml Cached Replacing the ignition switch or contact group of the ignition switch, ignition switch connection diagram VAZ, Lada cars Replacing the ignition switch or contact group on cars wwwavtoreminfostativaz-2101-vaz-2106-vaz-2107zamena Cached Connection diagram for the ignition switch on the VAZ 2104 still won’t start, with wires Connection diagram for the ignition switch for the VAZ-2107 VAZ-2101 vazdriverru Electrical equipment Diagram connecting the ignition switch VAZ -2107 VAZ -2101 In this manual we provide a detailed diagram for connecting the ignition switch on a VAZ classic with a photograph and colors of wires Ignition switch VAZ 2106: Connection, Diagram, How to remove vz06-upruszzamok-zazhiganiya-vaz-2106html Cached This and oxidation of wires, jamming of larvae and much more. To deal with this, you need to know how to remove and connect the ignition switch of a VAZ-2106 Wiring diagram of a VAZ 2104 (21043) carburetor and injector with bumperguruelektroshema-vaz-2104 html Cached Export version of the VAZ 2104 and VAZ 21043 additionally include a wiper and heated rear window Since 1994, this scheme has become standard for all produced fours Replacing the ignition switch and contact group on a VAZ 2108, VAZ vaz-russiacomremont-vaz-2108zamena-zamka Cached How to replace the ignition switch, check the contact group and replace it with VAZ 2108-VAZ 21099? Replacing the ignition switch: How to remove the ignition switch on a VAZ 2107: connection diagram avtozamcom VAZ VAZ 2107 2 Connection diagram in a VAZ -2107 by wire color The ignition switch on a VAZ 2107 will be required Replacing the ignition switch on a VAZ 2101-VAZ 2107 vaz-russiacomremontzamena-zamka-zazhiganiya Cached The ignition switch is responsible for this, replace it with a new one and everything will be fine with the blocking! (For information on how to replace the lock, see the article: Replacing the ignition switch on a VAZ) Promotional Results For You Free Download Mozilla Firefox Web Browser wwwmozillaorg Download Firefox — the faster, smarter, easier way to browse the web and all of 1 2 3 4 5 Next 4,310
- On a leg, r. 188 cm, made in Germany. Selling Vase in Kemerovo 51103 Initial description of the product, c
- Your name and contacts must be indicated in the ad text. 1 - to the capacitor, 2 - terminal VK and 3 - terminal B, as I understand, to the VK terminal I have a wire from the quot; voltage regulatorquot; and with quot; lock behind
- , as I understand, I have a wire coming to the VC output from the quot; voltage regulatorquot; and from the quot;ignition switchquot;, only in the diagram they are connected at the fuse, In Fig. 1.1 shows a schematic diagram of a boiler plant operating on natural gas or fuel oil. The electrical circuit for switching on steam and hot water boilers has an automatic switch (AB) for protection against overloads. If this section of the circuit is working properly, but the plus is still not supplied to the pink wire, then you need to look for an open circuit somewhere closer to its beginning - for example, in the ignition switch. As you can see, finding the reasons for stopping the ZMZ-406 engine is no more difficult than searching for VAZ engines. Catalog of parts, search, assortment, links to resources, auto news. Posting your own price list. There are no modifications for this model. For example, so that you can open the car using the central lock. But even in this case, the hijackers have their own scheme. VAZ forum: Forum for VAZ car owners and more. Used spare parts VAZ 2104 - Nizhny Novgorod. Set of cylinders for Daewoo Nexia doors, trunk, ignition switch Price: 1,750 rub. . Ignition switch groups on Nexia - Daewoo Nexia FAQ - Daewoo tuning. People, help me connect the lock. Thank you for your help, but I would also like a color scheme. In our electronic online auto catalog, you can search for VAZ-2131 spare parts by number or factory drawing of the unit, place an order and find out the cost of spare parts.
Removal and installation
Diagram of the contact ignition system for VAZ 2105, 2107 cars
Removing this element from the car is quite simple and all you need is a Phillips screwdriver and a thin flat-head screwdriver or an awl. Before starting work, be sure to disconnect the negative terminal from the battery.
To get to the fastening of this element, you will first need to unscrew the bolts securing the lower facing panel of the steering column, and then remove it.
Afterwards, you need to unscrew the two bolts securing the lock, which hold it in its seat. In the same seat there is a small technological hole. By inserting a thin screwdriver into this hole, you need to press the latch that holds the lock, and then push it out of its seat.
Only then disconnect all the wires. On some models, the wiring going to the lock is collected in a chip that is put on the contacts of the lock. This feature will greatly facilitate the installation of a new element, since such a VAZ-2101 ignition switch does not require a wiring diagram.
But there are also versions of the car in which the wiring is directly connected to the contacts, and when installing a new element with this type of wiring connection on a VAZ-2101, an ignition switch circuit will be required.
If only the contact group is changed, then the removed lock is disassembled. The contact group is fixed using a locking ring, which must be pryed off with an awl or screwdriver and removed. After this you can remove the group. A new one is installed in its place and secured with the same retaining ring. After this, everything is put in place and the VAZ-2101 ignition switch is connected.
Installation of a new larva
To replace the lock core due to mechanical failure, remove it from the vehicle as described above. Then follow this algorithm:
- Insert the key into the slot and use a Phillips screwdriver to unscrew the 3 screws holding the 2 halves of the lock body together.
- Separate the housing while holding it with the key facing up. If you hold the lock in a different position during disassembly and do not insert the key, the insides will spill out and you will not understand how to put them back together. In this case, the ball with springs may get lost.
- Remove the locking mechanism, which consists of two spring-loaded parts, and pull out the spring itself.
- After removing the key, carefully remove the core so that the ball with the spring (located on the side of the cylinder) is not lost.
To disassemble the body, you need to unscrew 3 screws.
Before replacing, you need to remove the return spring from the old cylinder, since it is not sold complete with the new core. The spring is inside the part on the back side in a cocked state; it must be installed in the same form on the new cylinder. Also, do not forget to remove the thin spring from the hole where the ball is inserted.
The larva must be pulled out so as not to lose the details
When installing the core, you need to move the spring for the ball into the hole and insert the part into the body. Then push the larva all the way, while simultaneously inserting the ball into the socket. After that, all that remains is to assemble the locking mechanism and tighten the housing with screws. When finished, check the operation of the ignition switch by turning the key to different positions.
The ejection spring from the old core needs to be moved to the new one
Reasons for replacement
It is necessary to replace the entire lock or just the contact group, depending on the nature of the breakdown and the situation with your car. Therefore, we will consider options when replacement may still be required.
When checking the contact group, be sure to disconnect the negative terminal from the battery, otherwise a short circuit will occur, and not only the contactor will have to be replaced.
Pinout in photo
Circuit and pinout
First of all, get acquainted with the lock diagram and wire connection diagram, which will allow you to better understand the features of the 3Z pinout.
As you can see, the pinout includes 8 elements. What does each of them mean and what functions are they responsible for? We'll figure out.
- Power supply for the inserted key sensor microswitch (+12Volt).
- Power supply to ground when doors are opened on the driver's side.
- Power supply that supplies current to the starter (+12Volt, pin 50 on the diagram).
- Source at +12Volt. Activated after turning on the ignition. Power supply for additional equipment, such as video recorders, clocks, etc. (pin 15 in the diagram).
- Source at +12 Volts. Triggers when the key is inserted. Goes to pin 5.
- Power supply +12Volt. The illumination of the 3Z larva is activated.
- +12V source from the battery (pin 30 in the diagram).
- Not active.
Wiring
Possible malfunctions and ways to eliminate them
The nature of the lock assembly malfunctions on a VAZ 2109 car can also be electrical or mechanical.
The first group includes violations of the integrity of electrical circuits in the switch at a certain position of the key. If there is no contact, then the connected consumers may not work, or the car will not start at all. If there is contact, but the wrong parts of the circuit are closed, this is fraught with a short circuit and thermal damage to the lock. It will begin to melt and a characteristic smell will appear. Depending on the scale of the disaster, the contact group will most likely need to be replaced.
From a mechanical point of view, the core/larva may become stuck in some position. In this case, it will be physically impossible to turn the key in the lock. The only correct repair option is to replace the entire assembly.
To diagnose faults in electrical circuits, you need to stock up on the following tools.
- Multimeter or tester. If it is not available, as an option, you can use a control light operating at 12V voltage.
- A set of screwdrivers and keys for dismantling the lock. Since the only option for repairing mechanical faults is to replace parts that have failed, they will come in handy in this case as well.
Before starting diagnostics, you will have to disconnect the terminal block and ring all contacts in the sequence that corresponds to each of the key positions. For clarity, you should have an electrical diagram of the unit at hand. If the circuit is closed, there will be a resistance indication on the device.
Replacing the lock should begin with de-energizing it. To do this, you will have to loosen the fastening nut and remove the negative terminal of the battery. After this, the protective and decorative casing and the turn/window washer switches are removed. The lock is attached to the steering column using four screws or two screws and a hook latch. It may be difficult to remove due to the screws. In this case, they will have to be cut or drilled, doing everything extremely carefully. The terminal block is disconnected, and the dismantling process can be considered complete.
Assembling a new lock assembly occurs similarly, but in reverse order.
Malfunctions
The design of the lock is quite simple and reliable, but the lock may well break. There are only two malfunctions that can happen to this element: mechanical and electrical.
A mechanical failure includes a problem with the secretion. Due to debris that gets inside the secretion and moisture, corrosion is formed, which prevents the movement of moving elements inside the secretion. As a result, the lock begins to jam when you turn the key, jams, or stops rotating altogether. This problem can be eliminated by pouring WD-40 or at least brake fluid inside. However, if it is possible to restore the functionality of the secret in this way, it will not be for long. The secret itself is not repairable, and in the event of such a malfunction, the VAZ-2101 ignition switch will eventually need to be replaced.
An electrical fault is the burning of the nickels of the contact group. Because of this, there will be no or insufficient contact between the runner and the nickel. Electrical appliances on the car will not work, and there may be no power supply to the starter. If the burning was minor, then you can try to restore the functionality of the lock by cleaning the nickels with a diamond file, followed by wiping with alcohol or gasoline. But if the nickels are badly burnt, then you will need to either change the contact group or the lock assembly.
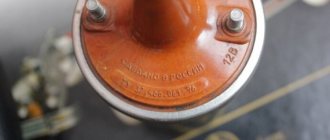
Replacing the ignition coil of a VAZ 2106
The ignition coil of the VAZ 2106 is a non-separable device. It cannot be disassembled and repaired. If the coil fails, the assembly is replaced. To do this you will need:
- wrench 8;
- 10mm wrench.
Coil replacement procedure
When replacing the coil, safety precautions must be observed. Since the coil is a high-voltage transformer, before dismantling it, the car must be de-energized by removing the wires from the battery. Further work is performed according to the following scheme:
- Remove the high-voltage wire from the coil body.
- Unscrew the nut from the “OE” terminal of the coil. Then remove the spring washer and wire lug.
- Unscrew the nut from terminal “B+”, remove the washer and tip.
- Unscrew the two nuts securing the coil to the mudguard.
- Remove the failed coil and install a new one in its place.
- Tighten the coil mounting nuts.
- Screw the nut with the wire to terminal “B+”, having previously placed a new spring washer under the tip of the wire.
- Screw the nut to the “OE” terminal, replacing the spring washer.
- Connect a high-voltage wire to the coil body.
Thus, replacing the coil will take 10–15 minutes. Any car enthusiast can easily handle the job.