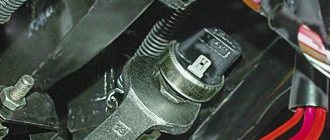
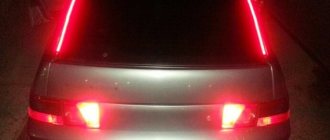
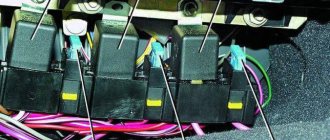
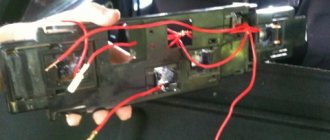
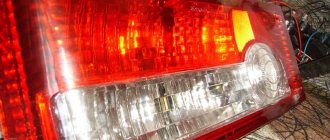
The most common reason for the loss of the reverse light on a VAZ-2107 is oxidation and poor contact on the sensor switch located on the gearbox in the rear right part.
Due to the fact that the terminal chips are not structurally protected from the effects of water and salts from the road, they corrode, as a result of which contact with the sensor is broken and current stops flowing to the lamp lamps.
Also, the wires are not protected in any way from mechanical damage and the effects of road sandblasting. In our case, in addition to the oxidation of the contacts themselves on the sensor and wires, one of them broke.
Reversing lights are generally not a legal requirement, but they are useful. They serve two main purposes - to warn other road users that you are about to reverse, and to illuminate if you are reversing at night. The circuit is a simple mechanism consisting of one or two rear lights, which are activated using a switch. So if something goes wrong and you find that the reversing lights are not on, it will be quite easy to identify the cause of the failure.
On most cars, the switch is installed on the transmission, and it operates automatically when reverse is engaged. If you or the previous owner of the car made your own adjustments by adding lights yourself, the reverse lights can light up manually. In this case, the switch is most often installed on the dashboard, closer to the driver.
Dimensions of VAZ 2104, 2105, 2107 do not light up
On VAZ 2104, 2105, 2107 cars there are 4 side lights (dimensions): one in the front headlights and one in the rear lights. Failure of any of them to work is a fairly common occurrence. Let's look at the reasons for this malfunction - “why the lights on VAZ 2104, 2105, 2107 cars don’t light up.”
Symptoms of a malfunction: “VAZ 2104, 2105, 2107 dimensions do not light up”
One dimension, two dimensions (front or rear, right or left side, crosswise) or all of them may not work.
The side light bulb is burnt out
The most common reason. One light bulb, or several at once, can suddenly burn out. In some cases, it may be impossible to visually identify a burnt-out light bulb. Therefore, we replace the burnt out one with a known good one. You can use a similar one from a nearby headlight.
The contacts of the light bulb in the socket have oxidized
We rotate the light bulb in the socket several times to remove the oxidized layer and restore contact. In the future, you can clean everything with sandpaper.
Lost ground to headlights or taillights
Loss of contact with ground leads to failure of not only one size, but also the entire headlight or rear light.
The “negative” wires of the front headlights and rear lights with side lights on VAZ 2104, 2105, 2107 cars are attached to the car body. It is necessary to clean the mounting location to ensure good contact with ground. Usually the negative wire is the black wire from the headlight connection block, attached to the body next to the headlight or tail light.
Broken contact in the headlight or rear light connection block
Either it has oxidized or the block is not attached tightly. In such a situation, either one side lamp or the entire headlight may not light. We put on and take off the pad several times to restore contact.
The track in the rear light board has crumbled
During long-term use of the vehicle, or if a low-quality part is installed, the track to the side light lamp socket in the rear lights may shed (burn out).
Contact is broken in the connecting blocks of the relay and fuse mounting block
Check the pads Ш12 (Х12), Ш13 (Х13), Ш9 (Х9), Ш6 (Х6) of the mounting block. Or Ш2 (Х2) - terminals 1 and 3 if all the dimensions do not light up.
The fuse in the mounting block has blown
If fuse No. 14 (F14) is blown, the side lights in the front left headlight and rear right headlight will not light. If No. 15 (F15), then the marker in the front right headlight and rear left lamp will not light up, that is, crosswise.
The fuses must be replaced with serviceable ones and the cause of their burnout must be determined in the future. There may be a short circuit in the electrical circuit.
The external lighting switch on the instrument panel is faulty
All dimensions will not light up. Remove the switch and remove the wire block from it. Connect the leads of the black and yellow-red wires with a piece of wire. Turn on the ignition. If the dimensions light up, the switch is faulty and must be replaced.
“Open” in the electrical circuit connecting the side lights
It is necessary to check the sections of the circuit responsible for the non-burning light using the connection diagram. Read more: “How to find an open circuit in a car’s electrical circuit.”
Scheme for switching on the external lighting of a VAZ 2105 car
Wiring diagram for dimensions 2107.
Connection diagram of dimensions (external lighting) of a VAZ 2107, 21074 car
parking lights
Dimensions on the VAZ-2107 are activated by the leftmost of the four key switches located under the gearbox control lever . This switch is a three-position switch: the side light, along with the license plate light and instrument lighting, is turned on in the second position.
The side lights are activated by a three-position switch located under the gearshift lever.
On the fuse block, which is located under the hood of the car near the windshield closer to the passenger seat, the rear side lights fuses are numbered F14 (8A/10A) and F15 (8A/10A). In this case, fuse F14 is responsible for the operation of the side lights of the left front headlight and the right rear light, as well as:
- a lamp indicating the operation of the dimensions;
- license plate lights;
- engine compartment light bulbs.
Fuse F15 is installed in the side light circuit of the right headlight and left rear light, as well as:
- instrument lighting;
- cigarette lighter lamps;
- glove compartment lighting.
If one of these lamps does not work, you should check the integrity of fuses F14 and F15.
Read about repairing VAZ-2107 fuses: https://bumper.guru/klassicheskie-modeli-vaz/elektrooborudovanie/blok-predohraniteley-vaz-2107.html
Fuses F14 and F15 are responsible for the operation of the side lights.
Replacing the sensor
And now it’s time to consider the process of replacing the reverse sensor on various VAZ cars - from 2106 to 2115. Here are the instructions.
VAZ 2107
Let's start with the Classics
Let's start with the VAZ 2107 car. On VAZ Classic models everything is done exactly the same.
Advice! Before replacing the sensor on any car, clean the gearbox housing from dirt to make it easier to find the sensor and to prevent dirt from getting into the oil.
First, we look for the sensor - it is located on the right side of the gearbox, if you look at the car as it moves. It is very difficult to make a mistake - this is the only part in the gearbox where two wires fit.
Sensor location on Classic
- If the wires are broken, then look for protruding contacts.
- If the wires are still on the sensor, then disconnect them.
- Next, you will need a 22 key. They need to unscrew the sensor. For convenience, it is better to take a longer wrench, since over time the sensor will stick to the crankcase.
- If you cannot unscrew the reverse sensor using a wrench (head), then you need to do this using a hammer and chisel.
Note! The gearbox housing is very fragile. Therefore, be extremely careful not to damage it with hammer blows.
- Then clean the seat from dirt using a knife.
- Remove the metal washer along with the dirt and replace it with a new one.
- Insert the sensor and tighten it using the same wrench until it stops.
- Next you need to put the wires back on. If necessary, crimp the contacts with pliers.
- And now, the replacement of the reverse sensor on the VAZ 2107 is completed!
Some people have a question about oil - whether it will leak or not. In this case it will not leak.
VAZ 2109
VAZ 21099 replacement reverse sensor
Let us remind you that this point applies to the Samara family as a whole, and not just to the VAZ 2109 car:
- Remove the protection from the car engine, if any.
- The location of the sensor on a VAZ 2108 and similar cars is slightly different than on a Classic, since the car has front-wheel drive.
- As the vehicle moves, the sensor is located on the left side.
- If the Classic had to be driven into a viewing hole, then cars with front-wheel drive can simply be lifted under the left front wheel using a jack.
- Again, the electrical wiring leads to the sensor.
- Remove the wires.
- To remove the sensor you will need an extended 22mm socket and a wrench.
- Using the head, remove the sensor.
VAZ 2109 replacement of reverse sensor
Remember! Replacing a reverse sensor on a front-wheel drive vehicle is characterized by small oil leaks from the gearbox housing.
- Prepare a container and, as soon as you unscrew the sensor, place it so that the oil does not spill on the floor.
- Insert the new sensor as quickly as possible.
- Screw it in by hand first and then tighten it using the same socket and ratchet.
- Connect the electrical wiring wires.
- Add the required amount of oil.
VAZ 2110
Cars of the VAZ 2110 family are equipped with engines from the VAZ 2108. Therefore, there is no point in writing the same information a second time. The answer is: VAZ 2110 replacement of the reverse sensor - see the information above.
VAZ 2114
Replacing the reverse sensor on a VAZ 2114 or cars of the Samara-2 family. Instructions:
- The essence of the process is the same.
- Raise the car using a jack.
- If necessary, remove the engine protection, but this may not even be necessary.
- Find the sensor; on new gearbox models of Samara-2 models it has a slightly different location, but finding it will also not be difficult.
- Disconnect the electrical wiring connector from the sensor.
- Using a 22mm wrench (it’s more convenient to use a head, but you can also use a wrench) unscrew the sensor.
- Before removing the sensor from the connector, place an oil container.
Note. It is best to replace the sensor on a cold car, as less oil will leak out. Although this is not important.
- Take out the old sensor and insert the new one along with a new ring.
- Screw the sensor using a wrench or socket.
- Wipe the gearbox housing from oil traces.
- Connect the wires.
- Top up the oil level in the gearbox to the required level.
- Reinstall the engine protection (if necessary).
How to manually unlock the hatch door of a washing machine?
The most accurate scheme for unlocking your washing machine is in the instructions. But if the treasured document is lost somewhere on the shelves, try using the standard scheme:
- First, if you haven’t already done so, unplug the washing machine
. - Secondly, open the small hatch on the front panel (drain filter) and check if your unit has an emergency hatch release cable
. It is usually orange in color. If there is a cable, then you need to carefully pull it, and the hatch door will unlock. - If the cable is not in the indicated place, then to forcibly unlock the hatch you will have to remove the top panel
, then tilt the car back so that the drum, under its weight, also moves a little away from the front wall and frees up room for you to maneuver. Next, you need to reach the lock, by touchfind the latch and move it to the side
.
Note! If you are not sure that you can unlock the door yourself, entrust this work to a specialist!
7 (495) 215 – 14 – 41
7 (903) 722 – 17 – 03
The blocker is easily damaged, after which it cannot be restored and will require complete replacement!
Read more:
The design of washing machines is designed in such a way that the door opens easily. However, there are times when errors or malfunctions occur due to which the washing machine does not open. What to do, and will you be able to cope with such a difficulty on your own? This is exactly what we will talk about next.
Why is the dashboard backlight off?
I will give an example from my life. In the summer, I went fishing with a friend in a VAZ 2115. On the way to the place of arrival, the dashboard lights turned off. The malfunction may seem insignificant during the day, but in the evening and at night the driver in this situation cannot concentrate on the instrument readings, which means it was necessary to eliminate the malfunction.
What to do in this situation, where should you look for the cause of the malfunction? Spare bulbs were available, but no fuses. Or maybe the reason is not in the fuses, but in the gap or lack of contact? You won’t immediately understand where to start. That is, we asked ourselves one opinion: how then to determine guilt in this case?
Checking the electrical wiring
If the current does not reach the lamp socket, you should check the rest of the electrical circuit in reverse order.
- Check your repair manual for the color and route of the reversing wires.
- Probe each wire along its entire length.
- In most cases the wire will disappear into the cable where you can't reach it.
- In this case, you should be extremely careful, because you risk damaging the working wire.
- Once you have identified the faulty section of the wire, remove it and install a piece of new wire in its place.
Video - Reverse gear does not light up on VAZ 2108, 2109, 21099. We are looking for the reason
Tail lights occupy a special place in the car lighting system due to their functional purpose and ability to change the appearance of the car using tuning. Safety on the road largely depends on the performance of the rear lights, since it is from the light devices located in the rear of the car that drivers of vehicles behind can understand what maneuver the driver of the car in front intends to take.
The rear lights of the VAZ 2107 have their own characteristics that must be taken into account when operating and maintaining the vehicle.
Fuses
In many cases, the fuse protects the reversing lamps and also covers other accessories. If this does not give a positive result, replace the fuse and test again. If after replacement the new fuse melts again, then this indicates a short circuit that has occurred somewhere in the circuit. In this case, you should contact an electrician who can quickly determine the location of the short circuit in the electrical circuit.
If the other fused components are still working, then you need to check the rest of the circuit using a test light.
How to replace spark plugs on a car?
You can find an article about this here. You may also be interested in our new article on the topic “How to adjust the clutch.”
Block lights
Here are the turn signal bulbs, dimensions, low and high beams. To get to the side lights and low and high beam lamps, you need to:
Remove the protective cap. We turn it counterclockwise, the indicators are marked on it. It has no thread, but can be removed by turning it 180 degrees. In its inner part there are “antennae” with which it is fixed in the body of the headlight unit.
Remove the wire retainer. It secures the low beam lamps in the reflector housing. This clamp is made of elastic metal, so you need to remove it carefully. We take its upper ends out of the grooves and lower them down, freeing the socket of the high and low beam bulbs.
We take the lamp out of the reflector, holding it by the base, and remove the plug.
Changing the headlight bulb
We take it out of the reflector housing along with the socket. If you haven't done this for a long time, then getting it out will be problematic. To do this, remove the low and high beam unit. We insert a finger into the reflector hole, feel for the size bulb and push it out with a little force.
To replace, you need to lightly press the light bulb and turn it half a turn. It will come out of the plinth retainers and can be easily removed. We insert the new one in reverse order.
Video, instructions for replacing light bulbs in the headlights and dimensions of the VAZ “Seven”:
Direction indicators
We turn the turn signal socket counterclockwise half a turn in the headlight unit housing.
Let's take it out. The lamp, similar to its dimensions, is fixed in the socket with two “antennae”. Therefore, they pressed lightly on it, turned it and took it out. The cartridge is made in the form of a single plate with a slot on one side. Therefore, the light bulb must be pulled out of it with little effort, because its contacts will cling to the socket.
Video about modifying the direction indicator in the headlight unit of a VAZ 2105-07, removing and replacing the lamp in it:
Brake lights do not work on VAZ 2105, 2107 cars
The reasons for brake lights not working on VAZ 2105, 2107 cars can be either a banal bulb burnout or a short circuit in the wiring. Let's look at the most common faults that lead to their failure, as well as how to consistently identify the cause.
The bulb in the rear light socket has burned out
One or two light bulbs can burn out at once. Moreover, visually they may look like workers. We replace the faulty lamp with a known good one and see if it lights up or doesn’t light up. The P21W bulb can be taken from the reversing light or from the turn signal in the same rear light. We replace faulty light bulbs with new ones.
The contacts in the rear brake light sockets have oxidized
Turn the light bulb in the socket several times to remove the oxidized layer. A more radical repair would be to sand the contacts in the cartridge with sandpaper.
The contacts in the rear light wire blocks have oxidized
We remove the block and clean the contacts in it and the contacts on the rear light board. The red wire is responsible for supplying current to the brake lights (to both the right and left lights).
Fuse blown
Brake lights on VAZ 2105, 2107 cars are powered through fuse No. 11 (F11) 10A in the mounting block. In addition, it also has interior lighting. So, if the “stops” and the lamp do not work at the same time, the fuse has definitely blown. Replace the burnt fuse with a new one. Subsequently, it will be necessary to find out the reason for the blown fuse, since there may be a short circuit.
Brake light switch sensor faulty
It is located under the brake pedal. When the driver presses the pedal, the sensor contacts are closed, and current flows to the brake lights and into the rear lights. The electric current comes to the sensor through the red and white wire from the fuse mounting block, and goes to the “stops” along the red wire, also through the mounting block. It is necessary to remove the wires from the sensor, connect them together with a piece of wire, turn on the ignition and see if the brake lights are on. If they suddenly light up, change the sensor-switch.
For a more thorough check, use a test lamp or tester to check for the presence of current in the red-white wire. Suddenly there is a break in it. Current is supplied to it from the 11th fuse in the mounting block.
Burnt out contact tracks on the rear light boards
Visually inspect the rear light boards. If necessary, check the integrity of the tracks using a test lamp or tester. You can solder wires onto a faulty track and thereby restore its functionality.
No "mass"
The negative wires come from the taillight plugs (black wire) and are attached to the body. The fastening of the wires to the body should be checked for oxidation.
The wiring blocks of the mounting block have come off, or their contacts have oxidized
Clean the contacts in the blocks (you can simply remove and reinstall them several times) and make sure they fit securely in the mounting block.
Open or short circuit in wiring
Check the main components of the brake light wiring diagram for short circuits or open circuits using the diagram below
Special attention should be paid to the red wire in the wiring harness to the brake lights. It stretches across the entire car along the right threshold. It may fray or burn out during welding work.
It may fray or burn out during welding.
Electrical connection diagram for brake lights on a VAZ 2105; Electrical connection diagram for brake lights and parking brake on a VAZ 2107 car.
The plus in the brake light connection system comes from terminal “30” of the generator. Minus – black wires in the rear light plugs connected to the body.
Notes and additions
— It should be noted that the brake lights only light up on a vehicle with the ignition on.
Troubleshooting procedure
Lamps fail most often. It's best to start with them. If they are working properly, remove the plugs from the frog and connect them together. The plugs should have +12.
If there is no voltage, check the fuse. If the fuse is intact, check connector Ш12. By applying 12V to pin 3 of the Ш12 connector, voltage should appear. Check the voltage at the fuse contacts. If there is voltage on the fuse on both sides, we try to apply +12 directly to the frog plug. If the lights come on, change the fuse box.
The fuse box can only be repaired in specialized workshops. In this case, the board track could have burned out.
When there is voltage at the frog plugs, but the lights do not light up, we check 12V directly at the contacts of the lights board. If there is voltage, but the lamp does not light, check the connector contact. When there is voltage at the board contact, but the lamp does not light up, remove the lamp and check for the presence of 12V directly on the current of the conductive surface of the base. If there is voltage and the contact is clean, check the housing part of the base. If necessary, replace the flashlight board.
It is extremely rare for the brake light wire to break. The wiring harness comes out from under the instrument panel and runs along the floor of the car under the carpet. Both brake lights are connected in parallel. We check the integrity of the wire from the frog to the lights. If necessary, replace a separate stop wire.
Accessories for modernizing rear lights
For such a mass model as the VAZ 2107, many small domestic and foreign companies produce many options for lighting equipment for tuning, which can be easily installed in standard places and do not require alteration of the body structure. Alternative taillights of the VAZ 2107 can be made using both incandescent lamps and LEDs. The latter are more expensive, but have a number of advantages:
- Less energy consumption. LEDs consume 10 times less energy than incandescent lamps of similar brightness.
- Fast response. Incandescent lamps do not light up immediately; they require time to warm up the coil, while LEDs begin to glow at full power immediately after voltage is applied.
- Higher information content of signals, achieved due to the original arrangement of light indicators.
- Increased brightness compared to standard devices.
Taillights for tuning the VAZ 2107 are presented on the market in a wide range. Conventionally, they can be divided into five groups:
- A sporty version featuring four round and two rectangular indicator lights. They can be arranged separately and placed in a plastic case, painted in the color of the car body.
- Skylain lights with three round indicators and two rectangular turn and brake indicators located above them. The lamp housings are made of transparent plastic with a chrome finish.
- The “eyelash” taillights are distinguished by their original shape and LED turn indicators, which are perfectly visible even in bright sunlight.
- Tinted rear lights designed specifically for those who love unusual lighting solutions. More powerful lamps installed in them ensure good visibility of signals even in bright light.
- LED lights of a classic design, the indicators in which are located similarly to the standard ones. They are popular due to their fast response and high signal brightness.
To install tuned taillights, it is enough to remove the standard taillights of the VAZ 2107 and install new ones in their place. The removal and installation procedure is described above, in the section “Tinting the rear lights of the VAZ 2107”.
Tuning ideas
The VAZ 2105 was little modernized, mainly in the engine. Owners of “fives”, like UAZ cars, often resort to tuning the instrument panel to give it a modern look and increase functionality.
On the VAZ 2105, tuning is possible in the following options:
- purchase a ready-made kit, which includes dials for sensors, instrument panels, parts for lighting, wiring and terminals for connections;
- A budget option is to illuminate devices with LEDs of different colors;
- More technically difficult is the texture and color change of the console.
With the help of LED lighting, you can change the design of the control panel, make it stylish and give it a personal look.
Principle of operation
Connection
This regulator works more than simply:
- You shift the gear stick to reverse;
- Simultaneously with turning on the reverse speed, the shift fork is pressed against the sensor;
- A wire short to ground is created;
- The light turns on, indicating that the car is starting to move in reverse.
Why don't my rear brake lights come on?
In order to find the cause of the malfunction, you need to use the method of elimination. You can start with the simplest faults, gradually moving towards the most complex and time-consuming ones.
First of all, you need to find the electrical circuit of a specific car model of this particular year of manufacture. Because they may vary.
On the VAZ 2110 model, the rear brake light is lit thanks to the following elements: mounting fuse block, limit switches, lamps. It is their work that needs to be checked.
Rear brake light on VAZ 2110
The lights only come on when the ignition is on. The wires run from the mounting block to the end of the brake lights. When it closes the contacts, current flows to the lamps.
The rear brake lights do not light up for the following reasons:
- Connector contact is broken.
- The lamps have burned out. They are connected in parallel, which means that if the lamp burns out, it will not work in splendid isolation.
- Poor contact where the lights come out. In this case, the problem may not be limited only to the rear brake lights.
- The brake light switch is faulty.
- The wiring has broken.
- The contacts are oxidized or dirty.
- The fuse has blown.
First of all, you should check the condition of the brake light fuse. If the new fuse blows immediately, there is a short circuit in the wiring; to avoid a fire, you must check the condition of all wiring.
If the contacts are oxidized or there is dirt on them, they need to be either replaced or cleaned.
In order to check the power on the positive wire, you need to turn on the ignition and lock the brake pedal in the active state.
Burnt out lamps
One of the most common problems is a burnt out lamp. To check this, remove the light bulb from the holder and connect it to the battery terminals with a short wire. If the light comes on, then the fault must be looked for at another point in the electrical circuit.
First, check that the light bulb socket and electrical terminals are clean and bright. If there are any signs of corrosion, clean the socket with wet and dry paper, then reinstall the bulb and retest.
A burnt out light bulb is the most common cause
If the reverse light still does not come on, the fuse may have blown. Also, everything indicates a blown fuse if two reversing lights are constantly on. In this case, a replacement will be needed. Fortunately, getting to the fuse box where they are located will not be too difficult for you.
Design and characteristic malfunctions of the rear lights of the VAZ-2107
Structurally, the rear light of the VAZ-2107 car consists of:
- left and right diffusers;
- left and right conductors;
- two 4 W lamps and two sockets for them;
- six lamps with a power of 21 W and six sockets for them;
- four M5 nuts.
The rear light of the VAZ-2107 consists of diffusers, conductors, lamps and sockets
The brake light and side lights on the rear light should be red, the turn signal should be orange, and the reverse light should be white. The most typical malfunctions of the rear lights of the VAZ-2107:
- lack of mass on the lantern;
- lamp burnout;
- oxidation of contacts;
- broken or frayed wiring;
- failure of connector contacts, etc.
No mass
One of the reasons that the tail light does not work may be the lack of weight on it. You can check the integrity of the ground wire visually or by ringing it with a tester. The ground wire in the standard configuration of the VAZ-2107 is usually black, and it occupies the extreme position on the connector block. It is followed by wires:
- brake light (red);
- side lights (brown);
- fog lamps (orange-black);
- reverse lamps (green);
- direction indicator (black and blue).
The wires on the connector go in a certain sequence and have their own colors
Lamp burned out
The most common malfunction of rear lights is the burnout of one of the lamps. In this case you will need:
- Remove the plastic plug from the trunk side, which is secured with four plastic screws;
- Using a 10mm wrench, unscrew the 4 nuts on which the flashlight is attached;
- Disconnect the power connector;
- Remove the headlight and replace the burnt out lamp.
The reversing lights of the VAZ-2107 use lamps with a power of 4 W and 21 W
Contacts have oxidized
Oxidation or clogging of the contacts of the connector block may be a consequence of their insufficiently tight connection, as well as dust and other small mechanical particles getting inside the headlamp due to wear or drying out of the rubber seal. The processes of oxidation and contamination of contacts can be prevented through regular preventive inspections and maintenance of all elements of the lighting system.
Broken wiring
The integrity of the wiring is checked with a multimeter if the location of the break cannot be determined visually. The purpose of each of the wires coming to the connector can be determined from the VAZ-2107 electrical equipment connection diagram.
Failure of connector contacts
Deterioration of contact in the detachable connection between the board and the plug can lead to burnout of the track with the impossibility of restoration. In this case, additional wires are soldered between the connector and the socket or the connector is completely replaced. It should be remembered that the new board may be equipped with a cartridge with non-spring metal, so it makes sense to keep the old cartridge. When replacing the board, it should be taken into account that the color of the wires may not match the color on the original blocks, so it is better to focus on the order of the contacts and solder the wires of the new connector to the wires in the harness sequentially one at a time.
Main reasons
- The fuse has blown. Both lamp bulbs are protected by one fuse link. Along with the lamps, the fuse will most likely protect some other circuits. Therefore, if on your car not only the rear lights do not start to glow, but, for example, the dashboard backlight does not work, you first need to check the fuse. You can find out which “socket” in the mounting block the lamp circuit goes through from the repair and operation department of your car. In almost all cases, the main circuits are shown graphically on the inside of the fuse box cover.
- Limit switch faulty.
- Open circuit (breaking pins in connectors, chafing of wires).
- Formation of oxides, corrosion at the junctions of contacts, burning of pins.
- Poor ground contact of the lights. In case of problems with the total “mass”, brake lights and turn signals may also NOT work. It is very unlikely that both bulbs stopped glowing in an instant due to problems with the contact in the flashlight. But a bad ground may be the reason why the reverse gear light does not light up on only one side. Obviously, in this case it is worth checking the lamp itself.
Checking the circuit
The essence of diagnosing the reason why the reverse lights do not work comes down to identifying the section of the circuit where the voltage is lost. To do this, you can use an ordinary control lamp. Checking the continuity of the circuit is carried out with an ohmmeter, so you should know how to use a multimeter.
You can start checking specifically with the limit switch connector. Turn on the ignition. Connect one contact of the control light to the unpainted iron part in contact with the body, and the 2nd. to the "" connector.
- If power comes in, check the reverse sensor.
- If, after installing the “jumper” in the connector, the light bulbs do not glow, it means there is a problem in the section of the wire circuit going from the connector to the lamp. Ring the wire to the point where it divides into light bulbs on the left and right sides. Most likely, the reason is specifically the break.
To find the pinout of connectors, light contacts, and wire colors, be sure to study the electrical diagram of your model and vehicle configuration.
