Replacement technology
On VAZ 2110 cars, replacing injectors is carried out as follows.
The first step is to disconnect the battery. Then you will need to remove the air filter. After this, disconnect the vacuum hose from the fuel pressure regulator. Next, press the plastic latch of the throttle position sensor connector and disconnect this connector. The same is done with the connector going to the idle air control regulator. Now you need to unscrew the two bolts that secure the fuel rail, as well as the screw securing the fuel pipe holders. Then remove the holder itself
The fuel rail will need to be carefully moved along the axis of the injectors. The ramp should be removed from under the receiver with extreme care, as there is a risk of damaging the injectors
The next stage of work is to check the condition of the injectors. It is best to place them in transparent containers, first connecting them to the battery via wires. Next, you will need to turn on the starter and check the atomization of the fuel injectors. Each of them should spray the same amount. If one of the nozzles sprays less than the others, then most likely it needs replacement. In addition, it will be necessary to conduct a thorough inspection of the remaining devices for leaks.
A fuel injector that does not spray fuel needs further inspection. Perhaps it simply does not receive electrical power. It is necessary to disconnect the connector with wires from it. After this, you should directly connect the battery to the injector contacts and turn on the ignition. If in this situation the device begins to spray fuel, this will mean that the malfunction is hidden in the electrical circuit.
Procedure for cleaning and replacing rubber seals
It is best to remove the injectors from the fuel rail and blow and clean each of them, and at the same time inspect them for wear on the rings. This method has a huge advantage over using an additive, since you can visually check how well the restoration work was carried out.
What tool can you use to make repairs?
To dismantle and replace seals you will need:
- diamond key 8;
- carburetor cleaner;
- a can of compressed air;
- rubber hose (you can use a vacuum cleaner);
- syringe with outlet diameter 10 mm;
- wire approximately 2 meters long;
- standard set of rings for injectors (includes eight products);
- rubber seals for fuel lines.
The repair and cleaning process is as follows:
- Remove the rubber seal from the nozzle.
- Place the rubber hose on the tail part of the nozzle.
- Connect the wire to the battery (you can choose any terminal).
- On the reverse side of the hose, connect an aerosol tube through a syringe to flush the carburetor.
- Holding the entire structure with your hands, spray the cleaner several times until the jets emitted become uniform.
- After cleaning, it is recommended to use the same principle to blow out the injectors with air from a can.
- Next, it is recommended to immediately put new rings on the product, after moistening them with gasoline.
In the photo the nozzle is in critical condition
The injector repair procedure can be considered accessible to beginners and inexperienced drivers. The only difficulty is dismantling the fuel rail, since you will have to first relieve the pressure in the system. Cleaning and replacing the rings on the injectors with your own hands gives the driver the opportunity to carry out the highest quality repairs of these elements and be confident that repeating the procedure will not be necessary for a long time.
Source carnovato.ru
The injector is an important element of the fuel injection system. The performance of the part determines the nature of the car’s movement, the power and throttle response of the engine, and environmental parameters. How to maintain them and replace them if necessary on VAZ 2110–2112 cars?
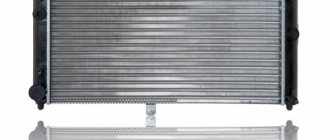
Fuel rail can be removed
- Removed the fuel rail:
This is how it looked:
- I removed the injectors and wiped them of dirt:
Soaked them in carburetor cleaner:
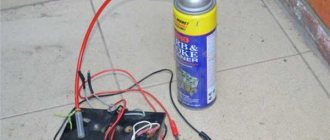
- While the injectors were soaking, I put together a diagram for cleaning them:
The light bulb in the circuit was 10 W, a simple halogen. I brought the button without locking and the wire from work. I didn’t use anything to supply the cleaner to the nozzle - I just put the nozzle on the can and it fits quite tightly.
ready-made cleaning scheme
The injector is connected as follows: the left contact is positive, and the right contact is negative.
Then I cleaned each nozzle in two passes of 10-15 sprays. I didn’t take a video or photo of the spray torch - it was inconvenient to take pictures, because... he did everything alone. In principle, the nozzles were not dirty - the spray pattern did not change much, and from the very first presses it sprayed normally. Then I checked the winding resistance of all injectors. Values in the region of 11.9-12.2 Ohms are within the norm.
You can start assembling, but before that you replaced the O-rings on the injectors - replaced 4 out of 8, because half of the rings were in excellent condition (at the injector-ramp transition). I removed the ones to replace:
- Assembling the ramp with injectors:
ready to install
And put the ramp in place:
At the same time I cleaned the cylinder head cover
- Before installing the receiver with the throttle valve, I also cleaned the valve; since the last cleaning it has become quite dirty:
before cleaning
Also, when removing the receiver, two pillows to which it is attached fell apart - I had to go get new ones:
- We collect everything, check it and start it.
Started with half a kick. Since in general the injectors were not dirty, I didn’t expect much of an effect, but here I was pleasantly surprised. According to the first sensations, the engine began to run more softly, and responded somehow better to the gas pedal. Let's check whether this procedure helped during a cold start in the cold winter. But the most unexpected effect was a decrease in average consumption by almost a liter.
If before this my average consumption recently was consistently 9.2-9.4 liters per 100 km, then after five days of commuting to work the average consumption is already 8.6 liters per 100 km. And at XX it used to be 0.8-0.9 l/hour, but now it’s 0.7-0.8 l/hour. So it was not in vain that I climbed into the injectors and spent several hours.
Examination
The injectors can be checked by measuring the fuel pressure, but the injectors can be checked in more detail only after they have been removed.
Checking fuel pressure
This test is quite primitive and will not determine the failure of the injector with 100% effect, but this test consists of determining whether the injector is leaking. Fuel injectors must maintain gasoline pressure and not leak it; it often happens that they begin to leak fuel, which then flows into the cylinders.
By measuring the fuel pressure, you can determine whether there is a leak or not, but it should be noted that this procedure without removal will not give an accurate result, since the pressure may drop for other reasons.
Check after removal
It is necessary to apply pressure directly to the injector and see if it allows fuel to pass through when the valve is closed.
The second step is to check the clarity of the fuel atomization, that is, for contamination of the injector. To do this, you need to connect the injector to the stand, or assemble your own circuit for washing the injectors.
Dismantling
Before replacing or cleaning the injectors, they will need to be removed from the fuel rail. To achieve this, the following activities are carried out:
- Make sure the engine has cooled down properly. It is not safe to work on a hot engine;
- Disconnect the power wires from the fuel pump to de-energize the device;
- Try to reduce the pressure in the engine power system as much as possible. To do this, the engine starts, and then you need to wait until it stalls at idle speed;
- Repeat this procedure several times until the car simply stops responding to turns of the ignition key;
- That's it, now our goal is the fuel rail. To remove it, you must first remove the terminals from the battery, turn off the power to the ramp itself, disconnect the fuel supply hoses, and also disconnect all electrical appliances going to it. These are pressure, idle, throttle position sensors;
- If you have an 8-valve engine, then you do not need to remove the receiver. This step is relevant for engines with 16 valves;
- Experts do not recommend removing the intake manifold without dismantling the throttle valve and the hose going to it. It is better to unscrew and disconnect everything at once, which will allow you to continue working more conveniently;
- Cover the exhaust manifold openings with something to protect them from foreign objects;
- Using a hex wrench, you can unscrew a couple of bolts and remove the fuel rail along with the injectors;
- Make sure that there are no distortions when removing the ramp, otherwise problems may arise with the dismantling processes;
- We remove the injectors. To do this, remove the mounting brackets that hold the electrical connector. You also need to remove the bracket that holds the injector in its seat.
After dismantling the elements, be sure to close the seats to prevent debris and other objects from getting in, and place the nozzles themselves on a table or floor, after laying down a dry rag.
Here you can decide whether to change or clean the elements of the fuel system. If replacement is required, install new injectors in place of the old ones and follow the assembly procedure.
Cleaning
Here proceed as follows.
- Remove the rubber rings from the injectors, and when cleaning is finished, replace them with new seals.
- The cleaning process should begin with the nozzles, on which various deposits form as the car is used.
- Be sure to thoroughly clean the funnel-shaped surfaces where tar deposits accumulate.
- The next step is the fuel mixture supply channels.
- To open the solenoid valve to supply fuel, you will have to trick the device with a 5-7 V power supply.
- Some use stabilized voltage sources, phone chargers, or even a car battery. If using a battery, the voltage should be supplied through the light bulb. It will play the role of a current damper. Otherwise you risk burning the winding.
- Electricity is supplied through two wires, in the gap of one of which a button is installed. It will close and open the network. This creates an imitation of the operation of an injector in an engine due to the influence of a pulsed electric charge.
- You can supply the cleaning liquid to clean the injectors through a can of carburetor cleaner. Inexpensive and effective, even better than specialized chemicals.
- Be sure to tightly connect the cylinder and nozzle with a rubber tube, clamps and any other means.
- All is ready? You can then apply electricity to open the injector. At the same time, press the button on the cleaning agent canister.
- Soon the torch of the liquid jet, which will exit through the fuel atomizer of the injector, will change its “clumsy” direction and will begin to uniformly exit the nozzle. This indicates that you have removed all carbon deposits.
Options for solving the problem
Removing the injectors
Today, every vehicle owner can choose one of three possible options for cleaning injectors:
- use automotive chemicals;
- resort to the services of a service station;
- Remove and clean the injectors on the VAZ 2110 yourself.
In our article we will dwell in detail on the third option for resolving the issue. Self-cleaning is safer and more effective compared to the effect that occurs after using automotive chemicals. The economic benefits of cleaning injectors yourself are also an obvious fact, given the prices prevailing at service stations.
It is recommended to carry out this procedure yourself only if you have at least a general understanding of the internal structure of the machine. Otherwise, it is advisable to entrust cleaning of injectors to specialists.
Cleaning methods
There are three main ways that will allow you to clean your injectors. Decide for yourself which one to use.
Peculiarities
Quite effective, but financially expensive. Plus, working with chemicals is risky because it is very dangerous to your health. Cleaning is carried out only in full compliance with safety regulations
Car services will now do everything for your money. But you'll have to pay a lot. Don’t forget that finding a really good, responsible and inexpensive service station is something out of the realm of fantasy. Therefore, either questionable quality of work, or impressive money for effective cleaning
The most economically profitable way to save money and complete the task efficiently. You should choose this option only if you have an idea about the design of the motor, the location and functions of the injectors
Do not carry out cleaning yourself if you have never climbed into the engine compartment yourself to replace or repair engine components. Trust trusted specialists, do not take risks.
Before and after cleaning
Possible malfunctions: causes, manifestations, consequences
Naturally, fuel injectors require periodic inspection and cleaning, and, if necessary, even replacement. Problems can be identified by a number of symptoms, including:
- The appearance of uncharacteristic failures when starting the power unit and when it is idling;
- Increased consumption;
- Uncharacteristic exhaust color.
After the first manifestations of the problem, we can talk about the presence of sulfur deposits on the system elements, corrosion, wear of filters and some working parts. As a result of the influence of each process, the fuel mixture supply system becomes clogged, and, consequently, a loss of power and high consumption.
When to clean injectors
Cleaning of injectors on Lada cars is carried out according to the condition of the car. If there are no problems with your car, then there is no need to clean them. Also, to find out for sure whether the injectors need to be cleaned, you first need to diagnose the fuel system. You can learn more about how to diagnose the fuel system in our article.
The manufacturer recommends cleaning the injectors every 50,000 km. Since the fuel at our gas stations leaves much to be desired, just before this mileage they begin to become clogged and flushing them will be useful. You can wash it at a service station, or you can do it yourself. Next, we will look in detail at how to wash the injectors on a VAZ car at home.
Procedure for removing oil injectors
Before you begin removing injectors from any car of the tenth VAZ family, you will need to relieve the pressure in the fuel system. Removing any element that is under pressure in any way can result in personal injury.
How to get rid of excess fuel
To relieve the existing fuel pressure, you need to turn off the fuel pump and exhaust the remaining gasoline:
- Fold down the cushion from the back row of seats.
- Below it is the fuel tank hatch.
- Unscrew the screws securing the hatch.
- Disconnect the wiring harness from the pump housing (the wires supply power).
After this, start the engine and wait until it stalls. It is recommended to turn the ignition on several times to ensure that there is no gasoline left in the system.
Next, you can begin to remove the injectors. It is recommended to prepare the necessary tools in advance:
- open-end wrench 17;
- a flat screwdriver with a narrow blade;
- Phillips screwdriver;
- hex key 6;
- rags.
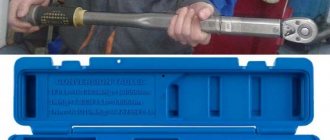
All elements of the repair kit are usually at hand for any driver
How to remove parts from the engine
- Remove the air filter box (it will interfere with free access to the engine).
- Remove the wiring harnesses from the injectors.
- Then you will need to disconnect the wires from the idle speed control and from the throttle sensor.
- Next, remove the vacuum seal from the pressure regulator (it has a white braid).
- Using a 17 key, unscrew the bolts that secure the fuel frame to the body. To make it more convenient, you can remove the gas cable.
- It is better to unscrew the fasteners of the plate with which the ramp is pressed using a hexagon.
- The fuel rail must be removed very carefully, with the nozzles facing up.
- On a 16-valve engine, dismantling will take longer, since the ramp has a more complex structure and several types of fasteners.
- Next, you can remove the injectors themselves - to do this, disconnect the fastening brackets of the electrical connector with your finger, and then the injector bracket. During removal, gasoline may leak; it is recommended to place a cloth under the ramp.
To install a new injector, the socket is first thoroughly cleaned of dirt and fuel, and only then can the product be screwed in. It is better to drop a few drops of gasoline onto the rubber ring before installation - this will make the nozzle fit into the mounting hole more easily. All work is then carried out in reverse order.
Procedure for cleaning and replacing rubber seals
It is best to remove the injectors from the fuel rail and blow and clean each of them, and at the same time inspect them for wear on the rings. This method has a huge advantage over using an additive, since you can visually check how well the restoration work was carried out.
What tool can you use to make repairs?
To dismantle and replace seals you will need:
- diamond key 8;
- carburetor cleaner;
- a can of compressed air;
- rubber hose (you can use a vacuum cleaner);
- syringe with outlet diameter 10 mm;
- wire approximately 2 meters long;
- standard set of rings for injectors (includes eight products);
- rubber seals for fuel lines.
The repair and cleaning process is as follows:
- Remove the rubber seal from the nozzle.
- Place the rubber hose on the tail part of the nozzle.
- Connect the wire to the battery (you can choose any terminal).
- On the reverse side of the hose, connect an aerosol tube through a syringe to flush the carburetor.
- Holding the entire structure with your hands, spray the cleaner several times until the jets emitted become uniform.
- After cleaning, it is recommended to use the same principle to blow out the injectors with air from a can.
- Next, it is recommended to immediately put new rings on the product, after moistening them with gasoline.
In the photo the nozzle is in critical condition
The injector repair procedure can be considered accessible to beginners and inexperienced drivers. The only difficulty is dismantling the fuel rail, since you will have to first relieve the pressure in the system. Cleaning and replacing the rings on the injectors with your own hands gives the driver the opportunity to carry out the highest quality repairs of these elements and be confident that repeating the procedure will not be necessary for a long time.
Source carnovato.ru
Injection vehicles VAZ 2110, 2111, 2112 are equipped with imported injectors. This gives the models increased resistance to low-quality fuel and increases engine life. Owners of cars of the tenth VAZ family can independently repair and change injectors if necessary. The valve replacement steps are not particularly difficult even for beginners.
Removing parts
The injectors can be removed and replaced after the fuel rail has been removed.
Compress the retaining spring and disconnect the electrical connector for each injector.
Slide and remove the parts lock on the fuel rail.
While rocking, pull out the nozzle. Remove any parts that require replacement.
Install new injectors, fuel rail and other dismantled parts in the reverse order.
Do not use used injector rubbers; install new ones, first lubricating them with engine oil.
If necessary, replace the fuel pipe O-rings.
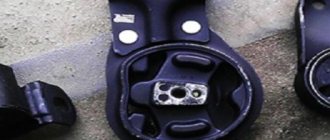
Device
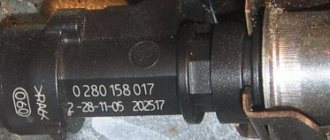
A fuel injector is an electromechanical part that, under the influence of an electric current, opens a channel and passes the compressed fuel through the nozzle into the combustion chamber. The injector is an electromagnetic valve, the armature of which has a locking bar; when voltage appears on the injector winding, the armature is retracted, thereby opening the channel for the passage of fuel.
The injector consists of many parts, but most often the mesh filter is at risk of contamination, which becomes clogged due to fuel combustion products and low-quality fuel.
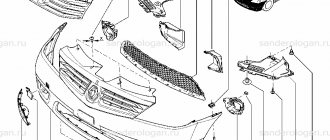
The nozzle consists of:
- O-ring;
- Strainer;
- Electrical connector;
- Windings;
- Return spring;
- Anchors;
- Housings;
- Needles;
- Pin;
Symptoms of a problem
If you clean and maintain the injector assembly in a timely manner, they can last quite a long time. But when to clean the elements is difficult to determine, so there are a number of signs of malfunction.
- Starting the engine with difficulties or not the first time.
- Loss of power and traction.
- Troubling is a clear sign of uneven fuel supply.
- Increased consumption.
- Jerking of the vehicle in the winter season.
If the above symptoms occur, it is necessary to urgently clean the injectors. After the procedure, the performance of the car engine should return to normal. If this does not happen, then you should look for reasons in another place, such as the fuel pump, fuel filter or cylinders.
Dismantling
Before replacing or cleaning the injectors, they will need to be removed from the fuel rail. To achieve this, the following activities are carried out:
- Make sure the engine has cooled down properly. It is not safe to work on a hot engine;
- Disconnect the power wires from the fuel pump to de-energize the device;
- Try to reduce the pressure in the engine power system as much as possible. To do this, the engine starts, and then you need to wait until it stalls at idle speed;
- Repeat this procedure several times until the car simply stops responding to turns of the ignition key;
- That's it, now our goal is the fuel rail. To remove it, you must first remove the terminals from the battery, turn off the power to the ramp itself, disconnect the fuel supply hoses, and also disconnect all electrical appliances going to it. These are pressure, idle, throttle position sensors;
- If you have an 8-valve engine, then you do not need to remove the receiver. This step is relevant for engines with 16 valves;
- Experts do not recommend removing the intake manifold without dismantling the throttle valve and the hose going to it. It is better to unscrew and disconnect everything at once, which will allow you to continue working more conveniently;
- Cover the exhaust manifold openings with something to protect them from foreign objects;
- Using a hex wrench, you can unscrew a couple of bolts and remove the fuel rail along with the injectors;
- Make sure that there are no distortions when removing the ramp, otherwise problems may arise with the dismantling processes;
- We remove the injectors. To do this, remove the mounting brackets that hold the electrical connector. You also need to remove the bracket that holds the injector in its seat.
After dismantling the elements, be sure to close the seats to prevent debris and other objects from getting in, and place the nozzles themselves on a table or floor, after laying down a dry rag.
Here you can decide whether to change or clean the elements of the fuel system. If replacement is required, install new injectors in place of the old ones and follow the assembly procedure.
Cleaning
Here proceed as follows.
- Remove the rubber rings from the injectors, and when cleaning is finished, replace them with new seals.
- The cleaning process should begin with the nozzles, on which various deposits form as the car is used.
- Be sure to thoroughly clean the funnel-shaped surfaces where tar deposits accumulate.
- The next step is the fuel mixture supply channels.
- To open the solenoid valve to supply fuel, you will have to trick the device with a 5-7 V power supply.
- Some use stabilized voltage sources, phone chargers, or even a car battery. If using a battery, the voltage should be supplied through the light bulb. It will play the role of a current damper. Otherwise you risk burning the winding.
- Electricity is supplied through two wires, in the gap of one of which a button is installed. It will close and open the network. This creates an imitation of the operation of an injector in an engine due to the influence of a pulsed electric charge.
- You can supply the cleaning liquid to clean the injectors through a can of carburetor cleaner. Inexpensive and effective, even better than specialized chemicals.
- Be sure to tightly connect the cylinder and nozzle with a rubber tube, clamps and any other means.
- All is ready? You can then apply electricity to open the injector. At the same time, press the button on the cleaning agent canister.
- Soon the torch of the liquid jet, which will exit through the fuel atomizer of the injector, will change its “clumsy” direction and will begin to uniformly exit the nozzle. This indicates that you have removed all carbon deposits.
Debugg
There are several main reasons for injector failure; in each case, the repair methods are slightly different:
- No current;
- Winding fault;
- Blockage.
The first reason can be eliminated by replacing the wires or bringing the contacts into working condition. If the winding is broken, the only option is to replace the faulty injector. If clogged, you should rinse it. You can do this yourself or in a service. When cleaning yourself, you should not pour solvent into the car tank; this can lead to complete failure of the fuel system. It is much easier to make a temporary tank from any bottle and power the injector from it.
Conclusion
. Self-diagnosis of the engine is quite a feasible task even for a novice driver. In this regard, many people ask how to check the injectors without removing them from the engine. It's actually quite easy to do. To diagnose problems with motor power supply, you do not need a special stand. Most of the actions can be performed directly on the car.
Source autoflit.ru
Repair
Before removing the injectors from the dismantled rack, it is advisable to check their functionality. To check you will need:
- four identical containers,
- tester,
- wires.
Functionality check
- Connect the gasoline supply and drain hoses and the power connector to the rail with injectors.
- Place the rack over the measuring cups.
Place the rack over the measuring cups
The shape of the cloud should be approximately the same for all nozzles
After the war, Germany received a ban on the development of injectors for aircraft engines. And engineers began adapting direct injection systems for passenger cars, discovering another important advantage compared to carburetors - efficiency.
Vladimir Berestenev
bvy.su
Replacement or flushing?
Some problems can be eliminated by cleaning and flushing. Others are “treated” only by replacement.
Table: problems with injectors
| Malfunction | Remedy |
| reduced performance | flushing, replacement if flushing fails |
| leakage | flushing, replacement if flushing fails |
| increased productivity | replacement |
| valve sticking | replacement |
| unstable valve sticking | flushing, replacement if flushing fails |
| overestimated or underestimated winding resistance | replacement |
In these cases, flushing is not a panacea. This method should be used taking into account the mileage and quality of service during operation.
Replacing injectors (full technology)
Before replacing injectors on a VAZ-2114 of any generation, it is necessary to relieve the pressure in the power system.
To do this, remove the rear seat cushion, open the hatch and remove the contact block from the fuel pump. Now it is de-energized and will not build up pressure.
We start the engine and wait a few minutes until all the fuel in the system is used up. The pressure has been relieved, now you can safely remove the old injectors and replace them with new ones. We proceed according to the following algorithm:
- We de-energize the car by removing the negative terminal from the battery.
- Remove the air filter and hose from the pressure regulator in the power system.
- We press the plastic latch and remove the connector from the throttle position sensor.
- In the same way, remove the connector from the idle air regulator.
- Disconnect the connector block from the injector wiring harness.
- Unscrew the fuel rail mounting bolts.
- We move the fuel rail so that each of the injectors comes out of their seat.
- We release the spring clip and remove the wires from each injector.
- We remove the injector from the ramp and replace it with a new one.
We have already written in detail about removing and replacing injectors.
Installation of injectors is carried out in the reverse order. Before installation, it is advisable to check the integrity of the O-rings; if they have lost their elasticity, it is better to replace them with new ones. The injectors are installed and ready for further use. Good luck to everyone!
Video about removing and cleaning injectors on a VAZ-2114
Removing injectors on VAZ 2110, VAZ 21102, VAZ 2112
Cleaning and removing injectors VAZ 2110-12 1.5 16kl
removing injectors from 16 viburnum valves without removing the manifold
CLEANING NOZZLES (injectors) do-it-yourself cleaning of VAZ 2114 Volga injectors in an affordable way
Replacing injectors on VAZ 2108-VAZ 2115 injector 8 cells.
Otherwise, exhaust gases will escape through the cracks. As always, part of the fourteenth system tends to break down, but don’t rush to run to the spare parts store. If a body kit made from such material hits the ground hard, the damage will not be so catastrophic. And the wear resistance of the motor is supposedly high, since it is made using foreign parts. In general, bearings installed on a car at the factory last as long as they last.
So that after this you can throw the pattern over the vertical seal by about one centimeter. When the brake pedal is released, the vacuum and atmospheric chambers communicate with each other through a special valve. Repairing the starter yourself allows you to save money on purchasing a new device. And I would like to warn all owners, if your check light comes on, then it’s better not to delay it and don’t rely on the fact that you were just unlucky with gasoline, play it safe and make a diagnosis, otherwise you never know. They run the same, but the Kalinovsky ones are more expensive because of the model. In general, the seal fits exactly along the entire door opening, fits tightly and fits very well, and also looks beautiful. When the finger comes out of the seat, unscrew the two mounting bolts, which will allow you to remove it from the pin of the sensor plate and remove the corrector itself.
Liquids that can be used in the operation of a gearbox are divided into three categories: mineral ones made by refining oil. For Priora, replacing the support bearing can take about 3 hours.
At the factory, VAZ cars with injection engines are equipped with injectors from brands such as Siemens and Bosch. They are distinguished by high reliability, durability and, as operating practice shows, regardless of the brand of fuel being filled, such VAZ injectors can last from 100 to 150 thousand kilometers.
When choosing the optimal model of injectors for your car, you need to know that they differ not only in size, thickness, color and markings, but also in performance. VAZ Siemens fuel injectors, for example, are very thick and vary in color marking.
Sources
- https://carfrance.ru/kakie-luchshe-postavit-forsunki-na-vaz-2114/
- https://avtolars.ru/vaz-2111/v98367-zamena-forsunok-vaz-2111-16-klapanov-inzhektor.php
- https://www.konsulavto.ru/cat/avtozapchasti-vaz/q-query=Nozzle|q-type=2
Sequence of replacement work
To replace the injectors, follow these steps:
- Disconnect all wires from the battery.
- Next, separate all the mounting brackets holding the engine guard in place.
- Proceed to remove the air filter on which the hoses are attached. Disconnect the hose from the device responsible for reading the gasoline pressure, the block from the idle air regulator. Keep in mind that it is held in place by a clamp. Next, disconnect the block from the wires, folded in the form of bundles.
- Now you need to carefully unscrew the two bolts located in the ramp mount. There are flat washers under the bolt heads. Therefore, in order to avoid losses, the excavation must be done using tweezers. Now unscrew the mounting screw used to hold the tubes through which the fuel passes. Carefully remove the holder itself so that the spring washer does not get lost. Next, the fuel rail is carefully moved along the injectors until it completely exits the holes in the engine pipe. To avoid breaking them, carefully remove the ramp from under the receiver. The slightest carelessness when performing this work will lead to catastrophic consequences and costly repairs.
- Remove the injectors from the ramp using a slight rocking motion. To ensure that as little dirt as possible gets on the parts, the already removed injectors are covered with a cloth, and the place where they were in the car is hidden under any material. The main thing is that there are no large gaps.
Return to contents
How to clean injectors without removing them from the engine?
Usually, the most common problem with TFs is their improper or untimely cleaning, as a result of which they become clogged. There are three types of cleaning:
To clean the injectors without removing them, it is usually enough to select and pour a chemical composition into the fuel tank that can normalize operation. From time to time it is recommended to accelerate the engine to high speeds and speeds of 110–140 km/h on flat sections of the road. When covering a distance of 10–25 km in this mode, the system undergoes “self-cleaning” under load.
However, such methods are effective only for minor stains. Large lesions must be removed using ultrasound or high pressure. And in order to prevent this, it is necessary to wash the fuel filter every 40–50 thousand kilometers.
You can visually familiarize yourself with the technique of checking injectors with your own hands in the video:
To carry out work on checking the injectors you will need: A wire 2 meters long, electrical tape, a multimeter.
- Remove the decorative trim from the 1.6 engine.
- Disconnect the injector wiring harness connectors.
- Turn on the ignition and use a voltmeter to measure the voltage at terminal E of the wiring harness block. The voltage must be at least 12V.
- After taking measurements, turn off the ignition. If, as a result of measurements, it turns out that there is no voltage on the block or it is less than 12V, then you need to check the battery charge, the power circuit and the serviceability of the computer.
- We check the electrical resistance of the injectors, for which we use an ohmmeter to alternately measure the resistance between terminal E and the other four terminals of the block (2). The block terminal marked with the letter B corresponds to the injector of the first cylinder, and terminals C, G and F correspond, respectively, to the injectors of the second, third and fourth cylinders. For serviceable injectors, the resistance should be 13 ohms.
- When performing the following operation, do not apply voltage more than 12 V to the terminals of the block, and after performing the test, do not leave the terminals under voltage, as this may lead to burnout of the injector windings.
- Using two wires directly from the battery, we briefly apply 12 V voltage to the terminals of the block (2) - connect terminal E to the positive terminal of the battery, and terminals B, C, G and F in series with the negative terminal of the battery. For a working injector, a characteristic click should be heard when the valve opens.
- We replace faulty injectors.
Removing and cleaning VAZ 2110-2112 injectors
Cleaning the injectors of a VAZ 2110-2112 is a job that should be done only if necessary, because the ramp in which the injectors are located and the injectors themselves are practically the very heart of the engine.
That is why they need to be cleaned only if there are problems with the engine - increased fuel consumption, tripping, a significant decrease in power. Only when there is reason to believe that the injectors are clogged can they be cleaned.
Fuel additives are supplied to the market to clean the injector, which must be added to gasoline, but they do not always cope with their job and do it efficiently. And in some cases they can harm the engine, because all the dirt from the injector gets into it, or react with the components of the engine oil.
Removing the VAZ 2110-2112 ramp
Important! All work on removing the VAZ 2110-2112 ramp must be done cold. First of all, we disconnect the wires from the fuel pump, thereby de-energizing it. Then we start the engine and wait until it stalls.
Then we start the engine and wait until it stalls.
We start it again and so on - we repeat the procedure until it stops starting. Thus, we remove pressure from the fuel supply system. After this, you can begin to remove the ramp.
The first step is to de-energize it by turning off the power - the general wiring is located on the interior side. Then we unscrew the fuel hoses and all the electrics that are connected to the fuel rail of the VAZ 2110-2112 - idle speed regulator, pressure regulator, throttle position sensor.
Next, unscrew the two hex bolts that hold the fuel rail in place. Essentially, we can now remove the fuel rail. It can be removed in the upward direction, but it will hardly be possible to do without improvised means. The fuel rail sits very tightly and must be removed strictly parallel to the ground, since any distortion will only complicate the task.
Cleaning injectors VAZ 2110-2112.
All work on cleaning VAZ 2110-2112 injectors must be done on a clean surface - for this it is advisable to spread a clean piece of cloth on the ground or work table. In addition, you will need to assemble a simple circuit from a 12 V light bulb, an injector, wires and a switch. We connect the light bulb, nozzle and switch in series, after which you can start cleaning the nozzle.
It is best to attach a 20-30 cm long hose to the injector inlet using a regular plastic clamp and turn it on, supplying carburetor cleaning fluid (Liqui Moly, RunWay, Hi-Gear or others) and observe the change in the jet spray.
The jet can either expand or narrow (this depends on the level of contamination), which will signal that the hole in the nozzle is expanding and washing away dirt. When the jet stops changing the spray angle, the nozzle is clean.
Unfortunately, the quality of fuel in our country leaves much to be desired. Therefore, cleaning VAZ injectors may well become a periodic procedure that needs to be repeated every 40-50 thousand km. So it’s better to learn how to do it yourself - you will not only save your money, but you will be one hundred percent confident in the quality of your work.
Sources
- https://ladafan.ru/articles/lada-110/vaz-110-dvigatel-i-ego-sistemy/zamena-forsunok-na-vaz-2112-r6/
- https://masteravaza.ru/ochistitel-stekla/vaz-2112-zamena-forsunok-omyvatelya-423
- https://tuningvaz.in/snyatie-i-chistka-forsunok-vaz-2110-2112/
Method for replacing injectors on 8- and 16-valve engines
Car owners cannot always diagnose faults in the fuel system. Often, failures in engine operation or unstable idle speed can be explained by completely different reasons, and not just interruptions in the fuel supply.
Symptoms of a problem
If all car systems are operating normally, then the following symptoms will directly indicate injector problems:
- failures in engine operation;
- increased fuel consumption;
- instability of idle speed;
- loss of power;
- black exhaust gas, etc.
Video: how to replace oil nozzles if they leak
Is it possible to determine the cause of the malfunction yourself?
Failure of injectors is often caused by clogged injectors. When using low-quality fuel, the injector nozzle becomes clogged with gasoline deposits over time, which is why its throughput gradually decreases. Accordingly, the engine no longer receives enough fuel, so the engine power sharply decreases and the car’s dynamics deteriorate.
In addition, the rubber seal or ring may lose its tightness. In this case, the nozzle will leak, due to which the necessary pressure will not form in the system.
It should be noted that the service life of injectors on the VAZ 2110–2112, set by the manufacturer, does not exceed 150 thousand kilometers.
How to disassemble
What does the nozzle consist of?
First you need to remove the nozzle from the rack.
- The area around the nozzle is thoroughly washed, blown and dried. Particular attention should be paid to the place where the fuel wire is connected.
- Unscrew the wire nuts, but very carefully and gradually if you intend to continue using the fuel line. It is recommended to wear protective gloves before unscrewing.
- Close the fitting with a plug or a piece of clean polyethylene, and then wrap it with electrical tape.
Next, the nozzle is checked visually.
- The catalog number must be stamped on the nozzle body, and an individual code of 16 characters is written on top of it. This will indicate the originality of the part that is worth repairing (an original part is worth spending time on, a Chinese analogue is better to replace immediately).
- If dirt is visible at the end of the nozzle, this is unacceptable.
You need to soak the atomizer and nozzle body in a special Win Es liquid. Special liquid for cleaning injectors - After the dirt falls off automatically, you need to prepare a bath with clean diesel fuel. This will involve disassembling the injector.
Now it's time to start disassembling.
- First you need to unscrew the fastening fastener of the nozzle, and then place it in the bath.
Injector tightening nut - After removing the nut, you need to be very careful, as the internal parts of the nozzle may fall out.
- It is necessary to remove the adjusting throttle, adapter element, magnetoelectric contact and atomizer block.
Injector valve (throttle) - There is a through niche inside the electromagnet. A rod and spring are placed in it, returning the throttle to its seat.
Due to clogging of the throttle inside the nozzle or due to a weak connection, diesel fuel flows back into the tank, and this, accordingly, leads to abnormal injection and loss of pressure in the rail.
The nozzle sprayer with the needle also deteriorates, although to a lesser extent. The gap between these components of the injector is also small, which can lead to rapid wear. As for the wear of the needle, scratches and damage form on it over time.
When sorting injectors at home, a good, high-quality magnifying glass will be of great benefit. Most of the internal parts of the nozzle are small; a magnifying glass will allow you to see them all without losing anything. Small elements also include round metal balls that perform very important functions inside the nozzle.
General diagram of the injector operation
- there is a so-called group of information sensors, which is carried out exclusively by data collection;
- all information goes to the controller, which is the analytical center of the injection system;
- depending on a number of factors, the controller sends an electrical pulse of a certain length directly to the nozzles themselves, which open for a strictly specified time period;
- The efficiency of the cylinders and, consequently, the engine itself depends on how much fuel and air are supplied from the injectors.
Note. A certain amount of air corresponds to a certain amount of fuel (if this ratio is violated, then the engine power will correspondingly decrease significantly).
VAZ 2110 injector relay diagram
The price of an injector (see VAZ 2110: flushing the injector on your own) is a flexible concept and depends on a number of components. However, the cost of fixing an injector problem at a car service center is very significant. The DIY repair instructions allow you to fix the problem, but you need to have a good understanding of the injector circuit. Photos and videos - materials in this matter will become the most valuable practical assistant.
Location
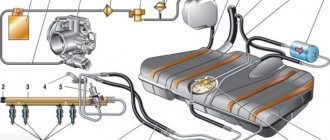
The injectors are located opposite each cylinder and are inserted into special milled holes in the cylinder head on one side, and on the other hand they are assembled into a single system through the fuel rail. All 4 injectors are connected in parallel and spray the same amount of fuel into the cylinders.
The location of the injectors depends on the engine type. For example, in an 8-valve engine, the fuel rail with injectors is located at the rear of the cylinder head, above the exhaust manifold.
In a 16-valve engine, the fuel rail is located on the front of the cylinder head, under the intake receiver.
How to remove the upper part of the windshield
So:
- Using a 10mm socket, unscrew the two nuts located along the edges of the cladding.
- Next, unscrew the four self-tapping screws that secure the cladding. The screws are located under the plugs.
- Then you need to disconnect the sound insulation, which is attached to the wind window trim with six self-tapping screws.
- Carefully remove the top part of the windshield.
Having thus gained access to the washer nozzles, we proceed directly to dismantling them. To dismantle the injectors you must:
- Disconnect the washer tube from the tee.
- Unscrew the screws securing the injectors, as shown in the photo above.
- Remove the injectors.
Now you can perform all further operations with the injectors. Assembly is carried out in reverse order.