Low pressure in the fuel rail of the VAZ 2110
If the electrical circuit in a VAZ 2110-2112-2170 car is obviously in good working order, and the pump hums as usual, this does not mean that gasoline is supplied to the injectors as normal.
No! There may be some problems here. Let's start with the most basic. First, remove the protective cap of the fitting (as shown in photo 1), be sure to place a cloth underneath so as not to splash the engine compartment with fuel, and use the tip of a thin slotted screwdriver to press the spool of the fitting. If the stream of fuel is thin or weak, this means low pressure in the fuel rail; you need to look for the cause. If gasoline sprays with strong pressure, then there is hope that the pressure is within normal limits (2.8-3.2 bar), but to be sure, you need to measure it with a pressure gauge. At the service center this is done using fuel pressure gauges with adapters.
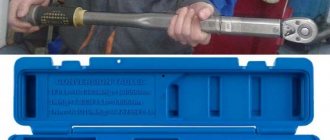
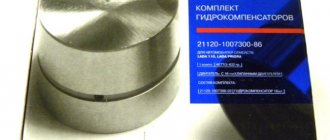
We will use a simple one from a tire pump. The only main thing is that the measurement limit is at least 4 bar. You will also need a part of a gas-resistant hose, the length of which should be 150 millimeters, the internal diameter of which should be 10-12 mm. , as well as 2 more clamps. Use the wheel valve cap to unscrew the spool valve from the fuel rail fitting. We put the pressure gauge hose on the fitting and tighten it with a clamp.
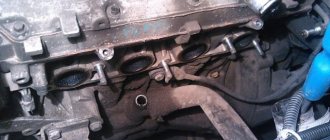
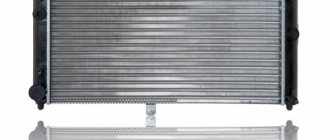
We turn on the ignition, without starting the engine: after 2 seconds, the gasoline pressure in the rail should increase to 2.8-3.2 bar and remain at this level (photo 3). If it is significantly lower (about 1 bar) and remains at this level for a long time, you need to check the supply line 4; most likely, it is clogged. There are 2 problem areas: fuel pump mesh 2 and fuel filter 5. First, let's check the filter. It is located under the underbody next to the gas tank (photo 4). If it is ok, you need to look at the pump grid.
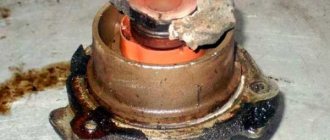
We take the fuel pump out of the tank, remove the screen and wash it. Before installing the fuel pump, it would be a good idea to check it for leaks and the reliability of the connection of its tube (arrow in photo 5) to the fuel line. You will certainly ask what to do if the supply line is clean, the pump is humming, and the pressure is still below normal. In this case, you need to change the pump itself; it has exhausted its service life! P Or it may happen that the pump seems to be functioning normally, but there is no pressure in the rail! This can happen in winter if there is a lot of water at the bottom of the fuel tank.
P When the grid freezes, it interrupts the flow of fuel to it. What should I do? Lighting a fire under a gas tank, heating it with a blowtorch or some other source of fire should not be done under any circumstances. It is preferable to remove the fuel pump and clear it of ice. The second option for those in no hurry: roll the car into a warm room and wait. Then it would be a good idea to empty the water from the fuel tank. It's a troublesome task, but a rewarding one.
Now we have made sure that the pressure in the ramp is within normal limits. Does fuel enter the engine cylinders? This is not a fact! The injectors may become clogged, the supply of gasoline decreases, and maybe even stops completely. However, sometimes a control signal is not sent to the injectors, although they themselves are in good condition. Control should begin with inspection of the spark plugs.
If the spark plugs are wet, then gasoline flows. Dry? In this case, you need to check the signal at the harness connector of the mechanical liquid or gas atomizer (injector) with a probe (as shown in photo 6). Did you do it, but the spark plugs are still dry? Then you will have to unscrew the screws securing the ramp and lift it under the intake manifold so that the injector nozzles can be seen. We turn on the ignition and turn the engine crankshaft with the starter. If there are no streams of fuel, you need to remove the injectors and most likely replace them with new ones.
True, almost every serious service will recommend that you wash them. Ask about prices: if the price of a new set of injectors is slightly higher than flushing, then you should choose a replacement. After all, old injectors also experience age-related problems. Taken from: https://autoshas.ru.
On the VAZ 2110, the fuel pressure regulator is designed to maintain constant pressure in the fuel system in any operating mode.
The RTD is a diaphragm valve that is installed in the fuel rail. On one side, gasoline pressure is exerted on it, on the other, springs and air from the intake manifold.
Detailed diagram of the fuel system
Detailed diagram of the fuel system.
1 — nozzles; 2 — fitting plug for monitoring fuel pressure; 3 — injector ramp; 4 — bracket for fastening fuel pipes; 5 — fuel pressure regulator; 6 — adsorber with solenoid valve; 7 — hose for suction of gasoline vapors from the adsorber; 8 — throttle assembly; 9 - two-way valve; 10 - gravity valve; 11 - safety valve; 12 - separator; 13 — separator hose; 14 — fuel tank plug; 15 - filling pipe; 16 — filling pipe hose; 17 — fuel filter; 18 — fuel tank; 19 — electric fuel pump; 20 — fuel drain line; 21 - fuel supply line.
Below we will look at the main elements of the fuel system separately.
Fuel tank
Dismantled VAZ-2112 gas tank.
The filled gasoline is supplied from the tank, which is located in the rear of the car, in the area where the sofa is located . The tank is made of steel and assembled by welding two stamped parts. Gasoline is supplied to the tank through a special neck, from a gas-resistant hose made of rubber, secured together with clamps.
Gasoline pump
Fuel pump VAZ-2112 1139009
A gas pump is an electrical functional device, submersible, installed directly into the gas tank itself. This pump is started by a signal from the ECU controller, which is responsible for fuel injection, through a relay when the ignition is turned on. If the fuel pump doesn't pump, the engine won't start! The operating pressure of the pump is at least 2.8-3 bar (atmospheres - approx.). In order to get to it, just lift the rear sofa and unscrew the technical hatch.
Fine filter
The new filter is ready for installation.
From the fuel pump, through a flexible steel hose, gasoline passes under pressure to the fine filter. The filter is made of steel and cannot be disassembled. A special paper filter element is installed inside. On the housing cover there is a special arrow, created for visual indication during installation, showing the direction of movement of gasoline in the system.
Fuel rail
Through steel fuel pipes, after filtration, gasoline passes directly to the fuel rail. It is designed to transfer gasoline to atomization and is mounted on the “outlet”. On one side of the fuel rail there is an RTD, on the other there is a fitting for controlling gasoline pressure. The pressure in the ramp in operating condition should be from 2.8 to 3.2 bar ( 2.8-3.2 atmospheres - approx.) - this indicator depends on the stabilization in the receiver, indicating constant differences in them. This is necessary in order to dose the optimal amount of gasoline into the injectors.
Fuel pressure control
Be careful when dismantling.
A LITTLE ABOUT THE OPERATION OF THE FUEL SENSOR
The latest developments by the designers of the automobile plant in Togliatti have brought the produced models closer to the best European models, but annoying, minor breakdowns can add “a fly in the ointment.” These fully include problems with the gasoline level sensor in the car tank.
It is located in the same block as the fuel pump. It includes a movable lever with a float, a resistor and a contact group, which turns on the signal lamp for the gasoline reserve in the tank. Among the most common malfunctions of this unit, the most common are problems such as resistor breakage, oxidation of the moving contact or output terminals. It is very rare that the float in the fuel level indicator loses its seal.
In any case, to repair or service this unit, it must be removed from the fuel tank. To perform this work, remove the rear seat cushion and upholstery that blocks access to the gas tank cap. When performing this operation, do not forget that you are working with a flammable substance. Fire safety rules must be strictly followed.
Unscrew all the screws securing the cover, move it slightly forward and remove it from the fuel tank. Before removing the fuel block, it is necessary to relieve the pressure in the fuel line. There are several ways to do this, and the simplest of them is to leave the car idle for about 4 hours.
Disconnect the wires and fuel line from the module, being careful not to spill any remaining gasoline in the hoses. You need to pull out the fuel pump carefully so as not to damage the float.
Replacement of the fuel sensor is carried out using a screwdriver with a thin blade.
How does this happen:
- Use a screwdriver to move the locking ring and make it possible to remove the cover from the fuel module;
- Remove all the wires, release the latches on the cover and remove the sensor itself along the grooves;
- The next step is to remove the meter from the block.
To install a new fuel sensor, everything must be done in reverse order.
Features of the power supply system for engines 2112 and 2111
Elements of the power supply system for engines 2112 and 2111 (1.5i):
1 — nozzles; 2 - fuel rail; 3 — diagnostic fitting; 4 - adsorber; 5 - check valve; 6 — throttle assembly; 7 - gravity valve; 8 - safety valve; 9 - separator; 10 — fuel tank filler pipe; 11 — fuel filter; 12 — fuel supply line; 13 — fuel line hose connecting the outlet (discharge) pipe of the fuel module with the fuel filter; 14 — fuel module; 15 — fuel tank; 16 — fuel drain line; 17 - fuel pressure regulator.
Note. The fuel supply line on the 2111 engine is connected to the fuel rail at the end (see below).
Location of engine power system elements
[Engine with decorative trim removed.]
2112 (1.5i 16V) in the engine compartment:
1
-
receiver; 2 — throttle assembly; 3 — air supply hose to the throttle valve; 4 — air filter; 5 — fuel pressure regulator; 6 — throttle valve drive cable; 7 — fuel rail; 8 — diagnostic fitting; 9 — adsorber check valve; 10 - adsorber
Location of elements of the engine power supply system 2111 (1.5i 8V) in the engine compartment:
1
—
canister check valve; 2 — diagnostic fitting; 3 - receiver; 4 - throttle assembly; 5 — fuel pressure regulator; 6 — air supply hose to the throttle valve; 7 — air intake; 8 — air filter; 9 — fuel rail; 10 — throttle valve drive cable; 11 - adsorber
Air is supplied to the inlet valves of the cylinders of engines 2112 and 2111 through a receiver and an inlet pipeline made of aluminum alloy.
Fuel pump
combined with the fuel level indicator sensor into a single unit -
a fuel module
(often called an electric fuel pump). The pressure pump delivers fuel from the tank through the fuel filter to the fuel rail.
Fuel pressure control
installed on the fuel rail. Excess fuel is returned to the tank through the fuel return line.
Fuel rail for engine 2112 (1.5i 16V) assembly
with
injectors:
1
—
fuel supply tube to the fuel rail; 2 — fuel pipe for draining fuel into the tank; 3, 4, 5 and 6 - nozzles; 7 — diagnostic fitting (to check the fuel pressure, closed with a threaded cap); 8 — fuel rail; 9 - fuel pressure regulator
Fuel rail for engine 2111 (1.5i 8V) assembly
with
nozzles:
1 — diagnostic fitting; 2 - fuel rail; 3 — fuel supply tube to the fuel rail; 4 — fuel pressure regulator; 5 — tube for draining (draining) fuel into the tank; 6, 7, 8 and 9 injectors
Fuel
engine module
2112 and 2111 (1.5i):
1 - fuel level indicator sensor; 2 — connecting block; 3 — inlet pipe; 4 - outlet (discharge) pipe; 5 — module cover; 6 — module cover guide; 7 - electric fuel pump in a plastic casing; 8 - intake chamber
Replacement process for a 16-valve VAZ-2112
If the regulator is still faulty, we replace it in the following order:
- We disconnect the negative terminal from the battery for fire safety.
- Next, we reduce the pressure in the fuel system by unscrewing the nut that secures the fuel line and the RTD to each other.
To avoid fuel spillage, use a rag.
You will have to remove the bolts using hexagons.
Be careful when dismantling.
When connecting, pay due attention to the condition of the O-rings. Attention! Before installing a new regulator, lubricate the O-rings with gasoline, so they will retain their elasticity longer and will be less susceptible to cracking
Attention! Before installing a new regulator, lubricate the O-rings with gasoline, so they will retain their elasticity longer and will be less susceptible to cracking
Signs of a faulty RTD?
You can understand that the regulator is not performing its functions by the behavior of the car, and they are expressed as follows:
- When all systems are working properly, there may be interruptions in the engine idling. You will see unstable idle speed. And in some cases, the engine may stall completely when idling and also begin to stall.
- The crankshaft rotates either with increased or decreased frequency.
- The throttle response and dynamics of the engine have decreased significantly, and in order to gain the required speed, you need to apply more pressure to the gas pedal.
- Dips appear and jerk during acceleration, which greatly increases fuel consumption.
- It doesn’t happen often, but sometimes it happens that the engine does not start the first time.
Checking the fuel pressure regulator
If you have checked and are already sure that your FLS (fuel level sensor - approx.) is working, but you simply have fuel consumption and other problems indicating it, then you must first check the regulator as follows:
We unscrew the fitting plug, which is designed to control fuel pressure.
Please note that if it has lost its elasticity, has cracks or other damage, it needs to be replaced
The location of the fitting plug on the editorial machine (although ours is 8-valve)
Pay attention to the condition of the O-ring inside
This element is also worth checking for serviceability.
When connecting the pressure gauge, make sure that all connections are tight.
In stores, the price of a new RTD is in the range of 300-600 rubles, such a range in price results from the presence of a large number of analogues from different manufacturers.
Fuel pressure adjustment
How is pressure maintained in the fuel system of the VAZ-2110? On cars with VAZ-2111 and VAZ-2112 engines, a pressure regulator is installed directly on the fuel rail. With its help, a certain pressure value is maintained inside. Moreover, it allows you to maintain both air pressure in the intake pipe and fuel inside the ramp.
The design of the regulator is not very complicated. Inside it are a valve, a diaphragm and a return spring. When the engine is running, the regulator allows you to maintain pressure in the range of 284-325 kPa. On the one hand, the diaphragm of the device is affected by fuel, and on the other, by low pressure in the intake pipe. As soon as the pressure in the intake manifold decreases, the valve begins to open. In this case, excess fuel is passed into the drain line to the tank. The pressure in the ramp is significantly reduced.
As soon as the pressure in the intake manifold increases (this happens when the damper opens), the valve on the regulator begins to open at a significantly higher pressure of the fuel mixture. At the same time, the fuel pressure inside the ramp increases significantly.
But on VAZ-2114 and VAZ-21124 engines, the pressure regulator is placed inside the module, next to the fuel pump. This is a kind of check valve in the fuel system of the VAZ-2110, which operates at a certain pressure (about 400 kPa). If the pressure exceeds the norm, the drain line opens and excess fuel is returned back to the tank.
The process of cleaning injectors on a VAZ-2110
Bosch injectors for VAZ-2110.
To begin with, it is necessary to dismantle the elements from the fuel line and completely remove them from the car. This was done for the convenience of transactions. So, let's start disassembling the unit and dismantling it:
- The engine has cooled down and operations can begin. De-energize the fuel pump. This can be done by turning off the fuse or removing the wire blocks from the power connector.
- We reduce the pressure in the fuel line. Disconnect power from the fuel pump and relieve pressure.
- We completely remove the terminal from the battery, since we will have to remove the ramp assembly. Remove the battery terminal to remove the fuel rail.
- Disconnect all wires connected to the fuel rail.
- Remove the fuel supply pipe. Once everything is disconnected, you can remove the fuel rail from the engine.
- Using a hexagon, unscrew the fastening bolts of the ramp and remove it along with the injectors. Having disconnected the fuel hose, we dismantle the fuel rail.
- Disconnect the mounting brackets and remove the injectors. We remove the fastening brackets and dismantle the injectors from the ramp.
The injector seats must be covered to prevent foreign objects from getting into the manifold and cylinders, which could damage engine components.
After the injectors are removed from the car, you can proceed directly to the cleaning process:
- We remove the rubber seal from the nozzle itself.
- Using a special nozzle cleaner, we wash the funnel-shaped surfaces and nozzles.
- Next, we clean the fuel supply channel.
- When manual cleaning is done, it is worth moving on to a more effective method. Do-it-yourself procedure for connecting and cleaning injectors.
- To do this, connect power to the injector. It is not recommended to use a standard car battery, since you can burn the injector winding and you will have to buy a new one. Ideal for mobile phone power supplies (charging).
- Using a standard syringe (used as an adapter) we connect a can of liquid for cleaning carburetors.
- After this, turn on the power for a few seconds. Do this several times until the stream from the nozzle becomes uniform. This operation must be carried out with each nozzle.
Cleaning methods
In practice, there are several types of injector cleaning. The most famous and used three methods:
Nozzle dirty.
- The first method involves the use of automotive chemicals. A very effective, but significantly expensive method. To everything else, we can add that automotive chemicals are not safe to use for the human body, and therefore you should be extremely careful. When using chemicals, the nozzles do not need to be removed!
- Car service. Of course, this is the safest and most reliable way to clean injectors using a special stand. The obvious disadvantages include the cost of performing such work, since the price is often too high.
- Do-it-yourself injector cleaning. The most profitable and economical method of repair and restoration work on the fuel system. In this case, the car owner needs knowledge of the structure and operation of the elements, so as not to screw up anything, and also not to increase the cost of repairs.
Symptoms of a problem
If you clean and maintain the injector assembly in a timely manner, they can last quite a long time. But when to clean the elements is difficult to determine, so there are a number of signs of malfunction.
- Starting the engine with difficulties or not the first time.
- Loss of power and traction.
- Troubling is a clear sign of uneven fuel supply.
- Increased consumption.
- Jerking of the vehicle in the winter season.
If the above symptoms occur, it is necessary to urgently clean the injectors. After the procedure, the performance of the car engine should return to normal. If this does not happen, then you should look for reasons in another place, such as the fuel pump, fuel filter or cylinders.
The process of removing the fuel rail (+photo)
General view of the fuel rail
Before proceeding directly to the dismantling process, you need to understand that you will have to remove the injectors, and therefore you can simultaneously diagnose and clean this unit. So, let's consider the sequence of actions that are aimed at removing the fuel rail:
- Remove the minus terminal from the battery.
- We are dismantling the receiver.
Unscrew the clamp and remove the crankcase ventilation hose
Unscrew the oil circulation pipes
Having disconnected the connectors, we disconnect the ramp from the on-board network
After unscrewing the fastening screws, we dismantle the fuel pipe bracket
Unscrew the screws by 5 and remove the ramp
Unscrew the fastenings of the fuel supply regulator and remove it
Reasons for withdrawal
There are several reasons for removing the fuel rail from the car:
- Cleaning injectors.
- Replacement or repair of the ramp itself.
- Removing the valve cover.
- Carrying out diagnostic and repair operations that involve engine disassembly.
- Other operations where removal of the ramp is required.
Fuel rail mounting diagram
Procedure for removing oil injectors
Before you begin removing injectors from any car of the tenth VAZ family, you will need to relieve the pressure in the fuel system. Removing any element that is under pressure in any way can result in personal injury.
How to get rid of excess fuel
To relieve the existing fuel pressure, you need to turn off the fuel pump and exhaust the remaining gasoline:
- Fold down the cushion from the back row of seats.
- Below it is the fuel tank hatch.
- Unscrew the screws securing the hatch.
- Disconnect the wiring harness from the pump housing (the wires supply power).
After this, start the engine and wait until it stalls. It is recommended to turn the ignition on several times to ensure that there is no gasoline left in the system.
in this video I will explain how to remove the injectors
With2110
. Thank you so much for watching my videos, tell your friends.
Removing injectors from a VAZ 2112 8 valve
subscribe to our channel.
Next, you can begin to remove the injectors. It is recommended to prepare the necessary tools in advance:
- open-end wrench 17;
- a flat screwdriver with a narrow blade;
- Phillips screwdriver;
- hex key 6;
- rags.
All elements of the repair kit are usually at hand for any driver
How to remove parts from the engine
- Remove the air filter box (it will interfere with free access to the engine).
- Remove the wiring harnesses from the injectors.
- Then you will need to disconnect the wires from the idle speed control and from the throttle sensor.
- Next, remove the vacuum seal from the pressure regulator (it has a white braid).
- Using a 17 key, unscrew the bolts that secure the fuel frame to the body. To make it more convenient, you can remove the gas cable.
- It is better to unscrew the fasteners of the plate with which the ramp is pressed using a hexagon.
- The fuel rail must be removed very carefully, with the nozzles facing up.
- On a 16-valve engine, dismantling will take longer, since the ramp has a more complex structure and several types of fasteners.
- Next, you can remove the injectors themselves - to do this, disconnect the fastening brackets of the electrical connector with your finger, and then the injector bracket. During removal, gasoline may leak; it is recommended to place a cloth under the ramp.
To install a new injector, the socket is first thoroughly cleaned of dirt and fuel, and only then can the product be screwed in. It is better to drop a few drops of gasoline onto the rubber ring before installation - this will make the nozzle fit into the mounting hole more easily. All work is then carried out in reverse order.
Disassembly
13. Using a slotted screwdriver, release the two brackets securing the wiring harness.
14. Disconnect the four wiring harness connectors from the injectors.
15. Remove the wiring harness from the fuel rail.
16. Move the spring clamp along the fuel rail and remove the injector.
17. Remove the spring clamp of the injector from the fuel rail.
18. 24 mm
Unscrew the nut of the fuel outlet pipe.
. and remove the end of the tube from the pressure regulator.
5mm hex wrench
unscrew the two bolts securing the fuel pressure regulator (1) and move the clamping bar (2) of the fuel supply tube along the fuel rail. Remove the fuel pressure regulator (3).
. and remove the tube from the ramp hole.
Warning! Damaged O-rings of fuel pipes and injectors must be replaced.
Checking and replacing injectors on VAZ 21124, 21126 engines
Signs of injector malfunction may include: – difficult engine starting; – unstable engine operation; – the engine stalls at idle; – reduced crankshaft rotation speed at idle; – the engine does not develop full power, insufficient engine response; – failures in engine operation when the vehicle is moving; – increased fuel consumption; – increased content of CH in the exhaust gases. You will need: a 5-point hex key, a flat-blade screwdriver, a 17-point key (two), an autotester. 1. Disconnect the connecting block of the injector wiring harness and the engine harness by pressing the lock. 2. Perform an initial check of the injector windings. To do this, connect the ohmmeter to the contacts of the pads one by one.
The block has five contacts: four for supplying a control signal to the injectors and one common “+12 V” (a crimson wire with a black stripe is connected to it).
3. In turn, connect the four control contacts to the common contact and measure the resistance in each case. It should be 11–15 ohms. If in one or more measurements the resistance value differs from the specified value, the tested injectors or their wiring harness may be faulty.
4. For a more accurate check and replacement of injectors, remove the fuel rail from the car (see “Removing and installing the fuel rail”). 5. Use a screwdriver to pry the spring clamp of the injector, remove the clamp and remove the injector from the fuel rail. Remove the remaining injectors in the same way. 8. To identify a faulty injector, connect an ohmmeter to the injector contacts. It should show a resistance of 11-15 ohms. If the winding resistance is not normal, replace the faulty injector, as it cannot be repaired.
Note Check the injector for the shape of the sprayed fuel spray and for leaks at specialized service stations, since such a check directly on the car is very fire hazardous.
The injectors of the VAZ-21126-00 engine of the VAZ-2170 Lada Priora car have an original design and are not interchangeable with the injectors of VAZ injection engines of other models. Buy new injectors with exactly the same markings.
6. Whenever removing injectors, be sure to replace the O-rings on all injectors on the ramp side. Using a screwdriver, carefully pry the edge of the ring and remove the sealing ring from the nozzle and similarly remove the ring from the nozzle side. 7. If you are installing old injectors, carefully wash their nozzles with solvent or carburetor cleaner. Warning
Install new O-rings carefully, without using any tools, after lubricating them with engine oil.
Note The sealing rings on the injectors are identical to other rings installed on early VAZ models with fuel injection systems and are interchangeable with them.
8. Before installing the injectors, lubricate the O-rings with engine oil or WD-40. 9. Install the injectors in the reverse order of removal, securing them to the ramp with clamps, after tightening them a little.
10. Having installed the fuel rail, connected the fuel line and connected the wiring harness block, secure the minus terminal on the battery, turn the ignition key 3-4 times to position “I” (ignition) at intervals of 2-3 s between turns on and check for leaks pipe connections and injector seals. 11. Install all removed parts in the reverse order of removal.
Replacing and removing injectors on a VAZ-2112 16 valves on your own
The injector in a car is almost the most important element in the fuel system. Indeed, in their absence, the operation of the engine will be impossible as a result.
The video below describes in great detail how to remove injectors on a 16-valve VAZ-2112 engine:
Fuel rail for engine 2112 (1.5i 16v) - removal, disassembly, assembly and installation
Before performing the operation, read the safety rules when servicing and repairing the power system (see “Safety precautions when servicing and repairing the power system”).
1. We prepare the car for work (see “Preparing the car for maintenance and repair”).
2. Relieve the fuel pressure in the fuel line (see “Fuel line - pressure relief”).
3. Remove the air filter housing (see “Air filter - removal and installation”).
4. Two 17 mm
unscrew the fitting (2) of the fuel rail tube, holding the hexagonal tip of the fuel line hose supplying fuel to the ramp. We remove the hose tip from the tube. Similarly, disconnect the fitting (3) of the fuel drain pipe into the tank. Release the clamp (1) securing the wiring harness.
5. Using a Phillips screwdriver, unscrew the screws securing the fuel pipes and remove the clamping bar of the bracket (see “Fuel rail of engine 21124 (1.6i 16V) - removal and installation”).
6. Remove the rubber sealing rings from the tubes (see “Fuel rail of engine 21124 (1.6i 16V) - removal and installation”). We replace damaged o-rings.
7. Remove the receiver (see “Engine receiver 2112 (1.5i 16V) - removal and installation”).
8. Disconnect the wiring harness block and disconnect it from the bracket (see “Injectors - check”).
9. Using a Phillips screwdriver, loosen the clamp securing the crankcase ventilation hose and remove the hose from the cylinder head cover pipe.
10 mm socket wrench
Using a ratchet, unscrew the bolt securing the oil level indicator tube.
. and remove the tube along with the pointer.
5mm hex wrench
unscrew the two bolts securing the fuel rail to the cylinder head.
12. Remove the fuel rail assembly with injectors, wiring harness and fuel pressure regulator.
To remove the fuel rail, you need to pull it towards you and then move it to the left side
Step-by-step instructions for removing and installing the VAZ-2109 steering rack
Sequencing:
- First of all, you need to remove the protection. To do this, you will need to unscrew the fastening nuts that are on it at the top and bottom.
- Remove the tread element completely, otherwise it will interfere with your further work.
- To get rid of the tie rods, unscrew a couple of bolts in the center of the rack. Only then will you be able to disconnect without interference.
- The clamps of all rails are secured with nuts on both sides - they also need to be unscrewed. After this, you will be able to move the element to the side.
- To completely remove the part, you will need to get rid of the coupling bolt, which is located on the interior side, at the very bottom of the steering shaft.
- You are unlikely to be able to remove the rack easily - you will have to rip it off the shaft. If that doesn't work, use a pry bar to pry it from the outside.
If the part needs to be repaired, do everything necessary to do so. If replacement is necessary, you will need to buy a new rail. On average, a new steering rack costs from 1,500 to 2,200 rubles. The price depends on the place of purchase and the manufacturer of the mechanism. Installation of a repaired or new element occurs in the reverse order of dismantling work.
Tips for replacing old rack parts
- Damping rings are placed on the new backing plate so that the thin edges of the rubber elements are in the middle of the cutout of the plate. After purchasing a repair kit for the steering rack, you will find in it two rubber bands needed for this purpose.
- The protrusions of the bushing will help you install it correctly in place, after which you need to carefully get rid of the thin rubber bands using a blade.
- The support ring is removed from the gear shaft with special pliers, and then the bearing is dismantled.
- Don't forget to wash the steering gear housing so you can insert a new needle bearing later.
Injector purpose
Installing an injector in the VAZ 2107 made it possible to significantly improve engine performance. Changing the type of fuel system increases the amount of energy that is produced during the combustion of gasoline. Compared to a carburetor engine, a fuel injection system is more efficient in the initial stages, but over time its performance decreases. What does this depend on?
VAZ 2107 injector plays the role of the final element in the fuel system of the car. The air mixture, together with a cloud of atomized gasoline, creates a huge amount of energy. Over time, this atomization may become less effective, the fuel jets will become weaker, and all due to low-quality gasoline.
The main cause of injector failure is poor fuel. Car fuel consists of many chemical components; in addition, various impurities are added to it, which should improve the overall performance of the engine. This factor cannot be ignored, since such gasoline leaves sediment on the walls of the fuel system. The thinnest channels are in the injectors, and it is these devices that suffer first. VAZ 21074 injector has the same problem. During operation, deposits from fuel only accumulate. What needs to be done to stop this?
What are the consequences of malfunctions in the operation of RDTs?
Over time, the engine starts more and more poorly. Fuel begins to come out of the cracks, which leads to a strong increase in its consumption. When the pressure changes unevenly, the dynamics of movement are disrupted, surges occur, and the car jerks during acceleration.
Is it possible to repair a failed part? In most cases, no, you have to completely change it. Repair units are almost always non-separable. Some experts suggest repairing the component, but this is dangerous. It is better to buy a new regulator - fortunately, it is inexpensive.
Determining violations in the operation of RTDs is not a very difficult task, which can be handled independently. Remember that this part of the machine needs to be checked periodically. By detecting the problem in time, you will protect important car components from rapid wear.
Cleaning engine injectors
First of all, this is much faster, but on the other hand, the result is not always effective. However, as VAZ-2112 car owners say, in some cases, this really helps.
Work process
- A compressor is connected to the system, similar to that described earlier, which is capable of increasing the pressure in the ramp to 3.2 atmospheres. In parallel, we connect a purifier in a container of at least 1 liter. (Most often, special injector cleaners are used in metal containers - approx.).
- Next, we start the engine and let it run for 10 minutes, after which we stop and let it rest for the same amount of time.
- Then we start it again and, by re-gassing, pass the entire liter of liquid through the injectors.
- When the engine stalls, change the spark plugs, which will become covered with soot.
The entire process of work in this way should not exceed one hour.
By the way, such work can render spark plugs unusable, so clean the injectors on the engine using old or spare spark plugs. Or guess the moment when you will change the spark plugs. We have already talked about the choice of spark plugs for 16-valve engines.
Cleaning VAZ injectors (2109, 2110, Kalina, Granta)
Now we will talk about self-cleaning of injectors on VAZ cars (2109, 2110, 2115, Kalina, Granta with 8-valve engines). How often should this be done? There is no clear answer to this question. It all depends on the quality of the fuel. But on average, it is recommended to clean injectors every 20-25 thousand kilometers.
But mileage is not the main indicator on which you should rely. The main thing here is to notice in time the incorrect behavior of the engine - floating speed, increased fuel consumption, dips in dynamics, etc. All of these factors may indicate clogged injectors.
You can clean the injectors without removing them from the engine by pouring a special liquid into the gas tank. But this method is not always effective. And, besides, we will not be able to personally see the result. Therefore, the second method is predominantly used - washing the injectors with removal.
There are two methods here - ultrasonic cleaning and cleaning with special liquids. The latter does not require particularly complex additional equipment, so it is better to use it yourself.
Do-it-yourself injector cleaning VAZ
- Carburetor cleaning fluid
- 5 cc syringe
- 2 wires
- Set of tools
The first thing to do is remove the injectors from the engine. All 4 injectors are mounted on the fuel rail, which in turn is attached to the engine with two bolts.
To make work easier, you can remove the intake manifold and clean the throttle valve at the same time. The intake manifold is mounted on 5 studs.
Before removing the fuel rail, it is necessary to relieve the pressure. For this purpose, there is a special spool on the left side of the ramp.
Remove the chips from each injector, having first disconnected the terminal from the battery. Unscrew the fuel supply hose from the ramp (key 17). Unscrew the 2 bolts securing the ramp to the engine block (hexagon). Now you can remove the injectors from the engine and take the entire structure out.
Remove each injector from the rail. It is secured with one small clip. Now you can start cleaning.
To clean the injectors yourself, you need to assemble the following structure:
Remove the two o-rings from the removed injector. We connect the wires to the 2nd terminals (if +/- are not marked, then + should be on the left). From the side where the injector is attached to the fuel rail, we tighten the syringe (it fits quite tightly). To the syringe, instead of a needle, we attach a bottle of liquid for cleaning the carburetor. Now this entire structure is ready for use.
We put a little liquid into the syringe and briefly supply power to the injector terminals by connecting the wires to the battery terminals (try not to supply power for more than 1-2 seconds, this may damage the injector).
Follow the steps described in the previous paragraph until the nozzle begins to spray liquid normally (there should be no separate jets, dripping, etc.).
After you have cleaned all the injectors with your own hands, you can put everything back in place. When you start the engine, you will be pleasantly surprised, and the dirtier the injectors were, the greater the surprise.
Removing and cleaning VAZ 2110-2112 injectors
Cleaning the injectors of a VAZ 2110-2112 is a job that should be done only if necessary, because the ramp in which the injectors are located and the injectors themselves are practically the very heart of the engine.
That is why they need to be cleaned only if there are problems with the engine - increased fuel consumption, tripping, a significant decrease in power. Only when there is reason to believe that the injectors are clogged can they be cleaned.
Fuel additives are supplied to the market to clean the injector, which must be added to gasoline, but they do not always cope with their job and do it efficiently. And in some cases they can harm the engine, because all the dirt from the injector gets into it, or react with the components of the engine oil.
Removing the VAZ 2110-2112 ramp
Important! All work on removing the VAZ 2110-2112 ramp must be done cold. First of all, disconnect the wires from the fuel pump, thereby de-energizing it
Then we start the engine and wait until it stalls.
We start it again and so on - we repeat the procedure until it stops starting. Thus, we remove pressure from the fuel supply system. After this, you can begin to remove the ramp.
The first step is to de-energize it by turning off the power - the general wiring is located on the interior side. Then we unscrew the fuel hoses and all the electrics that are connected to the fuel rail of the VAZ 2110-2112 - idle speed regulator, pressure regulator, throttle position sensor.
Next, unscrew the two hex bolts that hold the fuel rail in place. Essentially, we can now remove the fuel rail. It can be removed in the upward direction, but it will hardly be possible to do without improvised means. The fuel rail sits very tightly and must be removed strictly parallel to the ground, since any distortion will only complicate the task.
Cleaning injectors VAZ 2110-2112.
All work on cleaning VAZ 2110-2112 injectors must be done on a clean surface - for this it is advisable to spread a clean piece of cloth on the ground or work table. In addition, you will need to assemble a simple circuit from a 12 V light bulb, an injector, wires and a switch. We connect the light bulb, nozzle and switch in series, after which you can start cleaning the nozzle.
It is best to attach a 20-30 cm long hose to the injector inlet using a regular plastic clamp and turn it on, supplying carburetor cleaning fluid (Liqui Moly, RunWay, Hi-Gear or others) and observe the change in the jet spray.
The jet can either expand or narrow (this depends on the level of contamination), which will signal that the hole in the nozzle is expanding and washing away dirt. When the jet stops changing the spray angle, the nozzle is clean.
Unfortunately, the quality of fuel in our country leaves much to be desired. Therefore, cleaning VAZ injectors may well become a periodic procedure that needs to be repeated every 40-50 thousand km. So it’s better to learn how to do it yourself - you will not only save your money, but you will be one hundred percent confident in the quality of your work.
https://youtube.com/watch?v=fR9jaFxvnbI
Replacing and removing injectors on a VAZ-2112 16 valves on your own
The injector in a car is almost the most important element in the fuel system. Indeed, in their absence, the operation of the engine will be impossible as a result.
The video below describes in great detail how to remove injectors on a 16-valve VAZ-2112 engine:
Step-by-step work order
The most important thing is to remove the air filter housing, the mass air flow sensor (MAF – approx.) and the pipe. Then you need to relieve the pressure in the fuel system. If you set a goal not to suffer, and this work is easier to do, put a rag under the pipes and unscrew the connections
This will release the pressure quickly, and the remaining gasoline will flow out onto the rag.
When using two keys, unscrew the fuel line.
The power supply is disconnected.
Engine power system design
The vehicle's power system is designed to store fuel reserves, purify fuel and air from foreign impurities, and supply air and fuel to the engine cylinders. The power system consists of a fuel tank, a fuel module, a fuel filter, a fuel rail with injectors, an air filter, fuel lines, air ducts, a throttle assembly, a receiver, and a gasoline vapor recovery system.
The air entering the engine cylinders is cleaned of dust by an air filter. Air filter
installed in the engine compartment on three rubber supports. The filter element is replaceable and made of special paper. To prevent contaminated air from leaking into the intake tract, there is a sealing edging at the top of the element. To replace the filter element, the filter cover is removable. The purified air passes through the mass air flow sensor (for more details, see “Engine Management System”) through the air duct to the throttle valve.
Throttle valve
regulates the amount of air entering the engine cylinders. The damper drive from the gas pedal is a cable drive. The damper rotates on an axis in the housing (pipe). The throttle body is secured to the intake module flange with studs. The housing has a channel for coolant. The channel is connected to the cooling system by rubber hoses. Circulating coolant through the throttle body prevents the body's internal air cavities from freezing in the winter. The housing contains fittings for connection to the adsorber and the engine crankcase ventilation system.