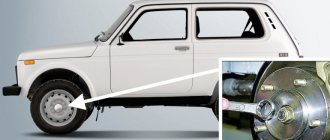
↑ How to remove the front suspension wheel bearings
Unscrew the hub nut and remove the washer and inner race of the outer bearing.
If necessary, if the outer bearing cage is damaged along the way, we do not press out the outer ring of the bearing, but replace only its inner part. However, at the first opportunity we install a completely new bearing.
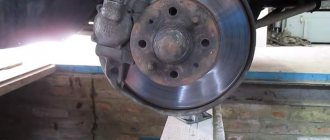
Carefully, trying not to damage the cuff, remove the hub together with the brake disc from the steering knuckle axis.
Using a 12mm wrench, unscrew the two guide pins and remove the brake disc and spacer ring from the hub.
We clean the inner cavity of the hub from old lubricant, wash all parts with kerosene and add fresh lubricant.
To remove the outer race of the outer bearing, secure the hub in a vice.
Using a beard, trying not to damage the hub, we hit the perimeter of the outer ring of the bearing and knock it out of the hub.
We take out the hub cuff by prying it off with a screwdriver.
A spacer bushing is installed under the cuff.
We remove the inner bearing from the hub in the same way as the outer one.
Description of replacing the VAZ 2106 hub
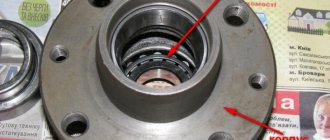
Replacing a VAZ 2106 hub is done quite rarely, since the part lasts a long time, at least 150 thousand km. The main reason why the replacement operation is performed is wear of the bearing seats, as a result of which the bearing races begin to rotate. The fault can only be determined by removing the hub and removing the bearing races. If they rotate in their seats, then after removing the lubricant, clear marks will be visible on the inner surface.
A sign of wheel bearing wear is a hum and vibration from one of the front wheels. To accurately determine the origin of the humming sound, the car is jacked up and the wheel is rotated by hand in different directions. If a loud noise is heard, then the bearings need to be replaced. The service life of these parts averages 40-50 thousand km. Disassembling this unit on a VAZ 2106 car, removing old parts and installing new ones is a simple task and is accessible to every car enthusiast.
↑ Installation of bearings
- We press the outer rings of the bearings in a vice, using the corresponding rings from old bearings.
- The old rings should be oriented with a smaller cone diameter inside the hub to facilitate their removal after pressing in the new rings.
- Using caution, you can press the inner races of the bearings with light blows of a hammer through the gasket.
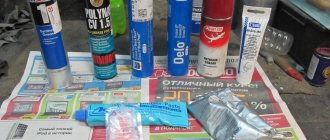
- We put about 40 g of Litol-24 lubricant in the separator of the internal bearing and the internal cavity of the hub. We cover the new cuff with the same lubricant.
- Install the inner bearing into the hub.
- We install the spacer bushing.
Preparing and disassembling the unit
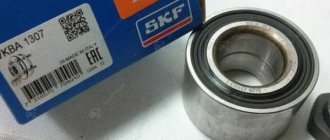
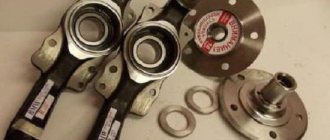
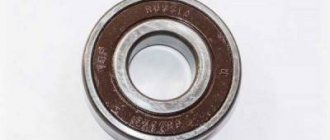
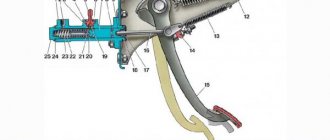
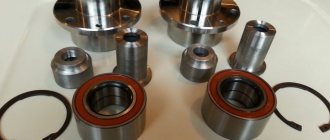
The front rolling bearings are roller, cone type, consisting of two parts: external and internal. Good quality products are sold complete with the required amount of lubricant and two clamping nuts. The nuts differ in their thread, on one it is left-handed, on the other - right-handed, the first will fit the axis of the right axle, the second - to the left.
The manufacturer does not know which wheel will be replaced, so he completes the product with both nuts. Additionally, you need to purchase an oil seal, which is located at the rear of the hub and does not allow grease to leak out. You can carry out the work on a level surface, securing the car with the hand brake so that it does not roll away.
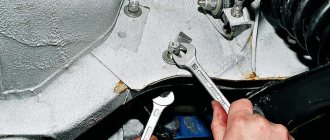
Before lifting the car with a jack, you need to pull out the metal boot covering the hub nut and loosen the latter with a 27 mm wrench. Then the wheel bolts are loosened, the car is jacked up and the wheel is removed. The next step is to remove the brake caliper, which is attached to the axle with 2 bolts; they need to be unscrewed, the part removed and moved to the side.
It is recommended to first remove the brake pads from the caliper, then it will be easier to put it back.
Now you can completely unscrew the nut, pull out the washer and remove the hub from the axle axle by hand. After this, you need to remove the old grease from all parts; it contains metal shavings.
Caliper
When considering the chassis of the VAZ “six”, you cannot ignore the brake caliper. This unit is mounted on the steering knuckle and holds the brake pads and brake wheel cylinders through appropriate holes, slots and grooves. There is a special hole in the caliper for the brake disc. Structurally, the product is made in the form of a monolithic steel part. When the piston of the working brake cylinder acts on the brake pad, the force is transmitted to the brake disc, which leads to the deceleration and stopping of the car. If the caliper is deformed, which is possible with a strong impact, the brake pads wear unevenly, which significantly reduces their service life.
The caliper may receive the following damage:
- appearance of cracks. Since the part is constantly exposed to loads, over time cracks appear on it due to metal fatigue. This indicates the need to replace the caliper, since it is unsuitable for restoration;
- formation of oxides on moving elements. The working cylinders gradually become covered with dirt and an oxide film, and the pistons begin to jam over time, which reduces braking efficiency. In this case, repair or replacement of the cylinders is required.
Rear wheel axle shaft of VAZ 2106
On the VAZ 2106, the rear wheels are secured using axle shafts. The part is fixed on the rear axle housing and is an integral part of it, since it is the axle shaft that transmits rotation from the gearbox to the rear wheels.
The axle shaft is a reliable part that practically does not fail. The main element that sometimes requires replacement is the bearing.
With its help, uniform rotation of the node in question is ensured during movement. Bearing failures are similar to hub elements. When a part fails, the problem is solved by replacement.
Bearing replacement
To remove the axle shaft and replace the ball bearing, you need to prepare a certain set of tools:
- knob;
- head at 17;
- hammer;
- flat screwdriver;
- chisel;
- Bulgarian;
- new axle bearing with retaining ring;
- blowtorch or gas torch.
Removing the axle shaft
We carry out dismantling in the following order:
- We lift the rear of the car from the desired side and remove the wheel, as well as the brake drum.
- To prevent grease from leaking out of the rear axle beam, lift the edge of the stocking with a jack.
- Using a 17 mm socket wrench, unscrew the axle shaft mount.
The brake pads do not interfere with the removal of the axle shaft, so there is no need to touch them.
Bearing removal
The bearing removal process consists of the following steps:
- We fix the axle shaft in a vice.
- We cut the ring with a grinder.
Bearing installation
We install the new part as follows:
- Remove the boot from the new bearing.
Video: replacing the axle bearing on a “classic”
Although hubs with bearings and axle shafts of the VAZ 2106 are reliable elements, they can still fail due to constant exposure to high loads. The problem is mainly related to the wear of bearings, which the owner of a Zhiguli can replace on his own. To work, you will need a little experience in car repair and a minimum set of tools, and in order to do everything correctly and avoid mistakes, you should first read the step-by-step instructions.
Source
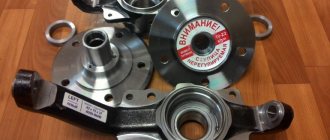
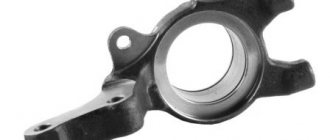
Rounded fist
An equally important element of the six's chassis is the steering knuckle. Force is transmitted to it from the steering linkage through the lever, resulting in the rotation of the wheels of the front axle. In addition, ball joints (upper and lower) are attached to the assembly through the corresponding eyes. On the reverse side of the steering knuckle there is an axis on which the hub with bearings is placed. The hub element is fixed to the axle with a nut. The left trunnion uses a nut with a right-hand thread, and the right one uses a left-hand thread . This was done in order to prevent the bearings from being tightened while moving and to avoid overheating and jamming.
An additional function of the steering knuckle is to limit the rotation of the wheels, while the part rests against the levers with special protrusions.
Malfunctions
The resource of the steering knuckle is practically unlimited, if you do not take into account the quality of roads and neglect of adjusting the wheel bearings. Sometimes a product can travel 200 thousand km. The part is made of cast iron and can withstand heavy loads. However, if it fails, the owners of Zhiguli cars often replace it along with the bearings and hub. It is necessary to pay attention to the steering knuckle when the following symptoms appear:
- the car began to pull to the sides, and the problem is not eliminated by adjusting the wheel alignment;
- It was noticed that the wheels turned out at a smaller angle. The cause may be problems with both the steering knuckle and the ball joint;
- wheel break. This happens due to the breaking of the threaded part of the steering knuckle or the ball joint pin, which happens relatively often on Zhiguli cars;
- unadjustable play. If the wheel bearings were adjusted untimely or incorrectly, then in the places where they are installed, the steering knuckle axis will gradually wear out, which will lead to the appearance of play, which cannot be eliminated by adjustment.
Sometimes it happens that during car repairs a small crack is discovered on the steering knuckle. Some car enthusiasts advise fixing the problem by welding. However, it must be taken into account that safety directly depends on the condition of the steering knuckle. Therefore, such elements should not be repaired, but replaced with known good ones or new ones.
How to increase wheel turnout
Many owners of the VAZ 2106 and other “classics” are interested in the issue of increasing wheel turnout, since the model in question has a rather large turning radius, which is not always convenient. Those who are seriously involved in tuning their car simply install a set of suspension elements (levers, bipod) with changed parameters. However, such sets for the average owner of a VAZ “Six” may not be affordable, because for such pleasure you will have to pay about 6-8 thousand rubles. Therefore, other more affordable options are being considered, and they exist. You can increase the wheel inversion as follows:
- We place the car on the pit and dismantle the bipod installed on the inside of the hub.
- Since the bipods have different lengths, we cut the longer part in half, remove the part, and then weld it back together.
The described procedure allows you to increase the wheel turnout by about a third when compared with the standard position.