The fuel injection system is a fairly important part of modern vehicles. Of course, like the rest of the car, it needs maintenance.
The essence of this article is precisely the independent maintenance of injectors, namely the process of flushing without removing them from the engine. You can carry out this procedure yourself, without resorting to expensive services at local service stations.
Injectors - what are they?
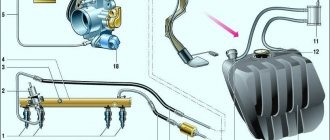
Let's figure out what injectors are and what they are needed for. Injectors are an electromagnetic mechanism designed to spray fuel into the cylinder. Their number depends on the number of cylinders in the car. The VAZ car has 4 cylinders, therefore there are also 4 injectors.
A serviceable and clean injector sprays fuel evenly without any delays or jerks.
Operation of a serviceable and clean injector
A clogged injector may not spray fuel at all or, on the contrary, pour it in drops. As a result, the engine cannot operate normally and correctly.
Dirty nozzle
Symptoms of clogged injectors
Loss of dynamics is one of the main signs of clogged injectors. If they are contaminated, the car simply will not accelerate properly.
- Unstable idling, the engine at idle will operate unstably and intermittently.
- Starting difficulties can occur when there is contamination or when the injectors stop holding pressure. Fuel begins to drip into the cylinder, which can cause popping sounds in the exhaust pipe.
- Ringing fingers are inevitable when the spray nozzle is clogged; this is due to the fact that the fuel entering the cylinder is mixed with air and the concentration of fuel in this mixture is quite small, so the engine experiences detonation.
Driving with dirty injectors will not provide any driving pleasure. And driving with such a problem is highly not recommended.
Signs and possible causes of malfunctions
Symptoms of a malfunction of one or more injectors may include:
- high fuel consumption;
- deterioration of the dynamic characteristics of the machine;
- unstable engine operation, internal combustion engine is tripping (one or a couple of injectors do not work);
- dips when pressing the gas pedal;
- malfunctions of various sensors, appearance of “Check engine” errors (for example, MAP sensor);
- knocking in the injectors (they “click” loudly);
- gas leaks through injectors (pouring/poisoning);
- The car stops idling and the injectors do not turn on.
The reasons for this may be:
- wear of the damper rubber rings on the valve stems (this causes the injectors to knock);
- development of the seat (seat) of the valve or its locking rubber;
- wear of the rod (also called piston, anchor) or sleeve (also called core, cylinder, bulb);
- armature jamming in the cylinder;
- weakening of the elasticity of the piston return spring;
- failure of the electromagnetic coil (solenoid);
- violation of the integrity of the electrical wiring.
All of the above reasons can appear naturally or due to low-quality parts, untimely maintenance of gas equipment, or violation of the rules for installing injectors. For example, if gas filters are not replaced on time, gas condensate (oily liquid, water, dirt) can get into the injectors, which can cause them to jam or accelerate wear.
Also, the horizontal position during installation affects uneven wear (ellipse) of the liner body and rod. And simple non-compliance with the rules for installing wires (twisting instead of soldering, mixing, improper fastening) can cause problems over time. One way or another, injectors of this type rarely survive up to 70 thousand km. mileage without repair (repair kit change). It all depends on the conditions of their use.
When to clean injectors
Cleaning of injectors on Lada cars is carried out according to the condition of the car. If there are no problems with your car, then there is no need to clean them. Also, to find out for sure whether the injectors need to be cleaned, you first need to diagnose the fuel system. You can learn more about how to diagnose the fuel system in our article.
The manufacturer recommends cleaning the injectors every 50,000 km. Since the fuel at our gas stations leaves much to be desired, just before this mileage they begin to become clogged and flushing them will be useful. You can wash it at a service station, or you can do it yourself. Next, we will look in detail at how to wash the injectors on a VAZ car at home.
What types of burners are there?
If a gas burner is considered from the point of view of the method of controlling thermal power, then all models can be divided into the following categories:
- Single stage. In this case, gas supply (switching off) occurs automatically, based on a rheostat signal.
- Two-stage. The burner has the design ability to switch to an economical mode. This process is regulated automatically.
- Burners with floating adjustment. The burner power can be changed smoothly, from 10 to 100 percent.
Burners are divided according to the method of air supply:
- Atmospheric. In this option, no electricity is needed; air flows to the burner under the natural action of draft. The efficiency is not very high, no more than 90 percent. This is a simple design: a pipe with holes into which fuel is supplied. It works in open combustion chambers. They can be quickly converted, if necessary, to use liquid fuel; the service life of such burners is very long. However, such burners impose increased safety requirements.
- Supercharged. They are also called blower or fan burners. This is a rather complex design. Air is supplied to the burner by a fan; in this case, the combustion chamber is closed. Efficiency exceeds 95 percent. Stoves with such burners do not require bulky chimneys. At the same time, the furnace operates stably even at low gas pressure. However, they produce a lot of noise and are volatile.
- Diffuse-kinetic. The air is partially pumped into the combustion chamber, the rest is supplied directly to the flame.
Date: September 25, 2022
Methods for cleaning injectors
Injector flushing additives
Additives that are poured into the tank
There are a huge number of different additives for flushing the injector. Such additives are poured into the car tank and mixed with fuel. The mixture of fuel and additives enters the main elements of the fuel system and flushes them, including the injectors. But, as a rule, such washings do not bring much results, since all the dirt that was washed away to the injectors gets and settles on them, which can only aggravate the situation. Using this method is not recommended.
Ultrasonic cleaning
Ultrasonic cleaning of injectors
This washing is considered as effective as washing the injectors during dismantling. We will not dwell on this method, since this method of washing can only be carried out at a service station. And the price of this method is not small, from 2000 rubles to 5000 rubles.
Clean in place without removal
This flushing method is carried out using special additives, but differs from the first method in that this flushing is used only on the injectors without going all the way along the fuel line. We will dwell on this method in more detail.
Washing with dismantling
This method is very reliable and probably the most popular among garage car enthusiasts who like to repair their car themselves. After reading this article, you can easily wash the injectors on a Lada car with your own hands without any special knowledge.
Types of burners
According to their design and functional differences, burner devices are divided into:
By purpose:
- for high power industrial equipment
- for household equipment.
By type of fuel used:
- devices for natural gas;
- devices for liquefied gas;
- universal devices.
By adjusting the flame:
- single-stage – capable of operating on/off;
- two-stage (as a variation - models with smooth modulation) - operate at full power, when the desired temperature is reached, the flame is reduced by half;
- modulating - boilers with a modulating burner are characterized by smooth adjustment of the flame power.
According to the principle of operation:
- injection/atmospheric. They operate by supplying air from the room. They are installed respectively in open combustion chambers. Also used for old-style boiler models.
- fan/supercharged. They work in isolated combustion chambers. Combustion air is supplied by a fan. According to their design features, they are divided into: - vortex (round-shaped nozzle holes) - direct-flow (shape of a narrow slot with a round/rectangular cross-section).
- diffuse-kenetic. Air enters two simultaneously: one is mixed with gas fuel, the second is added directly to the chamber during combustion.
Washing without removal
What you will need:
- Set of wrenches;
- Screwdrivers “+” and “-“;
- Flushing fluid;
- Fuel hose;
- Fitting for tubeless wheel – 2 pcs;
- Bottle;
- Clamps;
- Drill 10 mm;
- Compressor with pressure gauge (can be used for a car);
Making a device for washing injectors without removing them from the car
- In a 1.5 liter bottle, drill a hole in the bottom with a diameter of 10 mm.
- Insert the wheel fitting into the drilled hole.
- Similarly, drill a 10 mm hole in the bottle cap.
- Insert the wheel fitting into the bottle cap and screw it on.
- Unscrew the spool valve from the fitting in the bottle cap.
- We attach a fuel hose to the fitting installed on the cover and secure it with a clamp.
This is what should happen
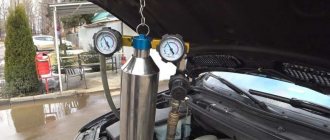
Nozzle cleaning device
Relieving pressure in the fuel rail
- In order to relieve pressure in the fuel rail, you need to remove fuse F3 (15A) it is located under the central panel where the foot air ducts are.
- After that, you need to start the car at the residual pressure and let it run until the car engine stops.
- After which you can start working
Connecting the device to the fuel line
- Under the hood we find a fuel line pipe (if the engine has a return line, there will be two pipes, one of them goes to the fuel rail, so you need to connect to it).
Connect to the “straight” hose
- We take two Keys on “17” and unscrew the fitting connection, carefully without damaging the tube.
- You need to unscrew it like this: position the keys like scissors and squeeze them; you must follow the correct direction so that the fitting and nut are unscrewed and not tightened.
- After the fitting connection is unscrewed on the tube, you will see a rubber ring; it must be removed; if it is in poor condition, it is better to replace it.
- Next, we connect the hose from our device to the tube and tighten it with a clamp.
- Pour washing liquid into the bottle and tighten the cap.
- We pump a pressure of 3 atm into the bottle with a compressor.
- We hang the bottle with the cork down and start the car.
Washing process
- We start the car on the flushing fluid and let it use up half of the flushing fluid.
- Next, we stop the car engine and let it sit for 20 minutes. This is necessary so that all the dirt in the injectors becomes sour and dissolves.
- We start the engine again and press the accelerator pedal and keep the speed around 3000 rpm. This must be done until the flushing liquid runs out.
- Next, remove the flushing device and screw the fuel line hose into place.
Attention
Don't forget to install the rubber O-ring when connecting the tube and the fuel line fitting.
How to weld a simple stove
There is no point in explaining how to make the standard and most common design, shown below in the assembly drawing. Firstly, the diagram is very clear, and secondly, there is no shortage of information of this kind.
Let's move on to a more complex version of the heater with an afterburner bent at 90° (the angle of rotation can be made larger, but not sharper). The purpose of the event is simple - to organize the extraction of heat from hot flue gases, and not immediately throw them out into the street. The second difference is a drawer with oil instead of a traditional closed container, which is inconvenient to clean. The design of the furnace with dimensions is shown in the drawing.
The dimensions of the unit are arbitrary and may change when selecting pipes of a different section
Step-by-step instructions for assembling a furnace for burning waste look like this:
- Cut blanks for the body, drawer and afterburner. For the latter, the pipes must be cut at an angle of 45°.
- In a profile with a smaller cross-section, cut out one wall with a grinder, and weld plugs on the sides to create an open container. Attach a handle to the front part protruding over the sides of the box.
- Weld the structure as shown in the drawing, drill an air hole on top of the fuel chamber and perforate your bent pipe. The heater is ready.
Here the master attached convection fins from a 40 mm steel strip for better heat transfer.
A few words about how to select the number and diameter of the afterburner holes. In our example, its cross-section is 80 x 80 = 6400 mm²; for the calculation you need to take half - 3200 mm². If you use an 8 mm drill, the area of each hole will be 50 mm². Divide 3200 by 50 and we get 64 pieces that need to be drilled during the assembly process; when setting up, their number will increase.
One of the simplest ways to extract heat is to connect the stove to a horizontal pipe 3-4 m long, running at a slope along the wall of the room. Make sure that there are no wooden shelves or fuel cans placed above it and the heater. It is better to fence the walls near the stove with sheet iron.
Now all that remains is to ignite, warm up and configure the oven. Your task is to achieve minimal emissions of black smoke into the street, indicating a lack of air for combustion. It is necessary to drill 3-5 additional holes in the afterburner and check the operation of the unit again until the emission becomes as transparent as possible.
Washing with removal of injectors
What you need:
- Set of wrenches;
- O-rings for injectors 16 pcs;
- Carburetor cleaner;
- Syringe;
- Injector plug 1 pc. or mother chips 2 pcs;
- Two-core wire up to 1 m long;
- Intake receiver O-rings;
Injector removal process
- First, we relieve the pressure in the fuel rail; how to do this is written above.
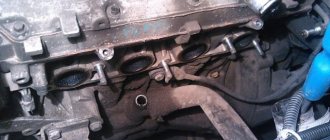
- In order to dismantle the fuel rail, it is necessary to remove the intake manifold.
- We remove the intake manifold corrugation by unscrewing the clamp from the DZ and unscrewing the clamp from the low crankcase ventilation, and remove the chip from the mass air flow sensor.
- Unscrew the dipstick with a screwdriver and pull it up.
- Unscrew the breather clamp, remove the hose and bend it down.
- We remove individual ignition coils except for the 4th cylinder (it does not interfere).
- Unscrew the two nuts securing the intake manifold from above.
- Unscrew the 2 bolts and 3 nuts securing the intake manifold.
- We move the intake manifold towards the radiator and lift it to the top.
- Under the hood we find a fuel line pipe (if the engine has a return line, there will be two pipes, one of them goes to the fuel rail, so you need to connect to it).
- We take two Keys on “17” and unscrew the fitting connection, carefully without damaging the tube.
- You need to unscrew it like this: position the keys like scissors and squeeze them; you must follow the correct direction so that the fitting and nut are unscrewed and not tightened.
- After the fitting connection is unscrewed on the tube, you will see a rubber ring; it must be removed; if it is in poor condition, it is better to replace it.
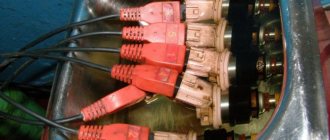
- Disconnect the injector wiring harness.
- Using a screwdriver, unscrew the bolt securing the fuel rail tube to the cylinder head.
- Unscrew the two hex bolts to “6”.
- Pull the fuel rail towards you; with a little force, the ramp should come off.
Removing injectors from the fuel rail
- We remove the chip from each injector and dismantle the wiring harness.
- Remove the retaining rings from the injectors
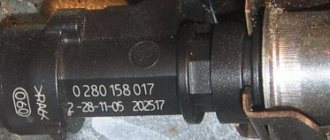
- Pull out the nozzles in a circular motion
Preparing to wash the injectors
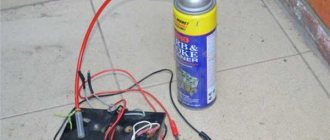
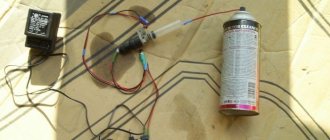
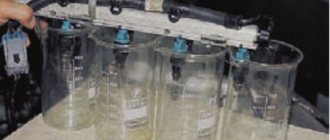
In order to wash the removed injectors, it is necessary to prepare a washing device. The injectors are flushed under pressure. To do this, we assemble the injector power supply circuit. The injector receives power from 9 to 12 V. The power source for opening the injector can be a crown battery or a car battery. We will use a rechargeable battery.
So, let's start assembling a device for washing injectors on a Lada car
For convenience, it is better to carry out the procedure together.
- You need to prepare a syringe. Pull the piston out of it; the syringe cylinder should fit tightly onto the nozzle with the ring. You can also use a hose of a suitable diameter instead of a syringe and tighten it with a clamp. We will use a hose.
flushing with a syringe
flushing through a hose
- Next, we twist the wires with the injector plug or with the “mother” terminals.
- We connect the nozzle to the power source, observing the polarity. "+" and "-"
- The injector should click, which means the injector is opening.
- We hold the nozzle and spray carburetor cleaner into the hose and hold it, creating pressure in the hose between the nozzle and the cleaner bottle.
- Then you need to open the injector by connecting the wires to the battery
- The injector will spray carburetor cleaner and clear itself.
- You can complete the procedure as soon as a uniform spray of fuel begins to emerge from the injector.
- Next, you should do the same procedure with all the injectors.
- Assembly should be carried out in the reverse order of disassembly.
Advice
For easier installation of the fuel rail with injectors into the cylinder head, it is recommended to lubricate the O-rings with engine oil.
Now you know in what ways and how you can wash the injectors. We hope our article helped you and you chose a method of washing injectors that is convenient for you.
Fuel Features
Spray fuel is not only dirty, but also very sticky. One of the tasks of engine oil additives is to ensure that a thin layer adheres to friction surfaces operating under difficult conditions. Therefore, burners during processing work almost exclusively with heating of the fuel, which increases its fluidity: too viscous fuel will not mix properly with air, will not pass through the nozzle nozzle, or will not coat the spray head in an even layer (see below).
Setting fire to the waste is also not so easy: what kind of engine oil would it be burning in a very hot engine? In fact, only an electric spark and a gas torch are suitable for quick and reliable ignition of waste. There is, however, one exception, see below.
And thirdly, the waste is contaminated not only with solid particles, but also with water and/or antifreeze that got into it from the internal combustion engine cooling system. Fuel filtration is a rather complex process. It makes sense to organize it only if fuel burner is constantly available, for example, in a fairly large and busy auto repair shop, and the burner used for burnout for irregular use should be insensitive not only to solid contaminants, but also to water content in the fuel.
Electricity for burner
This leads to an unfavorable conclusion: there are no energy-independent burners during mining. There are ways to burn waste without pressurization and heating, but such devices (see below) give acceptable technical and environmental indicators only as part of heat-generating devices developed at the same time and are not burners as such. Therefore, if your power supply is unreliable and there is enough waste, it would be better to make a stove or boiler for it.
