Many motorists prefer to contact the same technician to fix any problem in their car. The only drawback of such solutions is high prices and the need to often wait in a long line. In some cases, it is possible to do the work yourself. A simple set of tools and minimal knowledge is enough. Attention is also important, otherwise the result will not be as desired.
Injection cars and their main features
VAZ 2114 cars in any version are equipped only with an injection-type engine. Therefore, there is no doubt about the reliability of the devices. But it cannot be without problems, especially when they use insufficiently high-quality fuel or do not change the filtration elements in a timely manner. The appearance of the Check Engine sign indicates the need to check the engine for performance.
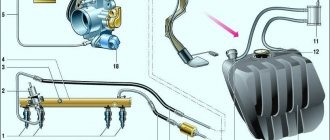
The mechanical part of the injector includes the following parts:
- Injectors.
- Air type pipe.
- Air filters with housings.
- Throttle units.
- Fuel ramp.
- Intake manifold.
Most often, these are the parts that people are faced with purchasing in the event of repairs and replacements. When repairing a VAZ 2114, the injector must remain intact.
How to clean injectors on a VAZ 2114?
The fuel system of an engine with distributed injection is equipped with an injector - an electromagnetic unit that supplies fuel to the intake manifold of the engine. On gasoline engines, a scheme using one injector per cylinder has become widespread, which has improved the quality of the fuel mixture and increased efficiency.
Gasoline sprayers are evaluated according to certain criteria:
- Dynamic range of operation.
- The form of a fine spray jet.
- Fuel injector lag (time period for opening/closing of the injector).
- Quality indicators of fuel atomization.
VAZ 2114
Malfunctions caused by clogging of the structure
Fuel injectors for the VAZ 2114 have rather low performance. In combination with the poor quality of gasoline at domestic gas stations, problems often arise with the VAZ engine caused by clogging of the element and their nozzles. For stable and balanced operation of the engine, it is recommended to monitor the condition of the injectors.
When the accelerator is applied sharply, dips occur, the car drives poorly on a not warmed-up engine, jerks or slows down - poor-quality system operation.
Based on the following indirect signs, we can safely say that the injectors require cleaning, and in some cases, replacement:
- stopping the engine at idle;
- increased gasoline consumption;
- the motor does not produce rated power;
- low engine response;
- unstable operation of the power unit;
- failures when moving.
Cleaning the VAZ system at a service station
You can clean the injectors using ultrasound by taking your VAZ to a service center. A qualified specialist using good equipment will perform this procedure, which will have a positive effect on the dispersion of the spray and increase the productivity of the structure. Cleaning at the station helps restore spray quality, which will increase engine efficiency, throttle response and power. The list of work performed at a service station may include measuring CO, adjusting idle speed, removing the rack with injectors, and measuring productivity. Next, the main procedure is ultrasonic cleaning, as well as replacing the fuel filter and system seals.
Injectors for VAZ 2114
Removing an element
But all this pleasure costs money, and high-quality work at a good service station costs a lot. Therefore, there is an alternative - cleaning the system with your own hands
First, let's pay attention to the features of dismantling injectors
- First, remove the fuel rail.
- Unfasten the wiring block (by pressing on the bracket).
- Using a screwdriver, disconnect the injector retainer.
- Extracting the elements.
- We remove the O-rings, since they are squeezed out and new ones must be installed during reassembly.
During dismantling and reassembly, no damage to the nozzles or entry into the system is allowed. In order to install new injectors on the ramp, you need to do everything the same, but only in reverse order.
Do-it-yourself system cleaning
Cleaning the structure without your car visiting a VAZ service center can be done in two ways.
In the first case, you must first buy an injector and carburetor cleaner and o-rings for the system.
After removing the injectors from their regular places, we lower them into a suitable container with injector cleaner. We separately clean the IAC using a carburetor spray. A layer of resin is formed around the nozzle on the structure, which must be carefully cleaned by periodically washing it with a spray.
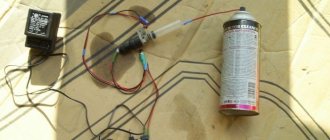
We carry out internal cleaning using a pump and a power source with a voltage of 3 to 12 volts. We pour cleaner into the pump hose and pump the nozzle under a pressure of 6 atmospheres, simultaneously applying voltage. The voltage can be raised to 9-12 volts until a characteristic crackling sound appears.
Next, in reverse order, we put everything back in place, connect the block and we can start the VAZ engine.
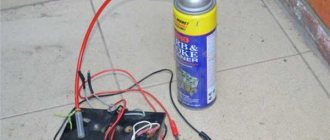
The second method is more economical, but more troublesome. We only purchase liquid for cleaning carburetors. Pour the spray into the pump hose and connect the latter to the system.
A high-quality carburetor spray can provide excellent external reading of the injector, but it will take longer to tinker and soften the coking. Next, we apply voltage to the injector in jerks until it crackles and perform internal cleaning. When installing the injectors in their original place, it is advisable to carefully lubricate the new seals with soapy water, which will increase the tightness.
Periodic maintenance and cleaning of fuel injectors will ensure stable engine operation and economical operation of a VAZ vehicle.
More information about injectors
The injectors themselves belong to the electromagnetic variety of devices. The electrical part with a pulse causes the valve to open. Then the fuel is atomized and injected into the cylinder under high pressure. The magnitude of the pulses indicates what the degree of opening of the valves should be. Dosage is organized according to existing conditions.
Compatibility with injectors of different brands and models is a distinctive feature of VAZ 2114 engines. Here is an example of the names of trusted manufacturers:
- SIEMENS.
- BOSCH.
- G.M.
Engine characteristics determine the performance of injectors to choose. If the conditions are not met, there is a high probability of a decrease in power and an increase in fuel consumption. Marking the part helps you understand which variety will be relevant. Products are now produced with approximately the same quality.
Injector cleaning options and basic tools
Now let's take a closer look at how to clean the injector, and what tools can be used to solve such a problem.
Automotive chemistry
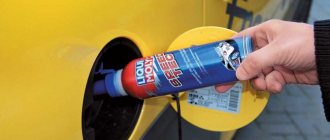
As noted above, the simplest option is to use a special additive, which is added to the fuel tank, mixed with fuel, passed through the system and cleans the injectors. This product is recommended to be used as a preventive measure, once every 5000 km. In addition, it should be used in “young” cars with low mileage.
What is the reason for such a requirement? If the vehicle's fuel system has not been cleaned for a long time, a large number of deposits accumulate in it.
If the car owner decides to clean the injector using additives, the latter cause the dirt to fall away from the walls, after which the main elements of the system become clogged. The first thing that gets dirty is the fuel pump.
The main representatives of auto chemical products include:
Liqui Moly (Liqui Moly) Injection Reiniger High Performance series.
According to the manufacturer, this product can help out even with serious contamination.
Its use eliminates the consequences of using low-quality fuel. After cleaning, engine power increases, fuel consumption decreases and the volume of harmful emissions into the atmosphere decreases.
How to clean an injector using Injection Reiniger High Performance? The packaging contains instructions according to which it is recommended to add 300 ml of liquid to a full tank of fuel from time to time.
Regular use of the product helps to avoid contamination, keep the system clean, and increase the efficiency of intake valves and injectors.
The use of the composition is recommended in case of problems with starting, a decrease in engine power, deterioration of exhaust gases, as well as in the event of other malfunctions associated with contamination of the injector.
Liqui Moly (Liqui Moly) series Langzeit Injection Reiniger.
The product also fights existing stains and prevents the formation of new deposits. Used to clean injectors, intake valves and other elements of the fuel system.
Regular use of the product allows you to maintain engine power, reduce the risk of failures in its operation and extend the service life of the catalyst.
To clean the injector, just add 10 ml of liquid per 10 liters of fuel. The additive mixes itself with gasoline and performs a cleaning function.
Liqui Moly (Liqui Moly) series Injection-Reiniger.
Another modern product that provides quick cleaning of injectors and other elements of the fuel system.
The use of the additive guarantees the removal of carbon deposits and deposits that appear on fuel lines, intake valves, dispensers and other components.
Periodic use of the fluid ensures smooth running, engine response, better combustion of the combustible mixture, reduction of harmful emissions, and reliable protection against rust.
Features of the product include compatibility with catalysts, as well as the possibility of use on all types of gasoline engines with an injection system.
According to the manufacturer, the anti-corrosion characteristics of the additive are maintained for 2000 km.
To clean the injector using this product, just stir it in a ratio of 1 to 230.
So, 200 ml of additive is enough to prepare 70 liters of fuel. The tank should be 75% full when adding.
Liqui Moly (Liqui Moly) Injection Reiniger Light series.
This is a mild cleaner that is suitable for gasoline engines with various injection systems. Used as preventive maintenance and periodic cleaning of the fuel system.
The manufacturer claims that the cleaner does not lift dirt from the fuel tank and does not clog fuel lines. Existing contaminants are dissolved and removed from the system.
If you clean the injector in a timely manner using Injection Reiniger Light, engine starting is improved, the volume of harmful emissions is reduced, and reliable protection against corrosion is provided.
The peculiarity of the additive is that it has no negative effect on the catalyst.
To clean the injector, you need to add 0.25 liters of additive to a full tank of fuel. The volume of gasoline should be no more than 70 liters.
Liqui Moly (Liqui Moly) Injection Reiniger Effectiv series.
This composition is suitable for cleaning injection power systems in the presence of obvious symptoms of contamination - engine problems, engine failures, and others.
The best option is to use the product every 2000 km. The additive is especially useful when low quality fuel is poured into the car.
To clean the injector, 300 ml of additive per full tank of fuel is enough. The product is mixed with gasoline, cleans the fuel system, protects it from corrosion and deposits in the future.
JET 100 ULTRA XADO.
Universal cleaner for injector and carburetor.
Its advantages include high efficiency, as well as the ability to remove all types of contaminants (dust, deposits, gasoline films, varnishes and others).
The use of the additive helps restore the factory characteristics of the injector, remove existing dirt from the fuel system, as well as the line through which the air flow is supplied.
The advantages include safety for catalysts, reduced fuel consumption, and restoration of the previous engine power.
Before cleaning the injector, it is recommended to start the engine and spray the mixture onto the throttle valve.
After this, the engine should run at high speeds for 4-5 minutes.
You can clean the injector in another way - spray the composition directly into the fuel tank. In this case, 20 liters of fuel requires spraying for 12-15 seconds.
The advantage of this method is the possibility of comprehensive cleaning of the system - intake valves, fuel tank, gas lines, injectors and other elements.
XADO MaxiFlush.
Concentrated additive containing highly effective elements. Purpose: cleaning the fuel system of gasoline engines.
The result of using the additive is to normalize engine operation, eliminate problems with idling, and reduce the volume of harmful emissions in the vehicle exhaust. Used in injector cleaning installations.
The advantages include quick removal of contaminants, cleaning of the combustion chamber, fuel nozzles and other elements.
If you clean the injector using XADO MaxiFlush, you can reduce fuel consumption, restore the spray pattern and optimize the fuel combustion process.
Regular use of the additive helps to increase the reliability of the system and increase the efficiency of injectors by 3-4 times.
To completely clean the system, 300-350 ml of product is required. If the composition is used in professional installations, mixing is carried out in the ratio of 300 ml of additive per 700 ml of gasoline.
If you need to clean the injector without additional equipment, you should add the product to the tank at the rate of 300 ml of additive per 40-80 liters of gasoline.
Features of the composition include a mild effect on catalysts and lambda probes. Cleaning frequency is every 15-20,000 km for prevention.
EGR Verylube XADO.
A modern product for cleaning the recirculation system valve, as well as the injector flap. Can be used for carburetor engines.
The use of an additive helps restore factory parameters. To clean the injector valve, it is recommended to heat the engine and spray the mixture onto the throttle valve, after which the engine should run at high speed for 4-5 minutes.
XADO VERYLUBE.
A universal composition designed for cleaning carburetor and injection engines. Its advantages include high speed of action and increased efficiency.
As a result of application, it is possible to clean the injector, remove carbon deposits, films and deposits from the elements of the fuel system.
The use of the composition as a preventive measure helps maintain engine performance and injector efficiency throughout the entire service life of the vehicle.
As a result of use, the volume of harmful emissions into the atmosphere is reduced. The product has a loyal effect on oxygen sensors and catalysts.
To clean the injector using this additive, you need to warm up the engine and spray the composition onto the car's throttle valve. The engine should run for another 4-5 minutes at high speeds.
An option with complex cleaning is possible, when XADO VERYLUBE is added directly to the car tank. In this case, the intake valves, pipelines, spark plugs and other elements are cleaned.
To achieve the result, it is enough to spray the additive into a tank with 20 liters of fuel for 12-15 seconds.
Ultrasonic cleaning, its features and disadvantages
An excellent option is to clean the injector using ultrasound. In this case, the injectors are removed from the engine, after which they are diagnosed on a special stand, and then, if necessary, placed in a bath with a special liquid.
After this, the part is exposed to ultrasonic waves. The ultrasound source is located at the bottom of the container into which the sprayers are lowered.
The following happens: under the influence of ultrasonic waves, the water in which the nozzles are located begins to vibrate. But since the liquid cannot vibrate at a frequency equal to the frequency of the ultrasound acting on it, microbubbles are formed and explode.
During microexplosions, water under high pressure acts on the nozzles, clearing them of contaminants.
As a result of such manipulations, the nozzles and the outer part of the nozzles are cleaned of contaminants.
It is worth noting that removing contaminants from the inside of the nozzles is only possible by opening and closing the nozzles directly in the bath. Otherwise, you will only be able to clean the outer part of the part.
In general, the use of ultrasound is most effective, because even the most persistent contaminants are eliminated. The disadvantage of this method is that it costs a pretty penny for the car owner.
The principle of ultrasonic cleaning is simple. First, the injectors are removed from the machine, they are inspected and installed in a special stand.
At the initial stage, the quality of the spray is checked, after which the sprayers are cleaned in an ultrasonic bath in a gentle mode. Once this work is completed, the check is performed again. If the result cannot be achieved, cleaning is carried out a second time.
If required, a new filter and o-rings are installed. Then the injectors return to their place.
According to experts, it is possible to clean the injector using ultrasound even after 100 thousand kilometers. But here everything depends on the degree of contamination of the part.
As for the disadvantages of this method, there are two of them - high price, as well as risks for nozzles, which may fail during the cleaning process.
There is a danger that the car owner will spend a lot of money on cleaning, but there will be no result.
Chemical method (liquid washing)
Another way to clean the injector is to use special chemical compounds.
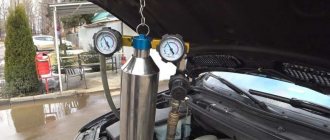
The bottom line is that cleaning equipment is connected to the injector using adapters. In this case, it is not fuel that is supplied to the injectors, but a flushing composition (for example, Liquid Moly, Carbom Clean, Vince). The washing mixture is supplied using tubes.
Thanks to the use of a fitting, the fuel pump, filter, tank and fuel line are not involved in cleaning.
The mixture of gasoline and cleaner is supplied under pressure, which is set taking into account the manufacturer’s recommendations. As a result, contaminants are broken down and released through the nozzle holes, after which the residues are burned in the cylinders. The procedure takes 30-50 minutes.
Despite its apparent effectiveness, this method does not always guarantee results. It is rarely possible to clean the injector 100%, because a small amount of the flushing compound remains in the injectors and oil system. Therefore, immediately after completing the work, it is recommended to drive 12-15 km in forced mode, and then change the oil and filter.
The disadvantage of this method is its high time and financial costs. The method is suitable for cars that have traveled a short distance, and dismantling the sprayers is associated with great difficulties.
Let's look at liquids that can be used to clean injectors:
- WYNNS - a German product intended for cleaning the injector. It is versatile and suitable for all types of gasoline engines (with direct injection and carburetor). As a result of the application, it is possible to clean the fuel system, reduce the volume of harmful emissions and improve the characteristics of the injector. There is no need to change spark plugs after cleaning is completed. The frequency of application is once every 20-30 thousand kilometers.
- Runway — flushing liquid for injector, sold in 0.3 l container. Its action is aimed at flushing the injector, maintaining and normalizing the injection quality. The composition lubricates the system and protects fuel injectors from contamination. Regular use guarantees improved vehicle response, reduced emissions, and reduced fuel consumption. The advantages include the absence of soot and deposits after use. To clean the system, just pour the liquid from the bottle into a tank with 50-60 liters of fuel. The frequency of manipulations is once every 3-5000 km.
- WYNNS Injection System Purge — flushing liquid for removing deposits and contaminants in injection engines. Using the product, it is possible to clean the combustion chamber, valves and their stems, injectors and other elements of the injection system. The result is restoration of injector efficiency, normalization of engine operation, improvement of compression ratio and other parameters. The cleaning liquid is safe for catalysts and spark plugs. Used once every 20-30 thousand kilometers.
- KENT - a powerful carburetor and injector cleaner. Available in 0.5 liter bottles. This is a fast-acting composition that has the following advantages - versatility, high drying speed, safety for catalysts, removal of various contaminants (varnish, glue, grease), as well as ensuring uninterrupted operation of the engine.
- Toyota D-4 Fuel Injector Cleaner - a composition with which it is possible to clean various types of fuel systems from the accumulation of carbon deposits. The use of the composition helps remove moisture, provides protection against corrosion and the appearance of ice “plugs”. Use for preventive purposes ensures cleanliness and maximum efficiency of injectors. Recommended for use on Toyota vehicles.
The use of a cleaner is important when fuel consumption increases, engine malfunctions at idle, and “dips” appear during the acceleration process. It is not recommended to use the composition on carburetor engines. The optimal time to clean the injector is during the oil change period. To do this, just add Toyota D-4 Fuel Injector Cleaner to a half-empty tank. Immediately after mixing, fuel must be topped up to 100%. One bottle of the composition is enough for 70 liters of gasoline.
Important information
First you need to find out exactly what kind of fuel the car is fueled with. Turning to unfamiliar gas stations is likely to interfere with stable operation. Negative consequences are associated with carbon deposits inside the combustion chambers. The service life of the injectors does not even reach 120 thousand kilometers if you regularly choose low-quality materials for refueling.
It is recommended to replace it at least every 90 thousand kilometers.
Is it possible to extend the life of injectors?
Extension of service life is acceptable. To do this, use one of the available options.
The first involves the use of additive materials that improve the quality composition of the fuel. Additives are poured directly into the fuel tank.
Or you can wash the injectors themselves. This is done when contacting a car dealership, or on your own. But in most situations, completely replacing the part itself is a more economical solution.
Why do injector nozzles become clogged?
The main element of the injector is the nozzles, which supply fuel to the engine cylinders.
Thanks to these devices, fuel is dispensed and atomized. If the nozzles are clogged, the injector efficiency will be reduced. What is the reason?
Today, there is an increasingly common opinion that the injector becomes dirty due to the use of low-quality gasoline, which contains foreign elements or even sand. In practice this is not entirely true.
The car's fuel system is well thought out. It provides several degrees of fuel purification, which prevents dirt from getting to the injectors, so the risk of injector contamination for this reason is minimal.
The system filters foreign elements, ranging from large fragments to small contaminants.
What causes the pollution? The main culprits are heavy fuel fractions that remain on the walls of the nozzles (nozzles).
Most often this happens after the ignition is turned off, when the body of the product heats up from the engine, and the cooling system no longer performs its functions.
At high temperatures, light fractions evaporate, but heavy fractions remain in the nozzle channels, gradually contaminating them.
Over time, the thickness of the deposits increases, which leads to a decrease in the cross-section of the nozzle and a deterioration in its performance. As a result, engine performance decreases.
The presence of heavy fractions in the fuel composition is a situation that is typical for low-quality fuel.
Such gasoline is obtained through direct distillation and performance improvement using high-octane additives.
Errors in fuel storage also lead to an increase in the volume of heavy fractions. The result is contamination of the injectors, and the car owner inevitably faces the question of how to clean them.
Carrying out diagnostics
Before replacement, be sure to perform an inspection and performance check.
Troubleshooting methods are described as follows:
- When the engine is not warmed up, although the latter continues to work.
It is enough to touch the nozzle with your hand to check if it works. If vibration or pulsation is felt, then everything is correct. But this method cannot be called completely reliable.
- Inspection at idle speed.
The number of revolutions is increased slightly. And then they look at how the engine works in this state. Then the nuts on the caps to hold the injectors are slightly loosened. Afterwards the number of revolutions should decrease. If this does not happen, one of the parts is definitely broken.
Work begins when the faults are accurately verified.
Procedure for removing injectors
The rack and nozzles must be completely dismantled before work can begin. The following manipulations are expected:
- The car is completely cleaned. It is assumed that the negative terminal is disconnected from the battery.
- All work is carried out if the engine has completely cooled down. Otherwise, the risk of injury increases.
- The upper part gets rid of the casing that covers it.
- Removing air filters.
- The pipeline is unscrewed from the injectors and pumps. Maintaining high pressure in the system assumes that the remaining mixtures are released before this. The pipelines are supported by brackets.
- The injector is unscrewed with a spanner.
- The puck is also removed, the main thing is not to lose it.
- The plug and clamp near the ramp are completely disconnected. Most of the parts are left behind.
The same principles apply when removing the remaining injectors. Next comes flushing the VAZ 2114 injector.
Main features
So, signs of clogged injector nozzles:
- misfires at idle,
- the engine is unstable,
- fuel consumption increased sharply,
- slow acceleration of the car when the gas pedal is fully pressed.
Why is it important to identify this malfunction? The injector supplies fuel to the system and is its main element, therefore, extending its service life is of great importance for the operation of the entire engine.
The quality of the fuel has a huge impact on the safety of the injectors. Since gasoline in Russia does not meet European standards, the injector nozzles do not serve the stated 100-120 thousand km. mileage When the mileage reaches more than 80-100 thousand km. injectors need to be changed. If a decision is made to change, then the question immediately arises: “What is the cost of injectors for a VAZ 2114?” If you buy “native” VAZ cars, then their cost in 2014 started from 500 rubles. for one piece. Many drivers believe that it is better to purchase imported ones. Injectors produced abroad are several times more expensive than domestic ones, but their service life also increases.
Cleaning inside
This is one of the most important points when working with devices. Among the main devices are tubes and syringes, and delivery cartridges. Cleaning agents get inside through tubes. First, they test the composition on a small area, because it is very aggressive. Work begins if nothing happens.
After cleaning, new rings are installed. It is not recommended to put the old ones back, even if they are cleaned. The filters and fuel pump mesh are also removed and replaced with new ones. Their location is easy to find out if you study the VAZ 2114 diagram; the injector rarely changes its position.
Cleaning injectors VAZ 2114
To clean the injectors, they need to be removed from the car, this is done as follows:
- From a vehicle with the engine not running, disconnect the battery terminal.
- Relieve pressure in the fuel rail. On the back there is a valve with a cap; by unscrewing it and pressing the valve with a thin screwdriver, you can release the pressure.
- For convenience, remove the air filter pipe.
- Disconnect both fuel pipes.
- Disconnect the connectors from the injectors.
- Unscrew the fuel rail.
- The injectors are removed along with the ramp; in order to disconnect them, you need to move the fixing washer and pull the nozzle.
After removal, you can begin cleaning yourself:
- Remove the O-rings from the injectors and soak for a short time in acetone or gasoline.
- After soaking, carefully clean the nozzles with a needle and remove any other external deposits.
- To clean the inside you will need carburetor cleaning fluid, a syringe, a tube that fits tightly in diameter to the injector inlet holes, and a button with wiring.
- Connect the injector through the button to the battery terminals, as you did when checking.
- Fill the syringe with liquid and connect it to the nozzle using a tube.
- Apply pressure with the syringe and press the button.
- Liquid should spray out of the nozzle.
- Repeat this procedure several times, constantly maintaining pressure with the syringe.
- After washing, it is better to immediately replace the fuel filters.
This method removes only surface deposits; for deep cleaning of VAZ 2114 injectors, send them for ultrasonic cleaning.
