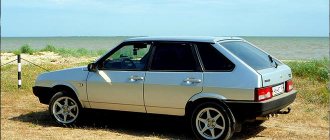
The direction indicators (turn signals) on the VAZ 2108, 2109, 21099 do not work
Either one turn signal (“turn signal”) or two may not work, or all at once, etc., in different combinations. Let's consider the causes of this malfunction on VAZ 2108, 21081, 21083, 2109, 21091, 21093, 21099 cars.
Causes of turn signal failure
One turn signal does not work: front or rear
Burnt out light bulb
When a bulb burns out in one or more direction indicators on VAZ 2108, 2109, 21099 vehicles, the remaining ones begin to blink at double frequency. We visually determine where the light bulb has burned out, turning on the direction indicators one by one. We replace the light bulb with a working one.
Light bulb socket oxidized
We turn the light bulb in the socket several times to restore contact.
Wire connections are oxidized or loose
We check the cartridges and blocks of the front turn signals (in the front headlights and on the wings) and the connecting blocks of the rear lights of the car.
“The culprits” of the failure of the “turn signal” on the wing of the VAZ 2108 (2109, 21099)
The “mass” is missing
All lights and lamps of VAZ 2108, 2109, 21099 cars have a negative wire. Usually it is black in color. The wire is attached to the body near each headlight and tail light. You should check its contact with ground.
Burnt out track in the rear light circuit boards
In this case, it is necessary to remove and “ring” the traces of the rear light boards going to the turn signal lamps. Read more: “Checking the rear light board of VAZ 2108, 2109, 21099 cars.”
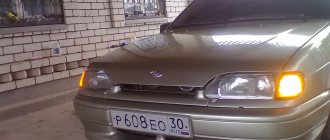
Direction indicator in the front headlight of VAZ 2108, 2109, 21099 cars
Two rear repeaters or two front repeaters do not work
The first four reasons
the light bulbs burned out, their sockets oxidized, the contacts in the connecting blocks of the direction indicators oxidized (on the headlight unit and the turn signals on the wings), the ground was lost.
Break in the wires going from the mounting block to the rear lights
Check the circuit for an open circuit. Or the block of this wiring harness has come off in the mounting block, under the panel on the driver’s side - Ш9 (Х9 in block 2114), the outermost one across the mounting block.
Break in the wires to the front turn signals
The block has come off (W6 (X6) – the far right one at the bottom of the mounting block under the hood).
All turn signals do not work, or they work in pairs - the right or left side of the car
Previous reasons
Fuse blown
In the old-style mounting block 17.3722 this is fuse No. 5, in the new blocks 2114 - F16. The cause of a blown fuse can be different, but most likely it is a short circuit in the wiring. Therefore, when you detect a blown fuse, you should pay attention to finding the cause of the burnout.
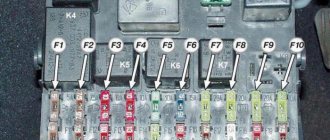
Fuse for the electric circuit of direction indicators No. 5 and relay-breaker “K2” in the mounting block 17.3722
The turn signal relay in the mounting block has failed
Replace the relay with a known good one. Before replacing, it is worth checking whether electric current flows to the input terminal of the breaker relay at all. We pull the relay out of the mounting block and, using a test lamp or a tester, check for the presence of current in the hole for the 49th pin.
The steering column turn signal switch is faulty or its connecting block has been removed
A break in the connecting wires or a loose fit in the mounting block of connecting blocks Ш 3 (Х 3), Ш 1 (Х 1)
Notes and additions
— A more thorough search for the causes of the malfunction - the turn signals do not work on VAZ 2108, 2109, 21099 vehicles, is possible using the turn signal wiring diagram.
Connection diagram for direction indicators on VAZ 2108, 2109, 21099 cars
— In some cases, at the same time, all direction indicators can be lit with a constant light without blinking. In this case, it is necessary to replace the turn signal breaker relay in the mounting block.
TWOKARBURATORS VK -More information on the topic in our VKontakte group
Tips for motorists
only work . When you move the steering switch up or down, the corresponding lamps on the right or left side of the car should light up, operating at a flashing frequency of about 60 cycles per minute. All other operating modes will be considered a malfunction.
The simplest fault, which is easy to identify and fix, is the burnout of one of the turn signal lamps. In this case, the remaining working lamp will blink at twice the frequency , and the indicator light on the instrument panel, instead of blinking, will begin to light constantly, signaling the driver about a malfunction. When replacing a burnt-out lamp, you must install exactly the same power (21W). But there are pitfalls here too. If the VAZ 2109 is operated with a trailer , then the indicator on the instrument panel will not inform you about a burnt-out lamp. Therefore, in this case, they must be checked visually.
Possible causes of malfunction
The first thing to suspect when both the hazard lights and the turn signals stop turning on is the fuse. Its burnout is the most common problem. It is located in a mounting block hidden in the engine compartment. The device number is F2, and the rating is 10 amperes.
A relay is also installed here, performing the function of a breaker. A malfunction of this electromagnetic device can similarly cause the breakdown discussed in this article. It is designated as K2.
If one turn signal does not work, but the others and the emergency lights are in order, then most likely the lamp installed in the flashlight has burned out. When everything fails, but the fuse and relay are working, then there is an open circuit.
Cables can also cause signals to not work properly. The problem occurs if they short circuit. Here, activating the turn signals can light up the emergency lights, etc. Checking the cable is not a difficult task, but quite troublesome. You need a multimeter to work.
And the last thing worth paying attention to:
- switch mounted under the steering wheel;
- emergency button.
They, like everything else, break sooner or later.
On the first VAZ-2114 cars, wiring damage very often occurs. The problem is that the cables in them are poorly placed and can fray over time.
How to check
First of all, see if the indication installed on the dashboard continues to work. If it also does not turn on, then reach into the mounting block - the fuse has probably blown.
When the control is functioning and the protective device is in order, then activate the VAZ emergency lights and see how well the lamps in the headlights glow. Moreover, this must be done both in front and behind. Excessive dullness indicates an incorrect rating or poor ground contact.
When the turn signal does not work, you should look at the relay. Make sure that current is flowing to its terminals. Proceed like this:
- remove the housing of the electromagnetic device;
- connect one tester probe to its positive contact;
- Place the second probe on ground.
Checking the hazard warning button.
If the hazard warning lights are working, then the turn signal and hazard warning relays are working properly, but the fault may be in the hazard warning light button. First, check the plus, as described earlier at pin 49 of the relay, with the hazard warning button off and the ignition on.
If there is no plus, then you need to check the serviceability of the alarm button. To do this, you need to remove the button from the socket by prying it off with a thin screwdriver or remove the instrument panel visor. In the contact connector of the button, use a test lamp to check the presence of power at pin 2 (the numbering of pins on the button near the contacts) with the ignition on.
If there is no power, repair the broken wire from the instrument panel to the button. If there is power, connect pin 2 to pin 5 in the button socket, with the ignition on, and turn on the direction indicators of either side. If the warning lights on this board light up, replace the faulty hazard warning button.
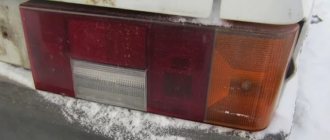
What kind of lamps are there?
Now a few words about the lamps used in the rear light of the VAZ 2109. The A12-5 (T5W) bulb with a power of 5 W is responsible for the side lights.
T5W bulb, responsible for the side light of the VAZ 2109
All steel lamps - direction indicator, fog light, reverse indicator and brake light - are of type A12-21-3 (P21W). Their power is 21 W.
Lamp P21W
Instructions for replacing light bulbs
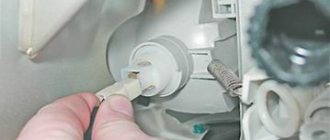
It's time to learn how to change lamps yourself so as not to waste extra money and your time on trips to a car service center. Open the trunk lid and find the rear part of the lights. Disconnect the power supply.
Removing the power supply from the rear light of a VAZ 2109
Press the side latch that secures the light fixture. The latch is located on the side of the light device, which is closer to the central axis of the car.
The back of the lamp is secured using side latches
We take out the back part of the flashlight along with the circuit board and bulbs.
Removing the rear part of the right lamp VAZ 2109
Place the module with the lamps facing up.
Removed module with lamps
We find the burnt-out light bulb, guided by the photo in the section “Pinout of connectors and design of lamps”, turn it counterclockwise, and remove it. Fix the new lamp by turning it clockwise. We install the module in place, connect the power supply.
Cover covering the rear part of the lamp VAZ 2109 (left) and VAZ 21099
Turn indicators do not turn on
If the VAZ 2109 turn signals do not work or one of them has stopped functioning, then there may be several reasons. It is recommended to consider each of them separately: 1. First of all, you need to check the lamp for operability. If necessary, it will need to be replaced with a new one; 2. Then you should check whether the connection contacts are working. It is recommended to pay special attention to the connections of the block, switches, and, last but not least, the indicators themselves; 3. Check if the switches are working properly; 4. Check the functionality of the relays, replace them and fuses. In the case when the turn signals and emergency lights of the VAZ 2114 do not work, the reason for this is almost always hidden in the relay. Heading 2: What to do if the turn signal does not turn off? If the indicators do not turn off on their own when turning the steering wheel, then the switch itself needs to be replaced. Heading 2: Fast Flashing If they blink too quickly, the cause is a burnt out light bulb. It is worth inspecting them and replacing them if necessary. Another factor in frequent blinking may be oxidation of the chips located on the taillights. Much less often, the cause of such blinking is the unsuitability of the tracks located in the additional block.
Preparation for replacement and necessary equipment
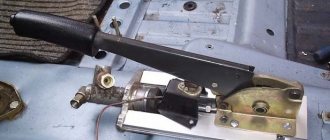
To replace the old switch you will need a Phillips screwdriver, a dry, clean cloth or thick napkins. And, of course, a new detail. Before changing the Kalina steering column switch, you have to carefully get to it, since such procedures are usually carried out rarely. Don't forget to disconnect the negative battery terminal.
The first stage of preparation is removing the steering wheel. First, move it to the lowest position. Using a Phillips screwdriver, carefully unscrew the 7 fasteners of the plastic casing. We remove first the lower and then the upper part.
The second stage is dismantling the old switch. It does not include anything complicated - you don’t even need tools, everything is attached with latches. For example, we will take the right lever, which is responsible for the on-board computer and wipers. Disconnect the small plug with the wires by pressing the latches and pulling towards you. Now, guided by the same principle, we pull out the large plug. You may have to make an effort here.
We see the steering column switch, which is held on by clamps. We clamp them and pull the lever towards ourselves. The other levers are removed in exactly the same way. The only thing worth mentioning is that they can be held by fewer or more plugs.
Emergency signal malfunctions
If the VAZ 2114 emergency light does not work, then troubleshooting should begin with the fuse box. To do this, you need to check and, if necessary, replace with a new one, 10 Amp fuse F2. Simultaneously with checking the fuse, you should inspect and clean the contacts in the mounting socket of the common unit (if they are oxidized, the emergency light may not work even with a working fuse).
The next step in finding a breakdown is to check the presence of voltage at contact X2/5, which is located on the mounting block (this is done using a multimeter and with the emergency button turned on).
The lack of power will indicate a break in the wire that goes from this contact to the alarm button.
If the wiring turns out to be working, then you should check the emergency light bulb and, if it is burnt out, simply replace it with a new one (the new light bulb must be suitable in power - you should not install weaker or more powerful lamps). At the same time, the contacts in the cartridge should also be cleaned.
You can do this:
- fine sandpaper;
- kerosene;
- refined gasoline;
- VD-40.
If the light bulb, wires and fuse are in good working order, then you should make sure that the button itself is working. To do this, you need to turn on the button and ring it using a multimeter.
If the button turns out to be broken, it should be replaced with a new one, since this element is not repairable.
If a breakdown of the hazard warning button is discovered on the road, and the hazard warning light itself is urgently needed, then you can make do with “improvised means”. To do this, you need to dismantle the button, disconnect it from the block and connect the two sockets in the block using any metal wire, thereby closing the alarm circuit.
Another cause of failure may be the failure of relay K2. You can find out about this by indirect signs - if the relay is faulty, both the emergency lights and the turn signals will not work. In this case, the relay should be replaced with a new, similar one.
Procedure for release before 1998
If a car manufactured before 1998 breaks down:
If, after pressing the emergency lights buttons, the indicator does not blink, first check fuses F5 and F11. They are located on mounting block 17.3722. This block is located in the engine compartment on the left in front of the windshield.
If for some reason your block does not match the indicated number, then find the fuse, which is indicated by a triangle.
This is the hazard warning fuse. The turn signal fuse is indicated by two arrows.
If turn signals and emergency lights do not work: common faults and their elimination
p, blockquote 11,0,0,0,0 —>
Turns relay
Until recently, the main element of turn signal and hazard signal systems was the turn relay. In the middle of the last century, turn relays with a bimetallic plate were used. In some models of budget cars and trucks they are still used to this day. Along with simplicity and low cost, they are more reliable and maintainable. A typical relay circuit is shown in the figure:
p, blockquote 12,0,0,0,0 —>
p, blockquote 13,0,0,0,0 —>
The core of the circuit is a bimetallic strip. It is included in the circuit of current flow through the turn lamps. When turning on the turns or emergency lights, it is in a non-heated state, and closes the circuit of the warning lights, they turn on. As the bimetallic plate is heated by the flowing current, it changes its geometric dimensions (bends).
p, blockquote 14,0,0,0,0 —>
A little physics: a bimetallic plate consists of two (bi) bonded plates with different coefficients of thermal expansion. When both plates are heated, one expands more, the other less, hence the deformation. When bending, the plate opens the relay contact, the current stops flowing, the lamps go out, the plate cools down again, the contacts close, the lamps light up, the plate heats up... So ad infinitum. If one of the lamps burns out, the current will be less, the plate will heat up more slowly, and the blinking period will increase. If there is a short circuit in the circuit, the lamps will flash quickly. Everything is very simple, reliable and informative. Such relays have been used for more than half a century.
Nowadays, combined relays with a built-in electronic circuit are used.
p, blockquote 16,0,0,0,0 —>
p, blockquote 17,0,0,0,0 —>
Such circuits are less reliable and often fail, especially from unknown manufacturers. Relays are usually mounted either on the steering column or in the fuse box under the dash. This is done so that their operation can be heard by the driver. In modern cars, there is an additional buzzer in the dashboard that duplicates the turn indicators. Such relays cannot be repaired; they must be replaced.
Dependence on the headlight itself
In order for the lighting to be of high quality and look beautiful, you need to focus not only on the characteristics of the h4 lamp - these are halogens that are installed at fourteenths, but also on the headlight unit itself. If the unit has an average reflector and diffuser, your brightest lamp is worthless. And such blocks are supplied from manufacturers of two brands: BOSCH and Kirzhach. For objective reasons, the first of the second wins:
- The reflector from Kirzhach is narrow and elongated, contains an internal partition, and does not have an upper wall.
- The BOSCH company, on the contrary, has a wide and short reflector, with full walls on all sides.
Fuse
To understand why the emergency lights on the VAZ 2114 do not work, the first thing you need to do is check the fuse responsible for it. It is installed in the mounting block under the hood of the car on the left side. This fusible element is designated F2 . To speed up the search, you can use the electrical diagram number fourteen, where its exact location is drawn.
A burnt out or broken part can sometimes be identified visually by the presence of plaque or damaged elements. You can also check the serviceability of the fuse using a multimeter. There are two diagnostic methods.
For the first method, the measuring device must be switched to voltmeter mode and the car's alarm system must be turned on. By connecting the probes of the device to the outputs on the fuse element, determine the presence of voltage on them. If one of them does not have it, the part needs to be replaced. It is inexpensive and can be changed literally with one movement of the hand. You can even make a replacement on the go. Especially if there is an auto parts store nearby.
You can also diagnose the element with this device in ohmmeter mode. To do this, you need to remove it from the car and attach the probes to the outputs. If the resistance is zero, the part should be replaced.
Often the fuse turns out to be serviceable, but its contacts are oxidized. This happens due to dampness and time. In this case, you should simply clean them.
It is worth noting that some motorists with such a breakdown begin to check the K2 relay. But there is no need to waste time diagnosing it, since in this case the turn indicators would not light up either.
Self-diagnosis of car lighting devices
There are several situations in which you can determine that optics need diagnostics:
- The turns do not flash, but light up. Such a malfunction indicates the failure of the relay, in particular, we are talking about its electromagnetic component. The electromagnet itself could close in one of the positions, as a result of which it cannot return to its initial state.
- The turning lights flash very quickly or very slowly. In this case, the problem may lie not only in the relay. In some cases, this type of malfunction occurs when the driver uses inappropriate lighting sources. So when purchasing new light bulbs, you need to make sure that they correspond to the rating set by the car manufacturer.
- The optics don't work at all. That is, the turning light bulbs do not flicker, and the corresponding indicators on the dashboard also do not light up. In addition, there are no characteristic clicks that appear when turning on the turning lights. With such symptoms, there can be many reasons for the problem; we will tell you more about their diagnosis below (the author of the video is the Steel Horse channel).
The emergency lights on the VAZ 2109 do not work
Hello everyone, dear car owners of the legendary VAZ 2109 (nine). Today I would like to talk about why the emergency lights do not work on this car.
The electrical circuit of the emergency lights on the car is protected by fuses, which are located under the hood in the mounting block. If you find that after pressing the hazard warning button on the instrument cluster, the special turn signal lamps do not blink, then most likely this means that the emergency lights on the VAZ 2109 are not working. First of all, you need to look for the reason in fuses F5 and F11; if you have a mounting block of a different type, then the designations may not match. But finding the right fuse is not difficult; any mounting block on the cover has a decoding. The hazard warning light is indicated by a triangle, and the turn signals are indicated by two arrows. The fuse designations for the VAZ 2109 can be found here.
If the fuses are not in order, then you need to replace them with new ones, observing the required amperage. And if the fuses are intact, then you need to check the K2 turn signal relay. The easiest way to check a relay is to replace it with another one that is definitely working. If in this case the emergency light on the VAZ 2109 does not work, then you need to check the wires and contacts in the connector blocks. If everything is fine with this, then most likely the problem with the alarm button can be solved by replacing it with a new one.
Well, that's all, we've looked at the main reasons why the emergency lights on a VAZ 2109 don't work. Bye everyone.
A considerable number of VAZ owners are faced with a situation where the turn signals and emergency lights do not work on the VAZ 2110 or other models, and the problem often takes them by surprise. The most common reason why turn signals on a VAZ 2109 do not work is that the car's electrical system has failed.
By the way, most VAZs are equipped with similar electrical circuits that are repaired in the same way, so the advice is relevant both for the 2109 model and for other VAZ models.
To prevent a situation where the turn signals and hazard lights do not function, determine the reason why they broke. The most common causes of electrical breakdowns in a car include:
- depressurization. This causes water and dirt to enter the electrical system;
- oxidation. This occurs at the terminals and results in loss of contact. It’s easy to see: when the turn signal turns off and you disassemble the optics, you will see a green coating. To remove it, clean it with a rag and try to energize the contact;
- fuse failure. To avoid getting into a situation where the emergency lighting stops functioning, find the fuse responsible for turns (for example, K2). Next you just need to replace it. In addition to the failure of the fuse, you may encounter the problem of replacing its contacts;
Mounting fuse block VAZ 2109 2108 21099
- light bulb burnout. If the lack of light occurs for this reason, simply replace the lamp with a new one;
- broken switch or button. If the turn signals and emergency lights do not work, to fix it, get to the switch located under the steering wheel and disassemble it. The button can simply be replaced;
- broken wiring.
When the turn signals, hazard lights, and electrics in the car do not work, most often the relay responsible for supplying voltage is at fault.
To prevent this problem from occurring in the future, follow these steps:
- find out where the relay is located. The layout of its placement is indicated in the instructions supplied with the car;
- tap the relay. Often the reason lies in a banal “sticking”, and a slight blow resumes the operation of the optics;
- if the measures did not help, and your lighting devices are still not functioning, replace the relay, because the product is inexpensive.
First steps
problems with turn signals or hazard warning lights
, for example, they simply do not blink. The reason most likely lies in the relay, which is responsible for the intermittent voltage supply. In this case, you need to get to the relay; its exact location is indicated in the standard instructions that are equipped with any car. When you get to the turn signal relay, first of all, lightly tap it, there may be some simple sticking.
If this does not help, it is recommended to replace the relay - it is not so expensive that you should try to fix it yourself. Also, to avoid such a problem, ask about the reasons that influenced the premature failure of the relay.
This component of the car must be hermetically protected from moisture from the environment. In addition, moisture can affect the seals that connect the relay to the electrical line. This effect consists of gradual oxidation and loss of contact. This is the second popular reason for turn signals not working.
Oxidation is a green deposit that is a dielectric. To eliminate it, just clean off this deposit with improvised means and try to power the element.
Check the fuse box
, read the instructions and determine the fuse (most often it is K2) that is responsible for the direction indicators. Very often, fuses are the cause of non-functioning turn signals.
Replace the marked fuse with an identical one. In addition to this point, I would like to note the fact that fuse contacts can also be subject to oxidation, so they need to be checked for this.
In troubles with non-working turn signals, the switches can also be to blame, yes, it is the switch that can fail. To check, you will have to get to the steering column switch and disassemble it. By the way, if your turn signals work, but the hazard lights do not work, then the reason lies in the malfunction of the button responsible for turning on the hazard lights. The same problems may be the reason why the turn signals do not turn off.
All these elements are available among auto products and are not cheap, so it is recommended to simply replace them.
Rapidly blinking turn signals may be the reason that one of the lamps may have burned out.
, or oxidation of the tracks in the electronic control unit has occurred. It is also recommended to try cleaning the “mass” of the turn signals.
Here are some of the main reasons that affect the malfunction of repeaters and emergency lights. Turn signals on VAZ 2109 do not work? We hope this article will help deal with this problem.
Do-it-yourself repair of direction indicators and hazard alarms
If the turns disappear, as well as the car’s emergency signal, then you can try to solve this problem yourself:
- If the safety element and relay break down, the failed parts must be replaced. If the reason lies in a short circuit, then before replacing it is necessary to check all electrical circuits in which it could occur. Only after the cause of the short circuit and power surges has been eliminated, the devices need to be changed.
- If the hazard warning button is faulty, you just need to replace it. We have already talked about how to diagnose this part.
- As for electrical circuit diagnostics, it is carried out using a tester. If damaged sections of the wire are identified, they must be replaced. When laying them, make sure that the wiring does not come into contact with moving body elements. It is also recommended to additionally insulate new wires to increase the reliability of the insulation.
- If the reason is the light bulbs, then all burnt out light sources must be replaced. In the front and rear headlights, the lamps are changed by removing the protection from the headlights, disconnecting the power circuit from the lamp, as well as unscrewing the light source from the seat and replacing it with a new one. If the lamps in the side headlights do not work, then, as a rule, to dismantle the lighting sources, the lamp itself must be pryed off with a screwdriver, then disconnect the power cord and remove the device.
- If the reason lies in the steering column switch, then this device needs to be disassembled and checked. As a rule, the cause of switch failure is poor contact or abrasion. In this case, the failed switch is replaced with a new one. As for the contacts (no matter where - on connections or buttons), it is advisable to clean them.
- You should also check all the plugs and connectors, because it is quite possible that the problem is poor contact on them. Acidified contacts must be cleaned with a wire brush or sandpaper. If the contacts are burnt out, they will need to be replaced.
vote
Article rating
Instructions for making a turn signal extension
Scheme for organizing lazy turns
If necessary, you can build a turn signal extension at home. You will need a turn signal diagram, which you can download from the Internet, make yourself, or take a ready-made one on our website. In accordance with the scheme, the main elements for its implementation are selected.
Brief instructions on how to make a turn signal extension yourself:
- First you need to find a case; alternatively, you can use the packaging from the magnetic head of an old tape recorder. In order for yellow or red turn signals to flash at longer intervals, you must follow the pattern exactly. In accordance with it, the main elements are soldered.
- When the circuit is soldered, the partitions should be removed from the case, but it is better to leave the ribs on the end parts; they will be needed to secure the board. If necessary, additional holes for connectors can be made in the housing.
- The board is mounted in the case.
- The case itself is closed; for a more reliable fixation, it can be treated with glue at the joints.
- The following work is carried out in the salon. You need to get to the fuse box where the corresponding relay is installed. The panel from this relay can be removed, and wires are then connected to its connector. The black cable goes to ground, the green cable with a blue stripe goes to the ignition, the black-blue cable is the left turn, and the black-red cable is the right turn.
- The device itself can be fixed directly to the relay using glue or double-sided tape.