How to check fuel injectors on a fuel injection engine
There are several methods for checking the performance of an injector. Let us list them in order with a detailed indication of the algorithm of actions.
Check using resistance measurement
You can check the injectors without removing them using a multimeter. First, check which injectors are installed on your car - high or low impedance (electrical resistance). This data will be necessary to perform an accurate diagnosis. In order to check the injectors with a tester without removing them from the engine, you must adhere to the following plan:
Measuring the resistance of the injector winding
- remove the high-voltage wires from the injectors;
- set the multimeter to the mode for measuring insulation resistance (ohmmeter) in the range from 0 to 200 Ohms (depending on the technical parameters of the device, the upper limit may differ, the main thing is that the ohmmeter can show a resistance value of several tens of Ohms);
- turn off the ignition and remove the negative terminal from the battery;
- disconnect the electrical connector on the injector being diagnosed (as a rule, to do this, unclip the fastening clip located on the block body);
- connect the tester's measuring probes to the injector terminals and take measurements.
High impedance injectors have an insulation resistance of 11.17 ohms, and low impedance injectors have an insulation resistance of 2.5 ohms.
If the measured insulation resistance value differs significantly from the specified value, this indicates that the injector is faulty. Accordingly, the injector must be dismantled and detailed diagnostics performed.
It is important to know that the voltage to the injectors from the ECU is supplied in pulsed and not constant form. Therefore, it is recommended to measure resistance not only using an ohmmeter, but also an oscilloscope, so you can see what peak values the resistance and voltage take
And the tester shows the average value.
How to check power to injectors
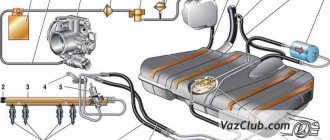
Checking the power supply to the fuel rail of VAZ 2110-2112
Let's look at checking the availability of power to the ramp using the example of VAZ 2110, 2111, 2112 cars, as some of the most popular. But first, let us recall that in the block with contacts, four of them supply power to the injectors, and one (pink wire with a black stripe) is the common ground. You need to act according to the following algorithm:
- disconnect the power plug;
- on the multimeter, set the upper limit of the measured resistance to around 200 Ohms (this value depends on the specific model of the tester);
- measure each of the four contacts from the injectors with a common connector in pairs.
The resistance value should be within 11.5. 15.5 ohms. Remember that this way you will only measure the power supply on the ramp to each injector.
You can check the injector simply for vibration. When the engine is running, a working injector should vibrate slightly. If there is no shaking, it means it is out of order.
Checking the power supply from the car's electrical circuit is quite simple, you just need:
- it is necessary to disconnect the supply wire block from each injector one by one;
- After this, use two pieces of wire to connect the injector directly to the battery;
- turn on the ignition.
If the injector starts spraying fuel, then the problem must be looked for in the wiring.
How to check the starting injector
First, let's say a few words about the monoinjector. Today, such units are becoming less and less common, since the system is outdated. Its essence lies in installing only one injector - in front of the throttle valve. They can be found on old models of foreign cars from VW, Audi, Skoda, Seat and others.
Let us describe the algorithm for checking the resistance of an injector on a monoinjector:
- check the contacts from the injectors in pairs and compare them with the data from the manual (as a rule, these values should be within 1.2. 1.6 Ohms);
- when checking pins 1 and 4, you need to make sure that the DATV (intake air temperature sensor) is working correctly; for this, also use the resistance data from the manual;
- if the resistance value is outside the acceptable limits, it is necessary to diagnose the injector in more detail.
Operating procedure
Yes, the carburetor was replaced by an injector. It is an order of magnitude more effective than its predecessor. Such engines are prescribed improved acceleration, fuel economy, and good environmental parameters. This is achieved without manual adjustment or other manipulations.
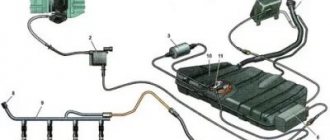
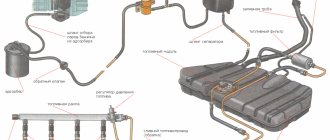
The principle of operation of this device in the fuel system is based on the supply of gasoline mixed with air through a special nozzle. They are located in the intake manifold; the system is called mono-injection. Because of her shortcomings, she managed to become somewhat of a thing of the past. The second option is to locate the injectors near the intake cylindrical valves. This type of system is called distributed injection. They may be located on the cylinder head. This is direct injection and is used frequently.
Fuel and air are supplied directly to the chamber. The distributed injection system is divided into several types:
- simultaneous - the existing injectors supply fuel all together;
- pair-parallel - open slightly in pairs, for injection and release. This method is used when starting the power plant;
- phased – opens before injection;
- direct - the fuel-air mixture is admitted directly into the receiver.
In order for fuel injection to occur, it is atomized by pressure created by an electric fuel pump. Pulse signals are supplied by the on-board computer. The length of the pulse and the batch of gasoline or diesel fuel for each injection are determined based on data received from sensors that read information about the operation of the motor.
What injectors are installed on Priora cars?
Injectors are an indispensable element in the operation of any power unit with continuous injection. Structurally, they are electromagnetic valves, which, when opening, ensure the supply (injection) of fuel in the required volume into the engine cylinders. At the same time, the main purpose of the part is to save fuel, so the valve opens at regular intervals, depending on the driving mode.
Have a red body
On "Priors" equipped with an injection type engine, imported injectors are installed. Products manufactured by Bosch and Siemens are characterized by a high degree of reliability and wear resistance. Their service life is determined by a mileage of 100–150, after which it is recommended to change them.
Usually available in black
Differences between injectors for 8 and 16 valve engines
Various modifications of Priora are equipped with parts of the same model. There are no differences for 8 and 16 valve power units. The only thing is that you should be careful when selecting injectors for engines of different sizes: for example, for a 1.5 engine, spare parts will differ in markings, color and thickness from those for a 1.6.
It is recommended to choose materials from the same manufacturer that were equipped with the car at the factory.
Engine Features 126
The development of the 21126 internal combustion engine was carried out in parallel with the VAZ-21124 internal combustion engine. With different working volumes of the models, a large number of coincidences were noted for the incoming systems and nodes. The main task before the creators of the 21126 engine was to obtain the most durable mechanism, characterized by a long service life.
The elements of the connecting rod and piston group were developed by Federal Mogul. The company's engineering team created a design that compares favorably in weight (30% lighter) with a similar kit installed on the 2110 machine.
In terms of external parameters, the engines of variants 124 and 126 are very similar, but there are certain differences between them. What is the difference between a 124 engine and a 126:
- The pistons of the 126 engine have less mass.
- The height of the block is 197.1 mm, while the diameter of the cylinders themselves has not changed.
- The inner walls of the cylinders are processed by honing using high technologies from Federal Mogul, which significantly improves their quality in comparison with analogues.
- The piston rings and pins are reduced in thickness, which also helps improve the power and speed characteristics of the motor (torque, efficiency, etc.).
- The cylinder block of the 126 engine is painted in a characteristic gray color, making it easy to distinguish from the 124 model.
In the Priora 126 engine, the ducts of the cylinder cooling jacket run along the entire height of the block. With this arrangement of channels, the degree of deformation of the body part is significantly reduced due to uneven exposure to ultra-high temperatures.
Important: Cars equipped with a 126 engine pick up speed faster. When tuning yourself, it is recommended to install brake system elements (pads, air-vented discs) that have the best quality and greatest efficiency.
How to check injectors without removing them from the engine?
Checking the winding resistance level on the injectors
1. You can carry out an inspection by turning off the ignition and removing the negative terminal from the battery.
2. Using a thin screwdriver or an awl, you need to unclip the spring clip on the block.
3. Disconnect the connector from the injector.
4. Attach an ohmmeter to the injector terminals and measure the winding resistance.
5. If the resistance between the side and central pins of the connector is within 11–15 Ohms, then the injector is working properly. If the device shows more or less than required, it should be changed.
Checking the functionality of all injectors
1. Initially, you need to remove the fuel rail on which the injectors are installed.
2. Then you should connect the wire block to the ramp harness. If the “-” terminal was removed from the battery, then put it back on.
3. Connect the fuel pipes to each other and, using a wrench, tightly tighten the fittings securing them.
4. Place a measuring cup or any other container with markings under each nozzle.
5. Using the starter, crank the engine and monitor the operation of all injectors. Fuel should come out evenly from each.
6. Turn off the ignition and check the fuel level in the measuring cups, it should be the same. If the amount of fuel in the containers does not match, replace or clean the nozzle that has come out of alignment.
7. Inspect all injectors for flaws or defects. There should be no fuel leaks on the spray part when the ignition is turned off. If there are such flaws, then the part is not sealed and needs to be replaced.
Priora relay and fuse blocks
Location of relays and fuses in the DELRHI 15493150 mounting block
Location of relays and fuses in the mounting block 1118-3722010-00
Relay Lada Priora - purpose
K1 Relay for turning on low beam and side lights of headlights (automatic lighting control system) K2 Relay for turning on heated rear window K3 Relay for turning on starter K4 Additional relay K5 K6 Relay for turning on high speed (automatic mode) windshield wiper K7 Relay for turning on high beam headlights K8 Relay for turning on sound signal K9 Relay for turning on the sound alarm signal K10 relay for turning on the fog lights K11 relay for turning on the electric heating of the front seats of the headlights
Lada Priora fuses - purpose
F1
Reserve
F2 (25 A)
Mounting block, rear window heating relay (contacts) Electrical package controller, contact “10” of block XP2 Rear window heating element
F3 (10 A)
Right headlight, high beam lamp Instrument cluster, headlight high beam indicator
F4 (10 A)
Left headlight, high beam lamp
F5 (10 A)
Mounting block, horn relay Horn
F6 (7.5 A)
Left headlight, low beam lamp
F7 (7.5 A)
Right headlight, low beam lamp
F8 (10 A)
Mounting block, alarm horn relay Sound alarm signal
F9
Reserve
F10 (10 A)
Instrument cluster, contact “20” Brake light switch Brake light lamps Interior lighting unit Interior lighting lamp Threshold lamp, right front doors Additional brake light
F11 (20 A)
Mounting block, windshield wiper high speed relay Wiper and washer switch, terminal “53a” Wiper and washer switch, terminal “53ah” Rear window heated switch Mounting block, rear window heated relay ( winding) Windshield wiper motor Rear window wiper motor (2171, 2172) Windshield washer motor Rear window washer motor (2171, 2172) Airbag control unit, pin “25”
F12 (10 A)
Instrument cluster, pin “21” Electrical accessories controller, pin “9” of the block X2 Electromechanical power steering control unit, pin “1” of the block X2 Reversing light switch Reversing light bulbs Parking system control unit, pins “11” and “14”
F13 (15 A)
Cigarette lighter
F14 (5 A)
Side light lamps (left side) Instrument cluster, main light switch indicator License plate lights Trunk light Electrical package controller, pin “12” of block X2
F15 (5 A)
Side light lamps (right side) Storage lamp box
F16 (10 A)
Hydraulic unit, contact “18”
F17 (10 A)
Left fog light
F18 (10 A)
Right fog light
F19 (15 A)
Seat heating switch, contact “1” Front seat heaters
F20 (10 A)
Switch recirculation (switch on) Mounting block, relay for low beam headlights and side lights (automatic lighting control system) Heater electric fan relay Automatic lighting control switch Windshield wiper and external lighting control unit, contacts “3”, “11” Controller for the automatic climate control system , pin "1" Automatic window cleaning system sensor (rain sensor), pin "1"
F21 (5 A)
Light switch, pin "30" Diagnostic deck, pin "16" Clock Automatic climate control system controller, pin "14" "
F22 (20 A)
Windshield wiper motor (automatic mode) Mounting block, windshield wiper relay and high speed windshield wiper relay, (contacts)
F23 (7.5 A)
Wiper and exterior lighting control unit, contact " 20"
F24-F30
Reserve
F31 (30 A)
Electrical package controller, terminal “2” of the block X1 Electrical package controller, terminal “3” of the block X1 Driver’s door module, pin “6” Threshold light of the left front door
Reserve F32
Causes and Effects
Very often, it is on Priors with a 16-valve engine that the problem arises due to power problems. Therefore, you need to check it first.
The consequences of engine tripping can be the most unpleasant. Outwardly, this manifests itself as hassle. After all, the engine is unstable and shaking. Often the interior begins to smell of gasoline. Don't forget the money issue. The car noticeably increases its appetite and you have to visit the gas station much more often. It's much worse that it leads to more serious damage.
First, the fuel settles on the cylinder walls and seeps into the block, mixing with the oil there. Due to this, the lubrication of the unit deteriorates, and parts wear out faster. It is also possible for a water hammer to form if a sufficient amount of fuel accumulates in the cylinder. In the simplest case, the remaining working cylinders bear a large load. As a result, their elements fail earlier. In any case, it is necessary to eliminate this problem in a timely manner.
Characteristics of the VAZ 2110 injector 8 valves with a working volume of 1.5 and 1.6 liters.
• Engine VAZ 2111 1.5 l. 8-valve injector ➤ Displacement – 1499 cm3 ➤ Number of cylinders – 4 ➤ Number of valves – 8 ➤ Cylinder diameter – 82 mm ➤ Piston stroke – 71 mm ➤ Power – 76 hp (56 kW) at 5600 rpm ➤ Torque - 115 Nm at 3800 rpm ➤ Compression ratio - 9.9 ➤ Power system - distributed injection ➤ Acceleration to 100 km/h - 14 seconds ➤ Maximum speed - 167 kilometers per hour ➤ Average fuel consumption – 7.2 liters • Engine VAZ 21114 1.6 l. 8-valve injector ➤ Displacement – 1596 cm3 ➤ Number of cylinders – 4 ➤ Number of valves – 8 ➤ Cylinder diameter – 82 mm ➤ Piston stroke – 75.6 mm ➤ Power – 81.6 hp (60 kW) at 5600 rpm ➤ Torque - 115 Nm at 3800 rpm ➤ Compression ratio - 9.6 ➤ Power system - distributed injection ➤ Acceleration to 100 km/h - 13.5 seconds ➤ Maximum speed - 170 kilometers per hour ➤ Average fuel consumption – 7.6 liters
Basic faults
The main malfunction characteristic of the VAZ 2110 is the appearance of the engine tripping effect. Malfunctions can occur for various reasons. Let's consider the factors that cause unstable engine operation, as well as methods of elimination. If the stove doesn't heat up, look here, and about replacing the valves here.
Poor quality fuel
The first thing you need to check is how high-quality the fuel was poured into the vehicle. If the gasoline was of poor quality, then most likely one of the elements of the fuel system was forgotten. So, the motorist will have to find out what the fuel supply scheme is and find parts that could have failed. So, the first element that comes under scrutiny is the spray nozzles. Malfunctions of the injectors can cause unstable operation of the engine, which will lead to tripping. A special stand is used to diagnose and clean the unit, but many motorists carry out the process themselves, using carburetor cleaning fluid. Also, unstable engine operation may be caused by clogged fuel filters. One is located under the rear right wheel, and the second is in the fuel pump. There is a filter mesh on the fuel pump intake that needs to be replaced. The process is quite complicated, since you have to remove the rear seats and remove the fuel supply element. But the fuel filter under the wheel can be changed quickly and without any problems.
Ignition system
Damage to spark plugs or high-voltage wires can also cause tripping. So, it is necessary to check all the elements using a tester, as well as visually inspect them. If there is damage, it is recommended to replace the entire set.
Sensors and ECU
Another major reason for engine tripping is the failure of one of the engine sensors, as well as a malfunction in the electronic control unit. To carry out diagnostics you need to connect to the “brains”. Next, based on the errors shown, find the faulty meter and replace it. If this does not help and the error in the ECU remains, then it is recommended to reset, and in some cases flash the control element.
Maintenance
Engine maintenance is carried out every 10-12 thousand kilometers. The schematic map is available from official representatives of the manufacturer. But, as practice shows, it all comes down to changing the oil and oil filter. Many car enthusiasts ask the question - what is the best engine oil to pour into the VAZ 2110 8-valve power unit? The best option remains semi-synthetic motor oil of domestic or foreign production labeled 10W-30 or 10W-40.
Engine chip tuning circuit
Not many car enthusiasts can boast of a powerful 2110 engine. Thus, to improve the power characteristics of the engine, it is necessary to carry out chip tuning of the VAZ 2110. To do this, they usually turn to specialists, but more and more vehicle owners are doing the process themselves.
The chip tuning scheme is quite simple. To perform the operation yourself, you will need an OBD II cable (USB-Auto), a laptop computer and software. It is worth remembering that there are three options for modifying the power unit: for power (but this will increase consumption), for reducing consumption (leading to a loss of power) and balanced (balance between the optimal indicators of consumption and power). Typically, chip tuning of a VAZ 2110 is done with the aim of reducing fuel consumption, therefore, if the owner of the car decides to do it himself, then it is necessary to select the appropriate software. But, it is recommended not to take risks and turn to professionals for help.
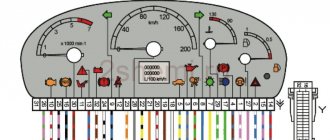
Instrument cluster block diagram
| № | Decoding |
| 1 | Electric power steering |
| 2 | Emergency gang control VAZ-2170 |
| 3 | Connection to oil pressure sensor |
| 4 | Parking brake indicator light |
| 5 | Electronic anti-theft device |
| 6 | Airbag control module |
| 7 | External lighting switch |
| 8 | Right turn signal indicator and doubler |
| 9 | Left turn signal indicator and backup |
| 10 | Engine control unit |
| 11 | Disabling the passenger's front airbag |
| 12 | Seat belt warning light |
| 13 | ABS brake system unit |
| 14 | Steering column switch button |
| 15 | Brake expansion tank indicator |
| 16 | ABS safety control module |
| 17 | Main beam headlight control unit |
| 18 | Shield backlight module |
| 19 | General disadvantage of the device |
| 20 | Constant positive battery terminals |
| 21 | Ignition switch contact |
| 22 | Fuel flow meter |
| 23, 24 | Steering wheel turn switches |
| 25,26 | Overboard temperature sensors |
| 27 | Fuel sensor VAZ-2170 |
| 28 | Speed sensor |
| 29 | Coolant temperature sensor |
| 30 | Tachometer signal |
| 31 | Shield diagnostics |
| 32 | Generator Regulator Relay Terminal |
Signs of injector contamination.
When the injectors of an injection engine of any vehicle become dirty, characteristic signs of malfunction arise, which necessitates the need to clean the engine injectors. Among these signs we note:
- Difficulty starting the engine, especially as the outside temperature drops and the engine is cold;
- Unstable engine operation at idle;
- Perceptible dips when sharply or smoothly pressing the accelerator pedal;
- Loss of acceleration dynamics and power by the motor;
- Increased gasoline consumption;
- Increased toxicity of CO-CH exhaust gases;
- A several-fold increase in detonation when accelerating, which is a consequence of an increase in temperature directly in the combustion chamber and a depletion of the air-fuel mixture;
- Misfires (ignition);
- Periodic, characteristic popping sounds directly in the exhaust system;
- Premature failure of sensors, including the catalytic converter, spark plugs and oxygen sensor (lambda probe).
It should be noted that even if all the problems listed above are present during the operation of your machine, this does not mean that the cause is clogged injectors. These problems can arise for a large number of reasons - from the failure of any sensor (air meter, throttle sensor, lambda probe, IAC) or a drop in pressure in the fuel system (RDT, fuel filter, fuel pump), to spark plugs.
Differences between engines 126 and 127 models
AvtoVAZ Corporation periodically introduces innovations into the design of its vehicles. Some models began to be equipped with a modern VAZ 21127 engine. Its design is based on the previous version 21126.
The main differences of the new engine:
- The presence of a so-called resonance chamber in the intake system.
- Engine power is 106 hp. s., maximum torque – 148 N.m
- Instead of the usual MAF oxygen sensor, the design includes sensors that reflect air temperature and absolute pressure.
- Thanks to the operation of new devices, the engine does not suffer from floating speed at idle.
- The timing mechanism drive is equipped with a special device that ensures belt tension automatically.
One of the main disadvantages of the 21127 engine is the high probability of valve deformation when the timing belt breaks. Another serious disadvantage of the new engine is expensive repairs, regardless of the location of the repair and restoration work. This is due to the high cost:
- a set consisting of a timing belt, an automatic tensioner and a pulley, produced by the well-known foreign company Gates;
- piston group elements from Federal Mogul.
Important: The VAZ 21127 engine does not work well at low temperatures. Experienced drivers recommend protecting the radiator of the cooling system in cold weather using ordinary cardboard.
Repairing engine 21126 VAZ 2170 Priora after timing belt break
Today we brought one of the old clients to the Priora, as it turned out, the jammed pump broke the belt and, as a result, the valves were bent.
But progress at AvtoVAZ does not stand still, and if on the engines of the tenth family the valves were simply bent, then on the Priora 126s the connecting rods also lose alignment and, if they are not changed, there is a high probability that the engine will begin to eat oil and, accordingly, your money. Glory to the designers of AvtoVAZ!
But every cloud has a silver lining, there are sets of pistons for 126 engines with grooves that do not bend the valves. In this article we will describe the procedure for repairing the cylinder head after a broken timing belt, as well as replacing the piston. Removing and installing the timing belt is described in this article, so we will not dwell on it in detail.
To perform this procedure, torque wrenches are required!
Does engine 126 bend valves?
When choosing a new or used car, buyers often have a natural question whether the VAZ 126 engine bends the valve or not. All models equipped with internal combustion engines: Priora, VAZ 21126, 21116, 21127 suffer from a common drawback - when the timing belt breaks, the valves are deformed , and damage to the piston group also occurs.
Interesting: The VAZ 21124 engine is the only model that does not suffer from this problem. The 124th engine was installed on cars of the cheapest standard versions. In the modern version, the Priora 124 power unit has been replaced by the 116th model from Lada Granta.
Purification process
Cleaning the nozzles itself should be done on a clean surface - for this you can cover the working surface with a piece of cloth.
Prepare a hose and a can for cleaning the carburetor. To flush, secure a plastic hose clamp at the inlet of the nozzle (make sure the length is at least 20 cm). The nozzle will need to be turned on, and the end of the hose itself will need to be lowered into the liquid that is used to flush the carburetor. Cleaning can be carried out by any of the proposed ones - RunWay, Liqui Moly or Hi-Gear.
But there is no need to add cleaning additives advertised on the market to the fuel: it very often happens that they harm the engine. The acidified dirt itself after such cleaning can create a blockage that will prevent normal access to the fuel-air mixture. Otherwise, fuel access may be blocked.
Cleaning is complete. Now do the installation in reverse order.
I decided to start cleaning the injectors on my car. The car ran no less, but so to speak, I decided to do preventive maintenance on cleaning the injectors on my car. The whole purchase began with Wynn's injector flushing fluid 1
Wynn's flushing liquids are used for washing injector nozzles without dismantling, cleaning the cylinder-piston group (partial removal of carbon deposits from the cylinder walls and sealing rings) as well as the exhaust system without harming the catalytic converter.
And since I did not want to remove the injectors from the engine, this was the flushing fluid that suited me as a flush. I once found information on the Internet about cleaning injectors in this way and decided to do the same operation without removing the injectors on my car. In general, for this I needed to buy some things that were necessary for this DIY flushing device. For this I needed:
For this I needed. 1. Flushing liquid 1l. 2. Fuel filter. 3. Clamps 2 pcs. 4. Two nipples. 5. Hose 12mm -1 meter. 6. Two liter bottle. 7. Drill 13 8. Compression pump
Flushing liquid 1l
Important nuances
There are a few things to keep in mind when cleaning your injectors. Here they are:
You cannot save on flushing fluid. The injector is a very important part of the engine. And it is extremely sensitive to the quality of the flushing fluid. The optimal choice for cleaning Priora injectors is a product from Wynns, developed specifically for injection engines.
The cost of a liter bottle is 700 rubles;
You need to be very careful when removing an empty plastic bottle from the hood. It should be remembered: the pressure in it is enormous, so it can explode literally from one careless poke with a finger, and flying nipples can seriously injure the driver.
Replacing injectors is a long procedure. Nevertheless, it is quite within the power of a novice driver if he has at least a vague understanding of the structure of an injection engine. When cleaning the injectors, the situation is much simpler: you just need to be able to use a drill and know where the main fuel hose is located.
How to determine
The condition of the injectors significantly affects engine performance. The main signs of their malfunction are: jerks and dips when the load on the engine increases, insufficient power developed by the engine, unstable operation at low speeds, increased toxicity of exhaust gases.
If the injectors are clogged, a cold engine may not start on the first try, especially in winter. During the first few seconds after starting, you can hear misfires in one or two cylinders - the engine is shaking. If you press the gas pedal sharply, a “dip” appears before picking up speed, and the engine may even stall. After warming up, at idle speed the engine operation becomes normal, but while driving, especially when accelerating, a deterioration in the engine’s “throttle response” appears.
The most common malfunction of injectors is their contamination. They are located in an area exposed to high temperatures. The consequence of this is coking of the resins contained in the fuel, especially low-quality fuel, and the formation of solid deposits on the injector, blocking the spray holes and violating the tightness of the needle valve.
contents .. 169 170 171 172 ..Lada Priora (2013+). Engine Maintenance
Car engine maintenance immediately after purchase
The first 3–5 thousand kilometers of a new car are the most important period during which the owner must act intelligently to ensure a long, trouble-free service life of the car. The parts of all components and assemblies are still grinding against each other, so you should not fully load the car and give the engine maximum speed. Fully warming up the engine before driving allows you to ensure stable operation of the internal combustion engine at idle without “choke”.
The first trip by car requires a number of mandatory manipulations. These include: tightening threaded connections, measuring air pressure in tires with a pressure gauge, checking the presence and level of technical fluids and oils in the internal combustion engine, gearbox, axles and power steering reservoir (if equipped) or in the steering column, antifreeze in the radiator tank, brake fluid - in the brake master cylinder reservoir and clutch hydraulics (if any), fuel - in the tank. Using a load fork, you need to check the battery charge, the level and density of the electrolyte and be sure to secure the battery with a special holding device in the proper place, and tighten the terminals according to their polarity. It is necessary to test the operation of the windshield wiper and washer systems (is there liquid in the tanks, are the sprayers working).
Before starting the engine for the first time, you need to pump fuel into the carburetor using a gasoline pump. After starting the engine, the driver should carefully check for leaks of oil, fuel, antifreeze or antifreeze. Let the engine idle, then press the accelerator, gradually adding speed, and listen. If there are no extraneous suspicious noises, you can start moving.
Car engine maintenance during the main period of operation
In general, car engine maintenance includes:
-cleaning the internal combustion engine and attachments from contaminants, removing tarry deposits of oils and carbon deposits; - checking and tightening of threaded connections; - changing oil and antifreeze/antifreeze, filters in fuel, oil and air systems; -adjustment if necessary.
During the first maintenance (TO-1) of the car, special attention is paid to tightening the bolts and nuts in the fastening systems of the exhaust manifold, muffler and engine mounts. During the second maintenance (TO-2), they check and tighten (if necessary) the cylinder head fastenings, adjust the thermal clearances of the valves in the gas distribution system, check and adjust the tension of the generator belt, timing belt, etc.
During the main period of vehicle operation, various types of maintenance are carried out:
-EO - daily maintenance; -TO-1 - first maintenance; -TO-2 - second maintenance; -SO - seasonal maintenance.
1. Daily engine maintenance.
This type of maintenance includes the following actions:
Visual inspection of the engine. Check the oil and coolant levels and top up if necessary. Evaluation of engine performance (using instruments on the panel and by ear).
2. First maintenance.
This type of maintenance includes the following actions:
Checking the reliability of fastening the engine units to the frame and body. Checking the reliability of fixing equipment directly on the engine (generator, fuel pump, muffler). Checking the reliability of the front supports. Check the crankcase pan for leaks and, if necessary, tighten the bolts. Adjustment. Carrying out operations according to the lubrication chart.
3. Second maintenance.
The second maintenance includes the following:
Perform all first maintenance items. Check and tighten (if necessary) the cylinder head nuts. Adjustment of thermal clearances of valves and, if equipped, pushers and rocker arms. Checking compression in cylinders. If necessary, remove carbon deposits. The first maintenance operations do not require disassembling the engine, while during the second maintenance it is necessary to remove the valve covers from the cylinder heads to diagnose and adjust the timing gaps.
Each automaker develops guidelines for preventing engine problems and repairing them. Thus, the tightening torque of the head of gasoline engines is lower than that of diesel engines. At the same time, it is necessary to evaluate the fastening of an aluminum cylinder head on a cold engine, and a cast iron one on a warm one.
At sub-zero temperatures, tightening cylinder heads is prohibited. The engine must be warmed up and only then begin tightening the fasteners. The bolts should be tightened evenly, in two steps, according to the manufacturer’s recommended diagram, which takes into account the design features of the engine. For broaching, use a special torque wrench. This type of work is carried out simultaneously with tightening the exhaust system bolts. The procedure should be completed by checking the valve clearances and, if necessary, adjusting them, the specifics of which are determined by the design of the engine.
During the operation of the car, the permissible gap between the valves and pushers often changes, as a result, the filling of the combustion chamber of the cylinders with the fuel mixture worsens and the removal of exhaust gases becomes more difficult. All this leads to increased fuel consumption and reduced engine power.
Inspection of the engine during maintenance
The main purpose of a control inspection of a vehicle’s internal combustion engine during maintenance is to identify obvious faults, and it is necessary to: assess the completeness, identify leaks of fuel, oils and antifreeze, check the mounting points of the engine and its systems, and perform a test run. The key characteristics of the latter are ease and time, the maximum value of which should not exceed 20 seconds. After 1–2 minutes, the launch must be repeated.
Such an inspection makes it possible, based solely on external (qualitative and quantitative) indicators, to identify internal problems in the “heart” of the car. And if you add instrumental research to them, you can get a more detailed “picture of the disease.”
More often than others, color analysis of vehicle exhaust gases, sound analysis of engine operation, and chemical analysis of crankcase oil (wear products of engine parts, insoluble pollution products, etc.) are used in diagnostics during maintenance.
1. Color analysis of exhaust gases.
By the color of the smoke from the exhaust pipe of a car, you can diagnose various engine problems:
1. White exhaust is a consequence:
insufficient pressure in the cylinders (due to wear of the piston group cylinders and incorrect operation of the valves); liquids getting into the cylinders (due to defects in the head or gasket burnout); incomplete combustion of fuel (due to ineffective atomization and skipping the compression stroke) - in diesel cars; starting the engine at low air temperatures, delayed flash (abnormal atomization by injectors, waxing of fine fuel filters, wear of the fuel injection pump) - in diesel cars. 2. Light or dark blue exhaust is a consequence of:
sticking of piston rings, general severe wear of the piston group; wear of valves, guide bushings and valve stem seals; untimely injection of the fuel mixture, improper operation of glow plugs, severe oil combustion - in diesel cars. 3. Brown or black exhaust is a consequence of incomplete combustion of fuel due to poor-quality atomization by injectors (the needle is worn out or the injection timing is reduced); incorrect fuel injection pump settings; insufficient air supply (indicates that it is time to change the air filter).
4. Gray or light gray exhaust is a consequence of:
poor running-in of piston group parts (the engine has not been run in sufficiently); loss of mobility of the piston rings due to high coking; lack of compression in the cylinders. Maintenance and repair of the vehicle's diesel engine power system must also be carried out in the case when there is no exhaust smoke at all (or it comes out in rare puffs) when starting up. This means that the fuel supply is insufficient, or the valves and pistons of the high-pressure fuel pump are stuck, or its spring is broken, or the plungers are stuck (perhaps their springs are not working properly). The problem may lie in the injector needle or check valve failure.
Car emission prints on paper can also be used to analyze and diagnose problems.
2. Analysis of noise when the motor is running.
The apparent simplicity of the method (noises are easy to hear) makes it very widespread, but it is important to remember that only a highly qualified specialist can qualitatively assess the technical condition of the car’s power unit in this way (and even his assessment will be subjective).
To obtain more accurate data, special stethoscopes are used - both the simplest (for example, KI-1154 is a probe with a handle and headphones), and more complex, resonant ones, equipped with a frequency perception regulator and an acoustic chamber that resonates with the vibration frequency of the unit, which allows tune the device to different frequency ranges. Electronic devices are capable of picking up faint sounds.
And ultrasonic stethoscopes can detect even minor leaks of compressed gases that the human ear cannot perceive. The devices transform ultrasound into audible frequencies or into a pulse recognized by an oscilloscope.
Maintenance of diesel and carburetor car engines differs significantly, although there are many common points.
Thus, diagnostics of the fuel system is carried out by analyzing the fuel mixture (its composition and consumption in accordance with the standard). They measure the carbon dioxide content in the car exhaust.
Cooling system. It is visually examined for leaks, and excess pressure is injected (approximately 0.06 MPa) to detect leaks at the junctions of components and assemblies. The following indicators are monitored: the coolant level (top up if necessary), the degree of tension of the radiator fan belt. Eliminate scale and leaks.
Lubrication system. Oil level and quality, its pressure - these are the main indicators checked during maintenance. Since the state of the system is immediately reflected in the functioning of the engine, there are no secondary elements here. The technician will pay attention to every detail, replace filters, flush the system, and lubricate the elements (according to the regulations recommended by the manufacturer).
Car engines running on diesel fuel require specific adjustment of the fuel system: if early fuel injection into the cylinders is detected, it is necessary to carefully set the advance angle. They carefully monitor the tightness of the fuel supply system, regulate the operation of pumps (booster and injection pump), change filters, and check injectors.
When servicing gasoline engines, the carburetor is adjusted and the crankshaft speed is adjusted to the minimum idle speed. The fuel level and tightness of the float chamber, fuel pump, cleanliness of the air and fuel filters, tightness of the throttle valve, and operation of the idle air valve are subject to assessment. Checking the tightness of the fuel tank and fuel lines is a mandatory maintenance step.
Maintenance of individual vehicle engine systems
Crank mechanism.
Drain the coolant and oil from the engine block. Check the degree of tightening of the bolts securing the cylinder heads to the block (if necessary, tighten them), clean the piston bottoms and the inner surface of the combustion chambers from carbon deposits. In V-shaped engines, it is necessary to loosen the fastening of the intake pipe to prevent the tightening of the cylinder heads from interfering with each other. Now the nuts securing the head to the block can be tightened using a torque wrench.
If only those types of oils and fuels recommended by the manufacturer are used, and the temperature regime for heating the coolant is observed (80–90 ° C), then carbon deposits are insignificant and do not have a serious negative impact on the operation of the engine.
If the recommendations are violated, this inevitably threatens the formation of carbon deposits that cause detonation, a decrease in engine power and an increase in fuel consumption. During maintenance, carbon deposits are removed by removing the intake pipe of the cylinder head. Then the piston bottoms and the inner surface of the combustion chambers are cleaned. Operation of the engine on leaded gasoline significantly complicates the maintenance process: in this case, the carbon deposits must be moistened (for example, with kerosene) to prevent inhalation of the strong poison contained in it. If deposits on the pistons reappear soon, this indicates that the car engine requires urgent repairs.
Gas distribution mechanism.
The valve clearances should be checked and adjusted at certain intervals - on a cold engine (for carburetor cars), when the pusher is completely lowered. Reducing the clearances relative to the values recommended by the manufacturer leads to earlier opening and closing, hence overheating and burnout of the valves, which, in turn, significantly worsens the quality of engine starting and its operation in general. It is necessary to clean the valves from carbon deposits and grind them into the seats.
Adjusting starting gaps
It is necessary to adjust the starting gap of the throttle valve of the first chamber. The first condition is a cold engine. The second is a removed carburetor.
Lubrication system
Every day it is necessary to monitor the oil level using a dipstick, which should be between the min and max marks.
Supply system. Cleanliness of instruments and components is the most important condition for the smooth functioning of the fuel system. Maintenance includes replacing fuel filters and checking the tightness of fuel line connections. Close attention must be paid to the hose connections: they must not be twisted or kinked.
Adjusting the engine idle speed.
Conditions for carrying out adjustment work: the engine is warm, the air damper is fully open, the timing gaps are adjusted, the ignition timing is correct. There are two main participants in the process: the first is the fuel mixture quantity screw and the second is the mixture quality (composition) screw, which is closed. The plug must be removed using a corkscrew to gain access.
Using the first screw, you need to set the engine speed on the tachometer within the range of 750–800 per minute. The second is to bring the carbon dioxide (CO) content in the exhaust within the limits of 1±0.3% (the carbon monoxide content is reduced to 20 °C and 101.3 kPa (760 mm Hg)). The values may be confused, so adjustments must be made as many times as necessary until the specified indicators are achieved.
After completing the adjustment work, sharply press the gas pedal and release it. If the engine suddenly increases speed, and then just as quickly slows it down and does not stall, it means that it is operating normally. If it stalls, the speed must be increased to the specified values and the quality screw plug must be changed.
contents .. 169 170 171 172 ..
Checking Lada Priora injectors
As mentioned above, both the fuel system ECU and the injector itself can fail. To carry out a complete diagnosis of the ECU, special software is required, which the average motorist simply does not have. Therefore, the only option is to diagnose the machine at a service center. The program, connected to special equipment, will quickly detect ECU errors and correct them.
A full check of Priora injectors is possible only on a special stand
And if problems arise in the mechanical part of the injector, then the diagnostic program will be useless. The maximum that it can do is indicate which cylinder is not working correctly. After this, the car owner can only replace the failed injector on the specified cylinder, since these devices cannot be repaired.
Checking the fuel pump pressure
The first thing to do is to specifically check the operation of the pump. To do this, just turn the ignition key not to the extreme position and listen to whether the electric fuel pump turns on (and this is exactly the variation that is installed in the Lada Priora car). If you hear a noise for a few seconds, followed by a click, everything is fine.
Using a pressure gauge, the check is performed on the ramp - this is where the protective valve cap is hidden, which does not allow air to get in, but presses the fuel out with pressure. The first step is to unscrew the cap and check whether the rubber in it is broken - this may be the main reason for the inoperability of the fuel pump. If it is damaged, it is better to completely replace it; fortunately, it is cheap. Then the spool is twisted. Next, a pressure gauge is connected to the outlet of the safety valve from the pump. Normal pressure is in the range of 380-400 kPa. If it is lower, then either the pump has failed or there is a blockage in the system. If it is more, then it is quite possible that the internal pressure gauge of the fuel pump is faulty and it is simply pumping fuel excessively to the carburetor. Replacing it is easy.
Naturally, before checking the pressure, the ignition is turned on, but the engine itself is not. The pump itself will equalize the pressure to the desired parameter. If this is not done, then the pressure will be at the level of 1 atmosphere with a slight deviation, because pumping is not performed.
It should also be taken into account that all manipulations are carried out at reduced fuel pump pressure. To do this you will need:
- remove the rear seat and gain access to the pump (by removing several screws on the rubberized cover);
- release the lock and let the fuel run out completely (the engine will be in neutral gear and will stall literally after a few seconds);
- Next, you need to turn on the ignition and equalize the pressure;
- It is also recommended to turn on the starter for 2-3 seconds and immediately reset the ignition key to its original position (turn off the ignition).
Signs of injector contamination.
When the injectors of an injection engine of any vehicle become dirty, characteristic signs of malfunction arise, which necessitates the need to clean the engine injectors. Among these signs we note:
- Difficulty starting the engine, especially as the outside temperature drops and the engine is cold;
- Unstable engine operation at idle;
- Perceptible dips when sharply or smoothly pressing the accelerator pedal;
- Loss of acceleration dynamics and power by the motor;
- Increased gasoline consumption;
- Increased toxicity of CO-CH exhaust gases;
- A several-fold increase in detonation when accelerating, which is a consequence of an increase in temperature directly in the combustion chamber and a depletion of the air-fuel mixture;
- Misfires (ignition);
- Periodic, characteristic popping sounds directly in the exhaust system;
- Premature failure of sensors, including the catalytic converter, spark plugs and oxygen sensor (lambda probe).
It should be noted that even if all the problems listed above are present during the operation of your machine, this does not mean that the cause is clogged injectors. These problems can arise for a large number of reasons - from the failure of any sensor (air meter, throttle sensor, lambda probe, IAC) or a drop in pressure in the fuel system (RDT, fuel filter, fuel pump), to spark plugs.
Where is the fuel pump located
The cover under which the fuel pump is located
The Priora fuel pump is located in the fuel tank. It is accessible under the rear seat of the car. When you remove the seat, you can find a hatch underneath it, which is secured with two screws. After unscrewing the screws and dismantling the cover, you can see the upper part of the fuel pump glass. The glass is attached to the tank with nuts through a metal ring and a rubber gasket, on 8 studs.
The fuel pump glass has:
- Fuel pressure control;
- Fuel pump;
- Fuel level sensor;
- Coarse fuel filter;
- Sump (bucket);
How to check injector nozzles
Troubleshooting and checking injectors when diagnosing an injector are not very different from similar operations with a carburetor engine.
- To check the injector for functionality, it is necessary, as when searching for a “dead” spark plug (ignition system malfunction), to turn off the power to each injector one by one. At what stage the shutdown will not cause changes in the operation of the motor - this means that the problem is in this element.
- Next, you should check the presence of voltage at the non-working injector with a voltmeter with a measuring range ranging from 0 to 2.5-3 V.
- After this, you should check the solenoid valve for operation: momentarily apply current from the battery to the injector terminal - if characteristic clicks are heard, then the valve is working.
If checking the injectors shows their performance, then all problems associated with their unstable engine operation should disappear immediately after flushing the injector.
Signs of product wear
The first and main sign indicating possible malfunctions is the obvious smell of gasoline in the car interior.
If there is no smell, you should pay attention to the appearance of the hose itself and its condition. Bend the product in different directions, there should be no cracks or holes
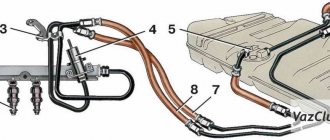
If there is damage (even minor), the hose must be replaced. In addition, there are often situations where the cause of fuel leaks is the connection between the hose itself, for example, with a metal tube of the fuel rail or a connecting tube coming from under the bottom of the car.
Cleaning the fuel system - getting ready for winter
As a rule, experienced motorists begin to prepare their iron horse for winter in advance. Everyone has their own plan of preparatory measures; it all depends on the general condition of the car and the result that the car owner is aiming for. Some inspect the suspension and purchase new winter tires, while others prioritize the condition of the engine, preparing it for operation in sub-zero temperatures. In the second case, one of the most important procedures is cleaning the fuel system, since it will determine how stable and confident the car will operate and start in the winter.
Preparatory work before replacing the fuel filter
Before replacing the filter on the popular LADA Priora in our country, of course, you need to buy a new one.
We offer you a list of catalog numbers of the required element: 21230-1117010-02 or 21230-1117010-00, additionally 21230-1117010-01, using exactly the same numbers you can purchase a filter for VAZ 9s and 10s. Don’t forget to pay attention when purchasing onto the fittings for fastening fuel hoses. They should always be smooth, and there should be a protrusion on each side for snapping plastic or spring clips into place.
Replacing the fuel filter on the Priora we are considering with a 16-valve engine is divided into several stages:
- Preparatory stage. Includes the purchase of a new filter and tool preparation.
- The stage at which pressure is relieved in the fuel system.
- Removing the old/installing a new filter element.
- Starting the power plant and making it operational.
The main reasons why engine speed fluctuates on a VAZ-2115
If everything is normal in the car, then you see the following picture. After the engine is started, the tachometer needle rises to approximately 2.5 thousand revolutions per minute. Gradually, as it warms up, it lowers. The range of 800-900 rpm is considered normal. However, it also happens that the arrow does not stay stable near the desired marks. It rises up and down - it seems as if the engine lives some kind of “life of its own”. In this case, the range of deviations is quite wide.
If you notice that your car's speed is fluctuating, then you need to start looking for the root cause as soon as possible. As mentioned above, this problem is quite unpleasant, and the sooner it is eliminated, the better. There are many reasons why engine speed starts to fluctuate, including in injection-powered cars. Their complete listing will take quite a lot of space, so we will limit ourselves to only the main ones.
Often the root cause of the problem is the failure of some sensor. A situation arises when the electronic control unit tries to read the information it needs, but cannot receive it. The consequence of this is precisely the incorrect operation of the engine, including floating speed.
In a “tag” with an injection engine, the following main root causes of the problem can be identified:
- damage to high-voltage wires, including due to common wear and tear;
- faulty idle speed controller;
- candles - pollution, exhausted resource, low quality;
- Exhaust gas recirculation sensor malfunction;
- Incorrect operation of the mass air flow sensor.
You should also indicate one more, fairly common reason. We are talking about a banal entry into the air intake system from outside
However, the very first thing you should pay attention to when this problem occurs is the XX sensor
Checking its performance is quite simple. First of all, you should, of course, find the device - it is located near the sensor that controls the position of the throttle valve. Then take a multimeter and measure the resistance. If the indicators deviate in one direction or another from the permissible interval (40-80 Ohms), then we can state with almost 100% certainty that the root cause of the problem has been found.
If everything is in order here, then you should engage in further search. In particular, check the mass air flow sensor. This is quite easy to do. Disconnect the connector from this sensor, and then start the engine. If you do not notice any changes in its operation, then the problem is most likely in this sensor. This can be confirmed by slightly improved vehicle dynamics.
However, the cause of the problem is not always located here. This means we move on to the next stage - checking the functionality of the mass air flow sensor. Its task is to return a certain part of the burnt gases back into the chamber so that the fuel burns in full, and, accordingly, harmful emissions into the atmosphere are reduced. In this situation, simply cleaning the valve seat is often enough to solve the problem.
Quite often the speed starts to fluctuate due to problems with spark plugs or high-voltage wires. In the first case, a visual inspection will help. Candles should be carefully examined for carbon deposits. Also remember the last time you changed them, perhaps the reason was a banal resource exhaustion. The problem with high-voltage wires can be seen in the dark. If you see a firework of sparks there, replace them immediately. However, you can take a simpler route. You just need to take spark plugs or wires that are known to work, borrow them, for example, from someone you know, and install them on your car. First replace one thing, then another. If engine operation becomes normal, then the problem has been found.
Procedure for replacing the fuel pump VAZ 2110
To replace the fuel pump, you will first need to dismantle the failed device; for this it is recommended to use the algorithm of actions described below:
Taking into account the peculiarities of the location of the fuel pump in the VAZ 2110, you will first need to remove the upper surface of the engine. A large amount of dust and other dirt often accumulates on the cylinder block and the pump itself, so they need to be wiped with a damp cloth or a brush with soft bristles; you can use special means.
It is recommended to prepare several bolts with a diameter of 8 mm in advance. They will be used as plugs for the hoses, and during the process of dismantling the pump there will be no time to search for them, since fuel will immediately begin to flow out of the holes.
At the incoming and outgoing hoses, you need to loosen the side clamps that secure them. This can be done using a screwdriver or a wrench specially designed for such purposes. Immediately after loosening their position, it will be possible to remove the clamps from the fittings and dismantle the injector.
The cylinder block will also need to be removed, since the device is securely fixed to it. This is quite easy to do if you unscrew a few nuts using a 13mm wrench.
Immediately after removing the nuts, the position of the fuel pump will weaken and it can be removed
It is also worth paying attention to the gasket located between the pump and the spacer - it has an extremely short service life, so it is best to replace it along with the main device. The spacer is necessary to ensure reliable protection of the fuel pump from high temperatures; when replacing the device, it should be cleaned of accumulated dust and dirt
There is another gasket between the spacer and the cylinder block; it is also recommended to replace it due to rapid wear
The spacer is necessary to ensure reliable protection of the fuel pump from high temperatures; When replacing the device, it should be cleaned of accumulated dust and dirt. There is another gasket between the spacer and the cylinder block; it is also recommended to replace it due to rapid wear.
After removing the old fuel pump, you can proceed to installing a new device, for this you should use the instructions below:
- If the car has a mileage of 100,000 km or more, you will first need to check the minimum protrusion of the pusher - the location of the new fuel pump and the correct functioning of it will depend on it. Otherwise, there is an increased risk of a significant reduction in fuel injection, which can lead to diaphragm rupture. Changing the protrusions of the pusher usually does not cause difficulties; it is enough to simply select and install suitable gaskets that will be located between the spacer and the cylinder block.
- Once the correct minimum projection is set, you should start turning the crankshaft at a low speed. At this time, the spacer should be pressed tightly against the cylinders, which will make it possible to measure the indicator of the pusher protrusion. The value can be dynamic and fluctuate constantly, but only within 0.8–1.3 mm. The gasket is changed in cases where the pusher is outside the specified range: depending on whether the value is too small or too large, its thickness is also reduced or increased.
- At the final stage, all dismantled parts and devices are installed. This process is not difficult; to implement it, it is enough to use the previous instructions, repeating all the described steps in reverse order.
Injectors installed on Priora
The Lada Priora car is equipped with imported injectors manufactured by the German company BOSCH. These devices are highly reliable. Their service life can reach 160 thousand kilometers. However, car service specialists strongly recommend changing injectors every 120 thousand km.
Almost all Prioras are equipped with German injectors from BOSCH
Injectors for 8 and 16 valve engines
You should know that the injectors of the 8-valve Priora engine are no different in appearance from the injectors of the 16-valve engine. These are all the same devices from BOSCH, consisting of a housing, a coil, a diffuser and a fuel grid. When choosing injectors for a Priora, you need to think not about the number of valves in the engine, but about its volume. Because the markings of injectors for 1.5 liter engines are different from the markings of injectors for 1.6 liter engines. In the first case, the BOSCH injector should be marked 0-280-158-110, in the second - 0-280-158-502. You can clarify the markings in the car’s operating instructions, at the end of which there is a summary table with digital designations of all BOSCH injectors depending on engine size.
Table of applicability of injectors for VAZ cars
Characteristics of the current configurations of Lada 2170
The popular Russian sedan Lada 2170 (Priora) has been on the Russian market for more than 9 years. During this time, AvtoVAZ released two successors to the model in the sedan body - Lada Granta and Lada Vesta. But Priora is still successfully produced in Tolyatti.
Why is this model so popular? The designers endowed it with a nice exterior, average technical characteristics, simplicity and reliability. Russian consumers are ready to buy a sedan for such qualities, and therefore the Lada Priora has been successfully sold for nine years. What modifications of the Priora line were produced during this time, and which ones are coming off the AvtoVAZ assembly line today?

