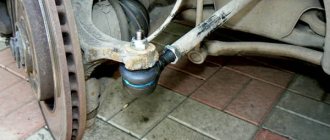
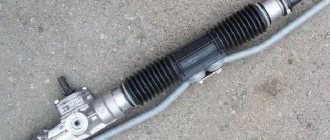
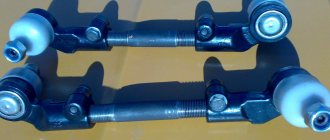
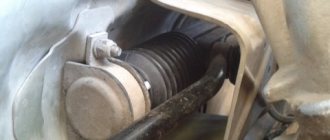
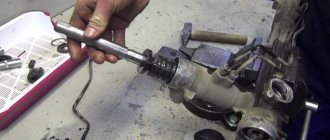
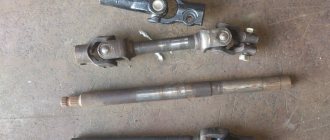
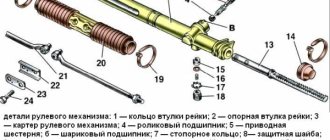
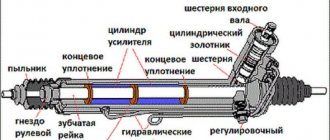
If knocking occurs in the front suspension of a Priora, you should pay attention to the following parts and components:
- racks
- strut supports and bearings
- ball joints
- steering rack
- steering tips
And in this article we will look at repairs related to tie rod ends. If the knocking noise appears specifically from the tips, and the play when turning already exceeds the permissible limit, it is necessary to replace the tips. for new ones. To perform this repair, you will need the following tools and accessories:
- Ball Joint or Steering End Puller
- Crowbar and hammer (if puller is not available)
- Pliers
- 19 mm wrench
- 13 mm wrench
- Torque wrench
- Penetrating lubricant
How to change the steering tip without adjusting the toe?
Nikita » 07/27/07 12:15
I’ll say right away - I searched for a long time. I couldn’t find the answer. If it’s available somewhere, I’d be grateful for the link.
The question is this: It is necessary to change the rods and ends. But how to do this without changing the wheel angle? How to maintain the wheel alignment?
By the way, I think I know that Scorp has one thing - just a convergence (?) Or I’m mistaken. Well, in short, everyone understands.
What's the best option so that you don't burn up the rubber after a kilometer?
It’s difficult for me here with the master and the stand, so I need to do it somehow.
Dimastiy » 27.07.07 13:03
Nikita » 27.07.07 13:09
Dimastiy In response to a stupid answer to a stupid question:
As for alignment and camber, that’s great, thank you, I’ll let you know.
As for the length, for example, I was thinking about options for replacing it in the pit so as not to move the wheels. They need to be blocked somehow, and not hung out.
I won’t buy identical ones at all, since the rods were changed before me on this car.
Dimon1 » 27.07.07 13:11
Dimastiy » 27.07.07 13:11
Nikita As for the camber, it’s a joke! It is regulated by current when cups, beams or very high inserts under the springs.
As for locking the wheels - it’s mega stupid, wouldn’t it be easier to pay 300-700 rubles for an alignment at the stand?
Nikita » 27.07.07 13:41
Dimon1 It’s a bit far, I’ll tell you straight
Dimastiy I understood the joke.
It will cost me as much to do a wheel alignment on the stand as it would cost to drive to St. Petersburg and back, plus the ferry.
An hour of work here costs more than 4,000 rubles with our money. You need to sign up well in advance, since all the services are “authorized.” So, believe me, it’s better to try to mega-stupidly block the wheels yourself.
sadko » 27.07.07 14:01
Valera » 28.07.07 00:29
Yastreb » 28.07.07 09:48
Nikita » 28.07.07 14:01
Nikita » 28.07.07 14:15
Dimastiy sadko Valera Yastreb Thank you all very much.
Valerina’s option seemed the most “difficult” to me. In the only sense that I’m afraid to take risks and generally “free up” the steering wheel and set it again (IN MY SITUATION). Although I’m sure that if, probably, I learn, or in case knocking something down, this is the option you need to have in reserve. So, if something goes wrong, I’ll try to set it according to Valera!
Sadko and Yastreb - I understood the principle. We must try to measure everything so that later we can return it “to its place.”
That is, I have two pressing problems then. I don’t have a barbell, I only have a folding ruler or a tape measure, unfortunately. This is exactly what I need, do you think it’s possible with a folding wooden ruler?
>". measure the distance from the center of the ball to the element that you will not touch” (Sadko) > “I measured the distance from the center of the ball to the end of the rod.” (Yastreb)
I have never removed the anthers before. The distance must be measured from the big crap that is at the end of the rod that is screwed into the rack? “The end of the rod,” “the element that should not be touched” - what is it?
And another question - what do you use to unscrew and tighten the rods with? An open-end wrench? (I’ll be doing this for the first time)
Yastreb » 28.07.07 14:29
Guest » 28.07.07 15:54
I should note that if the steering wheel has never been removed from the splines (not changed position), then you should not touch it, because on a rack with a hydrak, there is a variable gear ratio, and a change in position can lead to unpredictable consequences (for example: the steering wheel in one direction will turn easier than the other, or if the wheels are aligned correctly, it will still pull to the side, or increased wear of the rack). Those. Before making adjustments, simply position the steering wheel straight. The following measurements are described correctly. I usually use a strip and a metal ruler (to determine these 1-2 mm). There is no need to tighten the rods too much right away, because... accuracy is checked on the go - if the steering wheel is crooked in a straight line, you need to compensate for the drift by repeating the adjustment procedure. With a certain skill and experience, the toe is set 2-3 times. The first time is set from the 3-5th time.
I would like to point out to everyone else that during operation the toe-in gets lost (deformation of the metal, wear of the hinges, etc.) and very often it is useless to set the toe-in according to the marks. Usually, the operating instructions require checking the toe adjustment during maintenance (sometimes after 10 thousand km, sometimes after 20)
Nikita » 28.07.07 16:44
Speedy Well, in short, as I understand it, during the ride, of course, a lot can wear out, and a lot of things can actually end up there.
About my car I can say that I have driven more than 40,000 miles this year on good roads, and although there is some slight play in the steering, overall the car runs well at high speeds, and so far (pah-pah) there is no wear on the tires.
Of course, I myself agree and am confident that it is necessary to check the angle of the front wheels often. Even for preventive purposes. A racer I know (in the past), an experienced older guy, always said - “do the camber, drive, leave the car to the right and left, again to the stand, and so on several times, at least three times.”
I never removed the steering wheel. At the last convergence, the mechanic asked if I wanted to put the steering wheel straight, but I refused (it was just a couple of centimeters to the left). But you can mark it with the yellow mark sent, at least, for example.
I will first try to follow the path of measuring the length of the old rod and tip. If this does not work, I will use the “more complex” option.
Just tell me, guys, how do you turn the rod so as not to break anything?
Yastreb Everything ingenious is simple. This option sounds like a reliable one
Replacing tie rod ends with your own hands
Replacing a car's steering ends is a mandatory procedure that is performed when servicing a vehicle's suspension. These structural elements are responsible for turning the wheels.
Therefore, the condition of the tips must be constantly monitored to guarantee driving safety and decent maneuverability of the machine. Damage to the steering tips will result in a loss of connection between the wheels and the steering wheel, which can lead to irreparable consequences.
Structurally, the tips are hemispherical steel fingers, which are equipped with threaded connections for attachment to steering rods. These parts ensure a clear correspondence between the steering wheel turns and the front wheels of the vehicle.
Symptoms of a problem
Damage and the need to replace the right or left steering tip can be judged by several signs. Among them:
- beating in the steering wheel, which is more felt when cornering;
- large play in the steering wheel;
- atypical sounds that are clearly audible while driving over uneven surfaces.
You can identify this malfunction in the steering of a car in the following ways.
- One person sits in the driver's seat and turns the steering wheel from side to side. At this time, his partner is under the car, observing and recording the presence of play on each tip.
- In a situation where there is no one to help the car owner, he himself is able to determine the presence of a defect. To do this, the driver should manually check the condition of the rods and ends. Significant play in these elements will be noticeable to the naked eye.
- The easiest way involves lifting the car with a jack. In this position, you should shake the wheel, determining the presence of play.
Detected play is the main symptom in which the steering tips must be replaced.
Troubleshooting
To ensure a high-quality replacement of steering ends, rods or racks, it is not in all cases necessary to contact the service center specialists. This procedure can be done by most car enthusiasts. To carry out repairs yourself, you need to purchase left and right tips, because it is recommended to change them on both sides at once. And also prepare a set of tools, including:
- a special puller, an alternative to which can be mounting with a hammer.
- torque wrench;
- metal brush;
- pliers;
- key for 13 and 19;
- penetrating lubricant.
Next, the procedure for changing suspension parts is carried out according to the following plan.
- We jack up the car and secure it with wheel chocks.
- We dismantle the front wheels.
- We clean the junction of the tip and the steering knuckle with a brush and treat it with brake fluid (if there is no penetrating lubricant).
- Remove the cotter pin that secures the threaded connection and unscrew the steering tip nut.
- We press the finger out of the fist using a puller.
- Remove the mounting bolt and unscrew the pin.
Necessary tool
Keys and accessories:
- Rozhkovy on “16”.
- Hammer.
- Wooden beam.
- Balloon wrench.
If you have a little experience in carrying out such work, then you can replace the tips on Renault Logan yourself. To do this, you should only adhere to the rules listed below.
Let's start replacing (preparatory work)
To replace the tips, you need to put the car on supports. Then you should remove the front wheels. In this case, it is recommended to turn on the handbrake and place wheel chocks under the rear wheels to ensure the stability of the car.
Stages of work
- Before repairing, all elements of the steering mounts must be sprayed with WD-40. You can also use water if liquid is not available. You should pour it over the bolts and wait a while until they are saturated with moisture. This will make it easier to unscrew the bolts.
We removed the wheel and treated the tie rod end to the hub with WD-40
Loosen the tension, indicated by an arrow
Loosen the pin bolt
We use a ball joint remover (it is universal for all cars)
The steering knuckle was removed
We use a jack to help
AHTUNG! Do not overtighten, otherwise you will have to take a new tip
Adviсe
- It is recommended to lift the car on the side on which the part will be replaced.
- When carrying out work, the car must be on the parking brake.
- To clean dirt from the steering column, you can use a metal brush.
- In the event that you do not have a puller at hand to press out the finger, you can use a wooden block and a hammer. Using a hammer through the beam, you need to hit the mounting hole of the finger, freeing it.
- It is important to remember that the steering wheel tip on the right has a left-hand thread, and on the left – a right-hand thread ( that’s why the article numbers are different, they are lower ).
See all advertisements in the archive
It is necessary to do the alignment if you did not count the turns when unscrewing the old tips, and you also want to check if it has gone astray.
Replacing tie rod ends without a puller
It was mentioned earlier that a set of a hammer and a pry bar can replace a specialized puller. In this case, the whole process consists of the following steps.
- We jack up the car, install bricks under the rear wheels, dismantling the front ones.
- Clean and lubricate the joint between the tie rod end and the steering knuckle with WD-40.
- Remove the cotter pin and nut.
- We knock out the finger using a pry bar and/or a hammer.
- Unscrew the bolt securing the tip to the rod.
- We measure the distance between the worn part and the squeegee.
- According to the available data, we install a new tip.
- We carry out the assembly procedures in reverse order.
- We mount the wheel and remove the car from the jack.
- Check the wheel alignment.
The cost of replacing steering wheel ends at a car service center is quite affordable, and in order to save your nerves and effort, it is best to trust the professionals. This is quite simple to do by filling out the form below.
Installing new items
Installation is performed in reverse order:
- Screw the tip onto the rod, counting the turns. The main thing is to achieve an approximate match in the length of the rod with the new and old tips.
- Place the pin in the hole in the stand and secure it with a new nut.
- Tighten the nut on the rod.
- Tighten the bolt on the tip clamp.
- Install a cotter pin to secure the nut to the pin.
At this point the repair can be considered complete. If you only need to replace the Priora steering tip boot, then you do not need to remove the entire element, just remove the pin from the hole in the steering knuckle of the strut. Be sure to wash the hinge and apply new grease.
Replacing tie rod ends
The steering system is extremely important for the safe operation of the car, because problems with it can lead to irreversible consequences.
Also, strict traffic regulations requirements are imposed on the serviceability of this system. Therefore, for your safety and the safety of other road users, it is necessary to monitor the condition of the steering tips and carry out timely replacement.
What are tie rod ends used for?
This unit sets the desired angle of rotation of the car's wheels and ensures the mobility of the entire steering system.
The tie rod ends take on most of the shock load, ensuring that the tie rods and racks retain their strength; the ends significantly increase the service life of these mechanisms. Shock loads occur when moving quickly over uneven surfaces (potholes, gravel, crossings). All these factors lead to wear of the steering tips, which causes damage to the steering system.
Signs of faulty tie rod ends
It is easy to notice the malfunction, since when the car is moving on a bad and uneven road, a knocking noise that occurs during intense acceleration or braking will be clearly audible. Play in the steering wheel may also appear when the car begins to “float” on the road and lose control. You can check the safety of the steering tips in another way: raise the car with a jack and rock the wheel in different directions. If the movement of the wheel is noticeable, the tip must be urgently replaced.
Ignoring the above signs can lead to a noticeable decrease in controllability, as well as cause more serious and costly problems:
- Reduced vehicle controllability will lead to an accident;
- Car wheel play can increase the load on the stabilizer links and ball joints, which will accelerate the process of their deformation;
- The car will begin to “steer” away from the axis of motion when driving on a straight road, tire wear will accelerate due to a violation of the wheel alignment system;
- Shock loads will increase on the steering rack and steering rod, and because of this, there will soon be a need to repair the entire steering system, the cost of which is very high.
Driving style greatly affects the service life of tie rod ends; the following should be avoided:
- sharpness when cornering, accelerating and braking;
- driving on gravel at high speed;
- driving on unbalanced wheels, which causes significant vibration;
The anthers of the steering tips are also an important element, damage to which can lead to dirt getting into the hinge joint, which can greatly reduce the quality of lubrication.
Selection of tie rod ends
40–50 thousand km is the mark at which it is usually worth replacing steering tips, since they are consumables. Sometimes the quality of the tips leaves much to be desired, which is why they have to be replaced earlier than scheduled maintenance, especially in domestic cars.
So, on VAZ cars, steering tips are replaced every 15–20 thousand km, but the frequency of replacement also depends on the manufacturer of spare parts. There are repairable tips, but their repair requires a lot of experience and qualifications, and is carried out exclusively by professionals.
It is extremely important to replace tie rod ends in pairs! Replacing only one side is not permissible, since these elements fail almost simultaneously.
A set of keys and a special puller are what is needed when replacing the steering tip. The puller allows you to separate the tip from the hub. If it is not there, then car owners often simply loosen the nut that holds the tip and hub together, and then knock out the tip with strong and sharp blows of a hammer. But there is a risk of damage to suspension and body parts.
Instructions for replacing tie rod ends
Using a jack, lift the car and remove the wheel. For convenience, you can turn the car's steering wheel in the opposite direction from the jack.
Disconnect the nut securing the steering tip to the vehicle hub. Remove the tip using a special puller or knock it out with a hammer.
Unscrew the steering end locking nut on the rod. There are cases when the tip has a reverse thread.
Next, a new tip is installed and all elements are assembled in the reverse order.
Coking of the steering tip nut on the hub is something that car enthusiasts often encounter. Because of this problem, the process of removing it becomes problematic.
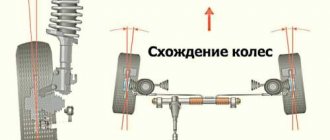
When replacing steering tips, their adjustment is necessary, since they are responsible for the wheel alignment of the front wheels. It is practically impossible to carry out this adjustment on your own, and setting the camber “by eye”, counting the revolutions at which the old tip was screwed into the rod, is not accurate. There is also a dimensional error in the parts, which is sufficient to violate the alignment angle of the car wheel. Therefore, checking and replacing tips should be entrusted to professionals at trusted service stations.
Preparatory work
Before you begin work on replacing the steering tips on the Priora, you need to perform several manipulations to prepare the car. Namely:
- Place blocks under both rear wheels. The machine must be on a level surface so that it does not roll away during repairs.
- Place a jack under the side of the car that is being repaired.
- Loosen the bolts that secure the wheels to the hub.
- Raise the car on a jack and remove the entire wheel.
- Place a support under the car - wooden blocks.
- Lower the car onto the support.
There are three options for getting out of this situation
The first option is to cut off the nut with a grinder.
The second is to place a second jack under the tip itself and press the steering tip pin to the steering knuckle.
Since it is conical, it will clamp and you can further unscrew the nut.
If you don’t have a grinder or a second jack, you can place a stump or some kind of stand under the steering tip and slightly lower the jack on which the car is currently standing.
Since I have a second jack, I will use it, try to press the steering pin a little against the steering knuckle and unscrew the nut.
There is no need to lift the car too much. The spring is pressed in a little and this will be enough for the nut to unscrew.
If the nut still won't come off, you can try heating it with a portable gas torch.
In my case, the nut does not budge; the bolt rotates inside the tip itself. You'll have to use a grinder.
In general, when repairing the suspension, you should always have an angle grinder on hand, because very often many bolts either turn or fail to turn.
The nut and bolt should be cut lengthwise, since if we also have to use a puller to press out the tip itself, we will need the rest of the bolt.
If we cut under the nut, then there will be nowhere to press with the puller itself.
Next you need to unscrew the locknut that holds the steering rod itself. The nut is located at the end of the tie rod. It can be unscrewed with an open-end wrench.
It unscrews clockwise; just loosen it a little.
The locknut has been unscrewed, now we knock out the steering tip bolt, you can knock it out with a hammer by hitting it a little.
If it doesn’t work, then you can’t knock anymore, since his hat will become flat and in the future simply won’t fit into the hole, you’ll also have to cut it off with a grinder.
In order to easily dismantle the steering tip, there is a puller that fits onto the steering knuckle.
There is a bolt in it, it presses on the bolt of the steering tip itself. We tighten the bolt on the puller and thus squeeze out the steering tip.
As you can see, the steering end came out very easily, all that was left was to unscrew it. It unscrews by hand from the tie rod without any problems.
Now we can determine which tie rod we need.
We go to the store and buy two tie rod ends. Why two?
Because they are the same, they drove along the same road, worked in the same conditions and they have the same resources.
If one tip knocks, then the second one will either knock soon, or is already knocking, which is why we buy two at once - left and right.
They are different from each other. The steering tip is sold from the factory already filled with some kind of grease.
But, as a rule, very little is put there, so I always add my own lubricant. It's better to have a lot of lube than for him to die very quickly.
In the steering tip boot I will add the paint that is used for the steering racks. It can also lubricate bearings.
I think it won’t be a big deal if I add it to the steering tip boot.
To press it into the steering tip boot, I squeeze a little of this lubricant into a syringe; it has a poisonous green color.
Since the boot on these steering tips cannot be removed, I simply lift it up a little so that some space appears, and use a syringe to press the lubricant inside.
For convenience, you can use pliers to slightly flatten the nose of the syringe, so it will easily fit under the rubber band.
I added about 5 ml of this lubricant inside the boot. That's it, the tip can be installed in its place.
First, slightly lubricate the threads and the cone where the tip bolt itself is inserted, so that later there will be no problems with dismantling.
We extend the tip onto the tie rod. We assemble in the reverse order and be sure to check the length by which the steering tip protrudes.
I check how well he performs. I measured it by bolt, I had 25 cm and 8 mm, but now the steering tip is twisted 3 or 4 mm inward.
Complete disassembly of the trapezoid
Removing all rods is practiced in two cases - when replacing assembled levers or a complete set of anthers on hinges. The technology for carrying out the work is similar to dismantling the outer tip, but is done in a different order:
- Complete the preparatory stage - place the car in the pit, clean the hinges, apply lubricant and remove the cotter pins. There is no need to turn or remove the wheels.
- Using a 22 mm spanner, unscrew the nuts securing the two side link ball pins; do not touch the clamp bolts.
The inner nuts securing the rods can only be reached with a curved spanner. - Using a puller, squeeze both fingers out of the steering knuckle axle and the pendulum bipod. Relieve the cravings.
- Remove the remaining 2 levers in the same way.
- Having loosened the clamps of the new rods, clearly adjust their length to the size of the removed elements. Secure the ties with nuts.
The length of the pull is adjustable by screwing in/unscrewing the short end - Install the new trapezoid parts, tighten the nuts and secure them with cotter pins.
Don't forget to position the middle section correctly - bending forward. After replacement, it is worth driving out onto a flat section of the road and observing the behavior of the car. If the car pulls to the side, go to a service station to straighten the camber angles of the front wheels.
Replacing tie rods and ends: what you need to know
Steering rods serve to connect the wheel and steering mechanism. The steering rod transmits the turning force from the steering mechanism to the vehicle wheel.
During the operation of the car:
- steering rods may become deformed or destroyed due to corrosion;
- the anthers of the steering tips are damaged, the sphere moves, and the bushing is damaged;
If problems arise with the rods, knocking noises appear in the front suspension, the steering wheel becomes “light”, and wheel alignment cannot be achieved. In such a situation, it is necessary to check the tie rods, and also replace the tie rod ends. Read more in our article.
Purpose and operation scheme of the trapezoid
The rod system serves as an intermediary between the steering shaft and the steering knuckles of the front hubs. The task of the mechanism is to synchronously turn the wheels in one direction or another, obeying the rotation of the steering wheel. The trapezoid is located under the engine at the level of the bottom of the car, attached to the body stiffening elements - the lower side members.
The part of the steering mechanism in question consists of 3 main parts:
- the middle link is screwed to two bipods - a pendulum lever and a worm steering gear;
- the right link is attached to the swing arm of the pendulum and the steering knuckle of the front right wheel (in the direction of travel of the car);
- The left rod is connected to the gearbox bipod and the left front hub knuckle.
Trapezium levers mechanically connect the steering wheel with the front wheel mechanisms
The method of connecting the swivel brackets to the trapezoid parts is a conical pin, inserted into the counter hole of the bipod and secured with a nut. The pendulum arm and gearbox are rigidly attached to the side members with long bolts.
The middle link is a hollow metal rod with two hinges. Two side rods are prefabricated elements consisting of 2 tips - long and short. The parts are connected to each other by a threaded clamp, tightened with two bolts.
The middle section is designed for rigid connection of the gearbox bipod and the pendulum
How does a trapezoid work:
- The driver turns the steering wheel, rotating the shaft and shank of the gearbox. The worm mechanism transmits fewer revolutions to the bipod, but increases torque (force).
- The bipod begins to turn in the right direction, dragging the left and middle rods with it. The latter transmits force to the right rod through the pendulum bracket.
- All 3 elements move to one side, causing the front wheels to turn synchronously.
- The pendulum arm, mounted on the second spar, acts as an additional hinged suspension for the system. In older versions of pendulums, the bipod rotates on a bushing, in new elements - on a rolling bearing.
- Ball pins at the ends of all rods allow the trapezoid to move in one horizontal plane, regardless of the compression of the front suspension springs.
The side lever consists of two tips fastened with a clamp
Increasing torque with a worm gear makes it possible to do without hydraulic and electric power steering. On the other hand, the driver physically feels problems with the chassis - as soon as the ball joint or rod end becomes sour, it becomes much more difficult to rotate the steering wheel.
Steering rod and rod end: purpose
The main task performed by the steering linkage is to transfer force from the steering mechanism to the wheels. However, additional difficulties arise due to the fact that the wheels are movable and the steering mechanism is rigidly fixed. The tie rod end solves the problem.
- the rod itself is attached to the steering rack rod by means of an internal tip;
- the middle rod of the trapezoid is attached using a swivel joint;
- The connection of the rod with the steering knuckle lever is carried out through the outer steering tip.
In turn, the external tip allows for mobility of the rod and wheel in any plane. As a result, the drive works normally when cornering, when driving over uneven surfaces, etc.
Tie rod and tip device
As for the device, the rod itself resembles a steel rod. The design of the steering tip is more complex, since it serves to connect moving and fixed elements.
In fact, it is a hinge joint where the pin sphere rotates inside a hemispherical body. A bushing is installed in the housing and lubricant is filled to avoid friction and allow the pin to deflect at a given angle. The hinge is protected by a rubber boot.
Replacing tips WITHOUT ALIGNMENT COSTS
The Delphi steering lugs I ordered on existential arrived on Sunday.
And just last night I got around to it, or rather my wife let me into the garage to change them :))) I decided to replace them, the old way, through which many cars have already gone through: the Fourteenth, the Ten, the Elantra, the Chrysler 300m, the Dodge Sratus, etc. This is done using a regular caliper - a compass. And so, in order: We hang the wheel, remove it. Next, unscrew the nut from the steering tip pin: now you just need to loosen the counter nut on the rod itself:
We have loosened it, now we need to release the tip finger from its seat. Here, too, is my grandfather’s method, or rather my father’s: On the reverse side we place the hammer with the heavier one, and with the front side we hit with the smaller one. A few clear and sharp blows and the finger will be released!:
Now we measure the distance with Shtangel. How to do this, in what planes, what extreme points to take - a flight of fancy. I always measure from the beginning of the thread to the edge of the tip head. On the Dodge, the thread was long, so I wound electrical tape and measured from it to the tip head. In general, we measured it, I got 139mm:
Now let's measure the old and new tips and compare. It turned out that the old one is 1.5 mm longer than the new one. Accordingly, you need to tighten the new one so that the distance is not 139, but 137.5 mm; for me it turned out somewhere closer to 137 mm. We put everything back together, tighten it well, put the wheel on, and go check on the road to see if the steering wheel is moving or if it’s level. Everything is ok, let's go to the garage and change the other side. Here’s a way to save about 3,000 rubles :)) ps, well, I’m in the process of working:
:)) pps for those who find it easier to pay 3000 than to worry - it’s your business, it’s easier for me to do it myself :)) And the last time, when the smart guys at the service station on the computer. equipment, only after the 5th time they set the steering wheel of my VAZ 2114 straight and made it normal. gathering, I have finally lost faith in car services! :))
Main malfunctions of rods and tips: causes
Steering rods are simple in design, have no moving parts and are highly reliable.
The steering tip is also a fairly durable part. However, these elements (steering rod and tie rod ends) still fail for a number of reasons.
Why is the steering rod damaged?
When driving a car, strong impacts when hitting a hole, hitting curbs or aggressive off-road driving can cause the rods to bend or break.
In this case, bent rods lead to the fact that the wheel alignment angles (wheel alignment) are disturbed, the angle of rotation of the wheels changes, the tip boots rupture, and the rod tip can be torn out. Experts recommend periodically checking the steering linkage geometry. By the way, if it is necessary to replace one rod, you need to change the second one (pair replacement).
Steering wheel breakage
Although the tip is highly reliable and wear-resistant (steel pin, liner made of wear-resistant material, anodized body), the structure still collapses on bad roads and under high loads.
Also, the hinge joint fails as a result of the boot breaking. If the boot is damaged, water and dirt get inside, the lubricant is washed out, active corrosion begins, small grains of sand begin to act as an abrasive, damaging the surfaces. For this reason, it is important to monitor the condition of the anthers, as well as pay attention to signs of malfunction of the steering tip.
Signs of faulty rod ends
As a rule, wear and malfunction of the steering can be determined by the following signs: play and knocking, increased vibration on the steering wheel, the steering wheel is too tight or light, a beating appears on the steering wheel.
In turn, faulty steering tips manifest themselves as follows:
- when driving, you can hear feedback on the gas pedal;
- quiet and frequent knocking when turning the steering wheel in the wheel area;
- knocking on rough roads;
- the steering wheel turns too easily;
- wheel alignment is not set.
Adjusting the wheel alignment after replacing the tips
You can adjust the wheel alignment angles yourself in the garage, but if you have a plumb line, a protractor and a ruler at hand . These measuring instruments are not particularly accurate, but it is still better than no diagnostics at all.
After the repair, it is advisable to visit a service station so that the specialists can make precise adjustments. They have the following devices at their disposal:
- optical stand;
- laser equipment;
- computer systems;
- 3D stands.
Video: Why is it necessary to adjust wheel alignment angles (wheel alignment)
Properly adjusted wheel angles are your safety on the road. The car becomes more obedient, and you enjoy driving it. The main thing is to find an experienced technician who can professionally adjust everything, because even with ultra-modern equipment for diagnostics at a service station, the human factor plays an important role.
How to change tie rods and ends
If signs of wear are detected or damage is obvious, the tie rods and/or tie rod ends will need to be replaced. When it comes to rows, it is highly recommended not to limit yourself to just one side. In other words, you need to buy tie rods in pairs and change them.
You also need to know how to change tie rod ends with your own hands correctly to avoid common mistakes. Let's move on to replacement:
- the car must be jacked up;
- then the front wheels are removed;
- the steering wheel must be locked;
- then you should loosen the fixing nut with which the tip is attached to the rod;
- if there is a cotter pin, it must be removed from the tip pin nut;
- Now you can unscrew the nut on the pin securing the tie rod end to the steering knuckle;
- Then, using a ball puller, you need to squeeze out the steering tip, inserting the connector of the puller under the rubber of the tip and tightening the nut.
- if the fit is tight, gently tap the lever ear with a hammer;
- if there is no puller, a small crowbar is used instead;
- before removing the tip from the rod, you need to put marks on the rod or remember the number of turns in order to know how much you need to screw the new tip when installing;
- Next, you should remove the anthers, unscrew the rods from the rack and reassemble in the reverse order, using new parts;
- during assembly, the threads on the rods and pins must first be lubricated;
Removing old tips
To remove the Priora tie rod end, you can use one of the following methods:
- Remove using a puller.
- Remove the hinge using a pry bar.
- Beat it out with a hammer.
The last two methods are very dangerous - you can damage not only the tip, but also the stand itself. And if you plan to replace only the anthers, then the risk of knocking off the thread on the finger is very high.
Therefore, it is best to use a puller for work. Follow these steps to remove the tip:
- Loosen the bolt that secures the clamp.
- Loosen the nut on the adjusting bolt.
- Remove the cotter pin from the hole in the hinge pin.
- Using a 19mm wrench, unscrew the nut from the pin.
- Install the puller and, by rotating its bolt, completely remove the tip pin from the hole in the rack.
- Unscrew the tip from the rod, while being sure to count the number of turns.
After repairs, be sure to do a wheel alignment. Even if you measure the total length of the rod before dismantling, you are unlikely to achieve the same value afterwards.
If you cannot unscrew the nuts on the rod, it is best to remove it completely. To do this, unscrew the bolts securing it to the rail. If necessary, you can warm up the threaded connection with a gas spray. But this is an extreme measure; usually pre-treatment with a penetrating lubricant such as WD-40 is sufficient.
Recommendations
- Replacing a tie rod end or replacing tie rods and ends is not a complicated procedure, but it does require certain skills and tools. It is also important to adjust the wheel alignment after replacement. If this is not done, the tires will wear out, the steering wheel may be crooked in the zero position, etc.
- When choosing tie rods and ends, it is optimal to use original spare parts or parts that are not inferior in quality. Purchasing cheaper analogues at the initial stage allows you to save money, however, the service life of the tips in the future can be very disappointing. The result is that the steering tip will need to be replaced again after 20-30 thousand kilometers.
Troubleshooting
As the car moves, the ball pins rotate in different planes and gradually wear out the crackers, which causes backlash. The following signs indicate critical wear of a tip (or several):
- a distinct dull tapping sound when driving over any uneven surfaces;
- vibration from the play of the ball pins is transmitted to the steering wheel;
- on a flat section of the road the car spontaneously leaves the straight path;
- The rotation of the steering wheel is difficult, and a creaking sound is heard from below.
When a lot of force is required to turn the steering wheel, the worn tip must be replaced immediately. The symptom indicates that the ball pin is jammed inside the housing. If measures are not taken in time, the hinge may jump out of its socket and the car will become uncontrollable.
A similar story happened to my relative. When there was literally half a kilometer left to drive to the garage, the right steering tip on the “seven” broke off. The driver showed ingenuity: he tied the end of the dropped rod to the suspension arm, leveled the wheel with his hands and slowly continued driving. When it was necessary to turn, he stopped, got out of the car and manually adjusted the wheel in the right direction. The 500 m long path was covered in 40 minutes (including the entrance to the garage).
Most often, hinges become unusable due to a torn protective cover.
Steering rods of Zhiguli cars become unusable for a number of reasons:
- Natural wear and tear. Play and knocking appear at 20-30 thousand km, depending on conditions and driving style.
- Operation with torn hinge boots. Water flows into the unit through the holes, dust and sand penetrate. Corrosion and abrasive effects quickly destroy the ball pin.
- Lack of lubrication leads to increased friction and accelerated wear. The presence of lubricant must be checked before installing the part on the car.
- Bending of the rod due to impact with a stone or other obstacle. If the outcome is successful, the element can be removed and leveled by heating it with a burner.
When the production of all tips reaches a critical limit, the front wheels have large free play in the horizontal plane. To drive straight, the driver has to “catch” the car along the entire road. How to diagnose wear on steering rods and not confuse them with suspension faults:
- Place the car on a viewing ditch or overpass and apply the handbrake.
- Go down into the hole and carefully inspect the trapezoid, especially after hitting the bottom.
- Grab the shaft near the tip with your hand and rock it up and down. If you feel free movement, replace the worn element. Repeat the operation on all hinges.
To check, the lever must be swung in a vertical plane, grasping it near the hinge
The method of developing traction during diagnosis is of great importance. There is no point in turning the lever around its own axis - this is its normal operating stroke. If the test shows a small tight play, the hinge is considered to be in good condition - the internal spring is triggered.
There is no point in putting pressure on the hinge from below - you will only feel the resistance of the spring
