Normal operation of a car engine is possible only if all its constituent elements, as well as the main components of the car, are in working condition. One of the main components of the ignition system in domestic “tens” is the starter device. You can learn more about how to repair a VAZ 2110 starter with your own hands and in what cases it needs to be carried out from this material.
How does the starter of the VAZ “Ten” work?
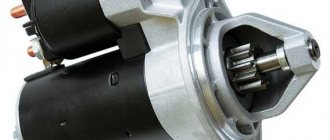
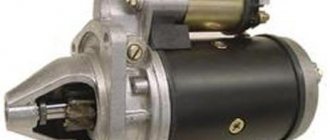
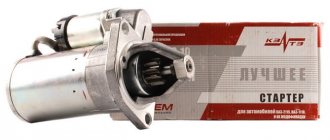
Domestic “tens” are equipped with a starter unit with number 5702.3708, which is essentially a DC electric motor. One of the main components of such a device is a traction relay, as well as a planetary gearbox. The motor is excited by the action of permanent magnets installed inside the unit structure. The body of the mechanism itself is made of steel; it is connected using two pins to the covers of the device.
Designation of the component elements of the device
Also, the design of the starter unit implies the presence of an armature and a stator. The armature is designed to carry out rotation in metal-ceramic liners, as a result of which the rotation is transmitted through a gearbox to the device drive. When the driver turns the key in the ignition, voltage from the car's battery is transferred to the relay windings. As a result of the influence of the magnetic field, the armature is first retracted, causing the gearbox gear to mesh with the flywheel. Accordingly, this leads to the closure of the contact bolts inside the structure.
Then the armature itself remains in the same state, it is fixed in this way with the help of a holding winding. When you turn the key in the ignition switch, this winding is de-energized. Ultimately, this contributes to the fact that the armature returns to its original position (the author of the video is Avtoelectrica HF).
Starter relay (retractor)
The starter retractor relay is located on the starter itself and serves to move the bendix to the flywheel, and then engage with it. This relay often fails due to poor workmanship. It is quite easy to understand that the solenoid relay has failed; with such a breakdown, the starter will spin at idle, but the engine will not rotate, since the moving part of the drive (bendix) will not engage with the flywheel.
Characteristic malfunctions of the mechanism
If the device stops working, the reasons may be:
- Low battery. Before repairing the VAZ 2110 starter, you need to make sure that the battery is fully charged and operational.
- The appearance of oxidation on the wires, as well as the terminals of the mechanism. As a result, the contacts can no longer transmit current, and therefore the operation of the starter device will be impossible. This malfunction also includes poor fastening of the wiring, in particular the lugs. In this case, in order to get rid of the malfunction, you will need to clean each contact, as well as the terminals. If during the diagnostics you notice that there are loose elements or clamps on the mechanism, then they should be secured as much as possible. In addition, the connecting components will need to be treated with Vaseline or grease, this will further prevent oxidation of the contacts.
- Failure of the traction relay. Due to the inoperability of this device, short circuits may occur in the unit, which will lead to a complete stop of the mechanism. A failed element will need to be replaced. The reason may lie in a broken electrical circuit.
- Failure of the traction winding - such a malfunction can also cause short circuits in the system.
- Failure of the contact part of the ignition switch. Such a malfunction, as a rule, cannot be repaired, therefore, when it occurs, the contact group must be replaced.
- Anchor failure. Its malfunction may manifest itself in the fact that this element cannot scroll as a result of complications during rotation. For more accurate diagnostics, this component should be dismantled and the efficiency of its rotation should be diagnosed. If the diagnostics confirm a faulty armature, then the device must be replaced (the author of the video is the stas di channel).
Node malfunctions
The most common starter breakdowns are divided into several types. These include:
- Damage to the electrical circuit. A sign of such problems is slow rotation or complete absence of it at the crankshaft when starting the internal combustion engine. The reasons for this phenomenon may be a discharge of the battery, rupture of the contacts of the ignition device, unreliable fixation, wear of the wires, or violation of the integrity of the wiring suitable for the relay contact group. If, when starting the internal combustion engine, the armature does not respond and the relay does not operate, then the cause of the failure is most likely due to a break in the solenoid relay wire. In the absence of the described “symptoms”, it is necessary to dismantle, check the plates for short circuits, and the presence of traces of “burning” in the collector system.
- Worn starter brushes. The presence of such problems may be indicated by difficulty starting the car, but not always. The reason for this phenomenon may be “hidden” in a battery failure. Complete wear of the brushes leads to the spring “resting” against the brush holder (contact is ensured only due to its mass). This can be easily checked by changing the position of the starter. The reason for premature wear is the misalignment of the brushes during the operation of the starter.
- Broken traction relay. This is indicated by a failure of the internal combustion engine, since it will not be possible to start the engine without a working relay. The “symptoms” of a malfunction of this starter element include its rapid rotation, even after starting the internal combustion engine, idling movement (without contact with the flywheel of the engine, which does not start), and a click after turning the key in the ignition device. It may not exist if there is a break in the coil, the armature is jammed, or there is no power for some reason.
- Lack of starter rotation with a characteristic “buzzing” sound. This phenomenon indicates the occurrence of a short circuit in the electrical circuit, in which power is supplied to the brushes of the electric motor. However, it is in working condition. In such a situation, the holding coil often does not work and the bendix does not move. Its gear cannot engage the flywheel gear, and the electric motor runs in idle mode. The reason may be that the force of the retracting element “enters” the bendix through a lever made of plastic (has the shape of a grip). If the movement resistance of the bendix is high, then the plastic elements break down. As a result, it is not moved to the working position and the starter rotates, but does not transmit torque to the flywheel. Another reason for the failure of the rotor can be severe wear of the teeth, which are located on the rotor shaft of the electric motor. Do not forget that complete destruction of the mentioned teeth can also cause failure. This type of malfunction is related to the breakdown of the motor and is not related to the functioning of the drive. The presence of such a breakdown is indicated by the activation of all starter mechanisms, that is, the rotation of the electric motor and the transition of the bendix to the working position. It can be locked by turning the key in the ignition.
Many car enthusiasts complain that the battery discharges quickly and cannot activate the starter. You can read about the reasons for battery discharge here: https://vazweb.ru/desyatka/elektrooborudovanie/razryazhaetsya-akkumulyator.html
The main malfunctions of the unit include: the appearance of oxide on the wires and terminals, failure of the traction relay and traction winding, wear of the brushes, breakage of the armature
The listed faults can cause more serious problems if they are not corrected in time. Ignoring problems will most likely lead to vehicle failure at the most inopportune moment. The best solution is to contact a specialized service station when the first signs of the listed problems appear.
Instructions for repairing and replacing the device
Replacing a VAZ 2110 starter and repairing it looks like this:
- Disconnect the battery and disconnect the wire plug from the relay. Dismantle the wire itself, which o.
- The starter mechanism should be disconnected from the engine; to do this, unscrew the nuts that secure it.
- If you are making a replacement, then at this stage the device can be dismantled and replaced with a new one. If you decide to repair, then move on.
- On the relay itself, unscrew the nut, and then disconnect the traction element from the screw. The relay is removed; to do this, you also need to unscrew the two clamps.
- Then the anchor is dismantled from the seat; to do this, the element should be slightly lifted up.
- Remove the pins, and then remove the starter cover. The cover is dismantled first with the drive and gear element, and then with the brush assembly and their retainer, which is located next to the commutator.
- Next, the gear is removed from the anchor shaft, and the anchor itself is then removed. Having done this, you can remove the gears from the gearbox. If they show signs of damage or defects, the gears should be replaced.
- The gear component is removed from the cover. Check the quality of the seal and replace it if necessary.
- Using a mandrel, it is necessary to dismantle the restrictive ring; it is located directly on the locking ring, after which the drive and other elements, including supports, levers and washers, are dismantled. Each of the elements, if necessary, must be replaced.
- After dismantling the brushes, you need to check them. If signs of wear are visible, the brushes are replaced. All failed components are replaced, and the starter is reassembled in the reverse order.
Starter repair for VAZ 2110, VAZ 2111, VAZ 2112
Welcome! A starter is a very necessary thing in a car; thanks to it, the engine of the car turns on and starts, but recently starters have begun to be counterfeited and made of poor quality, and therefore many car owners, when installing a new starter, after a very short period of time go back to the service center and replace it with a new one , although you don’t have to change it at all, but simply repair it thoroughly yourself and at the same time put lubricant in the gears, which is so little put at the factory where new starters for cars are made.
Note! To repair the starter, you will need to take from the following tools: Keys, namely wrenches, sockets, sockets, in addition, expansion pliers will be required and a screwdriver (It all depends on what exactly you will change in the car, if there is only one solenoid relay, for example, then In this case, you won’t need anything else except wrenches)!
Summary:
When should the starter be repaired? If your car stops starting or starts poorly, then this indicates that the starter may have become unusable, but besides it, the ignition switch can also cause problems and the car will not start or even the same wires, so it’s clear to say that it’s the starter it didn’t break so easily, but still the most common reasons are when something clicks when you turn the key and the car doesn’t start, or when the starter spins but does it very weakly and the engine cannot start due to this (In this case, the battery is also may be discharged), and the last thing is when, when you turn the key, you hear extraneous sounds (grinding of metal and the like) if you hear such sounds, then we do not recommend using the car in the near future, otherwise in the future you will need to change the crown of the flywheel You will have to remove the flywheel itself from the car to do this.
The starter doesn't turn over
There are many reasons why the starter does not work, but first of all you need to check the most common reasons why the engine will not start.
Checking contacts on the battery
Often the reason when the starter does not turn is due to loose terminals on the battery or their oxidation. It is enough just to clean the oxidized terminals from chemical reactions and tighten them with a force that will ensure reliable contact.
Battery discharge
Quite often, especially in winter, after a period of inactivity, the car’s battery may discharge, and thickened oil during parking will not allow the weak battery to rotate the crankshaft with the starter. You can check the battery with a regular multimeter; in winter its voltage should not be less than 12V, in summer not less than 11V. This voltage is not an indicator of the battery charge; at such values it is better to charge the battery.
Egnition lock
In some cases, the contact part of the ignition switch may fail. This is due to aging or poor quality parts. In this case, when turning the key, the contacts will not close to turn on the starter.
Winding break
If the winding on the stator or rotor of the starter breaks, the magnetic field that rotates the armature will not appear and the starter armature will not move.
How to repair the starter on a VAZ 2110-VAZ 2112?
Note! First, the starter is removed from the car and then checked for functionality. You can find all this information in the article entitled: “Replacing the starter on a VAZ”, but in addition, check out the video below, which talks in more detail about How can you check the removed starter for functionality?
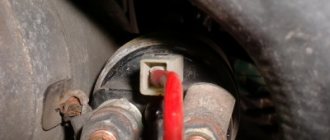
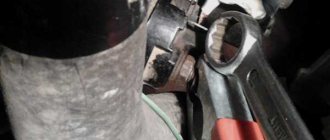
Disassembly: 1) First, unscrew the nut indicated by the blue arrow and remove the wire behind it indicated by the green arrow, thus after this operation the solenoid relay can already be removed from the car and no wires will interfere with this (But regarding the removal of the relay, a little We’ll explain everything later, since there are still a couple of bolts to unscrew, but if you need to change it, then immediately skip all the points and read carefully point number 3 in which everything is described), now unscrew the two nuts (Indicated by red arrows ) tie rods that hold the stator and then disconnect it from the front cover.
2) Now remove the three planetary gears of the gearbox from the starter (All of them are indicated by arrows), but you can only have three or four of them, if you still find four gears, then first pry off the very central one with a screwdriver and then remove it , then the remaining three and when they are removed, check their condition; the gears should not have chips, scuffs, signs of corrosion or other damage, otherwise they are replaced with new ones.
Note! After removing all the gears, there will be one more single and large one, called the ring gear, it should also not have chips or other defects, it can be removed either separately, for this you just need to pry it off with a screwdriver (see large photo), or together with the drive shaft, drive lever and lever support, for this you need to pry it off with the same screwdriver, but not by the gear itself, but by the support (see small photo), if you suddenly completely removed the entire drive, then first of all inspect it and make sure that the teeth on the drive are not painted in any other color and that there are no nicks or deformations on them; minor defects are eliminated with a diamond file or an abrasive stone; if necessary, replace the entire drive or the entire starter with a new one!
3) Regarding the removal of the solenoid relay, it has two bolts that secure it, they are also indicated by red arrows, so if you want to remove it, then unscrew these bolts and then, carefully pulling the relay (indicated by the blue arrow), remove it from the starter and by the way, about checking it, connect an ohmmeter to the terminals of the traction relay and then press the armature inward all the way, while the ohmmeter readings should be close to zero, if this is the case for you, then the relay is working properly and does not require replacement.
4) Then take a wrench and a hammer and, using them, knock down the travel limiter ring (see photo 1, do not forget to place some kind of piece of wood or a piece of thick rubber under the drive so that it does not deform), as soon as the ring is knocked down, using a screwdriver, remove the other retaining ring from the groove and then remove it and then remove the travel stop ring from the shaft (see photo 2), then remove the drive from the shaft and when it is removed, use expanding pliers to pry up the retaining ring and its remove (see photo 3) and thereby you can disassemble the drive and replace the parts worn out in it, and finally, the remaining part with the shaft can also be disassembled if necessary, to do this, remove exactly the same retaining ring (see photo 4) and remove the thrust washer from the shaft, as well as the shaft support, and so on.
This is interesting: Adjusting the carburetor Java 638
5) Next, using a flat-head screwdriver, pry and thereby remove the front cover (It is indicated by a green arrow) from the stator and by the way, if when removing the stator the same central gear remains seated on the shaft, which is still indicated by the red arrow, then you remove it, Otherwise, you won’t be able to remove the cover, it will rest against this gear (Don’t forget to check the gear, if traces of deformation are found on it, then replace it with a new one).
6) And finally, unscrew the two screws securing the stator cover (see photo 1) and then remove it, as soon as the cover is removed, using a screwdriver, pry up the starter brush assembly (see photo 2), then remove the one located behind it the front shaft support (see photo 3) and the thrust washer as shown in the fourth photo and at the end, grasping the shaft (It is also indicated by an arrow for clarity), overcoming the force of the magnets, remove the armature from the stator and after removing it, inspect its commutator and winding , traces of charring and various kinds of deformations should not be found on the armature windings, otherwise the armature is replaced with a new one, but if everything is in order with the winding, then proceed to cleaning the armature commutator, namely, if it is very dirty, then using sandpaper (Nulyovka), clean it, then rinse the starter armature with water in which the detergent will be diluted and at the very end, when the work has already been done, clean the armature dry with a clean rag from water and dirt and blow it with compressed air (Compressed air can be supplied parts such as compressor, tire pump and so on).
Note! There is something else we wanted to warn you about: when the brush assembly is removed, check its brushes, the height of which must be at least 3.5 mm, and the brushes must not have damage or other types of deformation, except for the brushes of the gearbox part (These include all gears) and the drive with white spirit, in addition to all this, rinse and then you can begin to reassemble the starter and install it on the car!
Assembly: During assembly, apply grease to the gearbox parts, dip the drive in engine oil and wait until it drains from it, lubricate the bushings in which the armature and starter drive shafts rotate and also the screw splines of the drive with engine oil, if you removed the brushes to replace them, then they can be installed in their place using a special mandrel, or if it is not there, then proceed in the following way, namely, secure the brush assembly to the cover with two screws, then lubricate the end of the armature shaft with two drops of engine oil and insert everything (Four ) brushes, into the corresponding brush holders, but do not install the brush springs in their places and then put the brush assembly on the armature commutator, then use pliers to open the outer stops of the springs of all brushes (see photo 1), then insert the springs into these places (see . photo 2) and holding each spring separately (First one, then the second, and so on) there with a screwdriver (To prevent it from flying out), bend the spring stops with pliers, install the other springs in their places in the same way and insert the armature into the stator ( When you insert it, do everything carefully and try to ensure that the armature commutator does not get out of engagement with the brush assembly, otherwise you will have to re-install the brush assembly), while the brush assembly and cover should already be on the anchor, assemble all the remaining parts in the reverse order removal
Additional video: You can clearly see the starter repair procedure in the video below:
Note! The video above does not show the repair of the Bendix, also known as the drive, but only shows partial disassembly of the starter. For more details on how to remove and disassemble this drive, see another video, which is also located below:
Tens starter device
The VAZ 2110 is equipped with a mechanism model 5702.3708, which is a DC motor containing two main components: a traction two-winding relay; planetary reductor. This motor is excited by permanent magnets. They are attached from the inside of the starter housing, which is made of steel. The specified body is connected to the covers (fastening is done using two studs).
The starter design includes an armature and a stator. The armature shaft rotates in cermet liners, and from it the rotation goes through the planetary mechanism to the drive. When the starter starts, the car battery transmits voltage to the relay coils. The armature, experiencing the influence of a magnetic field, is retracted, after which the planetary gear gear engages with the flywheel, which causes the contact bolts in the device to close.
After this, the armature remains retracted, and its fastening is ensured solely by the holding winding. When the driver turns the key in the lock, de-energization of this winding is noted. This causes the anchor to take its initial position.
Design and principle of operation
The VAZ 2110 starter does not have a very complex design, but a person who wants to repair this mechanism should know that its elements include:
- Drive shaft;
- Hubs with ring;
- Cover sleeve;
- Gears equipped with teeth and a coupling ring;
- Carrier;
- Drive shaft supports equipped with a liner;
- Anchor core.
- Gear axles are of the planetary variety.
- Permanent magnet;
- Gaskets;
- Frame;
- Collector;
- Lever bracket;
- Drive lever;
- The back cover is equipped with a special sleeve;
- Anchor relay and shaft;
- Holding winding;
- Brush holder;
- Traction relay core;
- Contact plate and bolts;
- Staples.
The starter components described most often require replacement, diagnosis or repair when problems occur.
Four devices creating a magnetic field are mounted to the starter housing. On the inside they are secured with an aluminum sleeve. The lid is tightly attached to the body. Reliable fixation is ensured thanks to two studs. The anchor shaft rotates in special bearings.
The starter plays a major role in starting the car, as it rotates the crankshaft
Through a planetary type gearbox, the torque “goes” to the drive shaft. Its transmission is ensured by a special gear. After the vehicle starts moving, it ensures their separation in order to protect the gearbox from damage.
When starting the engine, voltage is transmitted to two windings of the traction relay. After closing the contacts it stops working. The voltage should not exceed 8 V. If its value is higher or lower, then this “indicates” that there is a problem in the system.
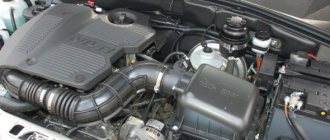
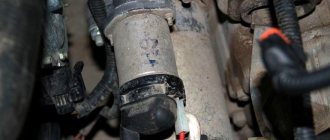
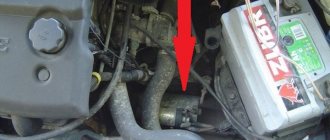
The starter on the VAZ 2110 is located to the left and slightly below the battery
Checking the functionality of the VAZ 2110 starter - why doesn’t it turn?
Before we begin disassembling the starting system mechanism of interest to us, we should make sure that it does not work precisely because of its malfunction. The check is performed as follows:
- We turn the gear in the direction of rotation of the armature. It should not turn in the opposite direction. If such reverse rotation is present, this indicates a faulty starter.
- We check the ease of movement of the device coupling along the shaft (use a screwdriver). With a normally functioning mechanism, the coupling moves without the slightest difficulty.
Using the “lighter” wires and the battery, we analyze the serviceability of the starter. To do this, we connect the negative terminal (black wire) to the starter housing, and connect the traction relay through its control cable to the positive terminal (red wire).
In cases where the relay operates normally, the drive clutch extends and a characteristic click is heard. If it does not turn on, you will have to disassemble the starter and replace the traction device.
Also, the starter of a VAZ 2110 car does not turn when its anchor does not work. Checking the armature is done as follows: remove the cable from the relay (from its output); connect the specified cable to the contact bolt. If the armature is in good working order, its rotation frequency should be at least five thousand revolutions per minute. If the frequency is lower, the starter does not operate.
Doesn't it turn?
If the starter on an injection VAZ 2110 does not turn, there may be several reasons for this.
- The culprit is the solenoid relay. If you insert the key, turn it, the instrument panel lights up, the fuel pump turns on, but when you turn it further, the panel goes out and the starter does not turn on, you should check the solenoid relay. Make sure there is voltage in it. Try closing the starter, turning off the alarm, which can also cause problems. If everything works separately, but in the end the starter does not turn on, then the reason is in the solenoid relay. It needs to be replaced with new ones and the problem will disappear.
- Overrunning clutch does not work. You started a cold engine, drove a couple of tens of kilometers, stopped to get out for a couple of minutes, returned, and the starter clicks, but does not turn on your VAZ 2110. Only when the car cools down, you manage to start the engine. First of all, the overrunning clutch, or popularly Bendix, is to blame. Replace it with a geared analogue. Additionally, check the wires that go from the Bendix to the battery.
- There are no contacts. The starter starts, but it is very difficult, making a lot of clicks. If the situation repeats regularly, be sure to check your contacts. The terminals are probably oxidized. Cleaning didn't work? Then check the ground contact with the car body and the starter contacts. For them, oxidation is a natural phenomenon. Another way is to ask a friend to turn the key in the ignition, and then hit the relay with a hard object a couple of times. If the car starts, then the closing contacts are simply stuck. But here it is better to completely replace all the relays than to repair and disassemble the unit.
- The problem is in the immobilizer. It is not uncommon for the starter activation circuit on the injection VAZ 2110 to be disrupted due to the immobilizer. The engine may suddenly stall, the starter stops turning, and it is not possible to start it even with a push. The terminals are clean and the battery is charged. If the immobilizer is turned on, this may be the cause. Due to the protection being triggered, the engine does not respond. You will no longer be able to start the car, so call a tow truck and go to the nearest service station.
- Problematic injector. We have examined almost all starter problems characteristic of a carburetor engine. But today the “tens” are injection ones. They don’t really like low-quality fuel, which VAZ 2110 owners so often like to refuel with. Therefore, the starter may not work for the simple reason that the injector is clogged or dirty. By performing a flush, you will eliminate the problem.
How to disassemble and repair the VAZ 2110 starter?
It is impossible to troubleshoot the starter without removing and disassembling it, so it has to be removed. The diagram of this procedure is given below: remove the battery terminals; We disconnect the cable connector from the relay; remove the wire marked “plus”; disconnect the starter from the engine by unscrewing the mounting nuts.
The mechanism has been dismantled, now you can begin disassembling it by performing the following steps:
- Unscrew the nut on the relay and disconnect the traction device from the contact bolt;
- remove the relay by unscrewing the two clamps;
- remove the relay armature from the lever (you need to slightly lift it up);
- remove the starter cover (it is necessary to remove the studs).
After all these operations, it becomes possible to remove the mechanism cover: first, it is removed as an assembly with the drive and gearbox on the drive side, and then with the brushes and their holder on the commutator side. Now you can remove the gear from the anchor shaft and take out the anchor, and then dismantle the gearbox gears. If they have defects, the gears need to be replaced (it is because of them that the starter often does not turn).
Next, with some force, we press on the drive gear and remove the gearbox from the cover. After this, remove the support from the lever (it is equipped with a sealing element) and check it for hardening and deformation. Very often the starter does not turn because of such little things. Just install another gasket, and you will forget about the inoperability of the starting system for a long time.
At the next stage of disassembly, using a mandrel, remove the restrictive ring from the retaining ring, then remove the drive, the lever ring and the lever itself with the washer and driver, as well as the lever spring. Now you can remove the drive shaft support, gear, and seal ring. Replacing the last of these parts is necessary in cases where it has lost its elastic characteristics (or has obvious signs of deformation).
Starter repair procedure:
1. First, you need to remove the starter from the car. Now let's start disassembling the part.
2. You need to unscrew the nut.
3. Disconnect the busbar from the contact bolt of the traction relay.
4. Carefully remove the two bolts that hold the traction relay.
5. The traction relay must be removed from the starter.
Disassembly and repair of brushes, armatures, bushings and starter assembly dozens
The brush holder is removed from the commutator side by removing two screws. The pressure springs and the entire brush assembly should be inspected, paying special attention to its stoppers. All deformed elements are immediately replaced. Installing new brushes is a simple process, so there is no need to describe it in detail.
But you may have to “tinker” with the armature, since it is often the reason that the “ten” starter does not turn (and replacing the bushings can take a lot of time). It is advisable to lightly grind the armature commutator, and also turn it on a lathe if its roughness is high. The armature is replaced when the runout in relation to the axles of its core is more than 0.08 millimeters. It is also recommended to install a new anchor if there are large nicks and burrs on it.
It may be necessary to replace the bushings (the shafts rotate in them), which are located on the drive side in the cover of the trigger mechanism we are describing. Installation of new bushings is recommended if there are holes on them and if they are heavily worn. Reassembling the starter is done in reverse order.
Replacement and repair of VAZ 2110 starter
The VAZ 2110 starter is a powerful DC electric motor. If used incorrectly, the unit may be damaged or burn out. One example is holding the key in the “start” position for a long time.
It is quite easy to determine if the starter is faulty - it does not turn, it clicks when you try to start the engine, or it simply does not work. This article details the process of removing and installing a new component. In some cases, the starter can be repaired - a separate section is devoted to this process.
This is interesting: Design and adjustment of the VAZ 2107 carburetor
VAZ 2110 trigger mechanism
The device for starting the VAZ 2110 engine has an electric motor with a planetary gearbox, as well as a starting solenoid relay. The gears of the planetary gearbox rotate on needle bearings, transmitting torque to the drive shaft. The traction relay switches a large amount of current and transfers it to the electric motor when the ignition key is turned.
The traction relay is returned to its original position using a powerful return spring. The interior of the assembly is a standard electric motor powered by DC battery power. An electric motor consists of a rotor, a magnetic stator and a brush assembly.
This is how the VAZ 2110 starter works. The photo (see below) shows in detail the structure of the unit.
Various external factors, including driver actions, can contribute to malfunctions. To troubleshoot the problem, it is important to understand how to disassemble the VAZ 2110 starter.
Purpose of the starter and its location
The “ten” has a small, but quite powerful 4-band electric motor, which is responsible for the primary rotation of the crankshaft. Without the participation of an electric motor, it is impossible to ensure the required crankshaft rotation speed. We replace this unit, since for a gasoline engine with an average cylinder capacity, 3 kW of energy is enough to start.
The starter supplies energy from the battery; it is a DC motor. Receiving voltage from the battery, the motor power is increased by four brushes. They are the main elements in any car starter. If necessary, the brushes can be replaced. If the starter meters are faulty, they can be purchased separately and replaced. But to do this, in any case, you will first need to remove the starter.
Starter problems and their elimination
If the starter does not turn, the car does not start, and the traction relay clicks characteristically, then the culprit is often a discharged battery. Due to insufficient battery charge, when voltage is applied to the starter, its level in the circuit drops, which causes the traction relay to turn off. To resolve this situation, you need to recharge the battery.
The culprit for the relay clicking may also be an oxidized terminal. Because of this, the voltage in the circuit is unstable and varies significantly depending on the load. To eliminate problems, you should grind the terminal connection, clearing the oxides. If the damage is significant, the defective element must be replaced.
The main problems with the starter are divided into mechanical and electrical. Among the first, the most popular is a Bendix malfunction. During operation, it wears out, which leads to backlash. Mechanical damage to the gear and clutch is also possible. If problems arise with the bendix, it must be replaced, since it is difficult to repair.
The planetary gearbox has improved the performance characteristics of the starter. At the same time, he introduced an additional malfunction, characteristic of VAZ 2112 units. The lubricant thickens over time, this manifests itself in sluggish rotation of the crankshaft, which can ultimately lead to the fact that the car will no longer start. To solve the problem, you should disassemble the assembly, wash the gears of the gearbox and fill the planetary gear with fresh lubricant.
In the electrical part, brushes are most susceptible to wear. They wear out at the point of contact with the collector. Insufficient brush length leads to unstable power supply to the armature windings, which affects the inability to rotate the crankshaft normally. To eliminate problems associated with brush wear, you should measure their length and if it does not reach 4 mm, replace the worn-out elements.
A large current flows through the brushes and commutator. It causes heat, which under unfavorable conditions leads to thermal and mechanical damage. Small defects can be eliminated by sanding. If the damage is significant, then the failed elements must be replaced.
Also, when diagnosing the starter armature, you should check the windings for an interturn short circuit, open circuit or breakdown to the housing. This will reveal damage to conductors or insulation.
Starter replacement
You can remove the starter yourself, as the procedure is quite simple. You need to start by preparing the tools for work.
Required tools:
- Extension.
- Handle with ratchet.
- Socket head for 15 and 13 mm.
Attention! Removal can begin after disconnecting the negative terminal from the battery. This applies not only to dismantling the starter, but also to any other work related to electricity.
To make the process easier, you need to remove the air filter housing.
- The next step is to disconnect the wiring from the solenoid relay. It is important to ensure that the positive wire is also unscrewed from the terminal. The photo shows the elements that we need to dismantle.
If it is no longer possible to repair the VAZ 2110 starter yourself, then replace it with a new unit yourself in the reverse order.
Possible starter failures
There can be a large number of starter breakdowns, but most often they are all of the same type. Below are all the most common starter failures.
Brush wear
Starter brushes are a copper-graphite part that conducts electric current. The brushes are in direct contact with the starter armature and rub against its commutator, conducting electric current. During long-term use, brushes become unusable due to friction and must be replaced. This breakdown is not expensive or complicated; you just need to remove the starter and replace the brushes.
Bendix wedge
The Bendix is directly connected to the flywheel and quite often, wear appears inside it or on its gears due to high load, which makes it impossible to start the car from the starter. By design, Bendix is an overrunning clutch that rotates freely in one direction and is locked when rotating in the other direction. This part is sold separately and can be replaced as soon as possible.
Gearbox failure
The VAZ 2110 starter is geared. This modification allows you to reduce the load on the battery and rotate the engine crankshaft much easier and faster due to the additional ratios. Quite often, wear appears on the gears, which can lead to jamming or even breakdown of the entire gearbox.
Winding break
Since large currents flow in the starter, the winding in it is quite powerful and can withstand large currents, but sometimes a large cross-section of wires is not able to preserve the winding and it burns out, rendering the starter unusable. Such a breakdown can be repaired by replacing the rotor.
Solenoid relay
The retractor is an electromagnetic part that is retracted under the action of an electromagnetic force, driving the bendix inward and engaging it with the flywheel. Inside the relay structure there is a regular coil, which quite often burns out and damages the starter.
Almost all starter failures can be repaired by replacing the broken part with a new one.
Repair
You should start with the pull-out relay. You should remove it carefully, as you can easily pull out the contacts. They need to be inspected for oxidation. If there is a lot of rust, then clean the copper contacts - this applies not only to the lever, but also to the bolts.
You can check the relay using a tester:
- “Minus” should be applied to the housing, and “plus” to the flat contact coming from the ignition switch.
- There is an alternative method, where the “plus” goes to the flat contact, and the “minus” to the brushes that are installed in the housing. When working properly, you can hear a clicking sound.
If the problem is in the contacts, then you can “throw” tin on the washer. If the condition of the relay is very bad, then it is easier to replace it. The asking price is about 500 rubles. If the starter burned out recently, you may smell a burning smell. By removing the retaining ring, you can verify this. In this case, the unit needs to be replaced. It can be purchased for about 1,500 rubles.
Electric motor repair
If the traction relay is connected to the housing through a gasket, you must first remove this part, then remove the spring. Assess the condition of the relay, clean the contacts and bolts if necessary. Take the tester and connect the “plus” to the flat contact, and the “minus” to the brushes. If you hear a click, then the relay is working properly. You can leave him alone. Sniff the relay; if it stopped working recently, you may smell a burning smell.
Simply cleaning the contacts will be enough. Sometimes the relay problem is hidden in its contacts, in this case you can put a little tin on the washer.
After this, you can begin disassembling and repairing:
- Using a 10 mm wrench, unscrew the two studs used for the tie.
- Together with these studs, remove the armature connected to the stator.
- Remove the central gear shaft from the armature. Locate the two screws and remove them with a Phillips screwdriver.
- Remove the back cover and brush holder, after which removing the armature is easy.
- There is a special washer on the armature axis that regulates its operation. You need to remove it.
- Using a thin flathead screwdriver or a metal rod, remove the armature shaft support.
The anchor must be lightly sanded with fine sandpaper. In some cases it will have to be sharpened on a machine. If there are potholes on the surface of this part, you will need to purchase a new anchor. After you have assessed the integrity of all parts and carried out repairs, you should proceed to further disassembly:
- Press the starter drive gear and remove the gearbox.
- Remove the support along with the seal from the lever. Inspect the support. The rubber gasket on it may be hardened. In this case, you need to replace it.
- Carefully knock down the restrictive ring; it is located directly on the retaining ring. To do this you will need to take a hammer and a mandrel. After removing the restrictive ring, you need to remove the retaining ring.
DIY starter repair on a VAZ car
The article describes in great detail with photo accompaniment the process of repairing a starter on a VAZ 2110 car.
In a new car, breakdowns and malfunctions in the starter rarely occur. But if the car has been in service for more than 5 years, then problems may arise. The car owner himself can determine if the starter is faulty - the car will not start, there are uncharacteristic sounds when starting the engine, the starter turns off spontaneously.
But many motorists do not pay attention to such car signals. And they bring the situation to the point where it is no longer possible to “save” the starter. But an experienced motorist who monitors his car will immediately determine the malfunction of this part by the sound of the car running. So how do you repair a starter? Its repair takes place in several dozen stages described below.
How to understand that the starter has failed
New cars operate without any repairs for up to 5 years. After this period, due to wear and tear of parts, minor breakdowns occur. This also applies to the starter. It is quite easy to understand that it is not functioning correctly. To do this, you do not need to show the car to a service center specialist.
A breakdown can be determined in 2 cases: by characteristic sounds or the car simply does not start. Less experienced car enthusiasts do not pay enough attention to this. If you do not notice such small nuances, this will lead to irreversible damage to the starter. Experienced drivers do not make such mistakes and as soon as they notice extraneous knocks (sounds) they immediately make repairs.
The starter adjustment should be carried out immediately after defects are discovered, as this can save it and prevent the car enthusiast from purchasing an expensive part. For inexperienced drivers, watching a video of repairing a VAZ 2101 starter yourself can help.
The VAZ 2110 starter system is a four-band electric motor that provokes rotation of the crankshaft. A typical 3 kW of energy is enough to start a gasoline engine. Rebuilding the starter is required if it cannot fully start the engine. The starting mechanism is a continuous current motor, which is powered directly from the battery. Its system has four brushes, due to which the electric motor increases its own power by acquiring power.
