If you notice that you have to apply significant force to slow down or stop the car, and the brake pedal travel when the engine is running has decreased and become stiffer, you need to diagnose the vacuum brake booster (VBS). Replacement of VUT if necessary, it can be easily done by hand.
Before checking the vacuum brake booster, you must make sure that the hose connecting its valve to the intake manifold is tight. This can be done by visually checking its integrity or by attempting to pump air using a compressor with a pressure gauge into a hose or rubber bulb that has been removed and plugged on one side.
What is a brake booster valve
Many cars use a vacuum brake booster to increase braking force. It creates a constant flow of brake fluid into the master cylinder, increasing brake pressure and helping the vehicle stop faster. This element is very often found on cars, SUVs and pickup trucks. Over time, the brake booster can become damaged or wear out. The same thing can happen with the brake booster control valve.
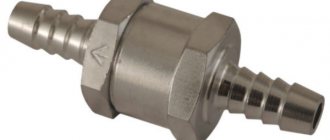
The brake booster valve is an element of the vehicle's brake system and is designed to remove air from the brake booster and prevent it from entering the cylinder. This ensures that the brake system pipes are protected from air contamination, which can seriously reduce the effectiveness of the braking system. The valve connects the vacuum booster housing and the vacuum hose - a safe technical solution that ensures the brakes work even when the engine is turned off.
Typically, the brake booster control valve is not checked during periodic maintenance. However, there are situations in which the valve may show signs of wear or complete failure. The following are some signs that can help you determine that there may be a problem with your brake booster control valve. Remember that these are just general signs. To accurately determine the cause of the malfunction and carry out repairs, you must contact a qualified specialist.
Checking the VUT check valve
The cause of poor performance of the vacuum brake booster may be a malfunction of the check valve to which the hose from the intake manifold is connected. To diagnose the latter, you need to remove the hose, remove the valve from the VUT body and put a rubber bulb from a syringe or hydrometer on it from the outside (to which the hose is connected) and squeeze it. If, after releasing the bulb, it remains compressed, the check valve is working properly.
Otherwise, it must be replaced. In a similar way, you can check the inlet hose for leaks in the absence of a compressor.
Diagnostics of the vacuum brake booster can be easily carried out in just a few minutes through simple manipulations without the use of any measuring instruments or tools. For a more objective check, try the various methods suggested in the article. Before doing this, do not forget to check the condition of the hose leading to the VUT from the intake manifold.
The main signs of failure of the vacuum brake booster control valve are a stiff or, on the contrary, soft brake pedal, as well as complete inoperability of the pedal.
Stiff brake pedal
When the brake booster control valve is working correctly, the brake pedal is pressed easily and smoothly. If the valve malfunctions, controlling the brake pedal becomes noticeably more difficult. Instead of being soft and light, the pedal becomes hard and tight. It is very difficult to press. This is due to increased pressure in the master cylinder, which the control valve is designed to regulate. Abnormalities in the brake pedal operation are a sign of possible brake malfunction and indicate the need for immediate diagnostics of the brake system.
How does a brake valve work?
Brake valves are designed to ensure smooth operation of hydraulic motors and hydraulic cylinders, limiting the speed of movement of actuators under the action of a passing load.
In lifting mechanisms, when lowering a load, the load acts in the same direction as the hydraulic motor. Under the influence of the load, the liquid will be forced out of the hydraulic motor at high speed, as a result of which the actuator can move very quickly, which can lead to shocks, breakdowns, and accidents.
In order to limit the speed of movement of the actuators, brake valves are used.
Softness of the brake pedal
As the brake booster control valve malfunction worsens, air begins to enter the brake system lines. In this case, the air that should be removed from the system using the control valve enters the master cylinder and then into the brake system pipes. This causes a drop in brake pressure and a soft brake pedal. In addition to the feeling of softness on the pedal, this entails an increase in the brake response time.
In such a situation, you should immediately diagnose the brake system. Once air enters the brake system, it becomes “locked in.” To remove it, the brake system must be bled. If you observe the described symptoms, immediately stop driving and have your brake system professionally diagnosed.
Bleeding the system
After completing any repair work that involved replacing vehicle parts, it is necessary to perform bleeding. It is carried out with the aim of eliminating air from the main line and equalizing pressure.
To work, you will need keys “8” and a cylinder, a jack, a transparent container, a hose and brake fluid. The car is driven onto a flat area. The fastening nuts are loosened, and then the body is raised using a jack. We unscrew the nuts and dismantle the wheel.
Remove the cap from the fitting, putting on the hose. The second end of the hose is placed in a container prepared in advance. At this time, you need to ask someone to get into the car and depress the brake pedal 4-6 times and then hold it down. After this, you need to unscrew the fitting with a key, but not all the way. Loosening will result in fluid leakage. We wait for the brake pedal to go down, only then tighten the fitting.
Bleeding is done until the brake fluid flows without air. All the same actions are carried out with the other wheel. The rear brakes require similar work. As soon as the procedure is completed, you need to add brake fluid to the reservoir and check the brakes on a calm road.
The brakes stopped working
In the worst case scenario, the brake booster control valve fails completely, resulting in complete inoperability of the brake system. Fortunately, such an outcome is unlikely. But if suddenly it does occur, carefully stop the car, tow it home and contact a qualified specialist in the diagnosis and repair of brake systems. Depending on the severity of the case, the matter may be limited to only replacing the valve, but serious repairs of the entire brake system may be required.
The brake booster control valve is an important element of the braking system, ensuring driving safety. That is why the presence of the described symptoms should not be ignored or postponed “for later”. Contact a qualified mechanic who can professionally diagnose and repair your vehicle's brake system.
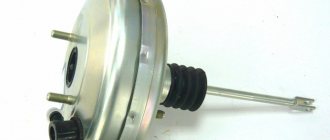
The design of the brake system of any car must include a booster. The most widely used in transport is the vacuum type amplifier, which provides additional force due to vacuum.
How to replace?
For this process you will need the following tools:
- Simple screwdriver
- Pliers
- Spanners 13, 17
- Specific wrench for unscrewing brake pipes
- It’s worth buying new fittings and plugs
The question of how to change the vacuum booster on a VAZ 2114 is a very common one. If the perception of the text is not accurate enough for you, you can always rely on our article.
- The brake cylinder will interfere with removing the booster. Therefore, you can first remove it, or simply disconnect the tube fittings from it and move it to the side. It's whatever your heart desires.
- But the cylinder is not the main obstacle. Unscrewing the amplifier fasteners is, in principle, not an easy task, or rather inconvenient. We start with the valve: remove the hose mount, pull out the support sleeve and pull out the brake pin.
- Then we take the key to 13 and begin to unscrew the 4 fastenings of the amplifier.
- Having endured troubles and inconveniences, we are preparing to install a new one in its original place. But first, you need to install a special mounting frame on the purchased amp. We wake it up with a key set to 17 and only then put it inside the car.
- The assembly sequence is simple, but an important point from the point of view of convenience is the primary action of connecting the brake (pedal) and the amplifier (all this with just a finger). And then attach the entire unit to the fourteenth.
As a recommendation, you can take the following information: when replacing the brake booster, you need to change the vacuum hose. It also does not last forever, and its wear and tear can have a bad effect on the quality of the new amplifier.
Basic device malfunctions
There are not so many types of vacuum seal failures, namely:
- Loss of tightness of the pipeline through which the vacuum is supplied, or its connection points;
- Failure of the check valve;
- Depressurization of the working chambers of the amplifier.
The first two faults are the main ones, but the third is very rare.
It is also worth noting that in most cars the vacuum pump operates from the vacuum created in the intake manifold (the pipeline connects them together).
But on some models, the amplifier is additionally equipped with a vacuum pump to increase operating efficiency. Moreover, this element can be either mechanical (driven by a camshaft) or electrical, with its own electric motor.
But these pumps are only an auxiliary element that increases the efficiency of the amplifier. In this case, the main vacuum is still taken from the intake manifold.
In cars equipped with this unit, the pump is another component that may become unusable. In this case, the booster will continue to operate, although in some driving modes the pedal force will increase.
Two way brake valves
If two brake valves are installed symmetrically in the housing, it becomes two-way and can be used to limit the speed of movement in two directions.
To supply fluid to the control channel, we will make a through channel in the spool; to separate the control channels, we will place a separating valve.
When pressure is supplied to the right channel (according to the diagram), the valve, under the influence of pressure, will be pressed against the end of spool 1 and the pressure will exert a control effect on this spool.
Let's consider the operation of a two-way brake valve using the example of a hydraulic drive of rollers.
When rotating clockwise, fluid from the pump will flow to the hydraulic motor. If the associated load begins to accelerate the hydraulic motor, the pressure in the control line will decrease, under the action of the spring force, spool 1 will shift, reducing the size of the gap through which the liquid flows, the resistance will increase, which will limit the speed of liquid outflow, and therefore the frequency of the hydraulic motor shaft.
Source
Signs of problems at work
Malfunctions of the vacuum amplifier and the components that ensure its operation are sure to manifest themselves, and quite clearly.
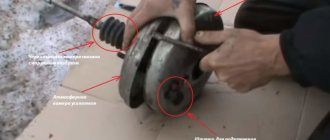
If the vacuum reservoir does not function, this will be accompanied by a “stiffness” in squeezing the pedal.
If this element completely fails, it is very difficult to press the brake pedal (to verify this, it is enough to press the pedal 4-5 times with the engine not running; on the last squeeze, the resistance will be very high).
Since the vacuum is taken from the intake manifold, the loss of tightness of the vacuum booster may be accompanied by a change in engine operation during braking (although this should not happen).
Moreover, in some cases, the speed of the power plant may drop when you press the brake pedal (even to the point of stopping the unit), while in others, the speed increases.
Everything is simple here - if there is a leak in the vacuum seal, air will leak into the manifold, which affects the proportions of the air-fuel mixture, hence the change in engine operating mode.
Another obvious sign is the appearance of hissing when the pedal is depressed. The appearance of such a sound indicates the appearance of air leaks.
As for vacuum pumps, mechanical ones can make knocking noises, and constantly (the drive rod is usually to blame for this), while in electric ones the operation noise increases, and strong heating is also possible when the motor is running (here the fault usually lies in the drive motor).
Service replacement cost
You may not be able to change the part yourself because you don’t have enough tools, knowledge, or a place where you can do it. In this case, you can contact a car service; the repair price will be around 1000 rubles, taking into account the average prices in Russia. In this case, the total repair budget will be around 3,000 rubles , unless replacement of additional elements is required. There is one important advantage when contacting a service center. When people who know their stuff work there, they will be able to identify other shortcomings of the system during the analysis and show them to you clearly so that you know exactly what you are paying for. Remember that repairs should be made immediately when the problem is diagnosed, since driving with a broken vacuum booster is very dangerous. For this repair you do not need special knowledge, so you can easily replace the vacuum booster yourself, saving a third of your budget.
Source
Checking the amplifier and related elements
Checking the performance of the amplifier is not difficult, and it does not require any equipment.
One of the simplest ways to check without the need to “climb” under the hood is done like this: with the engine off, pump up the brake system (press the pedal 4-5 times and fix it with your foot in the pressed position).
Then we start the engine. Immediately after starting, a vacuum will go to the vacuum chamber of the amplifier, as a result the pedal should go down a little. If this happens, the vacuum seal is working properly and there is no air leak.
If the brakes seem to be working, but when they are applied, the power plant changes its operating mode, you can check whether the booster is to blame for this: disconnect the pipeline from the intake manifold, and plug the fitting with a rubber plug (for this you can use a piece of a tube of suitable diameter, which needs to be clamped).
The improvised plug must be securely secured with a clamp.
Then we start the engine, let it run a little, and begin to press the brake pedal (you can do this on the road, but you should definitely take into account that the booster will not work).
How to test an amplifier?
The braking system helps you control your car and improves overall driving safety, but it all depends on many individual components, and therefore each of them must work at its best. The same applies to the vacuum brake booster, which creates power when you press the pedal, and the brakes themselves work faster and more efficiently, but, like any other element, it can fail.
This happens, of course, during operation, so the driver may find that the brakes begin to respond worse and have to apply more effort. Most problems leading to malfunctions are associated with the connecting hose, because it is made of rubber, and it tends to deteriorate. As a result, cracks appear, a change in shape occurs, and the necessary vacuum disappears in the working chamber. Sometimes a damaged diaphragm or a stuck valve can occur, which again will directly affect the brakes.
To make sure that the problem is really there, you need to perform a simple check, which the driver can do on his own. And for this you don’t even need to disassemble and remove the vacuum booster.
Simple ways to check:
The car starts and the engine should idle for no more than five minutes. Next, the engine is turned off and the brake pedal is pressed completely to the floor. Then the pedal is released and pressed again, and here the driver must decide. If the movement worsens (it becomes more difficult to press), then a malfunction is present, because this should not happen, accordingly, the element must be disassembled and examined, or even changed.
The second method is based on the fact that with the engine turned off, the driver presses the pedal about 5-6 times, and the brake is pressed and held, after which the engine turns on. If there are no problems with the vacuum booster, then the pedal should go even deeper, but if it is completely or partially faulty, then the pedal will remain in place.
The last method will help check for air leaks. You need to start the engine, hold down the brake pedal and turn off the engine without releasing it. You need to hold it for about 30 seconds, but at the same time watch carefully whether any deviations from the original position occur or not. If the pedal somehow changes position or returns to its original position, this means that there is a leak in the system.
These are simple test methods and will help determine if there is a possible problem and if the car should be sent in for diagnosis and repair. If any symptoms appear, then you should not delay inspection and repair, as the problem may worsen at the most inopportune moment, which will make braking extremely inconvenient.
In principle, everything related to the braking system is important, and therefore it needs to be regularly checked and repaired if any malfunctions occur, if the driver does not want unpleasant surprises or emergency situations in the future. If you don’t have time to do it yourself or don’t have the necessary knowledge, then it’s better to immediately take the car to a service center and entrust the work to a professional. At least the driver will not worry about potential malfunctions.
Troubleshooting
The problem with a non-working amplifier can only be fixed if the pipeline, check valve or its seal is damaged.
Troubleshooting should be done sequentially:
- we check the tightness of the pipeline clamps and the condition of the tube at the clamping points (cracks often appear in them);
- inspect the condition of the amplifier check valve seal. Over time, this rubber element delaminates due to which the tightness of the vacuum chamber is lost (hence the hissing when braking);
- We change the pipeline along with the clamps. It is inexpensive, so it is easier to change it than to check for leaks, especially since it is quite difficult to fix a crack. After replacement, we check the functionality of the amplifier;
If replacing the pipeline does not produce results, the amplifier itself must be replaced, since this unit is considered non-removable and cannot be repaired.
During the work process, it is not superfluous to check the check valve. There are two ways to do this.
The first involves dismantling this element. Next, you need to blow with your mouth into the fitting that installs the valve into the amplifier. At the same time, it must allow air flow to pass unhindered.
Then we do the opposite action - we draw in air through the same fitting. A working valve should not allow air to pass through.
If you don’t want to remove the valve, which could cause the seal at the connection to be broken, you can do this: start the engine and let it run.
Then press the brake pedal all the way, hold it in this position and turn off the engine.
If the valve is working properly, it will close (due to the lack of vacuum from the manifold), while the vacuum will remain in the vacuum chamber, so the pedal will not provide resistance (there is no need to create additional pressure to hold it).
Finally, a little about vacuum pumps. In a mechanical assembly, to eliminate knocking, some simply remove the rod and that’s it.
In this case, the pump will not work, but since it is auxiliary, turning it off will not greatly affect the performance of the amplifier (although the pedal will still become a little “harder”).
But in some cases, simply changing the position of the rod helps (turn it 180 degrees).
As for the electric pump, it is often simply replaced, since it is difficult to repair.
Failure of the “vacuum seal” is a rather rare failure, but unpleasant - to slow down and stop the car, the driver has to press the brake pedal hard. A sudden failure of the mechanism while driving can provoke an accident - the driver does not have time to change lanes and apply the required force at the right time. To identify signs of critical wear of an element, it is proposed to consider the operating principle of a vacuum brake booster (VBR) and diagnostic methods in a regular garage.
Replacing VUT on UAZ vehicles
The amplifier is removed on cars produced by the Ulyanovsk Automobile Plant according to the same principle as on VAZ cars. Let's consider replacing VUT using the example of a UAZ-31519 car:
- first of all, we unscrew the two fastenings of the GTZ to the “vacuum”, usually the cylinder is secured with nuts 17, without disconnecting the brake pipes, we move it to the side;
- under the hood, in the area of the windshield, unscrew the 2 bolts of the VUT amplifier bracket, the standard bolts are 14 mm turnkey;
- in the cabin, at the connection of the rod with the brake pedal, pull out the cotter pin; for this you will need pliers;
- remove the connecting pin;
the two lower nuts of the amplifier bracket are located in the car interior, they are turnkey 17, unscrew this fastener;
- pull off the hose from the fitting of the device, dismantle the VUT;
- disconnect the bracket from the “vacuum” - to do this, unscrew the four nuts (they are 17 mm);
- the check valve is not included with the part, so we move it from the old VUT to the new one;
- We connect the bracket to the new amplifier, carry out the assembly - we install all the parts in their places.
Design and operating algorithm
The first passenger cars produced in the last century were not equipped with “vacuum seals”. To sharply slow down the car in case of emergency braking, the pedal had to be pressed with a force of about 80 kg. The device of the vacuum brake booster installed on modern vehicles makes it possible to reduce the mentioned force to a light press.
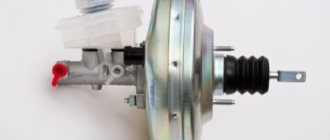
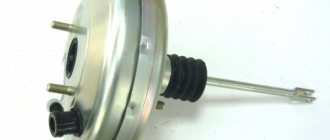
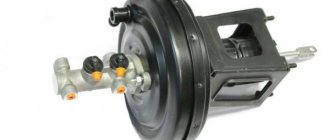
To diagnose malfunctions of this unit, you need to know its design and operating principle. The amplifier is a cylindrical metal housing, inside of which the following elements are located:
- a diaphragm pushed by a return spring;
- air valve with two channels - atmospheric and vacuum;
- in the center of the body there is a rod connected at one end to the brake pedal, the other to the main cylinder, and a diaphragm is attached to it;
- vacuum supply pipe from the engine intake manifold connected to the check valve.
In fact, the body of the “vacuum generator” is divided by a membrane into 2 separate chambers. The first is supplied with vacuum from the power unit, while in the second the air pressure is equal to atmospheric pressure. The chambers communicate with each other through the channels of the air valve, which alternately open when the driver presses and releases the pedal.
The classic vacuum brake booster works according to the following algorithm:
- Until the driver activates the brake system, both chambers communicate via a vacuum channel. Since the pressure in them is the same, the pusher and rod remain motionless.
- After pressing the pedal, the rod moves forward and the connection between the two chambers through the vacuum channel is interrupted. The valve opens another passage connecting the atmospheric chamber with outside air.
- Due to the pressure difference, the diaphragm bends towards the vacuum, thereby helping to put pressure on the pusher and the piston of the main hydraulic cylinder.
- When the driver takes his foot off the pedal, the valve produces the opposite effect - it closes the atmospheric channel and opens the vacuum channel. The pressure in the chambers is equalized, the spring pushes the membrane back to its original position.
Working principle of brake valve
Consider the design of a one-way brake valve.
A spool is installed in the valve body, which is acted upon by a spring; the preload force is adjusted by a screw. Under the action of the spring force, the spool moves to the right (according to the diagram), the belt on the spool blocks the channel for fluid movement. pressure from the control line acts on the opposite end of the spool; under the influence of this pressure, the spool moves to the left (according to the diagram), tearing off the channel for fluid flow.
Consider the operation of a brake valve in a hydraulic system.
We will install the valve in the line connected to the rod end of the hydraulic cylinder; it will operate when the load is lowered. The control line must be connected to the fluid supply line to the piston cavity.
If there is no pressure in the piston cavity, the brake valve spool under the action of the spring will block the flow area, the liquid will not be able to flow out of the cylinder rod cavity, the rod will remain in place. When the distributor is switched, the liquid from the pump will enter the piston cavity, under the influence of pressure in the control line the brake valve spool will move, opening the flow area, the liquid will begin to flow out of the rod cavity, and the load will begin to lower. But it will not be able to accelerate significantly, since as the speed of its movement increases, the pressure in the piston cavity of the cylinder, and therefore in the control line, will fall, which will cause the spool to move and the passage gap to decrease, which means an increase in resistance to the exit of liquid from the rod cavity. That is, the liquid flowing out of the rod cavity will be inhibited, this will limit the speed of the rod movement.
To ensure that when liquid enters the cylinder cavity when lifting a load, it bypasses the brake valve, install a check valve parallel to it.
In industrial brake valves, the check valve is located directly in the spool.
Signs and causes of malfunctions
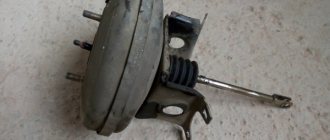
A breakdown of the booster does not lead to a complete failure of the braking system, but much more physical effort is required to slow down the car. The first and main symptom of VUT failure is a sharp decrease in braking efficiency and a feeling of “hardness” in the pedal. Other signs also appear:
- increase in free play (up to about half);
- unstable operation of the power unit, especially at idle;
- the mechanism continues to slow down the car after releasing the pedal - the brakes “stick”.
Note. The amplifier is unable to function normally without supplying vacuum from the motor. Therefore, symptoms of problems should only be checked with the engine running.
The above symptoms of a faulty vacuum brake booster occur for the following reasons:
- air leakage through a gust or loose connection of the vacuum hose;
- wear of the diaphragm leading to loss of tightness;
- failure of the air valve;
- depressurization of the housing;
- decrease in spring elasticity.
The first reason can be easily eliminated in your own garage; the main thing is to check the “vacuum unit” for functionality. Sealing connections or replacing the pipe will not be a big problem. Another issue is when the amplifier breaks down; usually the entire mechanism has to be replaced.
What to do with a faulty device?
As usual, there are two options: repair and replacement . Their choice depends on the degree of damage to the VUT. To eliminate them, you need to know the amplifier well and have a repair kit suitable for the specific model of the device in your garage.
We recommend: Changing the oil in the automatic transmission and Chevrolet Cruze engine
If the vacuum booster fails, you will have to spend more effort to brake, and the response of the braking system will be very slow. In some situations, this can lead to an accident, so if signs of failure of the VUT are observed, it should be replaced. Note that at home there is no point in trying to get the amplifier into working condition without a special set of spare parts and tools.
Methods for diagnosing VUT
If one of the above symptoms is detected, you should immediately check the vacuum brake booster for functionality without removing it from the car. Diagnosis is simple:
- Start and warm up the engine.
- Leaving the engine idling, use your hand or pliers to press down the vacuum outlet pipe leading from the manifold. Another option is to disconnect it from the fitting and plug the latter with a wooden wedge.
- Constant behavior of the motor indicates the tightness of the system. The serviceability of the air valve is checked in another way, described below.
- If the speed of the power unit has stabilized or increased, air is leaking through the VUT or supply hose.
Having determined that the amplifier is faulty, exclude the vacuum transmission hose from the list of “suspects”. Disconnect the pipe and inspect for cracks and tears. Check the condition of the clamps, install new clamps if necessary.
If sealing the pipe does not produce results, proceed to checking the “vacuum tank” itself:
- Without starting the engine, sit in the driver's seat and apply the brake 3-5 times. The first presses will be light, but on the last ones the stroke will be greatly reduced. In this case, the diaphragm draws air through the hose and pumps it inside the housing; a check valve prevents it from coming out. Remember, the atmospheric channel is closed.
- Having completed the last movement, hold the pedal depressed and start the engine.
- After starting the engine, the pedal should go down about halfway.
This brake booster test identifies problems with the check valve or air valve. If the first one is faulty, then it will not be possible to pump air into the housing - the pedal will sag all the way. A worn air valve will not open the air passage while the engine is running and the pedal lever will remain in the up position or drop very slowly.
The tightness of the VUT housing is checked as follows:
- Start the power unit.
- Squeeze the brake all the way.
- Without releasing the pedal, turn off the engine.
If the amplifier housing or diaphragm does not allow air to pass through, the pedal lever will remain depressed. Otherwise, it will return to its original position under the action of the spring. Then you need to remove the mechanism and replace it with a new one. Repairing a VUT in a garage is a rather difficult task, since the body of the element is held together by factory rolling.
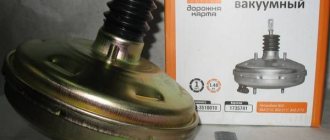
Unit cost
It is better to find out how much a vacuum brake booster for a VAZ 2114 costs directly from the stores. Since the regions are different, the price categories are different and it’s easier to navigate the area locally. The approximate cost is from 2,000 to 3,000 rubles. Installing it in the service will cost a third, or even half, of the cost. Despite the inaccessibility of the unit and some inconvenience, it is much easier to change the amplifier yourself. The frequency of breakdowns or replacements directly depends on the quality of the track, driving style and the general wear and tear of car parts, in particular the chassis. Therefore, it is difficult to say that there is any specific regulatory period. The only thing you need to remember is about timely diagnosis: sometimes it’s worth getting confused and going over your fourteenth with the eye of a caring owner. And, of course, you shouldn’t delay repairing or replacing the unit.