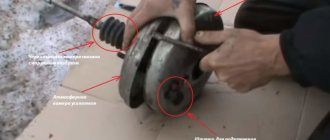
First you need to figure out what this vacuum amplifier actually is.
- This is a casing within which the valve is located. The element is structurally divided into two parts, which are separated by a layer of rubber - the diaphragm;
- One part of the amplifier is atmospheric, and the second is vacuum - it is connected to the inlet pipe from the power unit;
- The amplifier valve is a plastic casing containing the main elements that are subject to wear. It is because of them that the operation of the gearbox is disrupted. To be more precise, the gearbox begins to rattle;
- The composition of the valve is as follows: there is a rod on the bushing, adjacent to the buffer and piston. There is also the valve itself on the pusher and return springs with a filter.
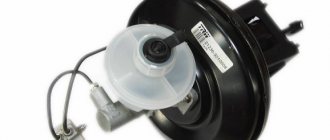
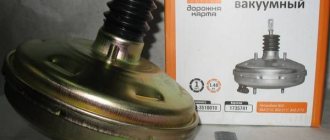
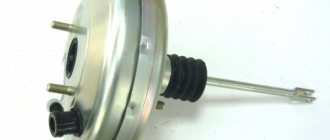
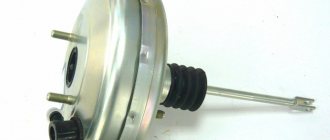
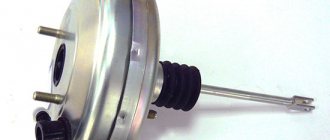
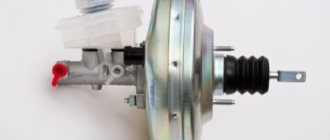
Appearance of the device
SIGNS OF MALFUNCTION AND CHECKING THE VACUUM BRAKE BOOSER
As soon as you have any doubts about whether the vacuum pump is working properly, you need to immediately check the vacuum brake booster of the VAZ 2114. It is worth noting that brakes are one of the key systems of any car, on which the life and safety of you and yours directly depends passengers, therefore, no negligence or irresponsibility is acceptable here.
Signs of a faulty vacuum brake booster, which indicate that the vacuum brake on a VAZ is broken, are as follows:
- The need to apply more force than before to press the brake pedal;
- Deterioration in the braking efficiency of a vehicle at the same pedal pressure.
As soon as any of these factors appear, immediately begin checking the spare part. To do this, you need to turn off the engine and press the brake pedal several times with sufficient force, then stop it in the middle of the range of motion (your foot fixes the pedal), and restart the engine.
If the vacuum brake booster of the VAZ 2114 is working properly, then the pedal itself will fall a little to the bottom, but if the vacuum booster fails, the pedal will remain in the same position.
After identifying the problem, you need to find out what exactly is wrong with the vacuum seal. This requires a visual inspection. In general, the inspection is carried out on the following points:
- The vacuum chamber is checked for tightness of the connection between the check valve and the pipe;
- The integrity of the fixing flanges is checked;
- A situation is possible when, due to wear in places of bends, the pipes have cracked, this is evidenced by characteristic wet marks on their surface;
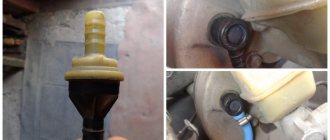
- Often the main reason for failure of the vacuum seal is damage to the shank - check the protective cap on the seal; it should not stick. Remove the cap and start the engine; if you hear a hissing sound after bleeding the shank, that’s the problem.
The process of replacing VUT with a VAZ-2114
The brakes in a car are a whole system. Accordingly, if you have already checked the amplifier, then additionally make sure that brake fluid is not leaking anywhere. Check the condition of the pedal itself. There are situations when it would be a good idea to check the brake cylinder and diagnose the entire system as a whole.
If checking the brake system did not show obvious problems, and the device we need refuses to work normally, then the VAZ-2114 vacuum booster will need to be replaced.
Please note that a malfunctioning amplifier has a significant impact on the operation of the internal combustion engine. The engine power it will produce depends on this.
general information
The design solution of the brake system of the 2114th model is almost the same for most VAZs. Therefore, these instructions will help you change the vacuum seal on many cars.
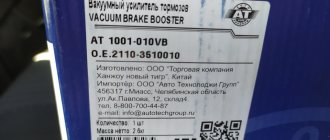
If you decide to change the device yourself, you need to read the manufacturer’s recommendations in the operating manual of your VAZ. And purchase exactly the vacuum booster whose model is recommended by the car’s creators.
During operation, the mechanical connections of parts become clogged with dust, residual working fluids, and dirt. After a long period, it becomes very difficult to unscrew such bolts and nuts. They seem to grow and become a monolith. To make work easier and not damage the surfaces, you should use WD-40: first spray a small amount of aerosol into the joint and after a few seconds, start working.
Replacing the vacuum brake booster
To ensure the safety of using the car, if necessary, the vacuum brake booster is replaced on the VAZ 2110 and 2112. After all, this auxiliary design element not least affects the braking efficiency. Timely repairs will allow you to keep your nerves safe and sound. After all, unstable brakes have a negative impact on the driver’s state of mind. The work itself to replace this device is not difficult.
But, during its implementation, you will have to tinker a little with some design elements that will interfere with you. Design Features Replacing the vacuum brake booster on a VAZ 2110 and 2112 is not a very frequent job, but still, sometimes you have to deal with it. The purpose of this part is to reduce the pressure required to operate the brakes. For this purpose, the vacuum that forms in the intake manifold is used. The amplifier itself is made in the form of a sealed metal can.
We recommend: Tire load index - meaning of symbols
It is divided into 2 parts. In one of the halves there is atmospheric air, in the other a vacuum is created. Also, there is a rod with a return spring. When you press the pedal, air is admitted into the first chamber. It presses on the rod, which is in the other half. Thus, under the influence of atmospheric air, the pressure on the pedal required to operate the brakes is reduced.
After the end of the air supply (action on the pedal), the return spring presses the rod back. This circuit only works when the engine is running, which is why the brake pedal of a stopped car is so hard. Diagnostics In fact, the failure of the vacuum brake booster is not very harmless. Especially if the failure occurs unexpectedly. The first sign of a breakdown is the brake pedal becoming sticky.
If this pedal has become much harder than it was before, then it makes sense to check the amplifier. Most likely, he simply cannot cope with his responsibilities. Often, when you press the brake, you can hear a hissing sound. Diagnosing such a malfunction is very simple. To do this, with the engine turned off, press the brake pedal 5-6 times and leave it pressed. After this, we start the engine. The pedal should go down a little, this indicates that the brake vacuum is fully operational.
If the brake pedal does not go away, then most likely there is a problem with the booster. First, check all hoses and fittings for air leaks. After that, run the diagnostics again. If nothing has changed, then it makes sense to replace the entire booster. Article on the topic “How to check the vacuum brake booster?” ReplacementAs already mentioned, the job of replacing an amplifier is not very difficult.
But you will need to remove some parts, they will interfere with your work. Before starting work, it is imperative to prepare the car. Place it on the handbrake, remove the terminal from the battery. If you have central locking, leave at least one window open. Replacement is carried out in the following order:
- The block leading the wires to the brake fluid level sensor is removed;
- The vacuum hose is removed from the branch pipe (amplifier check valve). Be sure to hold the valve with one hand;
- Unscrew the 2 nuts securing the main brake cylinder. There are washers underneath, so don’t lose them;
- Carefully move the removed cylinder to the side. Do not damage the air supply pipes of the system. Otherwise, you will have to change them, which will complicate repairs;
- At the bottom of the instrument panel, locate and remove the 4 nuts holding the brake vacuum in place. If you installed additional noise protection, you will have to remove it; Go under the hood and remove the vacuum booster from the car;
- Using a slotted screwdriver, the stopper (finger ring) is removed. Next, you can disconnect the pusher from the control pedal;
- All that remains is to tighten the nuts securing the vacuum booster to the bracket. Using a screwdriver, they are separated.
The vacuum booster is not subject to repair or restoration work. Therefore, you will have to supply a replacement part. Assembly is carried out in reverse order. It shouldn't cause any particular difficulties. Don't forget to reconnect any hoses you removed. After installing all the parts in place, check the operation of the new part. Sometimes, during work you have to unscrew the brake pipes.
In this case, you will need to bleed the brake system to get rid of air pockets. Conclusion. Proper brakes are an important safety feature. But, unfortunately, they can sometimes fail. Therefore, work such as replacing the vacuum brake booster on VAZ 2110 and 2112 may be required at any time. Although, it should be noted that this design element can be called perhaps the most reliable of this model.
Hisses when braking (with video example)
In the following video you can hear this characteristic sound:
By the way, according to the instructions, the standard “vacuum unit” of the VAZ-2110 cannot be repaired, only replaced, but we “do it ourselves.” And judging by the number of different instructions for self-repairing cars posted on the Internet, it can be argued that any domestic car enthusiast with more than five years of experience can safely be awarded the title of design engineer in absentia. Therefore, we will consider the repair procedure, especially since the difference in cost between the repair kit and the vacuum booster itself is disproportionately high.
In any case, first we will have to dismantle the VUT; for this we will need a minimum of available tools.
Tools
- Open-end and socket wrenches in sizes “10”, “13”, “17”;
- Powerful flat screwdriver;
- Repair kit or VUT assembled;
- Sealant and a little desire to do it yourself.
At this stage, we have a choice: either do everything as the manufacturer’s instructions say (disconnect the main brake cylinder from the VUT, unscrewing all the brake pipes from it, and then bleed it) or a little simpler and with little cost (simply moving it away to the side).
In any case, the choice is yours, but I will take the easy way:
- Disconnect the push rod from the brake pedal: Remove the latch and pull out the pin.
- Disconnect the block with wires from the brake fluid level sensor: Disconnect the block.
- In the engine compartment, unscrew the two nuts securing the master brake cylinder to the “vacuum chamber”:
Two nuts at “17”. - Holding the check valve, remove the vacuum pipe from it: Removing the vacuum pipe.
- It is at this point that all “manuals” require disconnecting the brake pipes from the brake pipe, but I suggest unscrewing just one nut securing the brake lines to the passenger compartment and simply moving the brake pipe to the side:
Nut at “10”. - In the cabin, under the instrument panel, unscrew the four nuts securing the brake pedal bracket:
Nuts at “13”. - We dismantle the vacuum booster together with the bracket: Dismantling the VUT.
- Having unscrewed the two nuts securing the pedal bracket and prying it up with a screwdriver, we disconnect it from the “vacuum unit”: Nuts for “17” Repair.
- We purchase a repair kit for VAZ - 2108/2109 in the store:
Contents of the repair kit. - Using a powerful screwdriver and a hammer, carefully flare the vacuum amplifier housing: Flaring.
- Since there is a return spring inside, to prevent the free half from “shooting out”, we tighten the previously unscrewed nuts onto the studs. This is the picture that opened up to us: Aperture defect.
- It will not be possible to disassemble the diaphragm further, since the pins securing it to the body are riveted. We simply remove its cuff from the body with a relatively light movement of the hand: Dismantling.
- You can see for yourself that the catalog number of the “native” and the purchased cuff matches! Catalog number.
- We install the cuff into the diaphragm body, while carefully using a screwdriver to help its edge get into the internal groove: Internal groove of the diaphragm.
- Next, lubricate the seat of the washer on the stud with the corrugation with sealant... Lubrication with sealant.
- ...and the junction of the pedal bracket with the vacuum booster housing: Sealing.
- At this point, the repair of the vacuum amplifier can be considered complete; all that remains is to carefully roll the attachment points of the previously flared halves. Installation of the “vacuum seal” occurs strictly in the reverse order.
This problem occurs when air leaks in the vacuum pipe of the brake booster. It is necessary to check for the presence of leaks both the pipe itself and its connections with the intake manifold and VUT. Since this malfunction causes depressurization of the engine intake system, the air mixture in the third and fourth cylinders becomes depleted and the engine begins to “sputter.” You can learn more about diagnosing this malfunction in this video instruction.
Functionality check
This instruction will be relevant when checking the vacuum booster on VAZ models from 2113 to 2115. So the technique is clearly universal.
- Press the brake pedal all the way to the floor about 4-5 times. In this case, the engine should not be started. Due to these presses, you will create equal pressure in two sections of your vacuum booster. The valve will report problems as soon as you start pressing the pedal. If you hear squeaks while pressing, this indicates a serious malfunction.
- Once the pressure is even, start the engine while keeping the brake pedal to the floor. If the brake booster system is working properly, then the pedal will rise by itself after the engine is started. If this does not happen, then you will definitely have to face repair work.
- If the check shows problems with the amplifier, do not forget to additionally check the quality of the hose fastening and the condition of the flange. When the mount is abnormal, this may result in the brake pedal not lifting.
We recommend: How to properly bleed the brakes of a car with ABS?
Sometimes poorly fixed fasteners cause quite expensive and actually unnecessary repairs or replacement of the vacuum booster. Conduct a preliminary check so as not to complicate your life.
When to change the amplifier
Brakes are a whole system that consists of many elements. Each of them must function correctly and efficiently.
In addition to checking the vacuum booster itself, you should inspect the condition of the brake fluid pipes, make sure there are no brake fluid leaks, and look at the current condition of the brake pedal.
If no faults were found in the braking system, you can think in more detail about the issue of replacing the vacuum booster.
There is no point in repairing the element. It's easier to start replacing right away. The functionality of the car and the power that your engine is capable of producing depend on the quality and timeliness of the work performed. Lack of power negatively affects the speed and comfort of movement around the city and beyond.
Replacement
To replace a vacuum booster you will need a certain set of tools and materials. It includes:
- Screwdriver Set;
- Pliers;
- Socket wrench for 13 and 17 millimeters;
- Special wrench for brake pipes;
- New plugs;
- New fittings.
Replacement procedure
Let's get straight to work.
- Removing the vacuum booster can be difficult due to the brake cylinder. Therefore, we advise you to remove it first. Another option is to disconnect the pipes from the brake cylinder and move them to the side for a while. Here you decide for yourself what is more convenient for you.
- The cylinder is not the main problem. It is difficult to cope with the mounting of the vacuum booster. It's just not very convenient to do this. This is the design of the VAZ 2114.
- Start with the valve - remove the hose fasteners from it, remove the support bush, after which you can pull out the brake pin.
- Next, using a 13 mm wrench, all four fasteners of the vacuum booster are dismantled.
- After all the inconveniences of the work done, you can remove the element and get ready to install a new amplifier in its place.
- To do this, you will have to install a special mounting frame. The frame is tightened with a 17 mm wrench, after which the new component is installed inside the car.
- If you want to make your work as easy as possible, do not forget to first connect the brake pedal to the booster with your finger when reassembling it. After this, it is much easier to cope with putting the vacuum seal back into place.
When replacing the vacuum booster, be sure to change the old vacuum hose at the same time. This element is far from eternal, therefore, as it wears out, it will negatively affect the quality and efficiency of the new vacuum seal.
Troubleshooting methods
What signs may indicate that the unit requires replacement?
- When applying the same force, the braking process becomes more difficult.
- When you apply pressure to the brake pedal, the speed begins to drop.
- The engine is adjusting.
- The appearance of hissing noises when the brake is pressed while driving. In this case, it is possible to increase engine speed.
- Inadequate operation of the brake pedal.
- Increased fuel consumption.
The results of a simple inspection will tell you whether the device needs to be replaced.
- Method No. 1. With the engine off, vigorously pump the brake pedal to the floor 4-5 times. Detection of creaking or hissing or other extraneous noise during these manipulations indicates that there are serious malfunctions. After this, holding the pedal in the lowest position, turn on the engine. A vacuum will begin to create in the VUT chamber. The pedal should move on its own. If this does not happen, then the breakdown is serious and repair is inevitable.
- Method No. 2. Let the car idle for 3-6 minutes. Silence it. Fully press the pedal (creating a vacuum in the chamber of the device) and release. Repeat again. If the stroke of the lever changes with each subsequent press, it means that creating a vacuum is difficult. Therefore, replacement of the problematic device is required.
- Method No. 3. Start the engine and squeeze the brake lever all the way. Turn off the engine and release the pedal. If it doesn’t move within half a minute, then everything is fine. The opposite result is a signal of a malfunction.
Sometimes deviations appear due to a broken fastening, flange failure, or mechanical damage to the vacuum hose. Therefore, in order not to complicate the situation, the inspection should begin by checking these positions.
At the same time, the condition of the brake pipes and their connections to the body, those places that are potentially places of leakage of special fluid, is examined. Which outwardly manifests itself in the form of streaks on the housing of the vacuum booster or brake cylinder.
Changing a unit yourself is not difficult if you have at least some mechanical skill and understanding of the design of the car. To replace it yourself, you will need the vacuum unit itself, some tools and parts.
NECESSARY TOOLS FOR THE JOB
Upon completion of the diagnosis, when the need to replace the part is obvious, before starting work it is necessary to prepare the tools and spare parts required for replacement.
First of all, purchase a new vacuum brake booster for your VAZ 2114; we also recommend replacing the connecting hose at the same time if it shows any signs of wear.
Replacing the vacuum on a VAZ 2114 requires the following tools:
- Pliers;
- Open-end and socket wrenches with a diameter of 10, 13 and 17 mm;
- Screwdriver.
Look at the condition of the plugs and fittings; you may need to replace them too, so when purchasing the necessary materials, do not forget to purchase them.
Checking the serviceability of the amplifier
In this section we will tell you how to check the performance of the vacuum brake booster on a VAZ-2114. All of the recommendations given can be used when checking the unit, both on the thirteenth and fifteenth car models.
To check, follow these steps:
- Press the brake pedal all the way about 5 times with the engine off. This action will create uniform pressure in both components of the VUT. When the brake is pressed, the valve will immediately release itself. If you notice a squeak, this is a clear signal that the part needs to be replaced.
- As soon as the pressure is uniform, you need to start the car while holding the brake pedal to the floor. If everything is fine with the unit, the pedal will rise after starting the internal combustion engine. Otherwise, repairs will need to be made to replace the device.
- When you have already realized that the part needs to be replaced, you need to additionally check how well the hose is fixed, as well as the condition of the flange. If these elements are in a condition that does not meet the standard, this may affect the performance of the amplifier. Accordingly, in this case, you may need to tighten the fastenings and the problem will solve itself.
We recommend: Replacing the crankshaft oil seal Lada 2107 (VAZ 2107)
How does he work
Before you begin to repair or replace a particular component or unit, you need to understand how it functions.
The vacuum booster works as follows:
- The driver presses the brake pedal all the way to the floor;
- At the same time, the piston and pusher move, opening the space between the two sections of the device;
- After this, a vacuum section moves into the formed space and takes all the air;
- The air presses on the damper between the parts of the amplifier, which causes a pressure difference in the two parts;
- The pressure difference causes the stem and valve to move;
- When the pedal is lowered, all elements return to their places, the system turns off.
A decision regarding repair or replacement of the vacuum booster can only be made on the basis of the inspection performed. It is quite possible to inspect the device yourself.
How to replace the vacuum brake booster on a VAZ 2110-VAZ 2112?
Removal: 1) First, unscrew all the screws that secure the soundproofing material (Most of the nuts are indicated by red arrows), then unfasten the belt securing the expansion tank of the cooling system (the tank is indicated by a blue arrow) and slightly lifting it up, remove it from the place where it is located.
The hoses are connected to it, do not disconnect them under any circumstances, otherwise liquid will flow out, which will stain your car. Of course, you can put some kind of container and drain all the liquid from the expansion tank, but why do this if you can do without it and the work will go much faster), then carefully place the tank somewhere and fix it and then take out the left (look in the direction of the car) part of the soundproofing material and put it aside.
Note! The same thing will need to be done with the right side, in order to remove it, you first need to move the rear window washer reservoir to the side (On VAZ 2110 cars, this reservoir is not present, it is only present on the VAZ 2111 and VAZ 2112), to do this, disconnect the two wires that fit it (see photo 3), unfasten the belt that holds it (see photo 4) and carefully remove it.
If there is a lot of liquid in the tank, then you don’t have to remove it, just carefully place it on the fender, but if there is none or you have pumped it all out, then disconnect all the remaining tubes from the tank and after that, remove it completely from the car) and to complete the removal on the right side of the soundproofing material, use a 10 mm socket wrench, unscrew the two nuts (see photo 1) and with a thin flat screwdriver, pry up the brake booster hose holder (see photo 2) and disconnect it too, and basically, you can take it out soundproofing material so that it does not interfere with the removal of the vacuum brake booster from the car!
2) Now that the soundproofing material is removed, disconnect the wiring block from the brake reservoir cap (Indicated by a red arrow), then disconnect the hose from the check valve of the vacuum brake booster (Hose indicated by a green arrow) and unscrew the two nuts (Indicated by blue arrows) securing the Brake Master Cylinder to the brake booster, then carefully move the GTZ to the side, but just be careful, make sure that the brake pipes do not burst, otherwise you will have to change them.
3) After the operation has been completed, move to the salon and there unscrew the four nuts that secure the vacuum booster bracket to the body (Indicated by red arrows), and also disconnect the wire blocks (Indicated by blue arrows) from the brake light switch (Indicated by green arrow), when everything is done done, you can move again to the engine compartment of the car and, once there, pull out the vacuum booster assembly with the bracket.
4) Having placed the vacuum seal on the ground or secured it in a vice, first of all, pull out the metal stopper with small pliers (Indicated by the red arrow), then carefully knock out the rod (see small photo, it is metal and comes out very easily), pressing on it from above or vice versa from below .
5) And finally, unscrew both nuts that secure the vacuum seal to the bracket and remove it, this completes the operation of removing the brake booster.
Installation: Install a new brake booster in the reverse order of removal, during installation, do not make a mistake and do everything exactly the same as before, when it is installed, do not wear soundproofing material, but try how it works (How to check the brake booster, we have already wrote above), if everything is fine, complete the installation of all parts as they were previously.