Every person who knows even a little about cars knows perfectly well what a starter is and what it is needed for. To briefly describe its purpose, it is necessary in order to start the engine. It is a DC electric motor, which has quite a lot of power. Of course, every component and unit in a car tends to become unusable, and the starter is no exception. This means that at some point you will have to start repairing it. This article will discuss how to remove and install the starter on a VAZ 2107 yourself. Separately, it is worth noting that this car, as a rule, has an injection power system, but you can also find a carburetor “seven”.
If you do everything yourself and with high quality, you can save a lot. The main thing is to approach the procedure with full responsibility, because there will be no one to blame if something happens.
Dismantling process
Removing the starter on a VAZ 2107 begins with the fact that you need to detect it. This point concerns beginners, because experienced drivers know where the starter is located. Located near the bottom of the power unit. It will not be possible to remove it while on the ground. You need to drive the car either into a pit or onto an overpass. In fact, awkward placement is the biggest problem in the removal and installation process. Otherwise, everything is very simple and convenient.
The actual dismantling process is as follows:
1. First of all, you need to remove the battery terminals. 2. Some 7 models have a mudguard, it is installed under the engine. It needs to be dismantled. 3. Remove the battery. 4. Unscrew the clamp of the wiring harness going to the starter. 5. Remove the wires from the traction relay. 6. Remove the stretch marks that come from the inlet pipeline. 7. The starter itself is removed.
The dismantling process is completed, and now you can take the starter for repairs, or replace it with a new one.
The above describes the process that is performed on cars with an injection power system. Do not forget that there are VAZ 2107 models with a carburetor installed. In such cars, the dismantling process has minor differences. The carburetor model does not have an intake pipe or stretch marks from it. This means you need to do this:
— Remove the wires from the traction relay. — Remove the air duct and the air filter. — Remove the starter.
Actually, the difference from the injector is only in one point, as you can see. As for the malfunctions that may occur, most often drivers are faced with the fact that the starter does not turn. In this case, it is better to install a new one, but you can send the old one for repairs, in the hope that a good repairman will come across who can fix everything.
Replacement technology
First of all, you need to disconnect at least one of the wires from the battery, as well as all the wires from the starter. Then you need to unscrew the bottom bolt that secures the starter and screw it in on the reverse side to secure the engine to its front mount. Otherwise, the motor may move forward. After this, you need to unscrew the remaining two bolts that secure the starter and remove it from the car. As mentioned earlier, the bushing is built into the clutch housing. To remove it, you need an M12 tap, as well as a drill chuck. The tap will have to be inserted into the chuck, then clamped, after which it must be carefully screwed into the sleeve, thereby cutting the thread. Great care is required due to the fact that the steel of the tap is very fragile and even a slight misalignment with the applied force can lead to its breakage. In this case, the shank will remain in your hands, and the cutting part will remain inside the sleeve. It would seem that the situation is hopeless. However, it is not. The length of the sleeve is approximately 14 millimeters, which means that there is approximately 10 or 20 mm of the cutting part of the tap on the hands. You need to take a regular nut with exactly the same M12 thread and screw it onto the broken tap. In a situation where the tap is broken off so that it is impossible to screw a nut onto it, you can take a bolt with a corresponding thread about 10 centimeters long and grind grooves on it similar to the grooves of the tap. Or you can do it more radically, but at the same time simpler. Go to the store for a new tap. The tap is equipped with three grooves into which you need to insert nails of the appropriate size. This must be done in such a way that their ends protrude beyond the end of the tap by about 10 mm. Try to insert the resulting structure into the sleeve with the broken end of the tap. It may not work out right away, but with the right amount of persistence the operation can be easily accomplished. After this, you can try to unscrew the piece and try to unscrew the bushing again. As a rule, after a few turns the bushing will begin to rotate and can be carefully unscrewed. If the bushing is very stuck, you will have to cut the thread in it approximately 6 or 8 turns. After this, remove the tap, and in its place screw in a bolt of a suitable size and use it to remove the sleeve. When a new one is inserted in its place, it is slightly pressed in.
If the replacement is not happening for the first time, then the bushing can be inserted quite easily by hand. But during long-term operation, this can lead to it turning in the mounting hole. Over time, the mounting hole will break up, forming the so-called eccentricity, and the starter shaft may become misaligned. This means that the starter will stick and the engine will not be able to start. However, this is quite easy to fix. To do this, it is necessary to determine the size of the so-called eccentricity. Then you need to machine or order from a specialist a bushing with a larger outer diameter just to fit the eccentricity. You should solder some solder on the side of this bushing. After this, the bushing will fit in with a slight interference fit.
It is worth noting that a starter without a gearbox has a larger gap between the armature and the stator than a geared counterpart. For this reason, its permissible shaft misalignment is also greater.
And one more piece of advice. If the starter is still disassembled, then it would be a good idea to replace the brushes. The parts are cheap, so waiting for them to fail and then dealing with them separately is not worth it. Of course, for all the operations described above, at least a little experience is required. And, as you know, he is a profitable business. In the end, to get it you have to try. Go for it!
Detailed installation process
In order to correctly install the starter, you must adhere to the following points:
1. Conduct a visual inspection of the device. 2. Installation of the device in its original place. First fasten with a long bolt, and then with two short ones. 3. Install the wire terminals and tighten the nuts. 4. Replace the battery. 5. Connect the terminals on the battery. 6. Install the braces coming from the intake pipe or air duct and air filter. 7. Replace the mudguard (if equipped).
After everything is done, you should start the engine. If everything works as expected, then the starter connection is made correctly. If the engine does not start, you should look for where the error was made.
Helpful information
Of course, every driver wants his car to be the best. Often, due to the fact that the design of some individual parts is already outdated, this cannot be achieved. This also applies to the starter on the “seven”, which is already quite old. To correct this oversight, some people prefer to install a gear starter. What is his task?
It is designed to transmit rotation of the starter shaft to the flywheel through a gearbox. This method makes it possible to reduce the weight of the starter several times, and at the same time increase the starting torque by almost half. It is easy to guess that in this case the starter will work much longer.
All that remains is to purchase it and install it, the result will be visible from the first turn of the ignition key. The car will start like never before.
Assessing the scale of the problem
If, when you turn the key in the ignition switch, the starter does not turn, no clicks or sounds are heard, then the reason may be this:
- the battery is discharged or faulty;
- battery contacts are oxidized;
- problem with the contacts of the starter itself;
- a break in the windings of the device or the electrical circuit of the car.
When the starter turns slowly, clicks of the traction relay are heard, the reason may be this:
- there is a charge in the battery, but it is not enough to properly spin the moving parts of the starter;
- carbon deposits have formed on the contacts or they have oxidized;
- worn brushes or burnt commutator;
- short circuits in windings or brush holders.
Starter brush wear
Repeated operation of the relay and its spontaneous shutdown can be caused by a voltage drop in the network due to oxidized contacts or a malfunction of the traction relay. When the starter turns, but the flywheel does not rotate, there may be several reasons:
- problem with the freewheel (Bendix);
- drive or flywheel teeth are damaged;
- The bearings or springs of the traction relay are worn out.
These are perhaps the main malfunctions and their most common explanations. They are equally valid for carburetor models and injectors.
VAZ 2107 starter repair
The starter is not the most complex and expensive unit to maintain. But it is one of the key components of the car.
You turn the ignition key, the lights on the dashboard are on, but the starter does not turn, the engine does not start? There are two reasons:
- faulty contact supplying current to the starter relay;
- The starter itself or the relay is faulty.
In the second case, the starter must be removed, checked, repaired and reinstalled. The repair process is quite complex and deserves a large separate article. Here we will tell you how to replace the VAZ 2107 starter (carburetor, injector) and check its performance.
Diagnostics of faults in the VAZ 07 model starter
- no rotor rotation;
- clicks when trying to start;
- extraneous sounds when the device is operating.
Starter won't start
The electric motor does not work due to battery discharge or winding failure. When the battery is discharged, the lighting devices do not turn on or the lamps glow dimly, and when you try to start the engine, a click is heard, after which the indicators go out.
Crackling sound when starting the starter
A cracking sound indicates a breakdown of the solenoid relay, which cannot engage the rotor gear with the flywheel ring. The repair consists of checking the wiring and measuring the resistance of the windings. A damaged relay must be replaced.
The starter clicks but does not turn over
The defect indicates insufficient voltage in the power supply due to battery discharge or oxidation of the contact pads. When the battery is low, the clicking sound is accompanied by a decrease in the brightness of the lamps. The defect is observed when there is poor contact between the battery contacts and the wiring terminals.
The starter hums but the engine does not start
The reason for the hum is that the bendix is jammed; the relay cannot move the gear to the flywheel. To check it is necessary to remove the electric motor. After cleaning the starter from dirt, performance is restored.
Removing the VAZ 2107 starter
In the "seven", as in most cars, the starter is located at the bottom of the engine near the gearbox. Work to replace the starter must be carried out on a pit or a lift in order to have free access to the mounting bolts and power supply terminals. Actually, the only problem when dismantling/installing the starter is its inconvenient location. The work does not require special tools or training.
It is necessary to remove the VAZ 2107 starter (injector, carburetor) with the battery disconnected. Otherwise, the “positive” wire running from the battery to the traction relay contact may cause a short circuit. Dismantling work is carried out in the following order:
Disconnect the battery terminals (you can remove the battery, it will be easier to work without it).
This is interesting: How to adjust the carburetor on a VAZ 2109
Remove the dirt shield if it is installed at the bottom of the engine compartment.
Unscrew the fastenings of the wiring harness that go to the starter.
Unscrew the nuts and disconnect the control and power wires from the traction relay.
Unscrew the two upper and one lower fastening bolts (One of the upper ones is located extremely inconveniently, so some “masters” do not put it in place after unscrewing it. This weakens the fastening and can lead to breakage under conditions of dynamic loads and vibrations on the unit) .
Remove the starter by lifting it down under the car.
After this, you can check the functionality of the starter and, if necessary, repair or replace it.
Starter VAZ 7 models (from 01 to 07)
The commutator-type electric motor used to start the engine is located on the side of the crankcase of the power unit. The parts are connected to each other by bolts with a hexagonal head. Power is supplied from the battery.
The power of the device is sufficient to rotate the crankshaft at air temperatures down to -35 ° C (without preheating the oil). The appearance and design of the device are shown in the photo in the spare parts catalogues.
Removing the starter and protective screen
To repair the starter, it must be removed from the car. If the car is relatively new and the starter has not yet been removed, then the heat-reflecting protective screen is in its rightful place. It will prevent you from removing the starter, so you need to remove it first.
The protective screen is attached on top to two studs with 13 nuts and on the bottom with a 10 head bolt. And if the nuts can be unscrewed with a simple wrench, then to unscrew it you will need a long thin socket wrench. Many, having removed the protection, do not put it back in place, but it is better to do it anyway. Without it, the starter gets very hot from the exhaust manifold, especially in summer in traffic jams.
Starter guard and bottom bolt location
Video of starter removal
Purpose
The device is designed to force the engine crankshaft at startup. The product is equipped with a special Bendix clutch, which engages with a ring gear mounted on the flywheel of the power plant. The electric motor is controlled remotely using a contact group in the ignition switch through an additional relay.
Starter electrical connection diagram
There are 2 types of electric motors for starting the power plant:
- On cars with a carburetor, a standard starter is used; torque is transmitted directly from the rotor to the ring gear.
- On some carburetor cars and VAZ 07 with an injector, a gear type drive was installed. By using a planetary gear, the current in the power circuit is reduced and the torque is increased.
Checking the VAZ 2107 starter
Before checking the starter, it is necessary to thoroughly clean it of dirt.
Then you should make sure that the traction relay is working. To do this, you need to apply “minus” to the starter housing and “50” to the terminal. A working retractor (traction) relay will push the starter gear forward, and a characteristic click will occur. If the relay is working properly, you need to check the starter windings using a multimeter. To access the winding, the brush assembly must be removed. The check is carried out in two stages:
- Check for short circuit. Connect one probe to the body, and touch the winding terminals in series with the second. If the winding is not closed, the resistance must be at least 10 kOhm.
- Check for a break. Connect the probes of the device to the terminals of the windings. In case of a break, the multimeter will show “infinity”.
Next you need to check the armature winding. If the armature is not closed, the resistance between the housing and the contact plates should be above 10 kOhm.
If the VAZ 2107 starter (carburetor, injector) has shorted or broken windings, it needs to be replaced. It is practically impossible to rewind the winding in a workshop.
Starter performance check and repair
First of all, you should clean the starter housing from dirt, which inevitably accumulates on it during the operation of the car. Then connect the mechanism to the battery: the “negative” wire to the starter housing, the “positive” wire to the contact of the traction relay. A characteristic click should follow, and a drive gear will appear in the front “cutout” of the casing. Now use an ohmmeter and check the armature windings for opens and shorts. To do this, you need to open the cover at the back of the starter and remove the brush holders with brushes.
Then connect the ohmmeter with one end to the armature body, and the other - alternately to the sectors of the winding. If there are no short circuits or breaks, the instrument needle will fluctuate from a minimum value of 10 kOhm and above.
Now comes the integrity check of the stator winding (in other words, located inside the housing, along the walls of the cylinder). Here you simply connect the ohmmeter contacts to the copper wire terminals. The arrow of the measuring device should “lie” in the area of the highest value if there are no problems. If there are breaks or short circuits in the windings of the starter or solenoid relay, there is no point in bothering with repairs if you have never dealt with electromechanics and have not encountered the technology of manufacturing electric coils. It is best (and easier) to purchase a complete starter and install a new starter.
Checking the integrity of the stator winding
An operation that can really be called a repair is replacing brushes. You can easily find out that they are erased during diagnostics. It is enough to turn the starter on its side when it is connected to the battery and turns properly. If the unit immediately stalls, brush wear is to blame. Replacing parts is simple and accessible even to a beginner. It was already mentioned above that it is enough to remove the cover at the rear of the starter. When the brush holder is removed, the springs in it will themselves push out the brushes, which will hang on the wires. Replacement is a matter of minutes.
The main thing is to never allow oil or fuel to come into contact with brushes or wire windings. Electrics do not tolerate moisture or grease. Therefore, during any operations with starter parts, especially when assembling it, act carefully and, if possible, stay away from liquids and fuels and lubricants.
There is one rare malfunction when the starter turns on, but nothing turns. In this case, the bendix is to blame - a device that prevents the teeth of the drive gear from sharply hitting the flywheel. Its main malfunctions are wear of the rollers, the gear itself, weakening of the pressure spring or unsuitability of the lubricant. This part is inexpensive, changes quickly, and therefore there is no point in bothering with repairs. It is better to purchase it in a store; replacement is done on the “return” when the starter is being assembled.
Sometimes the armature bushings need to be replaced, but this is extremely rare because they are made of very reliable material and wear only appears after a really long period of use. There are only two of them - in the toe and back cover. The process of knocking the bushings out of their seats is usually confusing, but by choosing the right attachment, you won’t ruin anything. Next, a part of the required diameter is lubricated and pushed into the hole. If things get tight, don’t use more force; it’s better to sand the bushing body and try again, otherwise the socket may simply burst.
- “They moved my car onto the lawn, and it turned out to be my fault” - the story of a motorist who suffered because of utility workers
- 6 Mercedes that were officially imported to the USSR
- 4 ways to deceive drivers in tire shops
- 4 mistakes when transporting cargo on the roof of a car that can lead to serious damage
- Advice from psychologists: how not to look at a traffic police inspector to avoid problems
- Celebrities who collect cars
- I found out why people buy used oil - you need to be careful
- “I was charged money for an accident in Volgograd, although I did not have an accident and had never been to this city,” is the story of our subscriber
Installation of VAZ 2107 starter
The work of installing a starter is not difficult, but it is extremely responsible. Therefore, before installation, it is necessary to carry out a visual inspection, check the equipment, make sure that the starter is working, and that the starter centering sleeve is present.
To “return” the starter to its normal place, you must perform the following operations:
Place the starter in its original place and fasten it with the longest bolt, then with a pair of shorter ones.
Install the power and control wires, tighten the terminal fastening nuts.
Screw on the starter wiring harness support.
Install the battery and connect the terminals to it.
Install (if equipped) a mudguard.
Advice: to make it easier to remove and install the VAZ 2107 starter, before starting work, you should remove the air filter on the carburetor engine or the inlet pipe stretch on the injector.
Mechanism repair and installation
After removing the starter from the car, we disassemble it and inspect the components. Particular attention is paid to the condition of the bendix and sliding bearing bushings; the housing must be disassembled for inspection. Carefully remove the brushes from their sockets and clean the commutator of dirt. We assemble the device and check its functionality using the battery.
Installation of the VAZ 2107 engine starting mechanism is carried out in the reverse order of removal. If during testing it is revealed that the starter cannot be restored, it is replaced with a new one. If an injector is installed on the car, after connecting the battery, it will take some time to create the necessary pressure in the gas line. The engine should be started only after the pump has stopped running.
Source
How to remove the starter on a VAZ 2107
The starter is an integral device of any modern vehicle with an internal combustion engine. Without going into details, we can characterize the starter as an electric DC motor, which has a fairly large power and is responsible for starting the car engine. The starter, like any other part, wears out and fails over time, so sooner or later any car owner may be faced with the need to dismantle it for the purpose of further repair or replacement. Today we will talk about how to remove the starter on a VAZ 2107 in a garage without the involvement of third-party specialists. If for some reason it is not possible to carry out this work yourself, then the car can be made available to the service station workers, but in this case you must be prepared for additional financial costs.
Purpose of the starter and its location
The “ten” has a small, but quite powerful 4-band electric motor, which is responsible for the primary rotation of the crankshaft. Without the participation of an electric motor, it is impossible to ensure the required crankshaft rotation speed. We replace this unit, since for a gasoline engine with an average cylinder capacity, 3 kW of energy is enough to start.
The starter supplies energy from the battery; it is a DC motor. Receiving voltage from the battery, the motor power is increased by four brushes. They are the main elements in any car starter. If necessary, the brushes can be replaced. If the starter meters are faulty, they can be purchased separately and replaced. But to do this, in any case, you will first need to remove the starter.
Preliminary work
We install wheel chocks
Performing a few simple steps related to preparing the VAZ 2107 for repair work will significantly save your time, improve the quality of maintenance and will guarantee the safety of your health.
- The place where the machine will be serviced must have good and uniform lighting. In some cases, this can only be achieved through the use of additional lighting.
- Due to the fact that the starter in the VAZ 2107 is located in the lower part of the engine, work on its dismantling should be carried out on an overpass or inspection hole. It is not possible to remove the starter from the top.
The machine must be securely secured using the parking brake or wheel chocks. Otherwise, there is a possibility that the vehicle will start moving spontaneously.
Instructions for dismantling the starter on a VAZ 2107
Disconnecting the battery
- The first step is to de-energize the machine's electrical network by disconnecting the battery.
- Next, you should remove the mudguard, which will be present if the “seven” has an injection-type engine installed.
- The fastening bolt, located at the bottom of the starter shield, is unscrewed using a socket wrench (the throat size of which is 10 mm) with an extension.
Unscrew the nuts
- At the next stage, the three mounting bolts securing the starter with the clutch housing are unscrewed. To do this, use a 13mm socket wrench.
- If the car is equipped with a carburetor-type engine, then the air duct and air filter must be dismantled. If the engine is of an injection type, then the intake manifold extensions must be removed.
Removing the starter
- Using a 13mm socket wrench, the fastening nut located on the starter shield is unscrewed, after which the shield itself is pulled out.
- At the final stage, you should unscrew the fastening nut connecting the electrical wires of the starter and the battery, after which you can remove the starter.
Installation of the starter is carried out strictly in the reverse order.
Work order
- We place the car on a viewing hole or overpass and secure it with the parking brake.
- Open the hood and disconnect the ground wire from the battery.
- Using a 10mm socket, unscrew the bolt of the lower fastening of the starter heat shield.
- We dismantle the air filter housing and the warm air supply hose (for injection units, remove the fastenings of the intake pipeline).
- Using a socket wrench with a 13 mm extension, unscrew the 3 bolts securing the starter housing. It is better to unscrew the bottom bolt from the inspection hole.
- Using a 13mm wrench, unscrew the nut (on the injection engine there are two nuts) securing the starter shield. Let's take it out.
- Using a socket wrench with a 13 mm extension, unscrew the 3 bolts securing the starter housing. It is better to unscrew the bottom bolt from the inspection hole.
- Using the same tool, unscrew the nut securing the tip of the wire going to the “+” battery.
- Disconnect the start relay wire.
- We remove the starter from the rear wall of the engine compartment.
- We install a new starter in its place.
- We carry out installation work in reverse order.
What to do first?
Disassembling the mechanism is not a priority task, since the starter’s power supply is connected to the battery, so you need to start with it. If the car is not too old, it is unlikely that the problems will lie in the design of the starter itself. It is enough to clean the contacts of the battery or the device itself for everything to work again in the desired mode.
Difficulties begin when the machine has worked for a long time and its operation has not been delicate. If, after a complete check of the electrical equipment of your VAZ 2107, the starter still does not start or continues to work intermittently, then the reason is inside the device and it is necessary to remove and disassemble the starter. On this model, both in carburetor and injection versions, it is installed rather inconveniently. To get to it normally, you will have to drive the car onto an overpass or inspection hole.
Disassembling the VAZ 2107 starter
After the ignition is turned off, you can begin the “operation”. It must be done in the following order:
- remove the ground terminal from the battery;
- if there is a protective mud casing at the bottom, then it must be dismantled;
- remove the electrical wires from the solenoid relay;
- unscrew the three mounting bolts (two upper, one lower);
- remove the starter.
As you can see, nothing complicated. The only thing is that in the case of an injection model, mechanics advise removing the inlet pipe extensions as well. Now we have to disassemble the device itself.
Replacing the starter on a VAZ 2101-VAZ 2107
Welcome! Starter - after all, but without it it would be difficult, because if this unit does not exist, then who will start the car? Of course, you can get out of the car, push it a little and turn on the speed and it will start, but why are such difficulties necessary? That's why a starter was invented, thanks to which the car can be started only by turning the ignition lock cylinder. But over time, this unit breaks down and therefore it has to be replaced with a new one, but not everyone knows how to replace it, and therefore we have especially prepared for you instructions in pictures on how to replace the starter on cars of the “Classic” family.
Note! To replace, you will need to stock up on: A basic set of “10” and “13” wrenches, and you will also need to take with you a screwdriver, a “10” socket and an extension for this head!
Summary:
When should you replace the starter? It needs to be changed if:
- It began to turn very poorly and therefore he began to start the engine of the car for a long time. (In this case, the starter can also be repaired; for information on how to repair it, see the article entitled: “Repairing a starter on a VAZ”)
- It also needs to be changed if it has stopped starting the car’s engine altogether and thus it is no longer subject to repair.
This is interesting: Reasons why the speedometer underestimates the true speed of the car
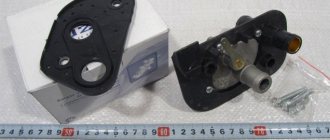
Cleaning nickels from carbon deposits on the solenoid relay
All this is best done on a removed part, which you can read about here. After this, you need to use a deep socket and a wrench to unscrew the three nuts securing the cover to the body, as is clearly shown in the photo below:
When all the nuts are unscrewed, you need to press on all the bolts from the same side and pull them out from the back:
Now carefully fold back the relay cover, but not all the way, as the wire will get in the way:
Pay attention to the central copper plate: it will definitely need to be cleaned of plaque and carbon deposits, if any. Also, you need to unscrew the nickels themselves (two in total) by unscrewing the two nuts on the outside of the cover:
And then you can take them out from there with your hands, from the back side:
Also clean them thoroughly with fine sandpaper until shiny:
After completing this simple procedure, you can put everything back in place in the reverse order. If the problem was precisely the burnt nickels, then it will definitely disappear!
How to replace the starter on a VAZ 2101-VAZ 2107?
Note! Before you start replacing this unit, be sure to make sure that its performance is not due to other reasons, for example, the battery is discharged, or its terminals are oxidized, or the wiring that goes to the starter is not working properly!
And also take into account the fact that the starter must be replaced in an inspection ditch, otherwise it will be inconvenient and very problematic to remove from the car!
Removal: 1) First, loosen the clamp that secures the warm air supply hose to the air filter housing.
2) Then loosen the clamp that secures the hose to the air intake itself.
3) And then remove this hose from the car engine.
4) Next, loosen the lower nut that secures the air intake.
5) Next, unscrew the top nut that secures the same air intake.
6) And then remove this air intake from the car engine.
7) Now remove both nuts that secure the heat shield to the engine.
 And then, using an extension joint with the socket head, unscrew the remaining bolt that secures the heat-insulating shield to the right engine mount bracket. (For information on how to unscrew the remaining bolt that secures the heat-insulating shield to the bracket, see the very bottom of the article in the “For Beginners!” section)
9) After unscrewing the bolt, remove the heat insulation shield from the engine.
10) Next, unscrew the bottom bolt that secures the starter.
11) Then unscrew the remaining two upper bolts, which also secure the starter.
12) Moving the starter a little forward... (Continued in point 13)
13) Disconnect the wire block from the starter traction relay terminal on the starter.
14) Then unscrew the nut that secures the wire to the upper contact of the traction relay.
15) And then disconnect the wire from the upper contact, and also remove the bolt and nut that held this contact.
16) Next, remove the starter from the car engine.
Installation: 1) Installation of a new starter is carried out in the reverse order of removal.
Important! 1) Before starting work, disconnect the negative terminal from the battery! (For information on how to disconnect this terminal, see the article: “About the battery”)
For newbies! Question: How to unscrew the bolt securing the heat-insulating shield to the bracket of the right engine mount. Answer: Using an extension joint with the socket head “2”, unscrew the bolt “1” securing the heat-insulating shield to the bracket of the right engine mount.
Additional video: To understand in more detail how to replace the starter, watch an interesting video in which the replacement process will be described in detail:
Fuse box VAZ-21074 injector
- 1-Rear window heating relay
- 2-Relay for headlight cleaners and washers (if equipped)
- 3-relay or signal jumper (if there is no external relay)
- 4-relay or jumper for cooling fan
- 5-high beam relay
- 6-low beam relay
- F1-F17-Fuses
- 1 (8A) Rear lights (reversing light). Heater electric motor. Warning lamp and rear window heating relay.
- 2 (8A) Electric motors for windshield wiper and washer. Electric motors for headlight cleaners and washers. Windshield wiper relay. Wiper relay and
- headlight washer (contacts).
- 3 (8A) Reserve.
- 4 (8A) Reserve.
- 5 (16A) Rear window heating element and heating relay (contacts)
- 6 (8A) Cigarette lighter. Portable lamp socket. Watch. Front door open warning lamps
- 7 (16A) Sound signals and relay for turning on sound signals. Engine cooling fan electric motor and motor activation relay.
- 8 (8A) Direction indicators in hazard warning mode. Switch and relay-interrupter for direction indicators and hazard warning lights in emergency mode.
- 9 (8A) Generator voltage regulator.
- 10 (8A) Direction indicators in turn indication mode and the corresponding warning lamp. Fan motor activation relay (winding). Control devices. Battery charge indicator lamp. Indicator lamps for fuel reserve, oil pressure, parking brake and brake fluid level. Parking brake warning light relay. Carburetor pneumatic valve control system
- 11 (8A) Rear lights (brake lamps). Body interior lighting lamp.
- 12 (8A) Right headlight. Coil of the relay for turning on the headlight cleaners (with the high beams on)
- 13 (8A) Left headlight. Indicator lamp for turning on the high beam headlights.
- 14 (8A) Left headlight (side light). Right rear light (side light). License plate lights. Engine compartment lamp. Indicator lamp for turning on the side light.
- 15 (8A) Right headlight (side light). Left rear light (side light). Cigarette lighter lamp. Instrument lighting lamps. Glove compartment lamp
- 16 (8A) Right headlight (low beam). Coil of the relay for turning on the headlight cleaners.
- 17 (8A) Left headlight (low beam).
VAZ 2107 starter repair - removing, replacing and installing the starter yourself
Hello, dear car enthusiasts! Especially hello, all owners of the VAZ “Seven”! Because this is exactly what we will be talking about – the VAZ 2107.
Although, the domestic auto industry has nothing special to boast about, given the model line and quality of cars produced, but still, there are examples of cars that should be paid attention to.
VAZ 2107 is a car that can deservedly be called a people's car. Thanks to its somewhat unusual design, this car stands out noticeably from the series of “classic” VAZ cars.
This fact, supplemented by minor design differences, was the reason why the model lasted quite a long time on the assembly line. At times it seemed that the “seven” would be produced forever, but time takes its toll.
Nevertheless, hundreds of thousands of cars of the seventh model are moving on the country’s roads, which will lead the popularity ratings among the “classics” for a very long time.
The design of the VAZ 2107 car is not fundamentally different from previous models. The biggest innovation in recent years has been the installation of an injection power system instead of the usual carburetor.
The rest is classic. This also applies to the starting system. That is why for every car enthusiast who bought a VAZ 2107, how to remove the starter remains a pressing question.
Removing the VAZ 2107 starter in the garage, do it yourself
As in most other cars, in the “seven” the starter is located at the bottom of the engine. In order to get to it, you need to have an inspection hole or overpass, since it cannot be removed through the top.
The inconvenient location is the only difficulty when dismantling the starter. Otherwise, everything is extremely simple; no special tools or special knowledge are required.
Removing the VAZ 2107 starter occurs only with the ignition off as follows:
- First, remove the battery cover and disconnect the ground terminal;
- the mudguard is removed, if one was installed in the lower part of the engine compartment;
- For convenience, the battery and support can be removed;
- the clamp of the wiring harness leading to the starter is unscrewed;
- unscrew and remove the wires from the starter traction relay;
- the three starter mounting bolts are unscrewed (two at the top and one at the bottom), after which the starter is removed under the car.
At this stage, the starter is completely ready for repair or maintenance.
Preparation for repair and dismantling of the device
It is more convenient to carry out work in a specially equipped room - a garage box. The VAZ 2107 is installed above the inspection hole; for repair and restoration operations, a set of wrenches, a set of heads with a wrench and a device for pressing out the bearing are required. In the event of a malfunction of several other components in addition to the bendix, it makes sense to replace the starter assembly. On a car where there is an injector in the power supply system, repair work is best carried out from below.
The procedure for dismantling the starter on a VAZ 2107 car is as follows:
- Disconnect the battery and remove it from the engine compartment.
- We unscrew the terminal and disconnect the terminal and the wire that supplies power to the starter.
- We unscrew the bolts securing the device that ensures engine starting.
- We remove the unit complete with the bendix feed mechanism from the hole in the housing.
On a VAZ 2107 car, an engine with an injector installed will require a number of additional operations. In this case, replacing the faulty unit is only possible from below. To gain access to the assembly, you need to remove the steel protection and boots covering the engine compartment from below. The remaining operations carried out on the starter are carried out similarly to those described.
