The operation is shown on the left turn signal. Removing the right turn signal is performed in the same way. To make it easier to work with the right turn signal, you can remove the battery, and to work with the right turn signal, you can remove the windshield washer reservoir.
1. We prepare the car for work (see “Preparing the car for maintenance and repair”).
2. Disconnect the wiring block from the front turn signal.
3. Release the tip of the turn signal mounting spring.
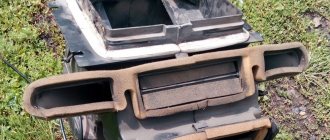
4. From the engine compartment side, press the indicator fastening clamp (shown with an arrow in the photo) and remove the indicator.
Install the front indicator in the reverse order.
Undoubtedly, the VAZ-2114 car can be called one of the most successful models of the Russian automobile industry, and therefore it is not surprising that this car is distributed almost everywhere in the Russian Federation. In this regard, questions regarding the correct operation and self-repair of this car are of interest to many domestic car enthusiasts.
In particular, many are concerned about the question of how to change the turn signal on a VAZ 2114 with your own hands? Today we will tell you how to replace a turn signal yourself, especially since for this the motorist does not need to go to a specialized salon; it is enough to have gloves, clean rags, alcohol and a screwdriver.
Step-by-step instruction:
1. Before you start replacing the turn signal, open the hood of the car and be sure to disconnect the wire from the negative terminal of the battery. It is better to work with gloves. This way there will be no greasy stains left on the glass of the lamp. However, if stains still remain, they can be easily removed by wiping with a clean rag soaked in alcohol.
2. If you leave greasy stains, this can ultimately lead to darkening of the bulbs of halogen lamps, which in the future will provoke their premature failure. Only after taking all necessary precautions can you disconnect the block with electrical wires from the turn signal.
3. After this, you need to disconnect the connectors of the wires that go directly to the headlight. By gently pressing the lock, the hydraulic compensator rotates counterclockwise. When it is turned all the way, you should carefully remove it out. Next, using a screwdriver, remove all the headlight mounting screws and remove it along with the turn signal indicator.
4. After this, you can snap off the spring clips, remove the rubber cap that plays a protective role, and remove the socket along with the lamp from the indicator body.
5. Now the faulty lamp is removed and replaced with a new element. The new lamp is installed in the socket, and the socket, in turn, is installed in the headlight housing. After this, the electrical connector is connected to the battery.
Removal
Warning!
When removing the pointer, do not use excessive force to avoid breaking the pointer spring clip, which is made of plastic. 2. By carefully moving the side turn signal indicator together with the sealing gasket forward by 2-3 mm, we move the rear part of the indicator away from the wing (at the same time we disengage the bracket-like protrusion of the indicator).
3. Remove the pointer and remove the rubber protective cover of the pointer from the hole in the front fender.
4. Remove the lamp socket together with the rubber protective cover from the pointer housing.
5. Remove the faulty lamp from the socket.
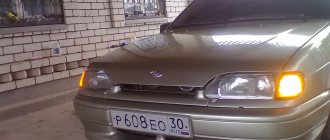
How to change the turn signal on a VAZ 2114 front
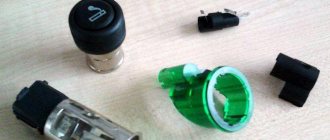
Replacing a turn signal bulb is not difficult. A woman can do it too. There are ordinary 21 watt, 12 volt light bulbs. Sometimes they are painted yellow if the lanterns have white glass, but this is rare. GOST implies yellow glass on turn signals. Therefore, you can purchase any single-pin light bulb at an auto parts store. Like this:
They're not expensive. Up to 10 rub. Next, open the hood and look at the headlight on the other side. The turn signal will have a socket with a light bulb. Such:
To remove it from the lantern, you need to turn it counterclockwise about 90 degrees. Once the socket with the lamp is in your hands, turn the light bulb in the same way and it will come out of the socket.
The bulbs are fixed with a bayonet connection. The pins on the base fit into the grooves of the cartridge. Insert the new light bulb into the socket and reassemble the assembly in reverse order. To check that all turn signal lights are working, turn on the hazard lights and walk around the car to make sure that all the lights are working.
The operation is shown on the left turn signal. Removing the right turn signal is performed in the same way. To make it easier to work with the right turn signal, you can remove the battery, and to work with the right turn signal, you can remove the windshield washer reservoir.
1. We prepare the car for work (see “Preparing the car for maintenance and repair”).
2. Disconnect the wiring block from the front turn signal.
3. Release the tip of the turn signal mounting spring.
4. From the engine compartment side, press the indicator fastening clamp (shown with an arrow in the photo) and remove the indicator.
Install the front indicator in the reverse order.
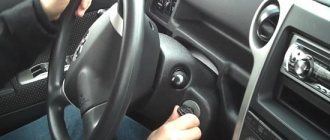
Hello, today we will show you how to remove the front turn signal on a VAZ 2113, 2114, 2115. If your front turn signal housing starts leaking or the glass cracks in a minor accident, then the turn signal will have to be replaced with a new one. Let's begin the process of removing the front turn signal. First, remove some terminal from the battery (usually “-“ is removed), of course, the terminal can be removed, most likely nothing dangerous will happen, but it’s better to be on the safe side and remove the terminal when doing any electrical work in the car.
Turn signal and repeater VAZ 2114. Replacement
In the lighting equipment of a car, the light bulbs that light up when the turn signal knob is switched on the right or left side of the car and inform oncoming and passing cars, as well as pedestrians, about the direction of movement of the car are called turn signals among motorists.
They are classified as warning lights and must show a yellow or bright amber signal, which is established by international regulations for cars in all countries. Turn signals VAZ 2114
Turn signals and emergency lights do not work on VAZ 2114 cars: diagnostics and repair
Turning lights should be in working order in any car. This type of optics allows other road users to know your intentions when making maneuvers, so the performance of turns has a large impact on safety. What to do if the turn signals and emergency lights of the VAZ 2114 do not work, how to determine the problem and replace the lamps? Read about it below.
Complete failure of turn signals - what to do
This mainly happens in the case of:
- If the electrical equipment is faulty, then the fuse must be checked. The cause of the burnout is sought, eliminated, then the safety device is changed;
- There is no normal contact between the relay and the body part or mounting block. The device is cleaned or completely replaced if it burns out;
The contacts of the button intended for signaling in emergency situations have fallen out. Its location is checked, along with the settings and status of all contacts. Replacement is carried out if necessary.
Replacing repeaters
If the turn signal on the car is changed to white, then the repeaters on the VAZ 2114 also need to be replaced. This procedure does not take much time.
Repeater VAZ 2114
The repeaters are made almost entirely of plastic and are very fragile, so when working with them you should not use much force to avoid breaking the part.
- Move the repeater body together with the rubber lining 0.5 cm forward.
- Remove the rear part of the part from the mounting location.
- Pull out the repeater completely, disconnect the electrical connector and remove the rubber gasket, moving it to the new repeater.
- Connect the terminals with wires to the connector of the new repeater and install it on the car.
Due to easy access to the car wiring through this channel, when installing an alarm system, it is not recommended to connect its contacts to repeaters. In this case, car thieves are deprived of the easy ability to disable the alarm by short circuiting.
How to check the lighting devices in the Chetyrka?
The verification procedure is carried out as follows:
- First you need to make sure that you are using a working fuse. The fuse box is located in the engine compartment, in the compartment between the engine and the windshield, opposite the driver's seat. Bend the latches and remove the cover, then carefully inspect the inside. It contains a diagram that will help you figure out which fuse is responsible for the operation of a particular equipment. Remove the fuse responsible for the functionality of the software and carefully inspect it - if the fuse inside is melted or damaged, the fuse must be replaced. But even if there is no visible damage, you need to insert another one with the appropriate rating into the socket of the removed fuse.
- If this does not help restore the software, then check the relay, it is located in the same block. Typically, the turn signal relay has a hazard warning symbol on it, you need to pull it out and replace it with a working one. To do this, it is not necessary to buy a new relay; you need to pull out another working device and install it. If the emergency lights and software do not work, then we continue checking.
- Now we need to diagnose the light bulbs, but such a check will be required if only part of the turns does not work. Open the hood or trunk and remove the headlight protection, then remove the light sources from their seats. Install a known working device in place of the removed lamp and check how it works. If there are no changes, we move on.
- It is necessary to check the integrity of electrical circuits. To do this, you will need a test lamp with two wires connected to it. One end should be connected to the negative of the battery or the body of the Four, and the second wire is connected to the contact of the electrical circuit being diagnosed. If, as a result of the connection, the lamp begins to light, this indicates that the section of the wire being tested is in good condition. The remaining circuits are checked in the same way. If you find a place where there is no current, then this indicates that there is a fault between the place being tested and the last point where the voltage was. Damaged wires must be replaced.
- You also need to check the quality of contacts on all electrical circuits. Check the contacts in the mounting block, on the base in the vehicle's optics, on the light alarm button and on the steering column switch. Often the cause of problems is oxidation; such contacts must be cleaned or replaced.
Photo gallery “Turning faults”
To watch online, click on the video ⤵
HOW TO REMOVE THE TURN SIGNAL AND REPLACE THE BULB ON A VAZ 2110, 2111, 2112, 2114, 2115, 2109 Read more
Replacing a VAZ 2110-2112 turn signal on your own Read more
VAZ 2115 diodes for turn signals. More details
Replacing headlights on a VAZ-2114 - Part No. 11 Read more
Removal - installation of turn signal repeater More details
VAZ 2114, E&R. Replacing turn signal indicators! More details
VAZ 2115 lamp replacement Read more
How to replace a turn signal Read more
VAZ 2115,2114-How to make the dimensions in the turn signals. Three s Read more
installation of turn signal repeaters on 2109 Read more
Replacing the light bulb in the peephole lamp of VAZ 2113, 2114, 2115 Read more
REAR LIGHTS UPGRADES. VAZ 2114 More details
HOW TO CHANGE A LIGHT BULB. VAZ 2114 More details
Changing the color of the dashboard backlight of a VAZ 2114, how to do everything yourself correctly and where to solder Read more
Illumination of buttons VAZ 2114 Read more
Replacing light bulbs on the dashboard of a VAZ 2114 Read more
LIGHTS BETTER THAN XENON (Episode 11) More details
VAZ 2105 - replacing P21W lamps with LED ones. Test comparison Read more
Tuning Mirrors for Any Car. With Your Own Hands. Under LED. More details
Common reasons why turn signals do not work
Before you begin diagnostics or repair work, you should take care to disconnect the battery terminal with the minus sign.
Most often, malfunctions can be as follows:
- There is a click in the relay, but the lamp does not light. That is, the turn signal is working properly. The cause may simply be a burnt out light bulb. First, the lamp mount is unscrewed, and then the connector is disconnected to replace it;
- The lamp flashes quickly, which means that it does not meet the power characteristics. It is worth cleaning the contact connections at the same time. Less commonly, the cause is a faulty relay device that requires replacement;
- The problem lies in the relay, if the lamps do not blink, but simply light up. The reason is closure. The relay is changed in such cases;
- If the indicators on only one side are lit, it means that the relay device is changing. However, the cause may be a button, which is checked and, if the contacts burn out, appropriate actions are taken. Quite rarely, the switch device may be the cause.
Replacing headlights and turn signal on VAZ 2109 Lada Samara
- Repair manuals
- Repair manual for VAZ 2109 (Lada Samara) 1987+.
- Replacing the headlight and turn signal
EXECUTION ORDER↓ Comments ↓1. Description of the car 1.0 Description of the vehicle 1.1 Appearance 1.2 Engine compartment 1.3 General data 1.4 Technical characteristics 1.5 Passport data 2. Vehicle operation 2.0 Vehicle operation 2.1 Safety rules and operating recommendations 2.2 Side doors 2.3 Trunk lid 2.4 Opening and closing the hood 2.5 Luggage compartment 2.6 Adjusting the front seats 2.7 Controls 2.8 Interior ventilation and heating 2.9 Eliminating fogging or frosting of windows 3. Vehicle maintenance 3.0 Vehicle maintenance 3.1 Checking the tightness of the engine and gearbox seals 3.2 Checking the tightness of the cooling system 3.3 Checking the tightness of the fuel system 3.4 Replacing the coolant 3.5 Replacing the oil filter and engine oil 3.6 Replacing the air filter filter element 3.7 Checking and adjusting the generator drive belt 3.8 Replacing the belt generator drive 3.9 Cleaning and flushing parts of the crankcase ventilation system 3.33. Replacing lamps 4. Car care 4.0 Car care 4.1 Car washing 4.2 Caring for and restoring body paint 4.3 Body lubrication 4.4 Cleaning drainage holes 4.5. Car storage 4.6 Preparing for winter use 4.7 Tips for starting the engine in severe frost 4.8 What is useful to buy for winter 4.9 Tips for winter use of the car 5. Problems along the way 5.0 Malfunctions along the way 5.1. Engine 5.2. Checking electrical equipment 5.3 Extraneous knocking noises appeared 5.4 Vibration and shock on the steering wheel 5.5. Brake problems 5.6 Wheel puncture 6. Chassis 6.0 Chassis 6.1. Front suspension 6.2. Rear suspension 7. Steering 7.0 Steering 7.1 Steering wheel 7.2 Steering column 7.3 Steering mechanism 7.4 Replacing steering rods 8. Brake system 8.0 Brake system 8.1 Front wheel brake 8.2 Rear wheel brake 8.3 Wheel cylinder 8.4 Brake drive 9. Electrical equipment 9.0 Electrical equipment 9.1 Relay and fuse box 9.2. Generator 9.3. Starter 9.4. Lighting and light signaling 9.5. Heater 9.6. Windshield wipers 9.7 Sound signal 9.8. Ignition system 9.9 Instrument panel (high) 10. Body 10.0 Body 10.1 Replacing the front buffer 10.2 Replacing the rear buffer 10.3 Replacing the radiator trim 10.4 Replacing the front fender 10.5 Removing and installing the hood 10.6 Adjusting the hood 10.7 Adjusting the hood lock 10.8 Front door 10.9 Rear door 11. Engine and its systems 11.0 Engine and its systems 11.1 Removing and installing the engine 11.2 Adjusting the clearances in the valve drive 11.3. Power supply system 11.4. Lubrication system 11.5. Cooling system 11.6. Exhaust system 11.7 Complete disassembly of the engine 11.8 Cylinder block. Inspection, troubleshooting and repair 11.9 Piston with connecting rod. Disassembly, troubleshooting and assembly 11.10. Cylinder head 11.15. Carburetor adjustment 12. Transmission 12.0 Transmission 12.1 Gearbox and differential. Main components and parts 12.2 Removing the gearbox 12.3 Installing the gearbox 12.4 Adjusting the clutch drive 12.5 Disassembling the gearbox 12.6 Inspecting and troubleshooting gearbox parts 12.7. Secondary shaft of the gearbox 12.8 Primary shaft of the gearbox 12.9. Differential 12.16. Clutch drive 12.17. Front wheel drive 13. Applications 13.0 Appendices 13.1 Appendix 1. Basic data for adjustments and monitoring 13.2 Appendix 2. Fuels and lubricants and operating fluids 13.3 Appendix 3. Tightening torques for threaded connections 13.4 Appendix 4. Service book 13.5 Appendix 5. Vehicle electrical diagram |
Conventional lamps or xenon: what to choose for VAZ 2114?
In the VAZ 2114, the xenon low beam lamp is changed according to the same scheme as a regular one. The only thing that needs to be taken into account is the need to install special reflectors and light flux dividers in the headlights along with xenon. This will help make the ground clearance lighting correct and comfortable for the driver's eyes. At the same time, a car equipped in this way will not blind oncoming drivers with excessively bright light.
Before changing the light bulb in the headlight of a VAZ 2114 from a regular one to a xenon one, it is worth analyzing all the advantages and disadvantages of such a solution.
Let us list the main features of each type.
- advantages - affordable cost, no need to install additional equipment;
- Disadvantages - insufficiently bright light, short lifespan (they burn out quite quickly).
- advantages - long operating period, low energy consumption, noticeably better quality of road surface lighting;
- disadvantages - the need to install additional equipment, expensive price (a xenon lamp is much more expensive than an incandescent lamp).
How to change the low beam bulb on a VAZ-2114 with your own hands: video and instructions
Many car enthusiasts have encountered the fact that one of the low beam lamps on a VAZ-2114 went out. Why does this happen? The answer is quite simple - the light bulb has burned out and needs to be replaced. Many motorists will ask the question - how to do this? Quite simple, and this article will walk you through this simple process.
A video on how to replace a low beam lamp on a VAZ-2115 (by analogy, replacement on a VAZ-2114 occurs) below:
The video will tell you how to replace the low beam lamp in a VAZ-2114.
What kind of light bulbs are in the headlights of the VAZ 2114 and other lighting devices?
Below we talk about what kind of light bulbs are in the headlights of the VAZ 2114, as well as in all other lighting fixtures of this car. In addition, the article provides expert advice on choosing light bulbs.
What kind of lamps are in the headlights of the VAZ 2114?
For the headlights, the manufacturer selected lighting elements with an H4 socket . These are halogen lamps that simultaneously have two operating modes - low and high beam. Depending on the manufacturer, lamp specifications may vary.
The lighting element has 3 contact pads for connecting an electrical connector. One contact is common; it is connected to the car body. The other two sites are responsible for low and high beams. A halogen lamp is a lighting element whose glass bulb is filled with gas. Parts of this type are characterized by high luminous brightness and improved directionality of the light flux.
Which light bulbs are better to choose?
By default, the VAZ 2114 is equipped with lamps that do not give the required effect in conditions of poor visibility. In this regard, car owners often replace lighting elements with better models. The choice is made based on the personal readings of the car owner. Before purchasing, you must study the technical specifications of the part. The following models are most common among motorists:
- OsramCoolBlueBoost – This is a high-quality lamp from a German manufacturer. Emits white light, which has a positive effect on visibility in low visibility conditions. The brightness indicators of the model are at a high level. Lighting element power 100/90 W. The service life ranges from 120 to 400 hours of continuous operation. The price of the product differs depending on the region and amounts to on average 1100-1200 Russian rubles.
- Philips Blue V ision Ultra . _ _ The power of the lighting element is 60/50 W. The model is distinguished by high brightness. Cold white light allows you to see the road situation regardless of the level of illumination. The cost of two lamps in this series is 1400 - 1500 Russian rubles .
- IPF T itan W hite are high-quality models from the Japanese manufacturer. A distinctive feature of the product is its high luminous characteristics and long service life. The lamps provide high-quality illumination of the road surface regardless of weather conditions. Power is 55 W. The cost of a product from a Japanese manufacturer averages 2,200 rubles .
Replacing the turn switch on a VAZ 2113, VAZ 2114, VAZ 2115
Welcome! Turn switches - most of them are made mainly of plastic and therefore these switches very often break, in most cases, as happens, you stop somewhere, for example, you need to turn around and you immediately start turning the steering wheel sharply so as not to interfere with the movement and then bam and you hit it , this very switch and even with average force it breaks, but few people know how to replace it, but in fact everything is very simple, so so that you can easily replace these parts in the future, then in this case, read our article which is aimed at replacing the turn switch, as well as replacing another side switch (the windshield and rear window wiper switch of the car)
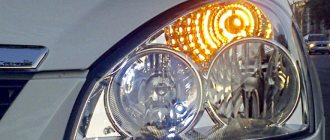
Turn signal lights for VAZ 2114
On the VAZ 2114, the turn signals are located on the left and right sides of the car. And they are located in the middle of the block for deliberate maneuvering. In addition, the vehicle is equipped with side repeaters. They stand on each side of the front fenders. In the basic configuration, plastic or glass lenses cover the reflector with the incandescent lamp. juicy yellow color.
The knob that operates the turn signals is commonly called a turn signal and is located under the steering wheel for easy control of the signal lights. The electrical wiring of the VAZ 2114 ensures simultaneous switching of all turn signals and repeaters using one button. This button is indicated by a red triangle and is called the “emergency stop signal”. Simultaneous flashing of all turn signal lamps indicates an abnormal situation. As a rule, this button is located on the road. It is also used while driving, such as when the car is being towed by another vehicle.
Read
The frequency of operation of the light bulb is usually at least 60 times per minute; this is acceptable more often, but no more than 120 times in 60 seconds. More frequent clicks of the turn signal indicate some kind of failure in this circuit. If the relay is operating normally, after completing the maneuver and returning the steering wheel to its original position, the flashing should stop and the lamp will go out. If this does not happen, then you need to look for the cause in the return mechanism of the turn signal handle.
An important place in the operation of such a mechanism is the turn-by-turn indicator on the dashboard, turn signals and fuses:
- Green lights are installed on the dashboard, when the lever is turned on, the corresponding direction lamp lights up and flashes with audible clicks. The fact that the signal is turned off and for some reason the handle did not rise to the neutral position;
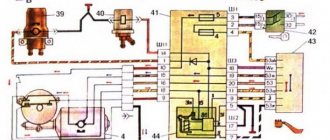
- The rotation relay is located in the mounting block , it has a square shape and is marked “K2”, this device is also called an interruption relay. It performs several functions. Passes electric current to the lamp, which is necessary, in accordance with the position of the turn signal handle, ensures intermittent operation of the signal. Electronic relays 07.4747 are installed on the VAZ 2114. This relay is more reliable, it simply does not heat up, consumes minimal current and does not lose its characteristics over time;
- The fuses are located in the same place in the mounting block . There are two of them, labeled F2. Directly safety turn signals, alarm switch and relay and F16. it is called. lights on the dashboard, although in fact, in addition to them, circuits of several other systems and devices, including turn signals, are tied.
Turn signal lights VAZ 2114
On the VAZ 2114, the turn signals are located next to the front light blocks and are built into the rear light blocks on the left and right sides of the car. Moreover, they are located on the outer edge of the block in order to clearly inform other road users about the driver’s intentions to perform any maneuver. In addition, the machine is equipped with side repeaters. They stand on each side of the front fenders. The basic configuration includes plastic or glass diffusers that cover the reflector with the light bulb - a rich yellow color.
The handle that controls the turn signals is usually called the turn signal lever and is located under the steering wheel for easy control of the signal lights. The electrical circuit of the VAZ 2114 provides for the simultaneous activation of all turn signals and repeaters using one button. This button is indicated by a red triangle and is called the “emergency stop signal”. Simultaneous flashing of all turn signal lights indicates an emergency situation on board the vehicle. Typically, this button is turned on to indicate the car when stopping in a place where it poses a danger to other cars, or in the event of an emergency on the road. It is also used while driving, for example, when a car is towed by another vehicle.
The frequency of operation of the light bulb is usually no less than 60 times per minute, more often is allowed, but no more than 120 times in 60 seconds. More frequent clicks of the turn signal indicate some kind of failure in this circuit. With the relays working normally, upon completion of the maneuver and the steering wheel returning to its original position, the flashing should stop and the light should go out. If this does not happen, then the reason must be sought in the return mechanism of the turn signal handle.
An important place in the operation of such a mechanism as a turn signal is occupied by turn signal lamps on the dashboard, turn relays and fuses:
- Green light bulbs are installed on the dashboard; when you turn the lever and turn on the turn signal, the light in the corresponding direction lights up and flashes, accompanied by audible clicks. These lights are installed for the driver as indicators of system functionality and reminders that the signal should be turned off if the turn is completed and the handle for some reason is not in the neutral position;
- The turn relay is located in the mounting block, has a square shape and is marked “K2”; this device is also called a relay breaker. It performs several functions. Passes electric current to the lamp that is needed, according to the position of the turn signal knob, ensures intermittent operation of the signal and produces characteristic clicks when the turn signal is on. Electronic relays 07.4747 are installed on the VAZ 2114. This relay is more reliable, it practically does not heat up, consumes minimal current and does not lose its characteristics over time;
- The fuses are located there, in the mounting block. There are two of them, labeled F2 - the turn signal fuse itself, the breaker and hazard warning relay, and F16 - it is called - the light bulbs on the dashboard, although in fact, in addition to them, the circuits of some other systems and devices, including turn signals, are tied to it.
Types and features of lamps
The need to change low beam lamps may arise in 2 cases, namely:
- upon failure;
- when replacing lamps that are included in the standard (standard) package with brighter ones.
The following types of light bulbs can be used in the headlights of the VAZ 2114 model:
- Incandescent lights produce quite dim light and often fail. However, their clear advantage is their affordable cost.
- Xenon - models of such lamps have a glass bulb filled with gas (xenon). Compared to incandescent lamps, they shine much brighter. However, if you do not install special lenses (to adjust the luminous flux of such a light bulb), the light of such headlights will blind car drivers who are moving towards you.
- Halogen - presented on the modern market in a very wide range (from all-weather/universal to very bright glow).
Universal (all-weather) halogen lamps have a coating on the inner surface of the bulb, which gives the light output a slightly yellow tint. This provides the driver with better visibility in bad weather (during fog, snowfall, etc.).
At the same time, cars equipped with such lamps are better visible in bad weather to drivers of cars moving along the highway in the opposite direction. These points make driving safer, significantly reducing the likelihood of accidents on the road.
The most commonly used products are from manufacturers such as Philips and Osram.
Turn signal and repeater VAZ 2114. Replacement
In the lighting equipment of a car, the light bulbs that light up when the turn signal knob is switched on the right or left side of the car and inform oncoming and passing cars, as well as pedestrians, about the direction of movement of the car are called turn signals among motorists. They are classified as warning lights and must show a yellow or bright amber signal, which is established by international regulations for cars in all countries.
Turn signals VAZ 2114
Repeater replacement
If the car is changed to white, it also requires replacing the repeaters with VAZ 2114
. This procedure does not take much time.
Pervatory Vaz 2114
Repeaters are made entirely of plastic and are very fragile, so you should not use much force when working with them.
- Move the repeater.
- Pull the back of the piece.
- Pull the repeater, disconnect the electrical connector and remove the rubber gasket, placing it on the new repeater.
- Connect the terminals with wires to the connector of the new repeater and install it on the car.
Thanks to easy access through this channel to the vehicle wiring. In this case, motorists are deprived of the simple ability to turn off the alarm by short circuiting.