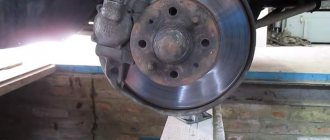
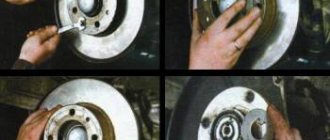
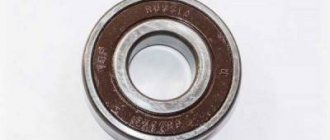
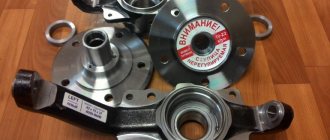
Signs of a faulty VAZ 2107 axle bearing
When operating the vehicle, the axle bearing itself may wear out or its seat may break. Any bearing malfunction is easily determined by a number of signs:
- the buzzing of the rear axle increasing with speed, which can turn into a creaking or crackling sound;
- rear wheel play (you can check it by jacking up the car and rocking the wheel with your hands);
- loss of balls when the separator is destroyed (in this case, the axle shaft may move out of its seat while moving);
- jamming of the rear axle when the wheels stop rotating (if a wheel jams at speed, this can cause a serious accident).
The design of the bearing allows for a long mileage of the part, but material defects or excessive loads while driving on bad roads can lead to rapid wear of the unit. In this case, it is necessary to replace the VAZ 2107 axle bearing.
What bearings to put
When a wheel bearing requires replacement, the question immediately arises of which part to install. Many people advise using original components. However, today the quality of parts leaves much to be desired and the issue of choice remains quite relevant.
Table: type, installation location, and size of bearings
| Installation location | Bearing type | Size, mm | Quantity |
| Front wheel hub (outer support) | Roller, conical, single row | 19,5*45,3*15,5 | 2 |
| Front wheel hub (inner support) | Roller, conical, single row | 26*57,2*17,5 | 2 |
| Rear axle shaft | Ball, radial, single row | 30*72*19 | 2 |
Manufacturer's choice
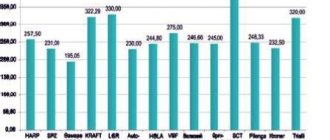
When choosing a manufacturer of a wheel bearing for a VAZ “Seven”, we can recommend SKF , SNR, FAG, NTN, Koyo, INA, NSK. The companies listed have many locations around the world. These products are of high quality and meet the most stringent requirements.
Among the domestic manufacturers that supply bearings for cars of the Togliatti plant, we can highlight:
- CJSC "LADA Image" - manufactures and sells original Lada wheel bearings through secondary markets;
- Saratov plant - produces parts under the SPZ brand;
- Volzhsky Plant - uses the Volzhsky Standard brand;
- Vologda plant - sells products under the VBF brand;
- Samara plant SPZ-9.
Replacing the VAZ 2107 axle bearing
To carry out the work, there is no need to lift the car on a lift or drive it into a viewing hole. Replacing a VAZ 2107 axle shaft or bearing is performed as follows:
- jack up, unscrew and remove the rear wheel;
- remove the brake drum;
- remove the brake pads using pliers to remove the springs;
- using a 17mm socket wrench, unscrew the axle shaft;
- remove the axle shaft from the seat (for this you need to use a wrench, inserting it between the rear part of the axle shaft and the brake cylinder and using it as a lever);
- remove the old axle bearing;
Preparation
First of all, you will need to remove the rear wheels, brake drums and the axle shaft itself.
- Place the car on a level surface (in case there is no pit or truck crane).
- The front wheels must be securely supported by chocks. Don’t forget that the “seven” has a rear-wheel drive and you can’t control its immobility by engaging a gear, it just won’t work.
- Using a jack, raise the rear of the car.
- Protect against accidental falls. You can place removed wheels, a metal canister or a safety bar under the body.
- Unscrew the bolts and remove the wheels.
- Use a 10mm end to twist the guides and remove the brake drums. You can help with a hammer, but be careful: you can only strike through a piece of wood.
- Wrench No. 17 removes the bolts securing the axle shaft and then removes it.
Useful tips for replacing the VAZ 2107 axle bearing
When repairing a VAZ 2107 axle shaft, you must adhere to the following tips and rules:
To avoid damaging the axle shaft when cutting off the old bearing with a grinder, it is necessary to saw only the outer ring and the cage. It is enough to make several cuts on the inner ring, and then split it with chisels.
The new bearing is driven onto the axle shaft using a hammer. If you hit the bearing directly, there is a possibility of it being distorted or destroyed. Therefore, the bearing must be filled using a piece of pipe whose internal diameter is slightly larger than the diameter of the axle shaft.
It is unacceptable to heat the bearing before seating it on the axle shaft. A heated bearing enlarges and fits into place more easily, but this may result in “annealing” of the metal, worsening its physical properties. As a result of annealing, the ductility of the metal increases and the hardness of the metal decreases.
Replacing a VAZ 2107 axle bearing is a rather complicated task, but quite doable in a garage. The main thing is not to damage the surface of the axle shaft when removing and installing the bearing. When installing a new bearing, be careful when using a hammer, as the steel from which the bearing parts are made is very brittle. Otherwise, the procedure does not contain complex operations that require special qualifications and equipment.
The problem that will be discussed today is quite common on VAZ 2107 cars. This is the failure of the axle bearing. Replacing it at a car service center is very expensive, but it is possible to carry out this procedure yourself. We will talk about how to do this correctly in this article.
Causes of failure
Every part on a car tends to become unusable. Rear wheel bearings are no exception, but any part has characteristic operational features. If the operating conditions are met, the part can serve for years, which is confirmed by the driving experience of current older drivers.
The main reasons for bearing failure are:
- careless driving;
- incorrect installation of the product;
- water and dust getting inside the hub;
- leakage of lubricant;
- long service life.
If a VAZ-2107 car is often operated in aggressive conditions close to off-road, then the need to replace the rear wheel bearing will not take long to occur. It is especially important to take into account the fact that the famous “seven” is a rear-wheel drive car. But how can you determine that a wheel bearing has failed and needs to be replaced? Let's find out in more detail.
Methods for determining whether a wheel bearing is faulty
Timely identification of a malfunction allows you to prevent unpleasant consequences that can provoke an emergency situation on the road. The part in question on the VAZ-2107 car plays an important role, since thanks to this product the wheel rotates easily. The car has 2 rear wheel bearings, one for each rear wheel.
The main way to determine the malfunction of an important part of the hub on a VAZ-2107 is to carry out the following manipulations:
- raise the rear of the car on a jack;
- swing the outer part of the wheel in different directions;
- if a knocking noise occurs and the wheel dangles, then the rear wheel bearing of the VAZ-2107 needs to be replaced.
If the car drives while turning corners and a squeaking noise appears, this also indicates the need for repair work. To replace the wheel bearing, you will need the following tools:
- jack;
- wrenches and screwdrivers;
- chisel and hammer;
- puller;
- Litol brand lubricant.
After making sure that you have a complete list of tools and materials for the work, you can begin replacement.
Replacing a faulty product
You must begin replacing the product by loosening the wheel bolts. This must be done before the rear of the car is jacked up. At the same time, do not forget to install stops under the front wheels.
- A jack is installed, then the rear side of the car where the bearing needs to be replaced is jacked up. Once the car is raised, you can install a safety stump in case the jack comes off.
- The wheel is removed, and then the drum. It should be remembered that you cannot put the car on the handbrake, otherwise you will not be able to remove the drum. To remove the drum, you need to unscrew two pins and insert them into the technological holes. When the pins are tightened, the drum is pulled out, after which it can be dismantled.
- Using a screwdriver, pry off the steel cap or protective cover. The 4 nuts securing the axle shaft are unscrewed.
- We use a special puller, with the help of which the hub is removed from the drive axle axle. If there is no puller, then you can use a regular chain or cable, attaching it to the axle shaft.
- It is necessary to remove the worn bearing from the axle shaft using a puller or grinder. To remove the bearing using a grinder, you need to cut the outer race on both sides.
Further actions are performed in the reverse order of removal. It is important not to forget that when replacing a bearing, the sealing seals must also be replaced.
The bearing must not be misaligned, which can lead to its failure on the first day of operation. If you operate the car correctly and carefully, then you can forget about replacing the bearing for 2-5 years. You can also read about replacing the front wheel hub bearing.
Purpose of the rear axle bearing
The axle shaft is the most important part of the drive (in this case, rear) axle of the VAZ 2107. The axle shaft itself rarely fails, but the bearing in which it is attached is the weak point of this design . The purpose of the part is simple: to ensure smooth and uniform rotation of the axle shaft in the rear axle while the car is moving. This part is located inside the bridge, immediately behind the brake drum. To see and change it, you will have to remove the axle shaft, remove the drum and brake pads from it. It is impossible to get to the bearing in any other way.
VAZ 2107 axle shaft bearing with retaining ring
What are axle shafts, why are they needed and how are they designed?
In rear-wheel drive cars, which the “seven” actually belongs to, the rear wheels are driving. It is they, rotating, that make the car move. The torque is transmitted to them from the gearbox through the drive (cardan) shaft, gearbox and axle shafts. There are only two axle shafts: one for each rear wheel. Their role is to transmit torque from the corresponding gear of the gearbox to the wheel rim.
Fracture
The result of a wheel hitting a pothole or a strong impact on a bump can be a fracture of the axle shaft. In this case, the car loses control because one of the drive wheels stops rotating. If the axle shaft is broken, the gears of the gearbox may also fail, so if such a malfunction occurs, it must be checked.
Axle shaft design
The axle shaft is an all-metal shaft made of steel. At one end there is a flange for attaching the wheel disk, and at the other there are splines for engagement with the gearbox gear. If we consider the axle shaft assembly, then in addition to the shaft, its design also includes:
- oil deflector;
- sealing gasket;
- oil seal (cuff);
- bearing.
Each of the axle shafts is installed in the corresponding (left or right) rear axle housing. An oil deflector with a gasket and an oil seal are used to prevent lubricant from leaking out of the casing. The bearing is designed to ensure uniform rotation of the axle shaft and distribute shock loads coming from the wheel to the rear axle of the vehicle.
Installing the axle shaft
Once the bearing and seal are installed, you can install the axle shaft. Installation is carried out in the following order:
- We install the sealing gasket.
- Insert the axle shaft
into the housing until it stops. Check how the splines engage with the gear teeth by turning the axle shaft in different directions. - Apply a few gentle blows with a hammer to the axle shaft flange to make sure it is seated correctly.
- Install spring washers onto the axle shaft studs. Install and tighten the nuts securing the axle shaft with a 17 mm socket wrench.
- Place the drum on the shoes and secure it with guide pins.
- Mount the wheel.
- Check to see if there is any play in the axle shaft or bearing by trying to shake the wheel along the vertical and horizontal axes.
- Lower the body and remove the chocks from under the front wheels.
- Tighten the wheel bolts.
- Check whether the signs of axle shaft malfunction have disappeared by driving on a flat section of the road.
READ How to install a window lift cable on a VAZ 2107
Signs of malfunction on the VAZ 2107
If the bearing itself fails or its seat breaks, the car owner will definitely notice this. We list a number of the main signs of failure of this part:
- While driving, a uniform low hum appears in the area of the rear axle, which over time can turn into a loud creaking or crackling sound. And the faster the car goes, the louder the noise becomes.
- A strong play appears on one of the rear wheels (to check this, just jack up the rear axle of the car and pull the wheel with your hands away from you and towards you).
- Balls fall out of the bearing (this means that the separator in which these balls are located has completely collapsed).
- Finally, the rear axle may simply jam. The drive wheels will stop rotating, and this can happen while driving (which may well cause an accident).
Sequencing
- The car is jacked up, and the wheel is removed using socket wrenches, behind which there is a worn bearing.
- The brake disc and pads are removed.
- Now you need to unscrew the axle shaft itself with a 17 socket wrench.
The axle shaft is unscrewed with a 17 socket wrench
To remove it from its seat, you can use a crank. It should be inserted between the brake cylinder and the rear of the axle and used as a lever to push the axle out.
Pushing out the axle shaft using a crank
Now you need to remove the bearing from the axle shaft. Often it turns out to be tightly welded to it, so you have to literally cut it off with a grinder. This must be done by first clamping the axle shaft in a vice.
The old bearing is cut off with a grinder
Once the old bearing is removed, the axle must be thoroughly wiped with a rag. And then a new part and a retaining ring are put on the axle shaft.
Installing a new axle bearing
Now, using a medium-sized flat-head screwdriver, you need to remove the worn oil seal from the seat.
The old oil seal is removed with a screwdriver
- As soon as it is removed, a new oil seal is installed in its place (it is most convenient to drive it into the seat with a 32 socket head).
- The axle shaft with a new bearing is installed back into the seat and the entire assembly is reassembled.
Video: How to change it yourself
Removing the old bearing
To replace the old bearing with a new one, you need to remove it from the axle shaft. How to do it? Take a chisel and a hammer, with which you remove the locking ring. Manipulations are carried out on an anvil, this makes it easier to create a rigid impact. If it was not possible to remove the stopper in this way, you can carefully cut off part of it with a disk using a grinder. The axle shaft is placed on the anvil so that its flange does not touch the steel surface.
Remove the unusable bearing using a chisel and hammer. To begin with, knock down the clip, knock out the separator and remove the bushing. If this cannot be done, you will have to cut everything off with a grinder. Before installing a new part, you need to thoroughly clean the “operating field” from any remaining dirt, dust, etc. You should check that the landing area is not deformed or damaged.
Important points
The inner ring of the bearing is cut off with a chisel
Step-by-step instruction
Using pliers, remove the “soldiers” and remove the tension springs of the pads.
Remove the rear brake pads and set them aside.
Unscrew the 4 nuts securing the axle shaft. Head nuts for seventeen.
Push the hub towards you using the mounting lever and remove the axle shaft. If the axle shaft cannot be removed, use a three-legged puller.
Use a grinder to cut the retaining ring. It is better to make the cut a little not completely and cut through the remaining rings with a chisel. In order not to damage the axle shaft, make the cut very carefully.
Use a chisel or drift to knock the bearing out of its seat on the axle shaft. In our case, only the bearing race remained.
Place the bearing on the drive and use a pipe and a hammer to press it into place. As a rule, seating a bearing is quite easy.
- The bearing retaining ring is hot pressed. Take the ring and secure it to a piece of wire. Next, light the gas burner and heat the ring almost to red.
- Have a helper hold the axle shaft upright and keep the pipe and hammer handy. Next, use pliers to put the hot ring on the drive, and then, without hesitation, an assistant puts it in place using a pipe and a hammer.
Using a slotted screwdriver, remove the oil seal from its seat.Using a piece of pipe along the outer diameter of the oil seal, press it into place.
Install the rubber O-ring.
- Fit the fastening nuts and tighten them in a cross pattern with a force of 50 Nm.
- Install the brake pads, drum and wheel.
Symptoms of a problem
Cases of axle shaft failure are extremely rare, unlike bearings. The main sign of a faulty rear axle bearing is a hum in the area of the rear axle wheel. Moreover, its intensity will depend on the speed of movement. If there is significant wear, a squeaking or grinding noise will be heard. Sometimes the bearing simply jams and it begins to rotate in the seat, and this leads to wear and tear and expensive repairs. The reason for its failure can be not only significant and frequent loads, but also simply a significant service life. Bearing diagnostics
How to make repairs
To begin, remove the gearbox from the machine, and then clamp it into a clamp. Unscrew both bolts for the locking plates and remove them.
Next, the bearing caps are marked for their future assembly. To do this, you will need a center punch and use a hammer to make marks. Use wrench No. 14 to unscrew the bolts and remove the covers.
It is important to immediately inspect the bearings for wear and serviceability. The outer races of each bearing are marked, since they are selected in pairs and cannot be disassembled. The radial play located on the axle gears is checked
If its size exceeds 0.5 mm, then the box is replaced. In normal condition, the bearing is removed and the planetary gear is unscrewed
The radial play located on the axle gears is checked. If its size exceeds 0.5 mm, then the box is replaced. In normal condition, the bearing is removed and the planetary gear is unscrewed.
Next, you need to knock out the satellite axis using the adapter and pull them out.
You need to remove the drive shaft and gear from the gearbox housing. A soft metal punch is perfect for this. The inner wheel of the roller bearing is knocked out.
It is also necessary to replace the adjusting sleeve with a new one.
After knocking down the bearing, you need to remove the adjustment ring.
Next, use a drift to knock out the outer rings of the bearings.
Now you can wash all parts in kerosene or diesel fuel. After the washing is done, all parts are diagnosed. There should be no chips or cracks
If these defects are present, it is important to replace the parts. If there are small scratches, they can be polished with sandpaper.
Replacing the rear wheel bearing
Before starting work, we carry out standard actions to secure it, jack up the car and remove the wheel. Next: 1. remove the brake disc; 2. through the holes of the axle shaft, unscrew its fastenings with a 17 socket head; 3. remove the axle shaft by prying it with a pry bar; 4. cut the locking ring; 5. through the holes that unscrewed the axle shaft, we knock down the bearing;
Don't remove the pads, I removed them to replace them.
We take out the oil seal and clean the seat
Next comes the assembly in reverse order: • install the oil seal; • stuff the bearing onto the axle shaft; • install the locking ring; • install the axle shaft in place.How to change a bearing?
Repair and replacement work can be done in the garage or outside. The main thing is to choose a relatively flat surface to work on, so that the car stands more stable during repairs.
To begin, stock up on the necessary tools, prepare a socket wrench (or an open-end wrench) for “ten”, a socket wrench for “seventeen” (if you have a head of this diameter, then this is only a plus), prepare a jack.
Please note that a regular “17” key is not very convenient to use, so it is better to optimize the tool - weld the head to the collar in the shape of the letter “T”.
It is better to buy spare parts after you have taken everything apart, since there are times when after dismantling you will have to buy a new axle shaft.
So, you will need:
Brand new bearing
axle shaft seal,
locking sleeve.
The sequence of actions for changing the bearing on a VAZ 2107 axle shaft:
1. Place the machine on a flat surface, install the locking shoes on the rear wheel and the front wheel on the other side.
2. Slightly unscrew the screws on the rear wheel and jack up the car.
3. Install a special support that will protect one of the sides of the car from accidentally falling. Alternatively, you can use an empty metal canister.
4. Unscrew the bolts completely and remove the wheel.
5. Using a ten-point socket wrench, screw in the guides and carefully “squeeze out” the brake drum (the easiest way is to knock it down using a wooden block and a hammer).
If these methods do not help, then try another method. Make sure that the car is well secured, depress the clutch, put the gearshift knob in the second gear position, start the engine, release the clutch, spin the silent drum (do not accelerate too much). After this, press the brake pedal sharply. As a rule, after just a few attempts the drum can be easily removed.
6. Using a “seventeen” wrench, through the special holes in the flange, unscrew the fastening bolts that secure the axle shaft.
7. Remove the axle shaft. If this cannot be done, place the wheel on two bolts and, tugging it (the movements should be as sharp as possible), remove the product. If it does not give in, then proceed by rocking.
Next, proceed to replace the bearing. Please note that if you do not have a special puller at hand, this operation will take you much longer.
