From the small list of amenities provided in the VAZ 2114 interior, the canopy lighting really has practical benefits. If the lampshade breaks down or the light bulb burns out at night, the interior is not illuminated. This may create some inconvenience. Understanding what the design of the backlight in the “four” consists of will allow you to carry out the repair yourself. In this article we will look at several reasons why the lamp in the VAZ 2114 does not light up.
Useful video:
Causes of malfunction
Of all electrical appliances, interior lighting is considered a fairly reliable element.
Infrequent use and placement of the ceiling on the ceiling of the car reduces the likelihood of mechanical damage. The very switching on of the lighting device occurs with a characteristic click when pressed. Excessive pressure due to switch failure is a common situation among owners of the fourteenth and fifteenth models. Light switch neglect is the number one cause of mechanical failure. In addition to the main lamp, the following light sources are responsible for illuminating the interior quad: the dashboard, a light in the glove box, and a small lamp for the driver (fisheye).
Considering the question “why doesn’t the light turn on in the interior of the VAZ 2114?” Please note that there may be problems with the following items.
What do you need to know about contactless safety equipment breakdowns?
If we talk about malfunctions of the non-contact ignition system, then the primary sign of malfunctions in its functioning is considered to be incorrect operation of the engine. If there is no ignition, the internal combustion engine may not start at all or will start only once, in addition, the engine will most likely function less stably in neutral gear. Also, one of the main signs is the inability of the car to develop power properly. It also happens that when trying to turn on the ignition, the driver sees that the warning lights on the panel are not lit. If the warning lights stop lighting, then the reason most likely lies in the lock itself, since this may be due to a lack of contact as a result of turning the key.
As for the main reasons, the following malfunctions are typical for non-contact SZ:
- Breakdown of the distributor cap is one of the most common problems; it usually occurs as a result of improper operation of the distributor or when it is worn out.
- A break in the circuit of high-voltage wires; as a rule, such a problem is associated with an insulation breakdown, which, in turn, is fraught with current leakage. Also, the reason may lie in poor contact of high-voltage batteries with spark plugs.
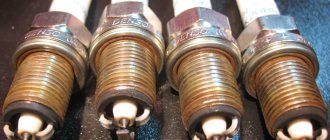
- Failure or wear of spark plugs, coil, controller or transistor switch. These elements can also fail due to wear and tear or improper use. As for the spark plugs themselves, they may not work correctly due to the constant use of low-quality fuel when refueling.
- Another common malfunction is a break from the stator winding controller.
- There is no contact at the switchgear output.
- A less common malfunction is the absence or disruption of contact between the wires and hardware elements of the SZ. If such a problem occurs, the driver will most likely hear uncharacteristic shots from the exhaust pipe.
- Increased gap in spark plugs (video author - Vyacheslav Chistov).
As practice shows, malfunctions in the operation of a contactless safety device can often be identified by increased fuel consumption. In this case, the reason is usually the failure or incorrect operation of the centrifugal or vacuum regulators, or both at once, or the failure of the spark plugs.
How to replace the license plate light bulb?
All this work will take some time, about five minutes. You need to prepare a flathead screwdriver and take new light bulbs. After performing a few simple manipulations:
- Turn off the lights.
- Open the trunk.
- Take a plastic screwdriver and use it to remove the cover from the latches.
- We take out the backlight housing and disconnect the contacts.
- Pull out the sealing sleeve.
- Replace.
- Assemble the structure.
- Check the functionality of the device.
Let's get started
First of all, we remove the decorative trim of the radio (since the dashboard and radio are connected to each other, you will have to disturb the music system too), which is held on by fasteners; here it is better to use a screwdriver, threading it under the trim.
The main condition of work is caution. You need to start detaching the cover from the bottom edge
When the bottom edge comes off, you need to pull it towards you a little.
Now detach the top edge. Further:
- Disconnect the wire directed to the cigarette lighter.
- In the same way as we removed the cover from the radio, we remove it from the dashboard. Above the left and right edges we find two self-tapping screws. They need to be unscrewed. We unscrew the screws located at the top and bottom.
- We remove the trim with a little effort (since it is also held on by fasteners, so the decorative plate will have to be rocked a little).
- We disconnect all the wires: from the alarm system, from the clock, from the headlights and other things.
- We remove the control panel itself, for which we unscrew the four screws on which it is held. In order not to damage the wires, it would be better to disconnect them on the one hand.
- Now the most important thing. We remove the sockets of the light bulbs that have stopped burning. To remove the cartridges, you need to turn them counterclockwise with a gentle movement. We replace the defective lamps with new ones, wrap them and install the entire structure in the reverse order of disassembly.
Fuse
There are fuses in the lamp circuit. The ceiling is activated and voltage is supplied to the light bulb only if the fuse is good. Over the several years the model was released from the factory, two different types of mounting blocks were installed on the vehicle. Note the location of the lamp fuses on each one. First, consider the location of the fuse in the mounting block of the new model. In addition, this element is responsible for the operation of the brake light.
Internal lighting power is 7.5 amperes. To quickly replace a blown element, it is recommended to have a spare set of fuses of any power with you.
In an old-fashioned mounting block, this element is located a little differently - from left to right it goes to the seventh place in the row. The cell power in this version of the block is 10 Amperes. In addition to interior lighting, a chain to the brake light passes through this element. This may help when trying to diagnose a faulty lamp.
If, after replacing a burnt-out part, the light in the interior of the VAZ 2114 does not turn on, then the reason should be sought in the wiring and in the light bulb.
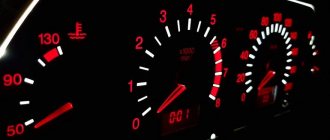
The instrument panel backlight has disappeared, what should I do?
Therefore, it is worth understanding that if the instrument panel does not light up, then this problem must be eliminated immediately, but not all car enthusiasts are capable of this.
It is worth understanding that if the backlight disappears, then the problem lies somewhere in the electrical circuits. This is where you need to look for the problem. This will require design knowledge of the vehicle's on-board circuit, a tester and related tools, such as electrical tape, a soldering iron or more. Of course, it is not always possible to eliminate the problem locally, and faulty products have to be replaced completely.
Causes of malfunction
Where does the problem lie? As mentioned earlier, it is worth looking for problems in electrical circuits. Let's look at the main locations where problems may be hiding:
- Fuse.
- Backlight bulbs and their electrical circuit.
- Wiring.
- There is a fault in the fuse box.
- Damage to the board.
Solutions
So, when all the main reasons are, so to speak, “in the face,” you can try to determine the exact location of the breakdown, and also fix it yourself. As always, it is worth noting that if a motorist does not know the design of the car or is not confident in his abilities, then it is recommended to contact a specialist car service center.
Fuse
General view of a blown fuse
This is where you should start troubleshooting. To find out which fuse is responsible for the instrument lighting, as well as its location in the mounting block, you should refer to the technical documentation. Also, on the fuse cover it is written which element should be checked. If the fuse is found and replaced, but the problem does not go away, then you should look for the source in another place.
Guys, the instrument panel has failed, nothing works, the windows are also empty, but the backlight works, and the on-board computer also does not work with this. The problem is generally in the fuse, I changed it and everything worked for about 15 minutes and suddenly the computer went out again and the arrows each remained in their place. What is the problem? Karatysh or maybe you can change some kind of relay? Yesterday I did diagnostics, and today everything went like this...(((
Standard interior lighting
The basic interior lighting kit for the 14th model (and a number of other VAZ cars) includes:
- dashboard lighting;
- individual shades of lighting;
- central inner lampshade (gen.
it is the latter that is responsible for lighting the entire interior space. This is a socket with an electric incandescent lamp, closed for safety purposes with a cap (which also plays the role of a diffuser, ensuring uniform distribution of the light flux throughout the cabin).
Wires from the lampshade contacts go to the door limit switches, which are responsible for automatically turning it on and off (buttons located on the central pillars are provided for forced control of the lighting inside the cabin).
If the light in the cabin suddenly stops burning, this does not mean that the lampshade itself is damaged and you need to replace the light bulb inside the VAZ 2114, which needs to be checked first.
Fuse box VAZ 2114
To check that the fuse is working - you don't even need to remove it from the block - just remember that the interior lamp and brake lights share the same fuse. That is why, if the legs work, but there is no light in the cabin, then the reason should be sought elsewhere.
Another common cause of malfunction can be limit switches, which wear out over time and stop working (not only a light that does not light up may indicate that they are closed, but, on the contrary, it constantly trips, which will lead to the limit switch being closed in the on position). This should also be remembered and their condition should be periodically monitored and replaced if necessary.
Wiring VAZ 2114
If the check shows that the light bulb in the VAZ 2114 interior does not work, it can be replaced as follows (to replace it you only need a flat-head screwdriver and a new light bulb):
- Disconnect the negative terminal from the battery.
- Using a flat-blade screwdriver, pry up the base of the lamp housing.
- Remove the body from the seat.
- Using a flat-blade screwdriver, pry up the two clips on the socket.
- Remove the socket along with the light bulb.
- Remove the light bulb itself and replace it with a new one.
Assembling and installing the lampshade is done in the same way, but in reverse order.
Bulb for interior lighting of VAZ 2114
After disassembling the ceiling, you must carefully examine the condition of the contacts on the light bulb socket: if there are dirt or oxides on them, they should be cleaned with fine sandpaper or a rag moistened with kerosene or another solvent.
Diagnostics
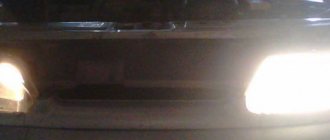
If problems arise with the vehicle's lighting equipment, the cause of the problem should be identified as quickly as possible and eliminated. The search should begin with the simplest and at the same time the most common causes. So, if one headlight on your VAZ 2114 does not light up, then most likely the reason is that the bulb of this headlight has burned out.
The simultaneous burnout of two light bulbs in both headlights also happens, but is extremely rare. As a rule, this occurs during sudden changes in voltage in the network and is accompanied by serious damage to other electronic equipment. Checking the serviceability of the light bulbs is very simple - you just need to replace them with new ones.
Burnt out light bulb filament
If, after replacement, the new light bulbs also refuse to work, then you should move on to the next stage - checking the condition of the sockets themselves. They very often become covered with a layer of oxides and stop transmitting current to the lamp. In order to fix this, you should carefully clean the nests with fine sandpaper or wipe them with a hard cloth soaked in kerosene or VD-40. If this also does not help, then move on to checking the circuit.
Inspection of sockets and contacts of headlight bulbs of VAZ 2114
In order to check the integrity of the electrical circuit, you should “ring” the wires leading to the headlights from the fuse box with a tester. If there is a signal, then the wires are working; if not, then there is a break and the wires should be replaced with new ones.
The next step of the test (although it can be done first) will be to check the fuses located in the common block. In this case, two 7.5 ampere fuses, labeled F12 and F13, are responsible for protecting the headlights. The first of them is in the right headlight circuit, and the second is in the left one.
The failure of one of them will lead to a breakdown of the light on only one side (this feature, along with the burnout of one light bulb, may be the reason why only one headlight is on). Solving this problem is extremely simple - you just need to replace the fuses with others designed for the same current strength.
Low beam elements on the fuse block
After all the methods described above have been tried, and you still have not been able to figure out why the low beam is not on and the high beam is on on the VAZ 2114, then you should check the last possible reason - the headlight switch button. First, you should check how the wires are attached to it - they have not come loose or oxidized. If everything seems to be working fine, then you need to check the button itself. The easiest way to do this is to replace it with a new one (fortunately, it costs a little more than a hundred rubles).
Finishing the conversation about possible malfunctions, it is worth mentioning an extremely rare but possible reason - a breakdown of the K9 relay (it is located in the common block). If a complete check of all electronic elements and replacement of the power button do not produce results, then this relay should also be replaced. Such a replacement should help correct the situation and return both headlights to operation.
Damage to the VAZ 2114 light switch button
Tuning the ceiling
Such a pleasant and exciting thing for a car enthusiast as tuning with your own hands is also possible with a ceiling lamp for interior lighting. Instead of the usual one, a ceiling with a programmable LED lamp is installed. It has advanced features:
- selection of three brightness modes, this selection is made by switching the switch at intervals of one second, the last switching on is remembered;
- shutdown delay 6-8 seconds with gradual switching off of the lamp;
- Automatic shutdown when the door is not closed or closed incorrectly after 30 minutes.
The price for such a ceiling is only about five hundred rubles, so the choice is obvious. The procedure for installing and connecting a ceiling with a programmable LED lamp:
- the plastic diffuser of the standard ceiling is removed;
- the wires are disconnected from the contacts of this device;
- Unscrew the four screws holding the light housing to the ceiling of the housing and remove the body of the old device;
- LED illuminator is released from a transparent plastic diffuser cover;
- the wiring is connected to the terminals of the LED illuminator according to the diagram;
- the housing of the new ceiling is fixed to the ceiling of the housing in the standard position with self-tapping screws;
- a plastic diffuser is attached to the body.
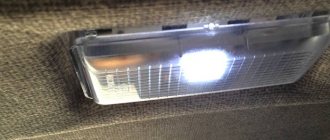
It should be noted that such a lighting device emits a brighter light, which in the dark is a good helper for all people in the car.
Lighting in the VAZ-2115 is one of the most important components of comfortable movement in a car at night. If the interior light does not work, the driver faces a lot of inconvenience.
The light emitted by street lamps will not help you find the desired object in the glove box, so the driver should make sure in advance that all light bulbs and other electrical components of the car are working stably and reliably. But what to do in a situation where the lighting fixtures in the interior of a VAZ-2115 for some reason refuse to fulfill their duties?
How to remove the lampshade and replace the lamp
Since two lampshades are responsible for interior lighting in the VAZ 2114, we will change the light bulbs in both.
General lighting lamp
Let's start with it, since replacing the light bulb in it is simple and won't take much time. First, a little theory. You can turn on this lamp in two ways: by opening any of the doors (mode 1) or by pressing one of the edges of the lamp (mode 2).
That is, the lampshade in this lantern swings around the central axis and acts as a switch.
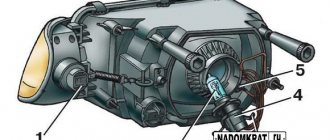
The principle of operation of the lamp switch
The numbers in the photo indicate:
- VAZ 2115 starter relay - where is the VAZ 2115 starter relay located
- Lantern body.
- Glass shade.
- Swing axis.
In order to remove the lampshade, it is enough to press the side of the housing at the swing axis so that the ebb on the glass comes out of the groove in the housing. This can be done with a flathead screwdriver or even your finger.
Pressing out the side of the flashlight body with your finger
First we remove this edge of the glass from the lantern, and the opposite one will come out on its own.
Removing the glass of the general interior lighting of the VAZ 2114
We remove the glass and observe the light bulb, which is clamped by two spring contacts.
Interior light bulb
We press the burnt out light device towards one of the contacts and remove it.
Removing a burnt out light bulb
We install a new one in place of the burnt one, simply snapping it into the contacts of the cartridge. We install the glass in the same way as we removed it: we insert one ebb on the glass into the groove of the body, snap the other one, slightly pressing the edge of the lantern with your finger.
Individual lighting lamp
Here we need a small flathead screwdriver to work. We insert the screwdriver into the slot, as shown in the photo below, and snap the flashlight out of the holder.
Removing the navigation light VAZ 2114
We take out the flashlight and see two blocks placed on the cartridge (marked with arrows). We remove them by simply pulling them out. In principle, you don’t have to remove the pads, but with them removed you won’t have to work with your hands suspended.
Power connectors can be removed for convenience
Now we press out the latches one by one, marked with arrows in the photo below, and gradually pull out the cartridge.
- VAZ 2114 fuse box diagram, location and replacement instructions
Expert opinionAlexey BartoshSpecialist in repair and maintenance of electrical equipment and industrial electronics.Ask an expert a questionImportant! The latches, like the cartridge itself, are very fragile - ordinary organic glass. We squeeze it very carefully, take our time and be sure to take turns, gradually pushing out the cartridge. If the latch breaks, the cartridge can be thrown away.
The socket together with the light bulb is in our hands.
Removed lamp socket for individual lighting VAZ 2114
Slightly recess the lamp, turn it counterclockwise and remove it. We also recess the new lamp and turn it clockwise. We install the socket with the new light bulb in place, making sure that both latches work, put the power blocks on its contacts (polarity may not be observed), install the flashlight in the standard socket and press it until it snaps into place.
Why the light in the cabin does not light (main reasons)
Electrical diagram of the car, which must be studied before starting work
The interior lighting of the car is part of the electrical system and therefore, in any case, it is worth looking for a fault in this part of the car. Of course, it is advisable to at least superficially study the technical diagrams of electricians, so that at least a little on the topic.
So what do you need? A detailed diagram of the car's electrical components, a little ingenuity and a minimum of tools. Let's look at places where the problem may be hiding:
We fix the lights and get acquainted with electrics
Since the main fault points have been identified, you can safely move directly to methods for solving the problem. It is worth noting that with an auto electrician, not everything is so simple, but since this is a VAZ-2114, everything can be said very clearly here. Let's move on to methods for solving the problem.
Bulb
First of all, check the light bulb, since it is its depletion that can lead to the disappearance of light inside the car.
To obtain it, you will need to remove the lamp cover. Next, you need to check whether there is an incandescent wire and insert the lamp into the control device or simply connect it to the battery. If the light comes on, this is not the cause of the problem.
Ceiling lamp
The problem may lie in the ceiling
More than once, the cause of the malfunction was the lamp itself, in which the contact group simply melted and short-circuited, causing a burnout or a blown fuse.
To diagnose it, you will need to disassemble it from the vehicle and visually inspect it. It is also advisable to ring the contacts going from the lamp to the wiring.
Fuse and relay for VAZ-2114
Replacing the screen may solve the problem
The next reason is a blown interior lighting fuse. This part can burn out due to a short circuit, which for various reasons occurs in the on-board circuit. Often a short circuit is caused by a faulty ceiling.
The interior lighting relay is marked with an arrow. Often the contacts burn out and prevent the light from turning on.
Wiring
Broken wiring may cause a malfunction
Electrical wiring is a motorist's nightmare. Some people understand everything, for others it’s a “dark forest.” So, during diagnostic operations, it is necessary to ring the wires going from the lampshade to the power supply or button.
How the central lock works
The central locking algorithm consists of sending an impulse to the VAZ 2114 central locking control unit, which analyzes the received signal and generates commands that control the door locks. They are either opened or locked.
General scheme of central locking
Elements that activate the central locking are connected to pin 30. If contact 87 closes, then the activator outputs will be affected by ground. When a certain relay 30 is activated, the contact will connect to the positive. Thus, the activator will receive power and the rod will begin to move. The control unit rod closes different pairs of signals depending on what action needs to be performed: closing or opening the doors.
Since the central locking activators are connected in parallel, all doors will either open or lock at the same time. Central locking can be pneumatic or electric. The first type of device includes a control panel, compressor and tubes. In an electric one, the main element is a motor, thanks to which the mechanisms are activated.
Why there is no light in the VAZ 2114 interior: the secrets of an electrician
The electrical system of the VAZ 2114 car includes a whole complex of various lighting devices.
It's good when there's light in the living room
They can be divided into the following groups:
- Lighthouse;
- Rear lights;
- Interior lighting.
To make it more convenient for the driver to navigate in the dark, halogen low and high beam lamps are installed in front of the car in the headlight unit. Turn signals are also installed in the same block with them, so when repairing a car you can remove the entire block. The rear has a unit on each side that includes brake lights, turn lights, and reverse lights.
INSTALLATION OF NEW EQUIPMENT
Now let’s figure out how to install an LED lamp on a car; for this we will definitely need a VAZ 2114 interior lighting circuit. This is done in the following sequence:
- Remove the lampshade;
- Unscrew the base of the case;
- We connect the new lampshade;
- Screw the LED lamp into place.
First we need to remove the original lampshade and disconnect the wires from it, all the contacts, we also need to remove the diffuser. The housing is screwed to the roof sheathing with four self-tapping screws; they are simply unscrewed and the housing is removed. Next, you need to take a new case and connect all the plugs in accordance with the diagram to the contacts that go to the battery. The new housing is screwed in exactly the same way onto the same four self-tapping screws, and the lens is snapped into place.
In this simple way you can update your car interior and make the interior lighting of the VAZ 2114 more comfortable and convenient.
Bulb
The operating principle of the internal light elements is simple. Limit switches are provided on all sides of the body struts.
This small part, when the door is opened, causes the contact to open, which gives a signal to turn on the lighting. When the door is opened, only the main lamp on 2114 lights up. Frequent opening of the door and constant operation of the light bulb lead to its gradual wear.
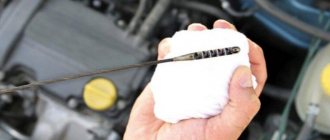
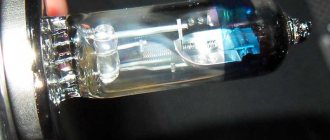
Once a light bulb runs out of power, it burns out. You can check the integrity of the light bulb yourself. Simply lift the plastic cover of the main light source and the inside of the illuminator will appear before your eyes.
The standard version of the lamp is AVS Vegas 12V. If desired, you can introduce LED elements instead of a conventional incandescent lamp. The photo above shows only this option.
The driver's lamp has a slightly different form of bulb with a socket - r5w with a power of 5 W.
Changing is a little more difficult. You need to use a screwdriver to pry up the fisheye housing and then remove the seat belt clip. Then press the latches on both sides of the case and pull out the r5w base.
If after the replacement procedure the interior lighting of the VAZ 2114 does not work, check the wiring.
BACKLIGHT DOESN'T WORK
In cases where the light in the interior of a VAZ 2114 does not turn on, drivers who do not understand the electrical equipment of the car and its repair immediately begin to go to the Internet and try to find some advice or a solution to the problem there. But, no matter how strange it may be, you can fix the interior lighting of a VAZ 2114 yourself, you only need a minimum of tools for this and a detailed action plan, which we will analyze today.
INITIAL CHECK
It is better to start repairs by checking the functionality of a specific lamp - perhaps the light bulb has simply burned out and will simply need to be replaced. If the light in the interior of the VAZ 2114 does not go out or, on the contrary, does not turn on when the doors are opened, then you need to check the door switches for functionality, you need to see if the contacts are in order, if they have oxidized, then it is better to clean them and wipe them with alcohol.
There are also certain nuances if there are LEDs. Typically, drivers prefer to replace conventional lamps with LEDs as quickly as possible, this is due to the following factors:
- Cost-effective;
- Longer service life;
- Light brightness is much higher at low cost.
So you need to check the plus and minus, and if so, turn the light bulb the other way and see if it lights up after that. In any case, it is better to convert the lampshade of the individual lighting of the VAZ 2114 to LED lamps so that it produces more brightness.
Also, on all light bulbs you need to check the voltage at the contacts and find out whether current is flowing there. If it is not there, then you will have to look for a broken wire somewhere in the wiring. This will require disassembling certain parts of the car, but there is no getting around it - if the interior lighting of the VAZ 2114 no longer works, then it needs to be repaired
The greatest attention still needs to be paid to the limit switches; often the problem with breaking the circuit lies precisely in them; a wire can easily break there, and you won’t even notice it
Malfunctions of fuses, wires and switches
Another equally common cause is a blown fuse. It is located in the corresponding block located under the hood, on the left side (towards the car), closest to the windshield. Open the black cover and find the required fuse: in the VAZ2114 it is F12 (right headlight) and F13 (left headlight). Both fuses are 7.5 amps. To ensure their integrity, turn the details into light - entire strands should be visible. If they are missing, the fuse(s) will need to be replaced. If these elements are intact, but there is still no light, it makes sense to check the relay on the way; it is designated as K9. You need to take it out and insert a known good part (you can use the K8 high beam relay to check).
Poorly connected or oxidized cables may also not light up. To make sure the wiring is working properly, disconnect the pads and look at the internal contacts - there should be no green spots on them. By the way, a bad or oxidized contact can cause a fuse to blow (the same problem occurs due to a short circuit in the wire). The most important thing is that the low beam does not turn on due to a faulty push-button switch. You can simply extract it and also replace it with a known one.
It includes a range of different lighting fixtures.
It's good when there's light in the living room
They can be divided into the following groups:
- Lighthouse;
- Rear lights;
- Interior lighting.
To make it more convenient for the driver to drive in front of the car at night with halogen low and high beam headlights. Turn signals are also installed in the same block with them, so when repairing a car you can remove the entire block. The rear has a unit on each side that includes the brake lights, turn lights, and reverse lights.
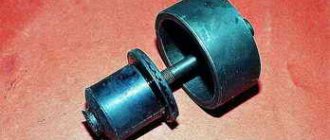
main relay, main relay VAZ
When the ignition is turned on, on cars with an injection engine, power is supplied to the corresponding output of the controller connected to the ignition switch. This power is a signal to turn on the main relay, through which power is supplied to the injectors, ignition coils (ignition module), fuel pump relay, and so on. That is, if the relay or its activation circuit is faulty, the engine will not start. How to find a fault if the engine does not start due to the main relay. First, find a place to install it on the car. It is mainly installed next to the fuel pump relay and the radiator cooling fan relay.
The fuses for the engine management system, fuel pump and radiator cooling fan are also installed there. On VAZ - 2107, VAZ - 2109 cars and its modifications, it is located on a shelf under the glove compartment or under it. On VAZ-2110 and similar cars, under the side of the heater console, on the passenger side. On GAZ cars, they are usually located under the hood on the front wall of the cabin closer to the passenger side. If, when you turn on the ignition, you do not hear the characteristic click of the relay turning on, you need to use a test lamp connected to the minus to check the presence of power at terminals 85 and 86 of the main relay socket. When using a test lamp, its current consumption should not exceed 0.25A, otherwise damage to the controller may occur. If the control lamp does not light up on any terminal, then the relay is not receiving power. This may be caused by a blown fuse or a broken power cord. In the case when the lamp burns brightly on one terminal, and at half-glow on the second, and the relay may be activated, you should remove the relay from the socket and connect terminals 85 and 86 with a test lamp. When the ignition is turned on, the control lamp should light up. If this is the case, then it is necessary to eliminate the poor contact in the connection of the relay with its block. If the control lamp does not light up, it is necessary to check the integrity of the wire following from the relay to the controller and the contact of the negative wires from the controller to the engine body. On VAZ cars, these wires are attached to the end of the cylinder head above the thermostat, and on GAZ cars to the connecting pin of the receiver and intake manifold in the area of the fourth cylinder. If the wires are OK, but the relay does not turn on, the controller is faulty. For example, on Volga cars, a common malfunction in this case is a break in the negative wire or water getting into the controller, which leads to its malfunction.
If, when you turn on the ignition, there is a click and the relay is activated, then you need to check the power supply at terminals 87 and 30. To do this, touch terminal 87 with the test lamp connected to the minus. If the test lamp does not light up, then possible malfunctions may be a blown fuse or wire break. If there is a plus on pin 87, but when the relay is turned on, there is no positive on pin 30, it means that the relay contacts have burned out and it should be replaced. On VAZ cars, you can use a suitable relay from the mounting block for this, for example, a relay for turning on signals, low or high beam headlights, and so on. When searching for a malfunction in which the main relay does not turn on, it is necessary to take into account the presence of anti-theft systems on the car. When installing them, it is not uncommon to include a blocking relay in the relay circuit, which breaks its power supply circuit when the alarm is triggered.
“If you notice an error in the text, please highlight this place with the mouse and press CTRL+ENTER”
We fix the lights and get acquainted with electrics
Since the main fault points have been identified, you can safely move directly to methods for solving the problem. It is worth noting that with an auto electrician, not everything is so simple, but since this is a VAZ-2114, everything can be said very clearly here. Let's move on to methods for solving the problem.
Bulb
First of all, check the light bulb, since it is its depletion that can lead to the disappearance of light inside the car.
To obtain it, you will need to remove the lamp cover. Next, you need to check whether there is an incandescent wire and insert the lamp into the control device or simply connect it to the battery. If the light comes on, this is not the cause of the problem.
Ceiling lamp
More than once, the cause of the malfunction was the lamp itself, in which the contact group simply melted and short-circuited, causing a burnout or a blown fuse.
To diagnose it, you will need to disassemble it from the vehicle and visually inspect it. It is also advisable to ring the contacts going from the lamp to the wiring.
Fuse and relay for VAZ-2114
Replacing the screen may solve the problem.
The next cause is a blown interior light fuse. This part can burn out due to a short circuit, which for various reasons occurs in the on-board circuit. Often a short circuit is caused by a faulty ceiling.
The interior lighting relay is marked with an arrow. Often the contacts burn out and prevent the light from turning on.
The filament in the light bulb has burned out
The first thought that comes to mind if any light source does not turn on is that the light bulb has burned out. Car lamps are designed in such a way that the low beam filament can burn out while the high beam filament is working. That is, in halogen lamps there are two separate filaments, and the breakage of one of them has no effect on the performance of the second.
To replace a light bulb, it is not at all necessary to contact the services of an auto electrician. All you need to do is follow these steps:
- open the car hood;
- remove the protective cover on both sides of the headlight;
- disable contact group;
- remove the spring clips;
- remove the burnt out light bulb;
- insert new one;
- Carry out all preparatory steps in reverse order.
At the same time, we should not forget to follow some rules:
- It is recommended to wipe the surface of the flask with alcohol before installation, otherwise it may immediately burn due to the presence of greasy or dirty stains;
- Do not touch the flask with unprotected hands, as this may lead to contamination of its surface. This is best done with cotton gloves, but you can also use a napkin or rag.
The lights still don't come on - other reasons
It often happens that after disassembling the lamp the lamp is in good condition, but the lighting does not work. What to do in this case? Let's try to find fault for ourselves.
Diagram of the ceiling lamp for the main interior lighting of the VAZ 2114
First, let's take a look at the connection diagram for the main interior lamp of the VAZ 2114.
Connection diagram for the main interior lamp of the VAZ 2114
Here:
- X1 - lamp lamp;
- SW1 - mode switch built into the lamp;
- SW2-SW5 - limit switch in door frames;
- F - fuse in the mounting block.
As can be seen from the diagram, one terminal of the lamp is constantly under voltage of +12 V. When one of the doors is opened, the corresponding limit switch is closed and the other end of the lamp is connected to the body (this is negative power) - the light comes on in the cabin. If you turn switch SW1 to the opposite position, lamp X1 will light up regardless of the state of the doors. So if:
The light doesn't come on at all. The fuse, lamp socket or switch SW1 is faulty. It is easy to check the safety of the fuse. Together with the interior ceiling lighting, it powers the brake light warning lamps, the navigation lamp, the trunk, the ignition switch lighting, and the on-board computer. If all this works, then the fuse is good.
- Heater fuse VAZ 2114
If everything goes out immediately, open the hood and find the mounting block. It is located in the engine compartment just behind the windshield facing the driver. In the photo below, the block is marked with an arrow.
Location of the mounting block in the VAZ 2114
We are interested in fuse F3, marked with an arrow in the photo below.
This fuse is responsible for the interior lighting.
Using the tweezers included in the kit, remove the burnt one and replace it with a new one of the same rating (10, in some modifications 7.5 A).
Next comes the cartridge. Everything is in sight. We remove the light bulb, inspect the base and socket contacts. Clean if necessary. There was a switch. We will find out what to do with it in the next paragraph.
Mode 2 “Always on” does not work. The cause is the switch or the wire running from the light to ground. It's black. Open the cover (see Section “How to remove the cover and replace the lamp”) and check the condition of the switch contacts. There are three of them: the central one is movable, the two outer ones are motionless. In the photo below they are indicated by numbers 1 and 2, respectively.
Mode switch contacts are built into the ceiling
We inspect and remove if necessary. If the contacts are clean, it is possible that the glass does not compress the movable contact onto the lower stationary one when switching. Do it with your finger:
Manual control of switch operation
The light comes on, which means the glass simply does not compress the contact. Bend the tip slightly, place the glass and check. If everything is in order with the contacts, but the light does not light, the problem is in the ground wire. We take a piece of wire with stripped ends and close the central contact of the lamp with it on any part of the body that is not covered with paint (bolt, screw, etc.). Did it catch fire? You will have to look for where the standard wire broke, or simply disconnect it and send a new one, using only a special one for cars.
Expert opinion All manipulations with the switch, except for checking (cleaning, bending contacts, etc.), should be carried out only with the battery disconnected, since the lamp always has +12 V. The slightest inattention - and you can lose the fuse or even completely burn out the wiring .
Mode 1 does not work. In this mode, the backlight turns on when one of the doors is opened. There are three options here: the light comes on when the doors are closed, the light does not come on when the door is open, and the lamp does not respond to the state of the doors at all.
In the first two cases, one of the limit switches is clearly faulty or the wire running from them to the ceiling is shorted towards the body. The third case is a break in the wire running from the limit switches to the device.
Let's start with the first option: the ceiling “does not see” one of the doors. We open the “guilty” door and find a limit switch on its counter.
The photo shows that the pusher head is quite worn. Maybe this is why? Press with your finger. Is it burning? The problem is mechanical wear. Here we are talking about changing the limit switch or inventing something else (for how long?). Off - unscrew the fixing screw and pull out the switch.
Removing the door opening limit switch
The only thread goes to him. We adjoin the body (the area without paint, of course). Is the light on? You will have to replace the limit switch, since it cannot be repaired at home.
If the light is on when the doors are closed, a similar operation must be performed with all limit switches. The only difference is that when the faulty limit switch is removed, the light goes out. Found? We are changing. Not found: you will have to look for a place to short the wires from the limit switches to the lamp. This activity is boring, since all the wires are securely hidden inside the body and under the upholstery. So what are you doing?
If the light does not respond to all doors, first check and, if necessary, clean the built-in switch (see above), then look for a break in the common wire from the limit switches to the ceiling. This is a tedious task, since all the threads are safely hidden inside the body and under the upholstery, but nothing can be done about it. Well, it's time to get started with your custom lighting flashlight.
Shower controller. The lighting in the shower stall does not work. Part 1 – Fault diagnosis.
Some time ago, in my home, the interior lighting in the shower stall stopped working. Symptoms: when you turn on the light, the light bulb flashes for a split second and goes out; the light bulb does not react at all to subsequent on/off turns. After a few hours of downtime, history repeats itself. The lighting in the shower is controlled by a clearly Chinese shower controller “SHOWER CONTROLLER Z8688”.
Photo of the front panel of the shower controller.
The first suspicion naturally fell on the light bulb itself. But a test on a known working power source showed that the light bulb was in good working order.
Next, it was necessary to check the wiring and the controller itself. To check, it was necessary to dismantle the controller and remove all wiring from the shower. Unfortunately, it was not possible to take a photo during the dismantling process, due to the too small distance between the wall and the back wall of the shower stall. The removed controller with wires looks like this.
The photo shows a separate power supply and a control module with wires extending from it intended for controlled devices. I did not remove the front panel from the shower, since it was fixed in the opening of the shower body using sealant, and there was no desire to re-seal it in the body. Two wires (red and black) protruding from the control module, in the photo, led to microphone built into the phone's shower controller, but due to the fact that the microphone was tightly glued into the corresponding groove on the front panel, it had to be unsoldered.
Checking the power supply showed that everything is fine with it and it produces the required 12V as expected.
Next, it was decided to measure the voltage at the output of the controller to which the light bulb is connected. This is where all the fun began. The fact is that the multimeter at the output to which the light bulb was connected showed the required 12 Volts.
For comparison, I decided to check the voltage at the adjacent output, intended for external lighting, and it showed the same 12 Volts.
Checking the light bulb on this adjacent output showed that at the same voltage the light bulb works without problems.
Accordingly, the problem should be looked for in the current at the problem output. We check the amount of current passing in the circuit through the light bulb when connected to the “working” and “non-working” output. To do this, switch the multimeter to current measurement mode and connect it in series with the light bulb. Connection to the “working” output:
Connection to the “non-working” output:
Already when I was writing the article, I noticed that when I took a photo with the working output, I did not switch the multimeter from the microampere measurement range to the ampere measurement range, for some reason it showed the correct value but in a different order, in fact, after measuring it again, I got close to the calculated 0.76 A .
As a result, we see that the current at the problem output is 1.2 μA, while at the working output it is equal to: 0.76 A
We look at the diagram and determine the current path from the input to the non-working output. There is only one element in the current path: the relay.
This relay (HUI KE HK4100F-DC12V-SHG) is controlled by a 12 Volt signal. There is a suspicion that this relay has problems with the quality of the contacts of the switched circuit. To test this hypothesis, you should try to connect a light bulb bypassing this relay; to do this, we connect the input and output contacts of the circuit switched through the relay.
As a result, we see that removing the problematic relay from the circuit restores the operation of the light bulb.
Therefore, to repair this controller, you should replace the problematic relay: HUI KE HK4100F-DC12V-SHG. We search by model number, a new relay on the AliExpress website, order and wait for the parcel.