Lighting in the VAZ-2115 is one of the most important components of comfortable movement by car at night. If the interior light does not work, the driver faces a lot of inconvenience.
The light emitted by street lamps will not help you find the desired item in the glove compartment, therefore, it is best for the driver to take care in advance that all the light bulbs and other components of the car’s electrical equipment work stably and reliably. But what to do in a situation if the lighting fixtures in the interior of a VAZ-2115 for some reason refuse to fulfill their duties?
What light bulbs are installed on VAZ 2114, 2113, 2115?
| Name of the light bulb | Name according to GOST | Name according to EEC | Lamp power, W |
| Headlight for high beam and low beam side light, turn signal | AKG12-50+55-1 A12-4-1 A12-21-3 | H4 T4W P21W | 60/55 4 21 |
| Rear exterior lamp, side light and brake lights | A12-21-3 F12-21+5 | P21W P21/5W | 21 21/5 |
| Rear interior reversing light fog light | A12-21-3 A12-21-3 | P21W P21W | 21 21 |
| Side turn signal | A12-5-2 | W5W | 5 |
| Anti-fog headlight | AKG12-55-1 | H1 | 55 |
| License plate light | AS12-5-1 | С5W | 5 |
| Lower glove box lighting | AS12-5-1 | С5W | 5 |
| Central interior lamp | AS12-5-1 | С5W | 5 |
| Front interior lamp | A12-4-1 | T4W | 4 |
| Ashtray light | A12-1.2 | W2x4.6d | 1,2 |
| Illuminated symbols of key switches and their indicators | ASMN12-0.55 | — | 0,55 |
| Instrument cluster and on-board control system unit | A12-1.2 | W2x4.6d | 1,2 |
| Trunk light | AS12-5-1 | C5W | 5 |
| Cigarette lighter socket | A12-4-1 | T4W | 4 |
Removal, disassembly and tuning
We have figured out the design of the lantern and its circuitry, we know how to change light bulbs, now we will try to make a little tuning of these lighting devices. But first, let's learn how to remove the lantern, disassemble (more precisely, break) and assemble (i.e., repair).
Removing the rear light
We open the trunk lid, find a pocket in the upholstery that covers the back of the lamp, and open it. We remove the power supply, take out the board with the lamps. All these steps are described in detail in the “How to replace lamps” section. We bend the upholstery along the edges of the lantern and find 4 nuts located around the perimeter. In the photo below, two of them are marked with arrows.
The lantern is secured with four nuts
We unscrew them with a key 8. Pull the lamp in the direction of the arrow in the photo below, remove it from the body.
Removing the rear corner light
Disassembly
Like most previous VAZ models, the rear light on the 2115 is non-separable, so we’ll break it. The most common option is to simply cut the glass around the perimeter. The author of the next photo used an angle grinder for this.
Cutting the rear corner light glass using an angle grinder with a cutting wheel
We walked along the perimeter, where we couldn’t reach with a cutting wheel, and used a piece of a hacksaw blade for metal. Carefully pry up the glass with a screwdriver and, with a little force (in one place it is glued to the edge of the body, which cannot be reached with a saw), disconnect it.
Removing glass from the lamp body
Healthy. Instead of a grinder with a huge disk, it is better to use circular attachments on a drill attached to a conventional drill. Such attachments cost around 300 rubles and are always useful on the farm.
Assembly
Of course, we will assemble the flashlight after tuning, but we will place this item next to disassembly. We assemble using a soldering iron and sealant. We apply the glass to the body, grab them together with a heated soldering iron at a dozen points - just so that the structure does not fall apart.
Temporarily grab the glass with a soldering iron
Now we carefully go around the perimeter with a soldering iron, soldering both parts of the lantern together so that it is not only strong, but, if possible, airtight.
"Soldering" of the rear light housing
Well, to ensure that moisture does not get inside the lantern, we coat the seam with sealant.
Sealing the seam with sealant
Once the sealant has dried, the rear light assembly can be considered complete.
Tuning
Let's look at a simple but very interesting way of tuning rear lights. Its beauty is not only in its simplicity, but also in the wide choice of appearance of the lighting device and at the same time in the extremely low price of the work. We will only tune the brake lights/dimensions, but if desired, the same can be done with the turn indicators or fog lights (you can disassemble the internal rear lights using the same algorithm).
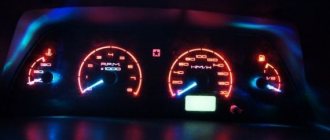
Instrument lamps VAZ 2114, 2113, 2115
Light bulb for lower panel glove compartment
Designation (article number) of the glove box light bulb:
- According to the classification of the Eurasian Economic Commission (EEC) - C5W
- According to GOST - AS12-5-1.
Bulb dimensions AC12-5-1 (C5W):
- Length - 35 mm;
- Diameter - 11 mm.
- The diameter of the base is 8.5 mm.
Technical characteristics of the glove compartment light bulb for VAZ 2114, 2113, 2115:
- Power - 5 W;
- Base - metal 2 pcs;
- Lamp - incandescent;
- The flask is transparent glass;
Installation location of the AC12-5-1 (C5W) glove box illumination bulb for VAZ 2114, 2113, 2115:
Ashtray light on dashboard
Designation (article number) of the ashtray light bulb on the dashboard of VAZ 2114, 2113, 2115:
- According to the classification of the Eurasian Economic Commission (EEC) - W2x4.6d
- According to GOST - AS12-1,2.
Dimensions of the AC12-1.2 (W2x4.6d) ashtray light bulb:
- Length - 20 mm;
- Diameter - 5 mm.
- The diameter of the base is 4.6 mm.
Technical characteristics of the ashtray light bulb for VAZ 2114, 2113, 2115:
- Power - 1.2 W;
- Base - glass;
- Lamp - incandescent;
- The flask is transparent glass;
Installation location of the AC12-1.2 (W2x4.6d) ashtray light bulb for VAZ 2114, 2113, 2115:
Lamps for illuminating the symbols of key switches and their indicators
Designation (article number) of the backlight bulb for the key switches on the dashboard of VAZ 2114, 2113, 2115:
- According to GOST - ASMN12-0.55.
Dimensions of the ASMN12-0.55 light bulb for backlighting the key switches on the dashboard:
Technical characteristics of the backlight bulb for key switches VAZ 2114, 2113, 2115:
- Power - 0.55 W;
- Base - wire antennae;
- Lamp - incandescent;
- The flask is transparent glass;
Installation location of the ASMN12-0.55 light bulb for the illumination of key switches VAZ 2114, 2113, 2115:
Instrument cluster lights
Designation (article number) of the instrument cluster illumination bulb for VAZ 2114, 2113, 2115:
- According to GOST - A12-1.2.
- According to the classification of the Eurasian Economic Commission (EEC) - W2x4.6d
Dimensions of the A12-1.2 (W2x4.6d) light bulb for the instrument cluster illumination:
- Length - 20 mm;
- Diameter - 5 mm.
- The diameter of the base is 4.6 mm.
Technical characteristics of the bulb A12-1.2 (W2x4.6d) for illuminating the instrument cluster of VAZ 2114, 2113, 2115:
- Power - 1.2 W;
- Base - glass;
- Lamp - incandescent;
- The flask is transparent glass;
Installation location of the A12-1.2 (W2x4.6d) light bulb for the instrument cluster illumination of VAZ 2114, 2113, 2115:
| Item No. in the illustration of the instrument cluster | Explanation of position |
| 1 | engine warning light |
| 2 | hazard warning light |
| 3 | instrument cluster lighting bulbs |
| 4 | high beam warning lamp |
| 5 | Low brake fluid warning light |
| 6 | lamp for turning on the external light VAZ 2114, 2113, 2115 |
| 7 | low fuel level warning light |
| 8 | right turn indicator light |
| 9 | left turn signal light |
| 10 | airbag warning light |
| 11 | low engine oil pressure warning light |
| 12 | parking brake light |
| 13 | warning light for loss of battery charge VAZ 2114, 2113, 2115 |
Cigarette lighter lamp
Designation (article number) of the cigarette lighter light bulb for VAZ 2114, 2113, 2115:
- According to GOST - A12-4-1.
- According to the classification of the Eurasian Economic Commission (EEC) - T4W
Dimensions of the A12-4-1 (T4W) cigarette lighter light bulb for VAZ 2114, 2113, 2115:
- Length - 26 mm;
- Diameter - 9.2 mm.
- The diameter of the base is 9.1 mm.
Technical characteristics of the A12-4-1 (T4W) cigarette lighter light bulb for VAZ 2114, 2113, 2115:
- Power - 4 W;
- The base is metal;
- Lamp - incandescent;
- The flask is transparent glass;
Installation location of the A12-4-1 (T4W) cigarette lighter light bulb for VAZ 2114, 2113, 2115:
Car modifications 2115
VAZ-2115 . The very first car that was produced since 1997. It was equipped with a 1.5-liter carburetor engine producing 76 horsepower. The maximum speed was 165 km/h, and the acceleration time from 0 to 100 km/h was 13.2 seconds.
VAZ-21150 . The next modification, released in 1998, was equipped with a 1.5-liter carburetor engine producing 68 horsepower. was discontinued in 2000.
VAZ-2115-20 . A modification of the car released in 2000, equipped with a 1.5-liter VAZ-2111 injection engine with a power of 77.8 horsepower. The maximum speed was 170 km/h, and the acceleration time from 0 to 100 km/h was 14 seconds.
VAZ-2115-40 . A modification with a 1.6-liter injection engine, which has been produced since 2003. The car's maximum speed was 158 km/h, and the acceleration time to 100 km/h took 13.2 seconds.
VAZ-2115-91 . A car with a 1.3-liter Wankel rotary piston engine producing 135 horsepower. The maximum speed is 190 km/h, and the acceleration time to 100 km/h is 9 seconds.
VAZ-21154 . The latest modification of the car with a new VAZ-11183 engine with a volume of 1596 cm3 and a power of 81 horsepower. Produced since 2007. The maximum speed and acceleration time to 100 km/h are exactly the same as that of the VAZ-2115-40.
Light bulb sizes 2114, 2113, 2115
Front light bulb for VAZ 2114, 2113, 2115
Designation (article) of the front light bulbs for VAZ 2114, 2113, 2115:
- According to GOST - A12-4-1.
- According to the classification of the Eurasian Economic Commission (EEC) - T4W
Dimensions of the bulb A12-4-1 (T4W) for the front dimensions of VAZ 2114, 2113, 2115:
- Length - 26 mm;
- Diameter - 9.2 mm.
- The diameter of the base is 9.1 mm.
Technical characteristics of the A12-4-1 (T4W) light bulb for the front dimensions of the VAZ 2114, 2113, 2115:
- Power - 4 W;
- The base is metal;
- Lamp - incandescent;
- The flask is transparent glass;
Installation location of the A12-4-1 (T4W) light bulb for the front dimensions of the VAZ 2114, 2113, 2115:
Tail light bulb
Designation (article number) of the rear light bulbs of VAZ 2114, 2113, 2115:
- According to GOST - A12-4-1.
- According to the classification of the Eurasian Economic Commission (EEC) - T4W
Dimensions of the A12-4-1 (T4W) rear light bulb for VAZ 2114, 2113, 2115:
- Length - 26 mm;
- Diameter - 9.2 mm.
- The diameter of the base is 9.1 mm.
Technical characteristics of the A12-4-1 (T4W) rear light bulb for VAZ 2114, 2113, 2115:
- Power - 4 W;
- The base is metal;
- Lamp - incandescent;
- The flask is transparent glass;
Installation location of the A12-4-1 (T4W) rear light bulb for VAZ 2114, 2113, 2115:
Purpose
The front lights are called head lamps; they are located in the headlight unit in front of the car on both sides. They are the outermost ones in the lighting system, and owe their name to the fact that they show the width of the car to oncoming vehicles.
The rear lights are intended for exactly the same mission—so that you can be seen by those driving behind you. This is especially true when overtaking; you don’t want someone to hit your “swallow” without seeing its real size.
Hence the important advice: if it suddenly happens that you need to go at all costs and you discover that the light bulb in the left side light has burned out, replacing it with a new one is impossible due to the lack of one, don’t be lazy and move it from the right side. And we will tell you how to do this.
Rear lamps VAZ 2114, 2113, 2115
| Item number in the picture | Explanation of the position in the picture of the rear light bulbs of VAZ 2114, 2113, 2115 |
| 1 | rear light bulb VAZ 2114, 2113, 2115 |
| 2 | brake light lamp |
| 3 | reverse light |
| 4 | fog lamp VAZ 2114, 2113, 2115 |
| 5 | direction indicator light |
Rear turn signal lamp
Designation (article number) of the rear direction indicator lamp for VAZ 2114, 2113, 2115:
- According to GOST - A12-21-3.
- According to the classification of the Eurasian Economic Commission (EEC) - P21W
Dimensions of the A12-21-3 (P21W) rear turn signal bulb for VAZ 2114, 2113, 2115:
- Length - 52.5 mm;
- The diameter of the flask is 26.5 mm.
- The size from the base stop to the top of the lamp is 45 mm.
Technical characteristics of the rear lamp A12-21-3 (P21W) of the direction indicator VAZ 2114, 2113, 2115:
- Power - 21 W;
- The base is metal;
- Lamp - incandescent;
- The flask is transparent glass;
Installation location of the rear lamp A12-21-3 (P21W) of the direction indicator VAZ 2114, 2113, 2115:
Reversing light bulb VAZ 2114, 2113, 2115
Designation (article number) of the reverse light bulb VAZ 2114, 2113, 2115:
- According to GOST - A12-21-3.
- According to the classification of the Eurasian Economic Commission (EEC) - P21W
Dimensions of the A12-21-3 (P21W) reversing light bulb for VAZ 2114, 2113, 2115:
- Length - 52.5 mm;
- The diameter of the flask is 26.5 mm.
- The size from the base stop to the top of the lamp is 45 mm.
Technical characteristics of the A12-21-3 (P21W) reversing light bulb for VAZ 2114, 2113, 2115:
- Power - 21 W;
- The base is metal;
- Lamp - incandescent;
- The flask is transparent glass;
Installation location of the rear lamp A12-21-3 (P21W) of the reversing light VAZ 2114, 2113, 2115:
Electric fog lamp
Designation (article) of the rear fog light bulb VAZ 2114, 2113, 2115:
- According to GOST - A12-21-3.
- According to the classification of the Eurasian Economic Commission (EEC) - P21W
Dimensions of the rear fog light bulb A12-21-3 (P21W) VAZ 2114, 2113, 2115:
- Length - 52.5 mm;
- The diameter of the flask is 26.5 mm.
- The size from the base stop to the top of the lamp is 45 mm.
Technical characteristics of the rear fog light bulb A12-21-3 (P21W) VAZ 2114, 2113, 2115:
- Power - 21 W;
- The base is metal;
- Lamp - incandescent;
- The flask is transparent glass;
Installation location of the rear fog light bulb A12-21-3 (P21W) VAZ 2114, 2113, 2115:
Rear brake light
Designation (article) of the rear brake light bulb VAZ 2114, 2113, 2115:
- According to GOST - A12-21-3.
- According to the classification of the Eurasian Economic Commission (EEC) - P21W
Dimensions of the rear light bulb A12-21-3 (P21W) of the brake light for VAZ 2114, 2113, 2115:
- Length - 52.5 mm;
- The diameter of the flask is 26.5 mm.
- The size from the base stop to the top of the lamp is 45 mm.
Technical characteristics of the rear brake light bulb A12-21-3 (P21W) VAZ 2114, 2113, 2115:
- Power - 21 W;
- The base is metal;
- Lamp - incandescent;
- The flask is transparent glass;
Installation location of the rear brake light bulb A12-21-3 (P21W) VAZ 2114, 2113, 2115:
Typical faults and methods for their elimination
There are many reasons why taillights may fail or partially not work, but the main one is failure of the flexible printed circuit board. This is, in fact, the most sore spot of the rear light devices of the VAZ 2115.
Often, flimsy contact pads that pretend to be light bulb socket contacts fail, although in fact there are no sockets in the flashlights - a plastic ring that fixes the light bulb, a plastic pressure pad (all with latches) and contact pads on the board. It couldn't be simpler, but funnier too.
That's the whole "cartridge"
The service life of such a “cartridge” is six months maximum. Considering that the car was produced for 15 years, then this approach of the developers to the flashlight, the design of which has not changed over all these years, is surprising, to say the least. But the fact is clear.
Converting the board to cartridges
You can, of course, regularly change the flexible board - this is not a problem. But, firstly, the board costs money and, in principle, should not be a consumable item in order to buy it in packages. And, secondly, when someone is dead, for example, you won’t immediately notice “stop”, which means that at any moment we risk getting “in the butt” in the literal sense of the word.
Therefore, it’s better to tinker and do what the VAZ designers should have done a long time ago - replace all this flexible hack with normal cartridges. So, we go to the store, buy three ordinary plastic lamp sockets: one for a single-helix P21W, two for a double-helix P21/5W lamp. They are practically the same in size and appearance.
For modification we will need 3 such cartridges for one flashlight
You will also have to buy a set of four-pin male-female car connectors. The photo below shows only an option, but there are many types of such connectors. In addition, any others for a larger number of contacts will do.
We'll also buy a couple of these connectors
How to disassemble the rear light board? Elementary and without any tools. For speed, you can use an awl, the tip of a knife or a screwdriver, but you can do everything with your bare hands. We press the latch (photo on the left) and pull out the plastic imitation of the cartridge. Everything else will fall apart on its own. We remove all three cartridges.
Disassembling the rear corner light board of a VAZ 2115
We completely disassemble the panel - remove the plastic lamp clamps, remove the flexible board. We mark places for new cartridges, while focusing on the position of the old ones.
We remove the mounting posts for old cartridges and everything that interferes with the installation of new cartridges using, for example, a soldering iron. We drill holes of such a diameter that our new cartridges fit in there tightly and do not dangle. If there is no appropriate drill, drill with a smaller diameter, then bore with a round file.
Ready-made seats for cartridges
For the turn signal bulb we use this socket - it takes up less space, but you can put another one - just cut it a little (however, this one also had to be cut a little).
Turn signal holder
We install the cartridges in their places and fix them in any available way. In the photo below they are simply soldered with a soldering iron. Not exactly aesthetically pleasing, but reliable. But this “aesthetics” will still not be visible. We take out the wires of the “turn” cartridge through the hole made.
How to replace a light bulb in a rear light?
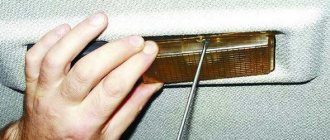
To replace the light bulb in the rear light of a VAZ 2114, 2113, 2115 passenger car, you must perform the following steps:
- To access the rear light, you need to remove the trim. To do this, first unscrew the top screw with a Phillips screwdriver.
- Then unscrew the bottom screw
- After this, unscrew 2 more screws and remove the trim panel
- After this, remove the terminal connector
- Then, pressing the latch, remove the electrical board with the rear light bulbs
- After this, pressing the lamp towards its socket and turning it counterclockwise, remove the desired lamp
How to remove the dashboard
Since the backlight of the VAZ instrument panel burns out relatively often, the designers took care of quick and easy replacement of elements with minimal disassembly of the car itself. For this we need:
- flat screwdriver or knife;
- A fairly long Phillips screwdriver.
First of all, you need to remove the decorative trim on the VAZ instrument panel, which is secured with five screws - I marked them with arrows
Places for attaching the decorative trim Please note that the upper right screw is covered with a decorative plug - it must first be removed with a knife or flat screwdriver
Now we remove the plastic handles placed on the control engines for the VAZ stove and dampers. If the car has a radio or receiver installed, it will also have to be removed. Now we pull out the cover and move it to the side: the length of the wires and cables is quite enough for this.
Shifted decorative trim. Thus, we get access directly to the VAZ instrument panel, which is secured with two screws on the left and right. We unscrew them with a long Phillips screwdriver.
Removing the dashboard
Carefully pull out the tidy, not forgetting that two power and control harnesses are connected to it.
Headlight bulbs 2114, 2113, 2115
Low and low beam lamp
Designation (article) of the headlight bulb AKG12-60+55-1 for high and low beam VAZ 2114, 2113, 2115:
- According to GOST - AKG12-60+55-1.
- According to the classification of the Eurasian Economic Commission (EEC) - H4
Dimensions of the AKG12-60+55-1 (H4) headlight bulb for high and low beam VAZ 2114, 2113, 2115:
- Length - 81.1 mm;
- The height of the base is 32 mm.
- The size from the base stop to the filament is 28.5 mm.
Technical characteristics of the AKG12-60+55-1 (H4) light bulb for high and low beam headlights VAZ 2114, 2113, 2115:
- Power - 60/55 W;
- The base is metal;
- Lamp - neon;
- The flask is transparent glass;
Installation location of the AKG12-60+55-1 (H4) light bulb for high and low beam headlights VAZ 2114, 2113, 2115:
Turn signal light bulb VAZ 2114, 2113, 2115
Designation (article number) of the direction indicator bulb in the headlight of VAZ 2114, 2113, 2115:
- According to GOST - A12-21-3.
- According to the classification of the Eurasian Economic Commission (EEC) - P21W
Dimensions of the A12-21-3 (P21W) turn signal light bulb for VAZ 2114, 2113, 2115:
- Length - 52.5 mm;
- The diameter of the flask is 26.5 mm.
- The size from the base stop to the top of the lamp is 45 mm.
Technical characteristics of the A12-21-3 (P21W) light bulb for the direction indicator headlights VAZ 2114, 2113, 2115:
- Power - 21 W;
- The base is metal;
- Lamp - incandescent;
- The flask is transparent glass;
Installation location of the A12-21-3 (P21W) turn signal headlight bulb for VAZ 2114, 2113, 2115:
Where does it short out most often?
I will try to make it a little easier for you to find the location of the short circuit, if, of course, this is appropriate in your case. But if all of the above methods do not lead to a positive result, this is the only option left. The wires going to the license plate lights, as well as to the trunk roof, most often fray and short out there. This wiring needs to be treated with electrical tape and nothing else.
Another problem area is the wiring from the rear of the fender under the carpet. There, too, you need to look carefully at everything and, if necessary, wrap it with electrical tape. Yes, there are cases when both bulbs burn out, but drivers refuse to believe this, checking everything, but not the headlights themselves. Start with them. That's all, good luck!
How to replace a headlight bulb?
To replace the light bulb in the headlight of a VAZ 2114, 2113, 2115 car, you need to perform the following operations:
- First you need to unscrew the 2 screws with plastic heads that secure the headlight cover.
- After this, remove the cap
- Next, disconnect the terminal block from the headlight high and low beam lamps
- Then, turning counterclockwise, dismantle the clamping frame of the headlight lamp
- After this we will remove the headlight bulb from its socket.
When changing a halogen lamp for high and low beam, do not touch its bulb with your fingers. If you touch it, wipe the flask with a clean cloth moistened with alcohol.
- To replace the headlight bulb located in the headlight, you must remove it together with the socket from the headlight reflector
- Then turn the size bulb counterclockwise and remove it from the socket
- We install the headlight bulbs in the reverse order.
Why the light in the cabin does not light (main reasons)
Car electrical circuit diagram, which must be studied before starting work
Car interior lighting is part of the electrical system , and therefore, in any case, it is worth looking for the problem in this part of the car. Of course, it is recommended to study, at least superficially, technical electrical diagrams in order to be at least a little up to date .
So, what do you need? A detailed diagram of the car's electrical components, a little ingenuity and a minimal set of tools. Let's look at places where the problem may be hiding:
We fix the lights and get acquainted with electrics
Since the main fault locations have been identified, you can safely move directly to methods for solving the problem. It is worth noting that with automotive electrics, not everything is so simple, but since this is a VAZ-2114, everything can be said very clearly here. Let's move on to methods for solving the problem.
Bulb
The first thing that needs to be checked is the lighting lamp, since its burnout can cause the light to go out in the car interior.
In order to get it out you will have to remove the lamp cover. After this, you need to check whether there is a filament, and insert the lamp into the control device or simply connect it to the battery. If the lamp lights up, then it is not the cause of the malfunction.
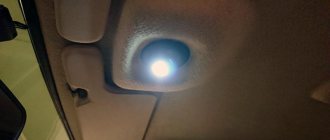
Ceiling lamp
The problem may be hidden in the ceiling lamp
More than once, the cause of the malfunction was the lamp itself, where the contact group simply melted and closed, which caused a burnout or a blown fuse.
To diagnose it, you will need to remove it from the car and visually inspect it. It is also recommended to ring the contacts going from the lamp to the wiring.
Interior lamps for VAZ 2114, 2113, 2115
Central interior light bulb
Designation (article number) of the central lamp bulb for interior lighting of VAZ 2114, 2113, 2115:
- According to GOST - AS12-5-1.
- According to the classification of the Eurasian Economic Commission (EEC) - C5W
Dimensions of the AC12-5-1 (C5W) bulb for the central interior lamp of VAZ 2114, 2113, 2115:
- Length - 35 mm;
- The diameter of the flask is 11 mm.
- The diameter of the base stop is 3.5 mm.
Technical characteristics of the AC12-5-1 (C5W) light bulb for the central interior lamp of VAZ 2114, 2113, 2115:
- Power - 5 W;
- The base is metal;
- The number of lamp bases is 2 pcs;
- Lamp - incandescent;
- The flask is transparent glass;
Installation location of the AC12-5-1 (C5W) light bulb for the central interior lamp of VAZ 2114, 2113, 2115:
Front courtesy light bulb for VAZ 2114, 2113, 2115
Designation (article number) of the front interior lamp bulb of VAZ 2114, 2113, 2115:
- According to GOST - A12-4-1.
- According to the classification of the Eurasian Economic Commission (EEC) - T4W
Dimensions of the A12-4-1 (T4W) light bulb for the front interior lamp of VAZ 2114, 2113, 2115:
- Length - 26 mm;
- The diameter of the flask is 9.2 mm.
- The diameter of the base is 9.1 mm.
Technical characteristics of the A12-4-1 (T4W) light bulb for the front interior lamp of VAZ 2114, 2113, 2115:
- Power - 4 W;
- The base is metal;
- Lamp - incandescent;
- The flask is transparent glass;
Installation location of the A12-4-1 (T4W) light bulb for the front interior lamp of VAZ 2114, 2113, 2115:
How to Choose Suitable Replacement Parking Lights
You can choose a suitable lamp both in car services and at car flea markets. At the same time, experienced drivers do not recommend purchasing cheap Chinese products, since the likelihood that they will burn out ahead of schedule is quite high.
When choosing a light bulb, you need to pay attention to the following characteristics:
- Brightness. This is the most important characteristic of a light bulb, which is assessed by its luminous flux. Luminous flux is measured in lumens. For an incandescent lamp this value is approximately 50 lumens. Remember that the purpose of side lights is to inform other road users of the size of your vehicle. Light sources should not dazzle other road users, but at the same time they cannot be too dim. The upper threshold of luminous flux for side lights is 150 lumens, and the lower threshold is from 50 lumens. Traffic safety sometimes directly depends on the brightness of the side lights, since failure to inform in a timely manner that your vehicle is starting to slow down can lead to an accident.
- Design. In the design of cheap Chinese light bulbs, the base is made of plastic. In this case, there is a high risk of melting, since plastic is by no means a heat-resistant material. If the part gets very hot, the plastic begins to melt and, as a result, the light bulb fails too early. More expensive models feature high-quality plastic that is heat-resistant. With increased brightness, the incandescent lamp begins to produce heat, which heats the lampshade. Therefore, recently the most popular are baseless lamps, the contacts of which are made on the basis of a glass plate and a sand board. Incandescent lamps are also very energy-intensive. With increased electricity consumption, fuel consumption begins to increase. When choosing a light bulb, it is also worth remembering to save energy.
- Price. The side light bulb is one of those car parts that you definitely shouldn’t skimp on. By buying lamps at low prices, you run the risk of replacing such lamps too often, and in the end, such “savings” will only lead to more serious expenses. It is best to purchase lamps from trusted manufacturers such as Osram and Phillips.
Side turn signal lamp VAZ 2114, 2113, 2115
Designation (article) of the side turn light bulbs VAZ 2114, 2113, 2115:
- According to GOST - A12-5-2.
- According to the classification of the Eurasian Economic Commission (EEC) - W5W
Dimensions of the A12-5-2 (W5W) side turn signal bulb for VAZ 2114, 2113, 2115:
- Length - 26.8 mm;
- The diameter of the flask is 10.29 mm.
- The size of the plinth seat is 6.1 mm.
Technical characteristics of the A12-5-2 (W5W) side turn signal bulb for VAZ 2114, 2113, 2115:
- Power - 5 W;
- Base - glass;
- Lamp - incandescent;
- The flask is transparent glass;
Installation location of the A12-5-2 (W5W) side turn signal bulb for VAZ 2114, 2113, 2115:
Do-it-yourself headlight adjustment technology
The adjustment must be carried out on a flat surface without tilting. The test screen can be installed at a distance of 5-6 meters. If you don't have a screen, you can use a flat brick wall, a garage door, or a large sheet of plywood. Headlight glasses must be clean, without cracks or chips.
Also pay attention to the condition of the reflectors
The design of optical devices has two adjustment screws, one of which directs the light beam in a vertical position, and the other in a horizontal position. With their help, we make adjustments as indicated in the diagram.
The headlight beam should be directed by the adjusting screw to point E
For convenience, we draw vertical lines A, O and B on the wall with chalk. They will serve as the necessary guidelines when adjusting the optics. We also draw horizontal lines 1 and 2. The distance between them should be 65 centimeters.
Next, we go into the interior and set the headlight hydrocorrector control to position 0. This is necessary to eliminate the influence of the device on the luminous flux during adjustment. The regulator is located under the dashboard, to the right of the steering wheel.
The procedure is as follows:
- We cover one headlight with dense material that does not transmit light.
- We turn on the near one.
- Open the hood and find the regulators on the back side of the headlight (in the figure below, numbered 1 and 2). One of them responds to the vertical movement of the light beam, and the second to the horizontal movement.
- Using adjusting screws 1 and 2, we direct the beam of light to point E. We adjust the indicator to the desired value. By turning the screws counterclockwise or clockwise, we position the beam of light at the desired point
- We repeat the procedure, turning on the high beams.
- We carry out a similar adjustment for the other headlight.
Adjusting the headlights does not take much time, so in poor lighting, do not delay this procedure. When working, you should take the advice of experts. In this case, you can adjust the light beam as accurately as possible.
Fog light bulb
Designation (article number) of the fog light bulb for VAZ 2114, 2113, 2115:
- According to GOST - AKG12-55-1
- According to the classification of the Eurasian Economic Commission (EEC) - H1
Dimensions of the AKG12-55-1 (H1) fog light bulb for VAZ 2114, 2113, 2115:
- Length - 62.5 mm;
- The diameter of the flask is 8.5 mm.
- The size of the plinth seat is 18.5 mm.
Technical characteristics of the AKG12-55-1 (H1) fog light bulb for VAZ 2114, 2113, 2115:
- Power - 55 W;
- The base is metal;
- Lamp - hologen;
- The flask is transparent glass;
Installation location of AKG12-55-1 (H1) fog lamp VAZ 2114, 2113, 2115:
Preparation Tips
To replace two side light bulbs, you do not need to create special conditions and drive the car into the garage - the work is carried out in any convenient place. What to do:
- Disconnect the negative terminal of the battery.
- Remove components and parts that block access to the headlight units from the engine compartment.
- Remove the plastic protective caps covering the rear parts of the blocks where the light fixtures are located.
To change the side light bulb, you need to get to the headlights from the rear, having first removed the interfering elements. Depending on the make and model of the car, there may be an air filter housing, a battery, cooling system pipes, and so on near the headlight units. Decorative plastic panels and trims should also be removed.
License plate lamp
Designation (article number) of the license plate light bulb for VAZ 2114, 2113, 2115:
- According to GOST - AS12-5-1
- According to the classification of the Eurasian Economic Commission (EEC) - C5W
Dimensions of the AC12-5-1 (C5W) light bulb for the license plate light for VAZ 2114, 2113, 2115:
- Length - 36 mm;
- The diameter of the flask is 11.5 mm.
- The diameter of the base is 8.5 mm.
Technical characteristics of the AC12-5-1 (C5W) light bulb for the lighting lamp number VAZ 2114, 2113, 2115:
- Power - 5 W;
- The base is metal;
- Number of socles - 2 pcs;
- Lamp - incandescent;
- The flask is transparent glass;
Installation location of AS12-5-1 (C5W) lighting lamp number VAZ 2114, 2113, 2115:
When is the replacement made?
Vehicle manufacturers do not provide clear regulations for carrying out this work. There are only 3 reasons why car enthusiasts change their side light bulbs to new ones as needed:
- The light elements have failed - they have burned out or gone out due to external mechanical influence.
- The owner of the car decided to install more modern LED bulbs.
- The lights began to shine too dimly.
The first reason is clear and does not require explanation. Installing LEDs is a useful operation, since these elements shine well, last a long time and consume much less electricity. The main thing is to maintain the polarity of the contacts during the replacement process, otherwise the new light bulb may fail or the fuses will begin to blow.
As a rule, a car enthusiast does not pay attention to the decrease in the luminous flux of running lights until he replaces one burnt-out headlight bulb. Then it becomes noticeable how much dimmer the old element burns than the new one. The reason is the internal darkening of the base glass from settling metal particles emanating from the heated spiral. Therefore, it is recommended to update old “dimensions” in pairs.
Video about choosing lamps
Light on the road means comfort, visibility, safety of the driver, passengers and other road users. At the same time, the very quality of the light characteristics of the car’s front lights depends on two factors of the lighting unit: the diffuser and the reflector. Therefore, the light bulbs on the VAZ 2114 must be of high quality, regardless of the year of production of your particular car.
It is also worth mentioning the aesthetics of the glow of the “eyes” of your car, because this is the first thing that people see when they meet your car for the first time at night. Let's figure out how to choose the right “mirror of the soul” of the iron horse, what nuances you should know about.
Which manufacturer's lamps are best to buy?
As we have already found out, to replace low and high beam lamps on a VAZ 2114 and similar models, you need to buy an H4 type lamp. I have compiled a list of popular models in descending order of price. It is impossible to clearly say that some lamp is good and some is bad. They are all fully worth their cost. So, our rating of lamps:
Philips H4 X-treme VisionBuy
Philips H4 3700K X-treme Vision +130% is a lamp from a well-known manufacturer with increased luminous flux. It has a standard power of 55/60W, so you don’t have to worry about the safety of the on-board network and the load on the generator. But at the same time, the luminous flux is increased compared to standard H4. The manufacturer claims that they are 130% brighter than conventional halogens. Their cost as of February 2019 is 1055 rubles, which is equal to approximately 16 dollars.
Osram H4 Night BreakerBuy
Osram H4 Night Breaker Unlimited +110% Another lamp with increased luminous flux from an equally well-known manufacturer. This brand has found popularity among car enthusiasts. It is also noted that defective light bulbs are rarely encountered. Osram claims they will shine 110% brighter than standard at the standard 55/60W output. They cost less than their competitor's counterparts from Philips: 795 rubles, which is equivalent to 12 dollars.
OSRAM H4 Ultra LifeBuy
OSRAM H4 Ultra Life - this lamp is best installed in headlights for those who want it to shine for a long time and not have to change it again. The manufacturer claims 4 times longer service life than conventional halogen lamps. Let us remind you that the average service life of halogen lamps is 600 hours. Users note that Ultra life series products really last a long time. The cost of these lamps is 380 rubles, which is almost $6.
But if you want to save money, then pay attention to two more brands - GE and Mayak. General Electric H4Buy
General Electric H4Buy
General Electric H4 12V 60/55W P43t GE are inexpensive lamps. Car owners note that they operate normally throughout the entire declared service life without any complaints. The shape of the light beam is correct, and they cost only 270 rubles. or $4.
Lighthouse H4BuyLighthouse H4 12V60/55W - lamps that are even cheaper. The best thing for taxi drivers and young owners of domestic cars. They give relatively good light for their 215 rubles. or 3.3$.
Tuning VAZ 2109 headlights
Tuning headlights for VAZ 2109
Hi all! I made headlights for the VAZ 2109 Dragon.
Tuning headlights for VAZ 2109
Tuning headlights for VAZ 2109
Tuning headlights for VAZ 2109
Tuning headlights for VAZ 2109
Repair work
To begin with, we advise you to make room for yourself near the car so that you can open the doors without any problems, nothing prevents them from always being in the open position, and you have the opportunity to approach and move away from the car without overcoming multiple obstacles.
If in summer you can simply drive your car outside, then in winter you will have to limit yourself to the available space of a closed garage.
You are ready? Then you can start repairing.
Dedicated place where the cigarette lighter fuse is located on the VAZ 2114
The first situation is that the fuse for the VAZ 2114 cigarette lighter has failed. A popular problem that is not so difficult to solve. The primary task is to determine where the cigarette lighter fuse is located on the VAZ 2114. It's simple. Open the hatch where the entire fuse box is located. The element you are looking for is located to the left of the steering column. This is a 20-amp fuse, which has a special marking - F4. It is difficult to confuse it with others, so finding the fuse is not a problem at all. Take a tester and check its functionality. If it works, we continue to look for the problem. If the fuse fails, you can simply purchase a new one. It’s cheap, so there shouldn’t be any problems finding and purchasing it. Since the old fuse has burned out, you won’t be able to simply take a new one, put it in place and supposedly complete the repair.
It is extremely important to understand exactly why the old fuse blew. Figuring out how to remove the cigarette lighter on a VAZ 2114 is quite simple.
Be sure to check the quality of the contacts in the blocks when leaving the mounting block. It is designated X1. This block has connections from the cigarette lighter located in the passenger compartment. If the reason is in the contacts, tighten them. The most popular problem with a cigarette lighter malfunction is the car owner’s own mistakes during operation. When connecting external devices to the device, there is no need to unscrew the plugs in different directions. Because of this, the plates short out and the cigarette lighter simply stops working. Another fairly common problem is a burnt-out backlight bulb. It is quite simple to replace, but to do this, our device must first be removed from its socket. Pay attention to the moving core of your cigarette lighter. Examine it externally, check the quality and integrity of the spring coils. If there is damage, you will have to replace this element. The problem is that the core is not sold separately; auto parts stores offer only a prefabricated design. The only search option is all kinds of car flea markets, where grandfathers sell spare parts from their old cars. Despite the apparent absurdity, in such places you can often find excellent parts for cars such as the VAZ 2114.
Recommendations from experts
We advise you to study some practical advice from craftsmen who have repeatedly faced the need to repair cigarette lighters on a VAZ 2114. The most difficult problems were complicated by the fact that the owners of the car tried to solve the problem on their own, in violation of many recommendations. But after the situation became even worse after a makeshift intervention, the breakdown had to be repaired by professionals.
- Hand twisting. The worst thing you can think of when replacing faulty wiring is manual twisting. Never do this, because in 80% of car fire situations this is how it starts. Be sure to use a soldering iron to create strong, reliable contacts, or even better, completely replace the old wiring with new one.
- When purchasing a new cigarette lighter for a VAZ 2114, use a tester. Moreover, this must be done on the spot, in the presence of the seller. Alas, the realities of our auto parts market today are such that a huge mass of spare parts are fakes or simply low-quality products. By checking the device immediately before starting repairs, you risk not only getting a fake, but also not returning the faulty cigarette lighter to the seller, since he will say that he never saw you and did not sell you anything. By the way, for this reason it is better to buy spare parts in trusted, certified stores.
- When working on any item that draws power from the battery, including the cigarette lighter, be sure to remove the terminals from the battery. Accidents are not uncommon, but you probably don't want to be one of them.
- Always be careful in your actions, carefully study the operating and repair manual for your car. This is the primary literature that allows you to do most of the repair work yourself, without the help of specialists. And if you are not confident in your abilities, do not take risks, do not experiment, but send your car to trusted, qualified technicians who will repair your car with high quality and with guarantees.