The rear suspension installed on the second generation Ford Focus has a multi-link design, which ensures a smooth ride and confident behavior of the car on the road. But the multi-link system has not only advantages, but also its disadvantages - in case of mechanical damage, you have to change more parts, and the repair of the chassis itself is not cheap. In this article we will look at what the rear suspension of a Ford Focus 2 is: diagram, repair, what are the characteristic “diseases” of the chassis, how to replace the rear shock absorber and stabilizer bar.
Rear suspension diagram for Ford Focus 2
The rear suspension of the Ford Focus-2 is an independent type, with a cross member in the middle, with four levers at each rear wheel (a total of 8 levers). The chassis consists of the following elements:
- crossbars;
- levers – rear lower, upper, front lower, longitudinal;
- springs;
- shock absorbers;
- compression buffers.
All elements, except the transverse beam, are paired; a stabilizer bar with struts and bushings is also installed on the rear axle.
The Ford Focus-2 was produced in two body modifications - a pre-restyling version (2005-2008) and a restyled version (2008-2011). After the modernization, some changes took place in the car, but the rear suspension was not affected by restyling - it remained the same.
Preparing tools and accessories for replacement
Before changing the silent blocks of the rear levers on the Focus, you need to make sure that all the necessary tools and accessories are at hand. First of all, you will need either pullers with grips for pressing out silent blocks, or a press. It is not always possible to knock out the bushings with a sledgehammer, even if you have spacers of the required diameter. But spacers are still necessary. Here are their drawings and dimensions. This is a spacer for pressing out the silent blocks of the spring-loaded rear lever:
Crimping.
And with this spacer the bushings of the curved wishbone are pressed out:
And these are the dimensions of the spacer for removing the silent blocks of the straight wishbone:
Spacer dimensions.
In addition, we will need a standard tool, a set of sockets, aerosol penetrating lubricant and a tie for removing the spring, as well as a standard jack and an adjustable stand (hydraulic jack).
Ford Focus 2 rear suspension repair
In the domestic market, the overwhelming majority of Ford Focus-2s are only Russian-assembled, so it is difficult to talk about the quality of spare parts installed on cars assembled in Spain and Germany. But cars assembled in Vsevolozhsk near St. Petersburg are distinguished by fairly high reliability, and the rear suspension lasts a long time during normal use.
If the car is not driven at high speed on bad roads, the chassis will require more or less serious repairs after a mileage of about 100 thousand km, not earlier. As a rule, the trailing arms are the first to fail; the silent blocks in them wear out. You don’t have to completely change the lever, you can get by by repressing the silent blocks, but in order to make such a repair, it is necessary to disassemble almost the entire suspension.
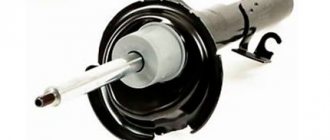
The rear shock absorbers on the Second Focus are distinguished by enviable “survivability”; on average, the parts last from 90 to 130 thousand km. The price of original spare parts is rather high; each shock absorber costs about 3.5 thousand rubles. But fortunately, Focus-2 has parts of non-original production, and of very decent quality. For example, Monroe or Kayaba shock absorbers can be purchased at a price of 2-2.5 thousand rubles. for 1 piece, and spare parts from TRW are even cheaper. Many other companies also produce these parts:
- Bilstein;
- SACHS;
- Koni et al.
Stabilizer struts are usually the first to fail on many car models, but on the Ford Focus 2 these parts are surprisingly durable, sometimes lasting more than 100 thousand km.
Second Focus car owners need to know that many spare parts for the car are suitable from the Mazda 3, in particular, many rear suspension parts are almost identical. True, there is one difference here - original Ford spare parts are more reliable than Mazda ones, although they are more expensive.
What's the result?
Taking into account the above information, we can conclude that the rear suspension of the Ford Focus 2 is quite comfortable and reliable, but only if driven on good roads. However, as practice shows, even when operating a vehicle in the CIS, many components and suspension parts are capable of traveling at least 100 thousand km.
We also recommend reading the article on how to replace the silent blocks of the front control arms. From this article you will learn when to change the silent blocks of the front lever, as well as how to do this procedure yourself.
The only drawback of the suspension is the large number of structural elements that require complex replacement. On the one hand, the costs are quite significant, but on the other hand, a well-repaired suspension will work for many tens of thousands of kilometers.
The main thing is to use original parts or high-quality analogues, as well as timely correct minor problems and regularly carry out diagnostics of the vehicle’s chassis as a whole, as well as separately check the rear suspension.
Replacing rear shock absorber Ford Focus 2
If oil stains appear in the area of the rear shock absorber rod, and the car begins to drive over bumps with the rear part of the body swaying, the shock absorber has failed and needs to be replaced. We carry out the work as follows:
- for convenience, remove the rear wheel;
- We place a support under the rear suspension (for example, an old unnecessary wheel rim), and lower the car a little on the jack - you need to make sure that the suspension spring is compressed somewhat;
- this is done so that when the shock absorber is removed, the spring does not straighten without load and shoot upward;
- unscrew the bottom bolt that holds the shock absorber, for this you will need a wrench with a 15mm head;
- from the body (inside the wheel arch) unscrew the two bolts securing the shock absorber support to the body; here you will need a 10 mm socket wrench or a socket with an extension and a wrench;
- We dismantle the part to be replaced, install a new shock absorber in place, and carry out the assembly.
Replacing the front suspension silent block: subtleties and nuances
Let's start with the fact that quite often the rear silent block of the front lever fails. The process of replacing the silent block itself is not complicated, however, it will require certain skills and tools.
To replace the front arm silent block, you will first need to find the mounting bolt and unscrew it; Next, the fastening nut is removed, after which you can unscrew the bolts securing the lever and the lever is dismantled (you need to pull the part towards you); Then the rear silent block should be removed with a puller. If there is no puller, then you can knock out the part with a small sledgehammer, holding the lever in a vice
Care must be taken when doing this, as the lever can be damaged. The next step is to press in the silent block
For these purposes, it is optimal to use only special tools, but if you don’t have one, you can try pressing in a new element with a hammer. Care must be taken, as there is a risk of damaging the new silent block or lever. ; If everything went well, all that remains is to assemble the lever in the reverse order and then install the part in place. By the way, the front silent block is tightened when the car is already on wheels. In other words, the tightening of the silent blocks of the front lower arm and the upper one is carried out under load, that is, under the weight of a car standing on wheels; Having completed all the work (regardless of whether the rear silent block of the front lever or the front silent block was replaced), it is necessary to diagnose the chassis again. If everything is fine, you can do the alignment. By the way, based on the results, it is possible to understand whether there are still deviations from the norm, that is, whether there is or is not a need to urgently replace any other suspension components of the vehicle.
Let us also add that when choosing replacement parts, you may encounter difficulties in choosing which silent block is better, rubber or polyurethane. So, polyurethane silent is more reliable and durable than its rubber counterpart. Also, polyurethane silent blocks make the suspension more “knocked down” and elastic, the car holds the road more confidently. This is especially noticeable at medium and high speeds.
However, there are also disadvantages. For example, such a silent block is noticeably more expensive compared to a regular one.
At the same time, it is important to select the right products for the car, as well as to carry out installation without errors. Only with proper installation can you count on improvements in suspension performance
Note that sometimes drivers complain that the polyurethane silent block creaks after installation. For some, the squeaks disappear over time, but for others, in the area where silent blocks are installed, the squeak is constant. This nuance should also be taken into account.
Replacing the rear stabilizer link
If a knock appears in the rear suspension area, it is likely that the stabilizer links are worn out. Changing parts is quite simple; if there are no complications during removal, you can replace the stabilizer strut in half an hour or even faster.
It is convenient to perform the replacement on a pit or a lift; the wheel does not need to be removed to perform the operation. We carry out the work in the following order:
- unscrew the nut that secures the strut to the wishbone of the suspension; for this you will need a 15 mm spanner. To prevent the strut from turning along the axis when unscrewing the nut, hold it with a hexagon;
- then use the same keys to unscrew the upper nut that holds the strut to the wishbone;
- Having unscrewed the fasteners, remove the old part, install the new one, and at this point we can consider the work completed.
Everything was simple, but the old stand does not always turn away normally. The thread on the ball pin becomes clogged with dirt, and when you try to unscrew the nut, the hex wrench turns in the body of the pin. Before you start unwinding the connection, you must:
- clean the threads on the stabilizer link from dirt;
- spray WD40 on it;
- wait 15-20 minutes for the remaining dirt to “eat off”.
Only after this should you begin to unscrew the nuts. If, nevertheless, the ball pin rotates in the body, and the nut rotates with it, you will have to use a small grinder to cut off the worn stabilizer link.
In this case, we consider replacing the L-shaped stabilizer struts, but the Ford Focus-2 can also install stabilizer struts of the so-called “straight” type.
These parts are even easier to change, and practically no complications arise here.
Replacing silent blocks
It is easy to replace the front silent block if you have a tool for pressing out.
They first press out the old element, and then press a new one in its place.
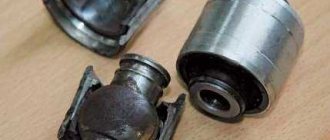
Inside the silent block of the front suspension arm there are two metal bushings and an internal clip that fits onto the arm.
The entire space inside the outer casing is filled with rubber.
Before removing it, it is better to make notes on the lever, how the silent block was located on it, as well as how the eyes were located relative to the lever, and the depth of its seating. This will help you perform the installation correctly in the future.
This is very important, because once a new rubber element is installed, it will no longer be possible to remove it without destroying the structure. If this silent block is heavily worn, you can try to pull off the outer housing using a puller
If this silent block is heavily worn, you can try to pull off the outer housing using a puller.
If there is severe wear, the rubber inside has already delaminated and the body must be removed.
After removal, two bushings and an inner race remain on the lever, all of which are filled with rubber.
If it was not possible to tighten the body with a puller, it can be cut with a grinder.
Next, the bushings are cleaned of rubber residues with a knife, and they are knocked down with a hammer and chisel.
They can also be cut with a grinder.
After removing the bushings, all that remains is to clean the inner race of rubber and cut it with a grinder, since it is seated very tightly and it will not be possible to pull it off with a puller.
Next, the remaining inner race is knocked down using a chisel and hammer.
At this point, the removal of the worn silent block is completed, and you can begin installing a new element.
Pressing.
Before installing a new silent block, its seat must be cleaned with sandpaper.
To make planting easier, you can expose the lever to low temperatures, that is, simply freeze it. You can use dry ice for this. It's true that it's not that easy to get.
This will lead to a short-term change in the structure of the metal, the seat will “shrink” a little.
The new silent block is installed on the edge of the seat so that all the previously made lug position marks coincide.
Install the new element using a hammer and a spacer made of a metal tube.
It is important that the tube is equal in diameter to the inner ring. But it will be ideal if you use a ball with the required diameter
But it will be ideal if you use a ball with the required diameter.
Impact loads should be carried out only on the holder, and in no case on the rubber component of the silent block or bushings.
When installing a new element, you need to monitor the depth of its seating on the lever.
After replacing the silent blocks, everything is put in place; before installation, all its fasteners must be treated with thread lockers.
Having replaced the silent blocks on one side, you should perform the same operations on the other, since these elements are replaced in pairs, on both sides of the car at once.
We hope we have helped you. Good luck.
If there is a video in the article and it does not play, select any word with the mouse, press Ctrl+Enter, enter any word in the window that appears and click “SEND”. Thank you.
Replacing the rear suspension of a Ford Focus 2: video
Related articles:
- Technical characteristics and maintenance of Volvo Penta engines Currently, the concern produces motors for boats and industrial marine power plants using diesel fuel. In this article we will look at what Volvo Penta engines are produced, […]
- Making a hole in the garage - stages of construction, materials used, tools An inspection hole in the garage helps out many car enthusiasts; with its help, you can carry out minor repairs and maintenance, perform a detailed inspection of the lower part of the car, diagnose […]
- Fuel consumption of a Chevrolet Niva with different engines The Chevrolet Niva has been produced in Tolyatti since 2002, the model is very popular in Russia. The compact SUV has excellent cross-country ability and is 90% domestic […]
How to check the suspension
Ford front suspension repair diagram
We should not forget about the errors that occur in our realities: we are talking about the quality of domestic roads: I really didn’t want to raise the topic of Russian roads again and again, but, in this case, they directly affect the service life of the entire suspension, reducing the “period » use for 20-30 thousand km - the amount is not so small, is it? Let us briefly recall the main characteristics of the front suspension of the Ford Focus: it is a lever-spring, independent MacPherson-type suspension. "Composition" of the front suspension.
shock absorbers and springs for ford focus
According to its “physiological” structure, the suspension consists of the following undoubtedly important parts, the total number of which hardly reaches one dozen: a lever together with a ball joint, as well as silent blocks; shock absorber strut and anti-roll bar; anti-roll bar; bracket for attaching the stabilizer bar to the subframe; hubs; steering knuckle; subframe
New front lever assembly
Tie rod end
front brake pads
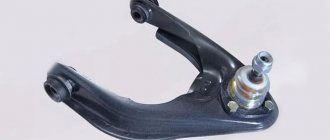
As one might guess, the parts are connected into a common chain, creating the very concept of a front suspension. The front suspension arm of the Ford Focus 2, for example, in this symbiosis plays the role of an organ that perceives braking and traction forces while the car is moving.
Steering rod Spain
We are convinced that the front suspension is faulty. We should probably start with the shock absorber. Why it is advisable to lift the car either with jacks or with a suspension mechanism. Next, you need to grab the wheel and “shake” it away from you and towards you. Having noticed free vibrations of the wheel (play), we will receive information about the need to replace the shock absorber. The brake will allow us to finally verify the situation. Having pressed on it and noticing the loss of play, we conclude that the front wheel bearing is most likely faulty. Of course, the initial “sampling” should be a visual inspection of the shock absorber for external damage and oil leaks.
unscrew the shock absorber tip and check the shock absorber
Even earlier, you can verify that the shock absorber is faulty in the following way: without lifting the car off the ground, you only need to press on one side of the car and watch what happens. If the car has returned to its original state with complete or almost complete absence of repeated vibrations, it is reasonable to draw a conclusion about the general serviceability of the shock absorber and only then proceed to longer checks. This is exactly how our advice is distributed; the best should be read from the end, gradually moving to the beginning.
front suspension play
Checking the anti-roll bar is also not a very difficult task. First, you need to check the covers of the ball struts for any damage, then, either by hand, or with a pry bar or any similar tool, you should try to move the stabilizer bar up and down. Is there any noticeable play in movement? Bad news for you: the rack will most likely have to be replaced.
