Suspension design features
A feature of the suspension design is that many of its elements should not be rigidly connected, otherwise it will transfer all the vibration to the body.
How does the VAZ 2110 suspension work?
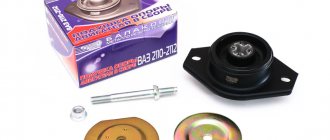
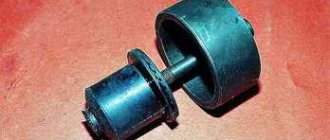
Therefore, some composite suspensions are connected by means of rubber bushings and rubber pads with metal bushings inside, i.e. silent blocks.
So, in the front independent suspension of the VAZ-2110 the following are connected to each other through silent blocks:
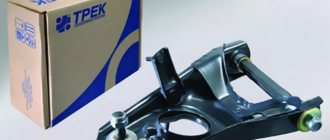
- Lower arm;
- Stretching;
- Anti-roll bar.
Each of these elements plays an important role in the suspension design.
The lower arm prevents lateral movement of the wheel, the extension prevents the wheel from moving longitudinally relative to the body, and the anti-roll bar prevents the body from swaying when performing maneuvers or when driving over uneven surfaces.
But the loads on these elements coming from the wheels are very large, so their displacement, although small, must be provided in order to partially absorb the loads and partially absorb them, and not transfer them to the body.
The possibility of displacement of suspension elements relative to each other and relative to the body, as well as partial damping of vibrations, is provided by silent blocks and rubber bushings.
Front suspension.
On the VAZ-2110, silent blocks and bushings are installed in the front suspension:
- Lower arm (two silent blocks - through one it is attached to the body, and through the second a stretcher is connected to it);
- Stretch bar (one silent block through which it is attached to the crossbar);
- Anti-roll bar (it is connected to the lower arm through a strut with two silent blocks, and to the car body through brackets with rubber bushings).
Rear suspension.
Since the VAZ-2110 has a dependent rear suspension, so many silent blocks are not required, because it is structurally simpler.
At the rear of the entire suspension there are only two silent blocks installed - through which the rear beam is attached to the body brackets.
What is a steering rack
This is the car part
There are times when a car owner has questions regarding such a part as the VAZ 21099 steering rack. First, it’s worth understanding what a steering wheel is. This is a device with which the driver controls his vehicle. The steering wheel is located directly in front of the driver and is directly connected to the wheels of the car. When the steering wheel is turned left or right, the car changes direction accordingly.
There are power steering and electric power steering. They serve to make the steering wheel easier to control and make it easier for the car owner to control the car. The power steering on the VAZ 21099 is based on the use of fluid, which helps the steering wheel to be more maneuverable.
At the heart of such an element as electric power steering, abbreviated as EPS, is a motor that also makes it easier to turn the steering wheel. Each option has its own pros and cons, so among car owners there are fans of both one and the other type of amplifier.
Advantages of electric power steering compared to power steering:
- takes up little space;
- installed directly on the shaft, it does not need a separate place in the car;
- fairly simple design and easy maintenance, no need to control the liquid level;
- much more economical to use, since the power steering is turned on when using the steering wheel, and the power steering works constantly;
- The electric amplifier can be configured using certain programs, which simplifies its operation.
Disadvantage of electric power steering: it can only be installed on light cars; it is not suitable for trucks.
Using a steering wheel without various types of amplifiers has its advantages and disadvantages. In addition, if the amplifier fails, the driver cannot always react in time, because he is already accustomed to relying on the operation of this part.
Consequences of consumables malfunction
It should be noted that silent blocks and bushings are consumables.
Due to heavy loads, it is possible that the rubber part of the silent block may be pressed through, detached from the metal bushing, and the rubber itself may delaminate. As a result, they are no longer able to work properly.
This results in knocking from the suspension, the appearance of creaks, when driving, especially over uneven surfaces, the car can throw from side to side, and the more wear on the silent blocks, the stronger the tossing will be.
Also, due to worn silent blocks, the angles of the wheel position - camber and toe - change, because of which the car will no longer hold the road, it will begin to drift in any direction, the tires will quickly wear out due to incorrect angles.
So, the condition of all rubber elements of the car suspension must be constantly monitored, and if signs of malfunction appear, they must be promptly replaced.
With certain knowledge and the availability of tools, you can replace silent blocks yourself without contacting a service center.
It should be noted right away that even if damage to one or two silent blocks is detected, it is better to completely replace all rubber parts of the suspension, and not just the damaged ones.
Also, all elements are replaced immediately on the left and right sides of the car.
Regulator device
It should be said that the “sorcerer” is not installed on cars equipped with an ABS system. It precedes this system and also helps to prevent the rear wheels from locking up when braking to some extent.
As for the location of the regulator, in passenger cars it is located in the rear of the body, on the left or right side of the bottom. The device is connected to the rear axle beam using a rod and a torsion lever. The latter acts on the regulator piston. The regulator input is connected to the master brake cylinder, and the output is connected to the rear brake cylinders.
Structurally, in passenger cars, the “sorcerer” consists of the following elements:
- frame
- pistons
- valves
The body is divided into two cavities. The first is connected to the GTZ, the second – to the rear brakes. During emergency braking and tilting the front of the car, pistons and valves block the access of brake fluid to the rear brake wheel cylinders.
Thus, the regulator automatically controls and distributes the braking force on the wheels of the rear axle. This depends on the change in axial load. Also, the automatic “sorcerer” helps speed up the unlocking of the wheels.
Tools and accessories
There are not so many tools that will be required to replace all consumables, but some of them are specific.
So, you will need:
- Set of keys, heads, knobs;
- A set of new oil seals and bushings;
- Device for pressing out and pressing in silent blocks;
- Puller for ball joint;
- Jack;
- Stops;
- Vise;
- Hammer and wooden spacers;
- Soap solution.
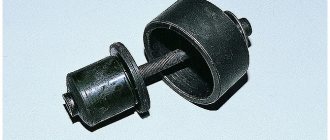
Device for pressing out and pressing in silent blocks.
You can buy it or make it yourself.
The simplest homemade device consists of a long bolt with a nut, pieces of pipe with different diameters and several thick washers.
The principle of operation of such a device is very simple.
To press out the silent block, take a bolt and put a washer on it, the size is slightly smaller than the diameter of the rubber part of the silent block.
The bolt is passed through the bushing of the silent block. On the other hand, a piece of pipe with a diameter equal to the diameter of the seat, for example, a lever, is thrown onto the bolt.
That is, the pipe will have to rest against the circumference of the seat in the lever.
Next, another washer is put on the bolt, its circumference larger than the diameter of the pipe, and then the nut is screwed on.
Pressing out is done like this: the nut, when screwed on, will pull towards itself the washer resting on the silent block.
The installed tube will allow it to come out of the seat and not rest against another washer.
Pressing is done in exactly the same way, with the only difference that it is not necessary to use a piece of pipe, since the silent block will rest against the thrust washer when it sits in place.
You can even press-fit without using a device; it is enough to have only a vice, between the jaws of which a new silent block and lever are installed, so that it and its seat are on the same axis.
Next, the vice compresses and the consumable itself falls into place. But in this way you can install silent blocks only on the lever and stabilizer struts, but on the cross member you will still need a device for replacement.
When the rack fails
In order to make timely repairs, it is necessary to identify at the initial stage malfunctions that can lead to irreparable consequences. And they will make the main work easier. After all, if the mechanism is faulty, then the further it goes, the more the parts that interact with it become unusable.
Identifying the problem
To identify a malfunction, you need to know how they manifest themselves. This can be seen through a number of symptoms. So:
All of the above nuances serve as a reason for inspection and adjustment. It is likely that a complete replacement will be required.
Mechanism design
Before making repairs, you need to know the structure and operating principle of the mechanism. Otherwise, nothing may work out. Among the domestic classics, the VAZ 2108 is distinguished by a simpler and more reliable steering system. Let's see what the steering rack consists of:
- Placed in a closed housing of the entire steering mechanism;
- There is a steering gear, which is connected by an elastic coupling to the steering shaft;
- The movement of the rack to the steering rods is transmitted by the connecting plate;
- Brackets for fastening.
These are the main parts of the entire mechanism. In total there are about forty of them. But you should know the basics. The operation of this unit is quite simple. Rotation of the steering wheel transmits force to the gear, which is carried out through an elastic coupling and shaft. In turn, the gear moves the rack using a gear connection. The wheel hubs are rotated using steering rods at an articulated joint.
Troubleshooting options
Before you do the work, you should also know how to troubleshoot the problem. There are several of them:
- Correction by adjustment, which allows you to get rid of the backlash and help restore the functionality of the mechanism for a certain period of time;
- Purchase a repair kit and replace it. This should be done when the shaft is badly worn and simple adjustment cannot help deal with it;
- Complete replacement of the unit, which is usually done when the integrity of the entire housing is compromised.
Removing front suspension elements
First, we will describe the sequence of actions to restore the front suspension.
It is better to perform all work in an inspection hole, so you need to place the car on it and immediately loosen the front wheel fastenings.
The front of the car is jacked up on both sides. First, they lift one side, install supports under it, and then lift the second side with a jack and also fix it with supports, after which the wheels are removed.
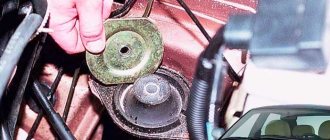
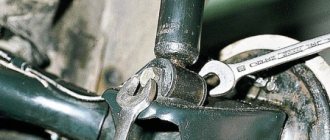
The first control arm to be removed from the car is the lower control arm. To do this, unscrew the nuts securing the extension, stabilizer strut and ball joint from it.
The lever is removed from the ball joint using a puller.
The last thing to unscrew is the nut securing the lever to the bracket on the body, the bolt is pulled out, and the lever is removed.
Next, the stretch is removed. Since it is already disconnected from the lever, all that remains is to unscrew the nut securing it to the cross member.
The last thing to be removed from the car is the stabilizer.
The stabilizer is attached through the struts to the levers on both sides, so you can either first dismantle it on the other side and start removing the stabilizer, or simply unscrew the nut securing its strut, and dismantle the lever itself and the brace later.
Having disconnected the stabilizer mounts to the arms, to remove it, all that remains is to unscrew the nuts securing the body brackets and remove the stabilizer along with the bushings.
Work order
To remove the mechanism, you need to use a trestle, inspection hole or jack. Having securely secured the car, you can begin the procedure. First you need to dismantle the unit.
- According to the chosen strategy, you need to remove the right front or both front wheels.
- To create access to the mechanism, you need to disconnect the filter and wires.
- Unscrew the spline bolt, first aligning the wheels with the steering wheel.
- Remove the fastening nuts of the rods, first removing any dirt from them.
- Remove the steering rods by disconnecting them from the rack housing. Note! There are recommendations for dismantling the crankcase with rods. Removal in a vice is easier and faster.
- The rail is ready for removal. It is removed through the wheel arch. Before fixing in a vice, the assembly must be cleaned and washed.
Now we need to decide whether to replace or repair the unit. The second is best done using the original repair kit.
- Troubleshoot the stops, boot and end caps.
- Remove the thrust bushings, springs and retaining rings (after removing the screw plugs).
- Check the bearing for play.
- Inspect the drive gear, then remove the rack.
- Be sure to replace the support shaft bushing along with the rubber bands.
- remove the needle bearing using a special wrench. There is another way: use a drill with a 1.5 mm drill to weaken the end. Then the needle bearing is knocked out of the crankcase. The installation site must be thoroughly cleaned.
- All elements of the assembly must be thoroughly lubricated.
- Installation is carried out in reverse order.
You can also watch the repair of the VAZ 2109 steering rack in the video, which shows in detail all the stages of restoring the functionality of the unit itself.
Similar to this video, work is carried out for VAZ 2108, 2113, 2114, 2115.
The operation is performed on an overpass or inspection pit. You need to find the adjusting nut and tighten it with a 17th wrench.
Source of the article: https://autorn.ru/vaz/2108/469-remont-i-zamena-rulevoy-reyki-vaz-2108-2109-21099.html
Replacing consumables, eliminating axial play
Having dismantled the suspension elements, you can begin to press out the worn silent blocks and install new ones.
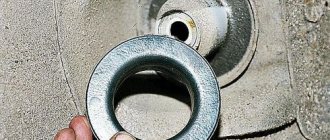
Using a special device prepared in advance, old silent blocks are removed from the crossbar, levers and racks and new ones are pressed into their place.
To facilitate installation, new consumables can be moistened with soapy water.
But the use of petroleum-based lubricants is not recommended, since they have a negative effect on rubber elements.
Regarding the stabilizer struts, before pressing out, they will need to be knocked off the stabilizer, since they are tightly seated on it.
When knocking down, it is better to use a hammer and strike through a wooden spacer.
Also, after removing the struts, the rubber bushings are pulled off the stabilizer and new ones are installed in their place.
Axial play.
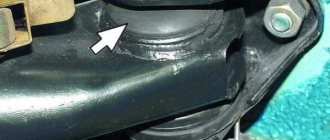
Often a phenomenon called axial play occurs at the lower arm.
It is formed when the body bracket to which the lever is attached, for one reason or another, loosened and a gap appeared between it and the metal bushing of the silent block, which is why the silent block itself was able to move along the fastening bolt.
This axial play negatively affects the performance of the suspension, so it should not exist. But if it appears, then there are two ways to eliminate it.
You can try to compress the bracket. But this is very difficult to do, since it is better not to apply impact with a hammer, even through a spacer, and using clamps or a vice is not very convenient.
It is much easier to get rid of axial play using washers that are placed between the bracket and the silent block.
But according to the manual, it is recommended to replace the entire lower control arm with joints
After replacing all consumables, the removed suspension elements are installed in place.
After replacing all the silent blocks on the front suspension, the vehicle must have its wheel alignment angles adjusted.
How to replace silent blocks without removing the beam
Rear silent block VAZ 2110
The silent block is located at the bottom of the car. Even for the first time, you can easily replace silent blocks if you follow these instructions:
- Raise the car with a jack.
Note: Place cardboard or an old blanket under the machine so you can easily work directly underneath it. This is not required if there is a special pit.
- The beam does not need to be completely removed. After all, if you remove it, you will also need to remove the brake hoses. And this will take a lot of time. But it is better to unhook the brake sorcerer, since it may accidentally be broken during operation. And besides, it can interfere, since its dimensions are quite large. To remove it, you need to pull it, but this must be done as carefully as possible. Otherwise, you may “rip” it out, making it difficult to put back in.
- You can unscrew the nut using a 19mm wrench. This is very difficult to do, so it’s better to call someone else to help. But if there is no assistant, then you will have to do everything yourself. To do this you need to press as hard as possible.
Note: it is advisable to spray the thread with water so that it oxidizes a little, and then clean it with a metal brush. This will make it easier to unscrew it.
- Using a crowbar, you can lower the beam down, but do not remove it.
VAZ 2110 rear beam silent block and its replacement
- You need to cut off the elastic band that is located on the beam, as it will also interfere. This should only be done if the rubber band is already old and not suitable for further use. Otherwise, you can not change it, but simply remove it. To make it easier to remove, you can drill a hole in it.
- You need to lubricate the silent block and press it back.
Note: you cannot lubricate the silent block with grease, as it can corrode it. Therefore, it is better to lubricate it with soap or detergent.
- Now insert the brake sorcerer back and screw the beam onto the bolt.

