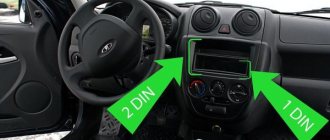
A budget option for replacing standard acoustics. Part 1.
When I first saw the Lada Largus, I immediately decided for myself: I will have it.
The sound from the standard speakers began to irritate me. .(
Less than a year has passed since the purchase of TRIFON, when the standard acoustics began to slowly “order to live a long time”! .) Strumming, metallic jingling, etc. began to appear. It all started with the front right speaker, then the rear left... And in order not to wait, it was decided to replace the standard speakers with something better than the standard ones. The budget for purchasing 2 sets of speakers was limited to $60. It was also decided to install speakers of standard size – 5.25″ (130mm). I turned to my friend. Outlined the situation. They inspected the speaker seats. The budget has been announced. And then it started. .) For the rear doors I was offered this kit: Coaxial speaker system DLS Matador M125G .
Characteristics: Type: Coaxial speaker Size: 130mm. (5.25″) Number of bands: 2 Rated power: 40 W. Maximum power: 60 W. Sensitivity: 90 dB (W/m) Frequency range: 60 – 20000 Hz Impedance: 4 Ohm
Tweeter Dimensions: 16mm. (0.63″)
Woofer Size: 130mm. (5.25″) Installation depth: 52mm. Installation hole: 120mm. (4.7″) Built-in filter.
I started replacing the standard acoustics. I started with the right rear door.
From above, I used a plastic spatula to pry off the standard protective mesh.
Released the top latch.
And carefully, pulling the protective mesh towards himself, he freed it from the hooks of the remaining latches.
I unscrewed the 4 screws that secure the speaker in the basket. And he took out the speaker.
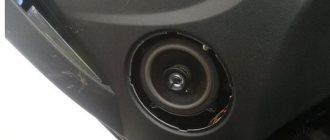
This “miracle” is installed as standard acoustics.
As you can see in the photo, the standard speakers are connected with a specific chip (Renault). And in order to connect a third-party speaker system to the standard wiring, you need to buy special adapters! And since: “Our hands are not for boredom. “. And the price for these adapters is very steep, so I decided to make them myself. (Since I already took out one standard speaker, I made 4 adapters in advance.)
The recently purchased “nice thing” came in handy again.
Crimped and insulated with heat shrink casing - 4 adapters.
Let's continue. I disconnected (took out) the connector from the standard speaker and took the wires out of the chip.
And further. If you don't have a wiring diagram for the speaker system at hand. For simplicity of definition, so as not to guess where is the “+” and where is the “-“.
I connect and isolate the adapters.
And at the same time I wrapped a plastic chip with electrical tape. So as not to lose it in the garage, and... But what if. .)
There was also an incident with the installed speaker system. Due to the slightly wide petals (with which the speaker fits into the recesses of the cup and is attached to it with self-tapping screws), they fit very tightly into the regular places. And so that the diffusers are not damaged when dismantling them. I bent the petals a little.
Now I connected it to the adapter. I inserted it into the cup and secured it with self-tapping screws.
I'm installing the standard mesh in place! That's it, with replacing the speaker in the right rear door - Finished.
Now I go to the back left door. I do everything absolutely the same way. ,)
With the replacement of the speaker system in the rear doors - FINISHED.
Let's move on to replacing the speaker system in the front doors.
For the front doors I was offered the following kit: Component speaker system Kicx PDN-5.2
Characteristics:
Type: Component speaker Size: 130mm. (5.25″) Number of bands: 2 Rated power: 70 W. Maximum power: 140 W. Sensitivity: 91 dB (W/m) Frequency range: 70 – 24000 Hz Impedance: 4 Ohm
Crossover Crossover: External Crossover frequency: 5 kHz Crossover slope: 12 dB/octave Tweeter material: Silk
Woofer Dimensions: 130mm. Diffuser material: Cellulose with moisture-proof coating Suspension material: Butyl rubber Magnet weight: 284g. Installation depth: 53mm.
The installation was carried out in the same way as installing the speaker system in the rear doors. I started the installation from the front left door.
And through the right front door.
Replacement of standard door acoustics with these kits – Completed.
see also
Comments 21
I’ll give you a Ural Hammer 165, they play great with the standard radio, I installed 4 speakers at a price of 3600, it seems like it was a bargain
That's why I switched from BMW to Largus
There is another option but it will be more expensive: sell the Largus and buy a BMW
Hello fellow countryman! Well what can I say, definitely change it. We definitely install component ones in the front doors. When buying, it is advisable to pay attention to the sensitivity of the speakers. It should be at least 91 db. It’s better if you find 93 db, but now this is rare, all the current shitty acoustics are geared towards amplifiers and the sensitivity leaves much to be desired, 89 db is edge in modern times (a tribute to the current shitty fashion). What would I recommend for the front of size 13? Herzi Dsk (I have them in front now. They’re 6 years old - they sound great) I wanted to install DLS_ki, but I can’t find them in the daytime right now, and the price tag they have space. You can try to install Pioneers in the rear door, but their sensitivity is not so great, but this is the best of all the current dermis that can work in the 13 range in terms of producing, albeit remotely, some low frequencies. But as for the standard head, I would change it. I now have a Jivisi 125_I regular receiver without CD, but with a very good set of functionality in terms of sound settings. The best feature in it is the possibility of channel settings. Regular sound is output to the front, and the rear switches to subwoofer mode. What do we have in this option? And this is what we have. The rear speakers work only in low frequency mode, the front ones in medium and high frequency mode. The sound image turns out to be quite normal, in other words, we have a three-way speaker on the left and on the right side of the car. It was not without reason that it was the Pioneers who suggested it as the rear ones, since in six years there were three sets of rear speakers already in this mode, and these have been holding on for the third year already. Well, that’s it in a nutshell (this is my option for today in a car if you take size 13.) And yet, there is a nuance with the front doors, the depth of the new speakers is limited and, if my memory serves me right, is only 51 mm. Further, if the glass lower it, the magnets can reach it - this is something to take into account when purchasing; be sure to measure the seating depth. In the rear doors, place it there until they reach the metal, there everything is fine with the seating depth and nothing interferes!
What speakers are there in Largus?
Video on the topic of the size of the standard speakers of the Lada Largus - click. Do you want to learn how to repair a car yourself? Then watch the free lesson. How to repair a car yourself at home. We will help you with repairs and repair the car yourself. We know how to restore a car with minimal investment. I have attached video instructions.
Category: Auto repair instructions
Laughter on the topic: - Why does everyone call you Lightning? - Do you see this brutal scar on your neck? - Yes. - I got it when I was buttoning up my down jacket.
Published by Admin: at the request of Andokid
Car owner review: Consumption about 6 liters per 100 is excellent
Lada Largus cars are available in several modifications, which differ in equipment. Basic versions do not have air conditioning and a standard head unit. Connecting a radio to a Lada Largus does not require the owner to have knowledge of electrical engineering or car design and can be done independently.
Sound via bluetooth
A standard car radio in combination with dynamic speakers “reads” music programs equally well, “digesting” any genre without much difficulty. The manufacturer has addressed radio lovers with a powerful antenna device that allows them to pick up a signal of even minimal power. The radio allows you to memorize 6 stations in each frequency range.
Renault Sandero DIY repair
Renault Sandero wiper blades
Compare Renault Captur and Hyundai Creta
Listening to music is available via CD drives or flash devices. Also for the same purposes, switching using Bluetooth is possible.
Recognized formats:
- "CD" and "MP3";
- "AAC" and "WMA", as well as "WAV".
With a wireless connection, it is possible to rewind not only between music programs, but also directly within a track.
The display clearly displays the charge level indication (if “Bluetooth”), as well as the “RDS” line. There is a Russified font in “IDTag”.
Other methods of connecting to this device are the “Jack” and “USB” sockets.
How to install
Some cars come from the factory with a 1 DIN car radio with CD player. Basic versions are equipped only with audio preparation; a plastic plug is mounted instead of the head unit.
To install the radio on Largus with your own hands, you need to:
- After removing the plug, place guide slides with locks in the instrument panel.
- Secure the mounting assembly using the tabs located around the perimeter of the part. Bending is done with a screwdriver; the installed shaft should not vibrate or make any extraneous sounds.
- Connect the ISO connectors located on the standard wiring to the head unit.
- Connect the antenna plug to the socket on the radio. If the sizes and shapes of connectors and plugs do not match, appropriate adapters are used.
- Insert the audio device into the shaft and push it until it clicks, indicating that the latches engage.
- Install a decorative frame around the radio panel.
Some owners install 2 DIN size radios on their Lada Largus. To place the head unit, it is necessary to replace the front plastic trim on the instrument panel, since it is impossible to accurately modify the original one.
The original panel is secured with latches, which can be removed manually or with a plastic screwdriver inserted into the gap between the parts.
The front panel with an extended window requires modification - it is necessary to install control buttons for additional equipment on it, borrowed from the Renault Logan sedan; original elements from Largus cannot be placed. This is due to the fact that the panel is designed for oval-shaped keys, which were never used on Largus.
At the same time, the mounting sockets for installing mounting clips are being finalized.
In the instrument panel, it is necessary to remove the horizontal jumpers located near the socket of the standard radio and climate control controls. Dismantling is carried out with a hacksaw and wire cutters, the remaining elements are cut off with a construction knife. All manipulations are carried out with caution, since there is a risk of damage to the standard electrical wiring. Then you need to reinstall the center console to assess the contact density of the elements.
How to connect a radio
Connecting the head unit depends on the vehicle modification. When installing the radio, you need to firmly snap the ISO plugs in place, and then reinstall the antenna connector.
If the product is equipped with a wired remote control, it is located on the steering column or the front of the instrument panel. The wire is laid inside the panel along the standard lines of the electrical harnesses.
With 2 speakers
The 2-speaker circuit is used only on cargo vans; the loudspeakers are located in the doors under the plastic panels.
The radio is ready for use immediately after connecting to the standard connectors. The car owner can install additional speakers in the cabin by laying separate speaker wires to them.
With 4 speakers
On passenger versions, 4 speakers are used, which improves the sound quality in the cabin. The wiring has a separate harness leading to the speakers in the rear doors.
The connection does not require any additional modifications to the vehicle wiring.
No speakers
The layout without speakers is found on the basic configuration. The car has connectors for connecting the radio and front speakers, as well as an antenna output. After switching the radio, you need to disassemble the door trims, which will allow you to mount the speakers in their standard places.
Loudspeakers are attached to factory mounting points, and wooden adapter rings may be used. After installing the elements, it is necessary to return the removed parts to their place.
Installing the speakers in their standard places on the Lada Largus is done as follows: first you need to dismantle the grilles in the door trims. To do this, use a thin straight screwdriver to pry up the edge of the decorative mesh and press out the hooks of the fasteners.
In this photo, the grid has been dismantled and you can see the wiring connector for connecting the speaker. The connector will not match the speakers you purchased. Therefore, change the connector to the one that comes with the speakers. Speakers need to be purchased in diameter 13. Luchka 2 stripes. I recommend KENWOOD. With a small diffuser size, they have a pleasant, soft bass.
This photo was taken after installing the speakers and decorative grille in place.
If it is difficult for you to install the speakers yourself, please contact our car service center by calling 8 9263988228. You can agree on a visit time and make an appointment to install the speakers.
How to install
Some cars come from the factory with a 1 DIN car radio with CD player. Basic versions are equipped only with audio preparation; a plastic plug is mounted instead of the head unit.
To install the radio on Largus with your own hands, you need to:
- After removing the plug, place guide slides with locks in the instrument panel.
- Secure the mounting assembly using the tabs located around the perimeter of the part. Bending is done with a screwdriver; the installed shaft should not vibrate or make any extraneous sounds.
- Connect the ISO connectors located on the standard wiring to the head unit.
- Connect the antenna plug to the socket on the radio. If the sizes and shapes of connectors and plugs do not match, appropriate adapters are used.
- Insert the audio device into the shaft and push it until it clicks, indicating that the latches engage.
- Install a decorative frame around the radio panel.
Some owners install 2 DIN size radios on their Lada Largus. To place the head unit, it is necessary to replace the front plastic trim on the instrument panel, since it is impossible to accurately modify the original one.
The original panel is secured with latches, which can be removed manually or with a plastic screwdriver inserted into the gap between the parts.
The front panel with an extended window requires modification - it is necessary to install control buttons for additional equipment on it, borrowed from the Renault Logan sedan; original elements from Largus cannot be placed. This is due to the fact that the panel is designed for oval-shaped keys, which were never used on Largus.
At the same time, the mounting sockets for installing mounting clips are being finalized.
In the instrument panel, it is necessary to remove the horizontal jumpers located near the socket of the standard radio and climate control controls. Dismantling is carried out with a hacksaw and wire cutters, the remaining elements are cut off with a construction knife. All manipulations are carried out with caution, since there is a risk of damage to the standard electrical wiring. Then you need to reinstall the center console to assess the contact density of the elements.
Since the original wiring has cables with colored insulation that does not comply with the ISO standard, it will be necessary to compare the assignments of each element on the car and the radio. An adapter is used for connection; wire switching is allowed by twisting the necessary cables. It is recommended to reinforce the joints with tin-lead solder or a metal connecting sleeve. The connection point is covered from above with a heat-shrinkable tube, which provides protection from moisture and short circuits.
Useful tips
Instead of a 1 DIN device, you can install 2 DIN on the Lada Largus. To position it, you need to update the front trim on the dashboard. It is not allowed to improve an unusual one. It won't look neat. In the panel, remove the jumpers located near the radio connector and climate control controls.
The front panel with a wide window will need some work. It is necessary to install control keys for additional equipment. They are borrowed from Renault Logan. Elements from Largus cannot be placed. The panel is initially designed for oval keys.
The unique wiring has colored insulation. It is not ISO compliant, which is why it is useful to compare the functions of the parts on the machine and on the device.
An adapter is used for switching. You can connect wires by twisting the cables. The junction point should be reinforced with tin and lead solder. Another good option is an iron sleeve. It is better to close the connection space at the top with heat shrink tube. It protects against moisture, preventing short circuits.
Source: omagnitolah.ru
How to connect a radio
Connecting the head unit depends on the vehicle modification. When installing the radio, you need to firmly snap the ISO plugs in place, and then reinstall the antenna connector.
If the product is equipped with a wired remote control, it is located on the steering column or the front of the instrument panel. The wire is laid inside the panel along the standard lines of the electrical harnesses.
With 2 speakers
The 2-speaker circuit is used only on cargo vans; the loudspeakers are located in the doors under the plastic panels.
The radio is ready for use immediately after connecting to the standard connectors. The car owner can install additional speakers in the cabin by laying separate speaker wires to them.
With 4 speakers
On passenger versions, 4 speakers are used, which improves the sound quality in the cabin. The wiring has a separate harness leading to the speakers in the rear doors.
The connection does not require any additional modifications to the vehicle wiring.
No speakers
The layout without speakers is found on the basic configuration. The car has connectors for connecting the radio and front speakers, as well as an antenna output. After switching the radio, you need to disassemble the door trims, which will allow you to mount the speakers in their standard places.
Loudspeakers are attached to factory mounting points, and wooden adapter rings may be used. After installing the elements, it is necessary to return the removed parts to their place.
Connection diagram
The procedure for connecting the car radio may vary slightly due to the modification of the machine. The audio device sometimes comes with a remote control. It is installed on the control column or the front part of the dashboard. The cable is laid along the length of the electrical harness lines.
The exact wiring diagram may vary due to the number of speakers. Therefore, it is better to understand the following information:
- With 2 columns. Two loudspeakers are used only on trucks. Speakers are most often located in doors under plastic panels. After installation, the radio can be immediately used for its intended purpose. All you have to do is connect it to the sockets. You can install other speakers in the cabin. Then it will be useful to lay a separate speaker cable.
- With 4 speakers. In passenger versions, a device with 2 pairs of speakers is more often found. The wiring contains a special harness that is routed to the rear door speakers. Connection does not require any modifications to the car wiring.
- There are no speakers. The diagram is appropriate for the main configuration. The car has connectors for connecting the device and front speakers. Additionally there is an antenna output. When the car radio is connected, you need to disassemble the door trim. This step will help you get the speakers in place.
The speakers must be fixed at industrial points. You can use wood adapter rings. After installing the parts, the removed elements must be returned to their original space.
Are you the driver of the car?! Then you can take this simple test and find out. Go to test »
Installing 16 speakers in Largus
After reading a bunch of articles on installing 16 speakers in Largus doors, weighing all the pros and cons, I decided not to bother and take the path of least resistance. Friends suggested that 16 speakers fit into their standard places, without any cutting or modifications. It is enough to remove the standard screens from the doors, attach the speakers and fasten them with self-tapping screws. They also advised not to bother with vibrations in the doors, because... On Logans the effect is not particularly noticeable. I decided to try it, do some farming, the main condition for me was to return the door panels to stock condition after dismantling the speakers. Speakers Power Acoustik XP2K-60C
Installation of 16 cm speakers can be divided into 3 stages:
1. Preparatory. Purchasing sound insulation, checking the presence of standard acoustic wires or purchasing new acoustic wires, preparing tools (find a jigsaw, check the battery charge level with a screwdriver, purchase a set of tools for removing door trim, buy solvent and rags).
2. Installation. Using the Tool Set, remove the door trim. We place the speaker grill grids on the standard speaker installation locations (round timber on the upholstery) and mark the INNER size - the mounting diameter of your speaker. We cut out a place for the speaker. Sound insulation of the door and door trim: degrease with a solvent, glue the sound insulation (it is advisable to cut it into pieces: strips or squares for ease of gluing), the pieces are tightly butted, it is advisable NOT to leave gaps. If there are no acoustic wires in the door, we stretch the wires.
We take the spacer and try it on the door. She must stand up and not move. Using a screwdriver, fasten it with self-tapping screws (included) to the metal of the door. As you can see, the hole for the 13 cm speaker does NOT slightly coincide with the center of the spacer - this is normal (now you understand how “well” the standard speakers play).
Reinstalling the door trims.
We screw the speaker, not forgetting to connect the acoustic wires to it. Installation is complete.
3. Turn on the mafon and listen to the new 16 cm speakers play.
If you are installing not coaxial (as in our case), but component acoustics, then you will need additional stands for tweeters (for installing high-frequency tweeters). You must first pull the acoustic wires from the mafon to the crossovers (which are convenient to hide under the dashboard), and from the crossover a pair of wires goes to the midbass and a pair of wires to the tweeters, which are already built into the racks for the tweeters. And you will get great sound in the car.
Everything is the same on VIDEO
The LadaTuningshop online store hopes that this information will help you install high-quality sound in your car.
On the Lada Largus, audio preparation is present on all modifications, but a radio and speakers are equipped only as options on the “norm” and luxury trim levels.” Next, let's try to figure out what the manufacturer understands by the word “audio preparation” and what connectors the standard Lada Largus radio has.
- Audio preparation of the Lada Largus includes an antenna with a cable, an interference suppressor, a wiring harness for the radio, a wiring harness for connecting the front door speakers. AvtoVAZ awarded this list to all Lada Largus configurations.
- The wiring harness for connecting the rear speakers (doors) is found on all station wagons and is missing on the van.
- The Lada Largus head unit with CD-MP3+AUX+USB+Bluetooth+Hands Free functions is installed optionally on the “standard” and “luxury” trim levels.
On versions without a radio, a shelf is installed instead. If you remove the shelf, the wires for connecting the radio will be inserted into its rear part. One plug is used to connect power to the radio, the other to connect two front and two rear speakers.
It is worth considering that the connectors for the audio system differ from the usual ISO standard. Therefore, to connect a non-standard radio, you will have to use adapters, which have the name: car radio socket/adapter Renault Duster/Sandero/Logan > 2012 - ISO (euro).
Adapters will also be needed to connect the speakers in the car doors and the antenna (by the way, the standard speakers are 13 cm in size). The connector for the rear speakers should be found in the pillar behind the driver's seat (near the passenger's feet).
If there are no adapters for connecting a radio or speakers, you can cut off the connectors and connect the wires according to the diagrams presented below. However, in this case you will have to think about maintaining the warranty on the radio and the car.
Device characteristics
It can't be called complicated. In addition, the instructions and user manual supplied with the system will help you understand the structure, functionality and characteristics of the device. Structurally, a car can be equipped with either a conventional 1 Din or 2 Din radio. The differences between them are minimal and lie in the location of the buttons and inscriptions.
To reproduce high-quality sound, the audio system provides four speakers:
- two in front;
- two at the back.
One of the main features and at the same time advantages of this device is the ability to connect to a smartphone via Bluetooth wireless channel. In addition to comfort and convenience, this function provides passive safety, since the Hands free system allows you to talk on the phone while driving without using your hands. The quality of communication is decent, communication with the interlocutor is not associated with difficulties, the driver does not need to raise his voice, and passengers hear him well.
The standard radio on Largus does not have much functionality and advanced capabilities, for some this is quite enough, but for others the characteristics of the radio are not enough. In terms of appearance, the device blends harmoniously with the standard car interior. All buttons and other controls are easy to use, and the inscriptions are easy to read and intuitive. The device is tightly fixed in the seat, there is no play or other defects.
Return to contents
Capabilities of standard audio device
Music in the car can be played both through removable media and via the Bluetooth wireless communication channel. At the same time, the genre of music does not matter, the sound quality remains at the proper level. To listen to radio stations, a standard antenna is provided, which can pick up even a weak and unstable signal. If necessary, you can save up to 6 radio stations in the device’s memory for quick playback, in each of the available bands.
In addition to the Bluetooth channel, you can listen to music via SD, USB media or CD, MP3 discs.
The radio supports most popular formats, for example:
- Connecting a car radio with your own hands
- MP3;
- WAV;
- WMA;
- AAC and some others.
Via the Bluetooth channel, you can control playback, i.e. pause the song or rewind to the desired segment. For convenience, it is possible to display the artist of the song and its title on the monochrome display. The radio can also recognize Russian fonts.
There are several connectors for connecting removable devices:
- Jack;
- USB;
- Bluetooth.
The unit is also equipped with several inputs for playing sound through third-party gadgets. The panel of the standard head unit is not removable, but this is no longer considered a disadvantage, since most car owners store the removable panel directly in the car rather than carry it with them. The purpose of each button, which is quite small, usually does not cause any difficulties. It would be much more informative to consider here other hidden features that are not mentioned in the detailed user instructions.
Return to contents
“Secret” menu of the Lada Largus radio
To go to the section with individual settings, use the SET button located on the front of the radio panel. Not every car owner knows that this button has hidden capabilities. Just press this key and hold for 6–7 seconds. The device will go to the engineering menu, where a number of special settings become available. The instructions included with the standard radio contain no information about such a tab.
The “secret” menu opens three sections (“Diagnostics”, “Configuration”, “Radio Monitor”). On the right is a rotating knob, which allows you to navigate up or down between these sections. To select the desired one, press the handle. To go to the previous level, press the “Back” key, which is located to the left of the rotary knob.
In the “Radio Monitor” section you can see the current frequency at which the received signal is located and some other data. In the “Diagnostics” section there is an additional subsection with the items “Autotest”, “Monitor” and “Errors”. The “Errors” block was created to inform the driver about existing problems in the BC (on-board computer). If there are no problems, the display will be blank. The “Autotest” item contains information about the current state of the equipment (OK on the screen means “functional equipment”).
The best option would look like this
| Inscriptions | What does it mean |
| FM, Am ant OK | The radio module is working properly. |
| Microphone OK | The microphone is working. |
| VT-Module OK | Bluetooth works fine. |
| CD OK | The disc player operates normally. |
| Fascia Button OK | The keys work properly. |
| Power IC OK | The on/off button works. |
The “Monitor” item provides information about the vehicle’s operating parameters. Simply put, the radio display displays information from the electronic control unit. In this menu, you can find out about the status of the current network, the functionality of the car’s backlight (to check the mode, just turn on or off the side lights - accordingly, the information about the backlight will change properly).
- Unlocking Ford 6000CD car radio, first and second generation.
It also displays data on battery charging and its current voltage, whether a removable device is connected or not, data on the correct decrease or, conversely, increase in volume when the vehicle speed changes (only if the wire required for this is connected to the appropriate connector).
In general, the engineering hidden menu on the Lada Largus radio was a good addition to the standard functionality. It won’t be difficult to figure out what’s here and how.
As for the electrical circuit and connection method, including pinout, this information can be clearly seen in the user manual or in the photo.
Return to contents
Installing 16 speakers in Largus
After reading a bunch of articles on installing 16 speakers in Largus doors, weighing all the pros and cons, I decided not to bother and take the path of least resistance. Friends suggested that 16 speakers fit into their standard places, without any cutting or modifications. It is enough to remove the standard screens from the doors, attach the speakers and fasten them with self-tapping screws. They also advised not to bother with vibrations in the doors, because... On Logans the effect is not particularly noticeable. I decided to try it, do some farming, the main condition for me was to return the door panels to stock condition after dismantling the speakers. Speakers Power Acoustik XP2K-60C
Installation of 16 cm speakers can be divided into 3 stages:
1. Preparatory. Purchasing sound insulation, checking the presence of standard acoustic wires or purchasing new acoustic wires, preparing tools (find a jigsaw, check the battery charge level with a screwdriver, purchase a set of tools for removing door trim, buy solvent and rags).
2. Installation. Using the Tool Set, remove the door trim. We place the speaker grill grids on the standard speaker installation locations (round timber on the upholstery) and mark the INNER size - the mounting diameter of your speaker. We cut out a place for the speaker. Sound insulation of the door and door trim: degrease with a solvent, glue the sound insulation (it is advisable to cut it into pieces: strips or squares for ease of gluing), the pieces are tightly butted, it is advisable NOT to leave gaps. If there are no acoustic wires in the door, we stretch the wires.
We take the spacer and try it on the door. She must stand up and not move. Using a screwdriver, fasten it with self-tapping screws (included) to the metal of the door. As you can see, the hole for the 13 cm speaker does NOT slightly coincide with the center of the spacer - this is normal (now you understand how “well” the standard speakers play).
Reinstalling the door trims.
We screw the speaker, not forgetting to connect the acoustic wires to it. Installation is complete.
3. Turn on the mafon and listen to the new 16 cm speakers play.
If you are installing not coaxial (as in our case), but component acoustics, then you will need additional stands for tweeters (for installing high-frequency tweeters). You must first pull the acoustic wires from the mafon to the crossovers (which are convenient to hide under the dashboard), and from the crossover a pair of wires goes to the midbass and a pair of wires to the tweeters, which are already built into the racks for the tweeters. And you will get great sound in the car.
Everything is the same on VIDEO
The LadaTuningshop online store hopes that this information will help you install high-quality sound in your car.
On the Lada Largus, audio preparation is present on all modifications, but a radio and speakers are equipped only as options on the “norm” and luxury trim levels.” Next, let's try to figure out what the manufacturer understands by the word “audio preparation” and what connectors the standard Lada Largus radio has.
- Audio preparation of the Lada Largus includes an antenna with a cable, an interference suppressor, a wiring harness for the radio, a wiring harness for connecting the front door speakers. AvtoVAZ awarded this list to all Lada Largus configurations.
- The wiring harness for connecting the rear speakers (doors) is found on all station wagons and is missing on the van.
- The Lada Largus head unit with CD-MP3+AUX+USB+Bluetooth+Hands Free functions is installed optionally on the “standard” and “luxury” trim levels.
On versions without a radio, a shelf is installed instead. If you remove the shelf, the wires for connecting the radio will be inserted into its rear part. One plug is used to connect power to the radio, the other to connect two front and two rear speakers.
It is worth considering that the connectors for the audio system differ from the usual ISO standard. Therefore, to connect a non-standard radio, you will have to use adapters, which have the name: car radio socket/adapter Renault Duster/Sandero/Logan > 2012 - ISO (euro).
Adapters will also be needed to connect the speakers in the car doors and the antenna (by the way, the standard speakers are 13 cm in size). The connector for the rear speakers should be found in the pillar behind the driver's seat (near the passenger's feet).
If there are no adapters for connecting a radio or speakers, you can cut off the connectors and connect the wires according to the diagrams presented below. However, in this case you will have to think about maintaining the warranty on the radio and the car.
Enter the code. Step-by-step instruction
How to enter the code step by step. The input process itself involves following this sequence of manipulations.
- We turn on the Lada Largus radio by pressing the “1” button in the keyboard field. In this case, an inscription appears in the form of “CODE” with the numeric dial “0000”. The first digit character will be in flashing mode.
- Now, by pressing the “1” button, we achieve the first digit to appear on the display.
- Entering the next digits in the code line is carried out in a similar way. However, this will require pressing the keyboard buttons corresponding to the serial number of the code digit (“2”, “3” and “4”).
- Once you have completed entering all four code characters, you will need to press and then hold the “6” button, also located in the keyboard field.
- Immediate unlocking of the radio will indicate that the code on the radio has been entered correctly.
Important! When the radio code is entered incorrectly, a message in the form of “CODE ERROR... WAIT” is displayed on the screen, after which a 2-minute time delay will be required. Then you can start re-entering.
Each subsequent input attempt, if it turns out to be incorrect, requires a shutter speed twice the previous time interval, etc.
