Acoustics for the front doors of Lada Granta
Installing speakers in Granta doors allows you to be independent of the body type - speakers in the doors do not require an acoustic shelf. This means that you can install speakers in a sedan and a hatchback according to the same principle.
Preparatory work
Before we begin the installation itself, let's figure out how to prepare the car. For this:
- We disassemble the door : dismantle the handle (pry up and remove the trim, unscrew 2 screws), the tip of the limit switch, two screws from the bottom of the door, overcoming the resistance of the retaining pins, pull the door card toward you and remove it from the door;
- We soundproof the door: in the warm season or in a heated garage, we cover all accessible parts of the door with vibroplast. Vibroplast StP M2 is suitable; when applying it to the door, be sure to heat it with a construction hairdryer and roll it with a pressure roller;
- If you have Spleen thermal insulation material, we cover the inside of the door card with it. This will further hide noise from the door when assembled;
- We are preparing spacers , if any are required for installing 16 cm speakers - more about them later in the text;
- We replace the factory terminals on the speaker wire in the door with normal ones (usually good terminals are included with the speakers) - to do this, we simply cut off the unnecessary connectors and attach the terminals we need to the wiring. A high-quality twist with heat shrink is enough;
- If the door panels do not have holes for speakers , we prepare them. It would be optimal to supply factory acoustic grids, which are installed on luxury versions of Granta and Datsun OnDo.
Installing speakers in Granta front doors
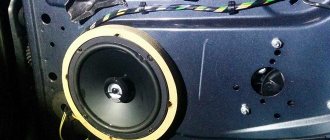
The standard acoustics in Grant are 13 cm speakers. They do not produce good sound, but they are easily installed in the factory holes for the speakers without unnecessary manipulation. The procedure for dealing with them is simple:
- connect the speaker cables, observing the polarity;
- fix with screws in regular places in the metal of the door or directly on the door card;
- install grids (in common parlance - grills).
An important disadvantage is that the center of the mounting hole and the place under the grill do not coincide. This means that when installed with complete grills, they will look asymmetrical and clumsy.
Standard acoustics most often do not produce a rich sound and, when installed with their own grids, look poor.
How to install 16cm speakers with spacers
In pursuit of sound, it is logical to install 16 cm speakers. This is where all the disadvantages of the AvtoVAZ design appear - the speakers either are not centered, or do not allow the window to roll down, or interfere with the glove compartment lid.
Why are spacers needed ? In order not to cut the door, if you do not put the acoustics in the spacer rings, you will have to attach it to the metal of the door. This may result in the need to cut the door itself in order for the speaker to fit in, and is dangerous for the glass.
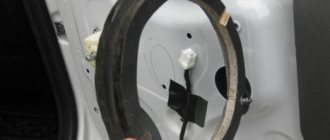
For this reason, speaker rings made of plywood are attached to the metal of the door, and the speaker itself is attached to them.
The procedure is as follows:
- we make or buy spacers for speakers - thickness 10 mm, material plywood;
- cut a hole for the speaker in the card and mark the installation location along it;
- put the spacer on 4 self-tapping screws;
- We install a column in it - observe the polarity!;
- install the map + install the standard mesh so that it doesn’t interfere with the glove compartment.
If the spacer bursts during installation, this may result in a rattling noise coming from the door while driving.
What speakers are better to put in the front doors instead of standard speakers?
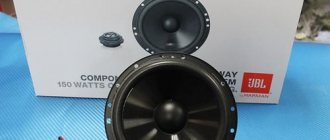
We recommend the Pioneer TS-G1733I model. At a price of about 2 thousand rubles, they are freely installed through spacers in Granta doors without cutting metal and do not interfere with the glass. Easy installation will save you nerves and time.
Link to Yandex description of columns here.
The speakers are easily pumped with a radio without an amplifier and produce medium bass. Not component acoustics!
Installing front speakers
Acoustics for Lada Granta
Before moving on to the actual algorithm for installing the front speakers (see How to choose speakers for a car radio on your own), let us remind you that this car has already been equipped with standard seats and there is no need to do anything new. But a serious problem arises when installing two-component acoustics. And yet, modernization will have to be carried out, since the diameter of the standard seats is quite limited, however, as on other car models.
Note. If, for example, we want to install high-quality 16 cm acoustics on a Lada Granta, then another intractable problem will arise. The front windows may not open all the way and will hit the speaker. You will have to make special spacers from plywood or chipboard.
Making podiums
So:
- The first thing to do is to make podiums.
DIY acoustic podium
- Cut out a paper stencil to fit the diameter of the speaker. Don't forget to cut out the inner circle too.
Note. For 16 cm acoustics, you should get a ring with the same diameter and a 15 cm circle cut inside it.
- We glue together 2 pieces of plywood, cut according to a stencil. We use PVA glue and self-tapping screws.
- We should get rings 11 mm thick. This is quite enough for most speakers, although the thickness can be increased, if necessary, later by adding additional rings.
- Now we need to install these same acoustic podiums in the door of the Lada Grant. Without removing the trim, we make markings by attaching a homemade ring to the door.
- We remove the casing.
- We take a drill and start drilling holes in the metal of the door.
- We put up podiums and fasten them well.
Note. During this work, it is recommended to at the same time make high-quality sound insulation of the door. It will make the sound from the speakers much fuller, and music lovers will be satisfied.
- We lay wiring in the door.
- We put the trim back in place.
- We install the decorative speaker grille. You can attach it in various ways.
Installing speakers in Granta rear doors
The procedure for working with the rear doors is identical to the front ones. Important difference : homemade spacers are not required here. The plant produces a set of special mounts for installing 13 cm speakers in the rear doors.
Articles for ordering online:
| Speaker Mount - Rear Left | 21907901033 |
| Speaker Mount - Rear Right | 21907901032 |
| Rear left column trim | 21906202095 |
| Rear right column trim | 21906202094 |
| Trim for front left door | 21906102097 |
| Trim for front right door | 21906102096 |
Installation sequence:
- Disassemble the door;
- Cut a hole in the door card for the lining;
- Install the speaker mount on the door;
- Replace the standard audio terminals with normal ones;
- Connect the wires to the column, secure it;
- Install the trim and assemble the door.
You can replace the fastening with improvised materials, but factory production takes into account all bends.
How to install 16 cm speakers with spacers
You can install 16-cm speakers without enlarging the hole, but then, due to the spacer, the speaker will stick out from the door. It is more advisable to carry out a standard cutting. Instructions:
- After the handle and facing panel are removed, the wires are disconnected. Sound insulation is removed. Use a jigsaw to enlarge the standard hole in the door.
- A pre-created podium is attached to the back and securely fixed with self-tapping screws.
- The cable is removed, the electronics are connected, and the structure is assembled in the reverse order.
Before putting the door back together, it is important to check the sound of the speakers. Incorrect operation may be due to incorrect wiring connections. If you hear wheezing or knocking, it means the speaker is not securely fixed.
General information about music in Grant
In this section, we will consider general non-professional points about music in the Lada Granta.
Installing music
If you have a VAZ 2190 in the basic configuration (or Norma) with audio preparation, then installing music will entail the following steps:
- Removing the radio cover - on the back side there are ISO connectors for power and speaker wires. You will have to run the wires to the rear speakers yourself if you plan to install an acoustic shelf, since from the factory the wires are routed only to the doors;
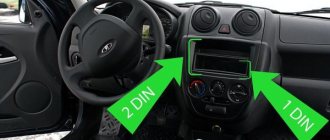
- Installation of a 1- DIN radio (for 2-DIN you will have to farm, cutting out a jumper in the panel and looking for a suitable frame);
- Finding and connecting the plug of the pre-installed antenna - often the antenna wire on the roof is lost under the ceiling trim and it turns out to be easier to install the antenna separately than to find the factory cable;
- Pulling wires into the trunk to connect an amplifier, subwoofer and speakers installed in an acoustic shelf.
- To install the amplifier, you will also need a separate power cable from the engine compartment directly from the battery terminal through a fuse.
Car radio installation
Acoustics in Lada Granta
The car radio for the Lada Granta must be selected in such a way that its connection corresponds to the 1 din connector.
Note. You can also install a car radio with 2 din on the Lada Granta, but then you will have to cut out the partition and adjust the frame in the console to the size, which is very, very labor-intensive.
- We dismantle the plastic pocket that stands in place of the future car radio. We use a flat blade screwdriver. On the back of the pocket we see slots where you will need to insert ISO connectors.
Installation of car radio in Lada Granta
- The metal frame is removed from the radio and installed in the same place where the pocket was removed. We unbend the frame's antennae and securely fix it.
- We connect the connectors to the car radio. Then we insert it into the frame.
We check the operation of the car radio, and if it is functioning normally, then we move on to the next stage of our operation.
Crib
Instead of a conclusion, let's summarize:
- You can plug in budget sound into the Grant for an amount of 20,000 rubles or more.
- Podiums in the front doors = impossible to open the glove compartment.
- 16 cm speakers in the front doors - cut the metal of the door or prepare spacers with the factory facing of the speakers.
- The acoustic shelf covers the ISOFIX mounts.
- Audio preparation pulls wires only in the doors.
- Article numbers for ordering speaker covers and mounts are in the “Installing speakers in rear doors” section.
Did you like the article? Write a comment or see what we have about the selection of budget cars for 200 thousand.
And so, I considered the standard speakers to be a drawback, so I decided to replace them. I decided to replace it with speakers of the same size 13 cm, since to install larger speakers it is necessary to cut the door, and I don’t want to do this, and since even in the long term there is no installation of an amplifier, so installing 16 cm is not logical, because of this I decided to install 13 cm speakers and just get better sound. I purchased the well-known Pioneer TS-1339R speakers for the front doors for 2,000 rubles. The kit comes with long wires, which is useful for those who do not have audio training.
Type - coaxial speaker; Number of speakers included - 2 pcs; The shape of the speakers is round; Number of stripes - 3; Rated power - 40 W; Maximum power - 200 W; Minimum frequency - 40 Hz; Maximum frequency - 30000 Hz; Sensitivity - 91 dB; Impedance - 4 Ohms; Diameter - 13 cm; Planting depth - 55.3 mm.
To install in the front doors, remove the trim; to do this, unscrew the bolts in the indicated places and unscrew the door lock release button, remove the trim that is held on by clips.
Tools:
- Small flat screwdriver
- Medium Phillips screwdriver
- Jigsaw with metal files
- Stationery knife
Parts and consumables:
- Speakers
- Wooden spacers - 2 pcs.
- Fastening pins (if necessary)
- Chalk
Notes:
In addition to the radio, for its normal operation, it will also be necessary to install speakers (acoustics) in the car door.
1. To cut holes in the door trim, remove it from the vehicle.
Note:
The door trim and metal frame of the front doors provide a size for 16 cm speakers.
2. Use a utility knife to cut holes in the front door trim.
3. If you decide to install 16 cm speakers, you may have to modify the door frame, since the speaker basket may not exactly fit into the standard hole in the door iron. Use a jigsaw to cut a hole of the required diameter and try on the speaker.
4. Connect the speaker and install it in place using spacers.
5. Install the speaker grille onto the speaker.
6. Reinstall the front door trim, replacing the damaged trim clips if necessary.
Note:
With the described installation method, the speaker grille does not protrude significantly above the door trim, and therefore will not interfere with the full opening of the glove compartment.
The article is missing:
- Photo of the instrument
- Photos of parts and consumables
The standard audio equipment of a Lada Granta liftback car includes: a 2-DIMM radio, two speakers in the front door measuring 13 cm, blocks with wires in the rear door.
Obviously, such an audio system is not complete and of low quality. The stock speakers are too small, weak when using mid and high frequencies. It's enough to listen to the radio. Is it worth changing the standard speakers? The answer is yes.
Speaker installation
Many sedans are purchased in a classic configuration, without a radio and sound system. To install these fragments, it is important to follow the step-by-step instructions:
- The casing is removed. To do this, unscrew the handle, which is held on by two bolts, disconnect the latches and pull out the panel covered with fabric. Sound insulation is removed.
- The electrical wiring is disconnected, the old speaker is removed (if equipped).
- A hole is created in the cladding for musical equipment. An iron niche has already been created for size 13 acoustics. This is where the back of the speakers is inserted. Sometimes a little filing with a jigsaw is required.
- The equipment is fastened with self-tapping screws. The wiring is being connected.
- The facing card is returned to its place and secured with clips. They often break during removal, so it is worth purchasing an additional set of clamps. At the end the handle is screwed on.
There are more wires in the front door than in the back door. In addition to the electric lifts and the locking mechanism, the electrical wiring of the car's side mirror is connected there.
A short checklist for installing speakers in the front doors of Lada Granta
- Removing the door card.
- Removing standard noise and vibration insulation.
- Removing the stock speaker.
- Installation of speakers (13 cm) Granta liftback. When installing speakers at 16.0 cm, use a metal jigsaw to make a cut in the door contour.
- We connect the blocks with wires.
- We collect the card and replace it in a similar way to the second door.
The sequence of actions is presented very briefly; during installation, many “pitfalls” arise, which are discussed below.
How to machine a cylindrical hole
16 cm speakers will require enlarging the hole in the metal structure. This diameter is preferable because it creates more sonorous acoustics. For cutting you will need a metal jigsaw and steel files. Chalk outlines the place of the cut, which is measured in advance. When the niche is ready, it should be cleaned with sandpaper, and also make sure that the speaker fits tightly into the hole. If it dangles, it will create extraneous noise in the cabin.
A wooden podium is additionally prepared from wood, which is attached to the inside of the speakers.
The subtleties of installing speakers on a Granta liftback that everyone should know
- To avoid additional manipulations with cutouts and extensions of standard holes in the doorway, install audio speakers with a diameter of 13.0 cm.
- If you want to improve the sound quality, increase the volume, frequency, install speakers in the front doors at 16.0 cm. Be prepared to widen the hole in the door structure. You can do this at a service center or yourself, armed with a metal jigsaw. From a ring with a radius of 6.5 cm, make 8.0 cm.
- When installing speakers of larger diameter, there is a high probability of glass coming into contact with the back of the speaker. As a result, vibrations are possible when lowering the glass to its lowest position.
Preparatory work
First, it is determined what diameter of the speakers will be installed on the Lada Granta liftback or other type of hatchback. Then a set of equipment and fasteners is prepared. Installation will require the following tools:
- screwdrivers;
- jigsaw;
- sharp knife;
- rags;
- metal files;
- wooden spacer;
- chalk to mark the diameter of the stand.
Speaker size 13 is the norm. The internal design of the door allows you to install such a column without additional manipulations. In this case, installation and cutting of the metal base is not required.
Review of prices of audio products manufacturers
| Name / characteristics / article number | Price, rub.) |
| Comprehensive budget solution | |
| Radio tape recorder PIONEER MVH-150UBG | from 1500 – 1700 |
| Speakers Pioneer TS-1339 (13cm) | from 2000 |
| Speaker trim | from 450 – 500 |
| Additional noise/vibration insulation of doors | from 1200 |
| Consumables, bolts, screws for vinyl (wood) spacers | from 100 – 150 |
| Car radios | |
| Pioneer SPX-HUD01 | from 10000 |
| Pioneer DVH-345UB | from 12000 |
| Sony XAV-65 | From 15000 |
| Pioneer SPH-DA230DAB | —/— |
| Pioneer SPH-DA120 | from 12000 |
| Pioneer MVH-X585BT | —/— |
| Pioneer MVH-X580BT | —/— |
| Pioneer MVH-S300BT | —/— |
| Auto acoustics coaxial | |
| Two-way coaxial acoustics URAL AK-M | from 7000 |
| URAL AK-74 | —/— |
| Coaxial acoustics URAL AS-C6947 | from 5200 |
| URAL AS-C1647 | —/— |
| URAL AS-C1347 | —/— |
| Four-way acoustics German Maestro AC6511 | from 7500 |
| Focal Performance PC 130 | —/— |
| Dragster DCB 5 | —/—7 |
| Dragster DCA 943 | from 6800 |
| Dragster DC 572.2 | —/— |
| Dragster DC 502.2 | —/— |
| Auto acoustics component | |
| 2-component acoustics Dragster DSB 5 | from 4000 |
| URAL AS-C1627K | —/— |
| URAL AS-C1327k | —/— |
| URAL AK-74.C | —/— |
| URAL AK-47.C | —/— |
| Avatar CBR-6.21L | from 5000 |
| German Maestro MB 4.2 FR | —/— |
| German Maestro 2S 6512 | —/— |
| Dragster DSC 592.2 | —/— |
| Dragster DSA 582 | —/— |
| Dragster DS 532.3 | —/— |
| Alphard Machete MC-6.2A | —/— |
| Amplifiers single / multi-channel | |
| Machete MFC-650.1D | from 10000 |
| Taramps DSP 3000 | —/— |
| Taramps TS2000x4 | —/— |
| Taramps TL500 | —/— |
| Taramps TL1800 | —/— |
| Taramps TL1500 | —/— |
| Taramps DS800x4 | —/— |
| Taramps DS800x2 | —/— |
| Taramps DS440x4 | —/— |
*prices are as of September 20, 2018.
The main differences between coaxial and component acoustics
- Coaxial: a single design of speakers, where low-frequency and high-frequency are mounted on the same axis. Depending on the type of preinstalled crossover, one, two, or three-way crossovers are distinguished.
- Component: consists of a number of individual different-frequency speakers that are installed throughout the vehicle interior.
It is better to install coaxial ones on the back row of seats, component ones - in the front. The cost of coaxial speakers is a third cheaper than component ones.
Conclusions and recommendations
Conducting standard audio preparation in cars such as, for example, the Lada Granta has now become much easier, because there is no need to conduct the wires themselves and the owners only have to make their proper connection.
Thus, the corresponding wires are connected to the power connector of the radio, as well as the connector for the speakers. Do not forget about the insulation of wires that are supplied directly.
After this, we cut out an opening in the door, where we insert the speaker and secure them with the appropriate fasteners. Most often, 5-inch speakers are mounted in doors.
Remember that independently connecting an audio system to existing factory outputs is in no way considered an excuse for refusing warranty service.
Sources
- https://expertVAZ.ru/lada-granta/audiopodgotovka-ustanovka-muzyki-magnitoly-norma-lyuks.html
- https://new-lada.ru/audiopodgotovka-lada-vesta-chto-vkhodit/
- https://car-fact.ru/marki-i-modeli/otechestvennye/lada-granta/magnitola-granta.html
- https://la-granta.ru/audiopodgotovka-i-audiosistema-komplektacij-lada-granta.html
- https://carfrance.ru/chto-vxodit-v-audiopodgotovku-lada-granta-v-komplektacii-norma/
Sequence of actions when installing rear speakers in a Lada Granta liftback
The speakers will be installed in the factory door openings. The situation with dimensions for openings is atypical. The shape is oval, while the columns are round. It is not known why AvtoVAZ made this decision.
To correctly install speakers in the rear door, do the following:
- remove the door card, handle, control unit;
- select the size of speakers for installation. Size 13 will require less cost and plumbing work compared to size 16.
- Selecting a speaker at “13”: using a utility knife, cut off the edge at the top of the hole for the speaker. The metal body is left unchanged.
- If you select a speaker with “16” or more, use a metal jigsaw to cut off the edge on the metal and plastic casing.
It is important to know. Many car owners are wary when they see that the hole in the speakers is not located in the center of the oval structure (preparation). The problem is familiar, but the defect has not yet been fixed.
- We cut out a stand from wood for the base of the speaker, no more than 0.6 cm thick. For these purposes, it is better to choose plywood.
- We insert the speaker into the door, place a wooden spacer, connect the block with wires - the so-called audio preparation.
To the left rear door: blue/white - brown/blue wire. To the rear right: green / black - yellow / green. We complete the assembly by installing the door card. By analogy, we carry out the installation on the left door.
Installation of 1 din radio in Grantu standard and norm
What is needed to install a radio in a VAZ 2190:
- The radio itself is also the head unit;
- flat screwdriver;
- Straight arms.
Abbreviations and symbols in the text:
- GU – head unit;
- MMS – multimedia system;
- DIN (din) – installation size for acoustics in a car.
Lada Granta Standard
The audio preparation of the Lada Granta Standard is arranged as follows: the car has power wiring harnesses connected to the head unit. Such wires are present only in the radio; there are no visible outputs of wires for the speaker on the doors.
Therefore, on the basic configuration of the car, the wires do not reach the audio system speakers. Under the panel on the driver's seat side there are wire outlets for the radio.
In order to connect them into one system, you need to find the corresponding audio system wire outputs on the Lada doors. After finding all the necessary outputs, the wires located on the panel are connected to the wires that are built into the doors.
On a car of this configuration, you will need to run the wires to the dashboard alone.
A few words about this configuration. The “Lux” assembly has a factory pre-installed radio with speakers. The radio has at its disposal such additional functions as a 5-inch touch screen, which also has a line input, a Bluetooth headset, and the ability to read flash media.
Lada Granta Norma
In the Lada Grant Norma, the audio preparation is configured in such a way that the door wires are connected to the head unit, which already powers the audio system itself. The car owner will only have to connect the radio and speakers.
The Lada Granta series has a flaw: the AvtoVAZ connectors for audio systems do not match the connectors of audio equipment manufacturers. Because of this, you have to additionally purchase the necessary wires and connect them directly, while paying attention to the corresponding symbols.
We recommend: Replacing the Lada Priora heater radiator without air conditioning
For example, the space for the speakers on the Norma doors is indicated by a corrugated pattern. It will be necessary to cut an opening to connect the speakers.
Step-by-step instructions for installing the head unit
Required:
- a narrow flat screwdriver or plastic spatula for installing acoustics;
- 1-din radio with frame.
The seat in Grant is designed for 1 din.
To work with large 2-din sizes, you will need to cut out the partition and install a decorative frame. Step 1 . Using a flat-head screwdriver, remove the plastic plug for the radio. To do this, carefully pry it around the edges and pull it towards you.
The placeholder for the radio is installed from the factory.
Step 2 . On the back of the plug there is a mount for ISO connectors. There are two connectors: music power and wires for the speakers.
When connecting the pads, you can’t confuse them - they have fastenings of different shapes. 8 wires at the speaker terminal. The second power connector.
Step 3 . If necessary, connect an adapter for your radio to the ISO. Usually it comes included .
If an adapter is not needed , proceed to step 4.
If an adapter is needed for acoustics, it is included in the kit. Example in the picture.
Step 4 . We remove the glove compartment. Holding the glove compartment clamps in the upper position, forcefully lower the glove compartment down.
Overcoming resistance, we pull the lid towards ourselves - the glove compartment is removed.
Removing the glove box on a Grant is easy when you know where its latches are located.
Step 5 . We climb under the panel in the area of the front right passenger's feet with a flashlight. Behind the felt on top we find a thick black wire - at its end there is a plug for the factory antenna.
We extend the plug to the installation location of the radio.
Here we are looking for the antenna wire.
Step 6 . We install metal slides for the radio. a screwdriver to bend the fastenings of the slide at the top and bottom to ensure secure fastening.
These fasteners secure the slide into the panel opening.
Step 7 . We connect the power connectors, speakers, antennas to the radio. We insert it into the slide all the way. We attach a decorative plastic frame.
If you plan to install an amplifier, you must first stretch the wires under the panel and bring them to the installation site of the power unit.
What to do if the length of the wires and antenna is not enough
To get by without extending the wires , you will have to suffer:
- We put our hand under the panel in the glove compartment area;
- We put the radio in the slide and connect it to the plugs;
- We blindly connect the power, the connector for the speakers, the wires for the amplifier, and the antenna.
Disadvantages of the method : we spend a lot of time, the process is dreary and inconvenient. We'll probably rip off your wrist.
Plus : there is no need to build up wires, which will then interfere with the installation of the PG, resting against the back wall.
If, after installing the acoustics, the alternator belt begins to whistle, the solution to the problem is here.
As you can see, immediately behind the GU in Grant there is a vertical partition, which greatly interferes with blind installation.
If the radio tape recorder dangles in the slide and rattles
It happens that the acoustics hold weakly in the sled , although they sit firmly. Solving the problem:
- Using the keys for dismantling (included with the control unit), remove the radio;
- We take a small piece of vibroplast (resin-based foil) and glue it onto the slide from the inside, top or bottom - this way we will ensure that the tape recorder is completely pressed against the slide without unnecessary vibrations;
- Once again, use a screwdriver to press down all the fastenings of the slide: some might have been under-tightened;
- We put the acoustics back and check - all unnecessary vibrations during shaking should disappear.
Vibroplast helps not only with soundproofing a car.
Installing speakers in the rear shelf of Lada Granta liftback
The installation process is somewhat complicated by the need to pre-prepare the shelf, cut holes, and install podiums.
- Open the back door of the Lada Granta Liftback, remove the shelf;
- We apply the speakers one by one, projecting their oval silhouette onto the shelf from the back side;
- We cut out holes with a jigsaw and clean them around the perimeter with sandpaper;
- We buy in advance and cut out the podiums for the speakers ourselves. We apply and assemble the structure.
The most crucial moment comes - laying the cable. Some masters practice feeding from side doors, which is fundamentally wrong. As the load on the circuit increases, the speakers will begin to sag. It is best to connect to the ISO connector on the back of the tape recorder.
- We dismantle the plastic linings - thresholds between the front and rear rows of seats.
- We lay the wires from the rear speakers and bring them out to the inside of the dashboard.
- We route the ISO connector and connect it to the free sockets.
- We reassemble the pads.
Provided you follow the recommendations and follow the algorithm, the performance of the speakers is guaranteed. During the warranty period, the buyer has the right to present to the seller any demands provided for by law.
How to remove the trim?
This is necessary for installing speakers. Here, the Lada Vesta owner will need maximum care and attention to eliminate the risk of scratching the plastic panels. Using a screwdriver is highly undesirable. It is better to arm yourself with a plastic card.
To remove the plug located on the end of the door, you will need to use a card to pry it through special recesses. Using the same principle, we dismantle the buttons for electric window lifts. Fastening components in the form of tendrils are located on the front, rear and side sections of the MUS.
The fastening of the casing is represented not only by screws, but also by 4 “hedgehogs”. The risk of breaking them is quite high if the owner does not use a specialized tool during dismantling. These “hedgehogs” are borrowed from cars from Renault-Nissan. You can use elements from Grants instead, but minor preliminary modifications will be required. Such “hedgehogs” are stronger and their price is several times lower.
According to these manipulations, the upholstery on the driver's side is dismantled. Removing the trim from the right door panel has its own peculiarities. There is no need to remove the window lift button. There is also no need to look for a self-tapping screw plug. A sufficient measure would be to remove the handle cover.
Reviews
| № | Positive |
| 1. | Kirill , 33 years old: the standard front speakers are quite enough for me. To add volume to the sound, I installed a couple on the rear shelf. |
| 2. | Vasily , 44 years old: The standard radio on the Lada Granta Liftback is not bad, the sound is good. There are not enough speakers in the back row. I didn’t bother, I set the speakers to “13”. |
| 3. | Vitaly , 33 years old: after purchasing the Lada Granta Liftback, I supplemented the standard audio system with only two rear speakers, that’s enough for me. |
| 4. | Gennady , 41 years old: to increase the volume of sound, he added two speakers to the rear side doors and the rear parcel shelf. The standard radio works, no problems. |
| 5. | Mikhail , 35 years old: I heard a lot of complaints about the standard system, my feedback is positive. Yes, it is not super powerful, but it is enough for the average driver. |
| 6. | Gennady , 29 years old: the standard 2-DIMM radio on the Lada Granta Liftback is quite enough for good sound. Anyone who wants a concert hall should buy it separately. |
| 7. | Vyacheslav , 38 years old: I heard that they install rear speakers on the Grant at “16”, but did not bother. I bought it on “13”, I’m happy, there are no complaints about the sound, it’s not ideal, but it’s enough for me. |
| Negative | |
| 1. | Vasily , 28 years old: I didn’t believe the negative reviews until I bought the Lada Granta Liftback. Weak and terrible. Change the speakers and radio. |
| 2. | Kirill , 33 years old: I took the car with me, it had a standard radio, I replaced it with a new one from Pioneer. It's a completely different matter. |
| 3. | Georgy , 41 years old: when buying Grants, I knew in advance about problems with acoustics. I bought coaxial speakers and a good radio. |
Audio preparation Grants of different configurations
In the “standard” configuration, the Lada Granta has pre-installed power wiring harnesses, which are located in the console opening. Electrical wires are connected only to the radio, so don’t be surprised if you don’t find them in the doorways. To wire to the doors, you will need to pull power wires, which are located under the console panel. In this configuration of the Lada Granta, the stereo system can be installed independently if due attention is paid to it.
In the Lada Granta Norma, the power wires coming from the console are already routed to the doorways. You only need to connect the audio system in accordance with the assembly diagram. It's not uncommon for the stock door wiring to not match up with some speaker connectors. To solve this problem, you need to purchase suitable wires and replace them in the doorway. Lada Granta Norma has a trim with a special pattern for the speakers. Based on it, you can cut the opening yourself.
During assembly at the factory, the Lada Granta luxury version is equipped with a touchscreen multimedia system and speakers. The improved radio tape recorder is complemented by Bluetooth function and a 5-inch display with line output. In addition, the built-in radio allows you to connect a USB 2.0 flash card, through which you can listen to recorded music.
Continuing the topic of audio, we recommend interesting information on the topic of Fm Radio not only for cars.
Video - Installing 16 cm Speakers in Lada Granta through spacers
Good sound in a car is one of the most important criteria for car operation for many drivers.
How to install speakers in a car? A question asked by car owners who want to install a sound system themselves. If this was not initially installed, at the request of the customer. Today it is possible to do this, and in some cases it is not even difficult, you just need to be patient, decide on the installation method and the size of the speakers, but the desire is already there. In this article we will consider the question: How to install speakers in the front doors of a Lada Grant?
Removing the standard radio in Grant Lux
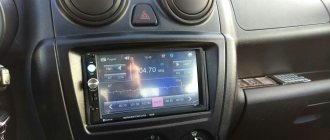
The difference between grants of the luxury configuration: the MMS (multimedia system) installed from the factory. This is a 2 din device.
To remove standard acoustic grants :
- take a knife or plastic spatula to dismantle the acoustics and disconnect the decorative trims to the right and left of the radio. It is not necessary to take pictures;
- in the gap between the cover and the panel we find the head unit lock. There are two of them on both sides. Press it out with a screwdriver;
- we take out the GU on ourselves.
Everything is described in detail in the video:
Three ways to install speakers in front doors
Before you get started, you need to consider all possible options for installing speakers in your car. Let's start with the simplest one. The doors of the Lada Granta car already have special places for installing speakers. All that remains is to purchase 13-centimeter speakers, with lining. Next, performing the installation process itself will not be difficult, but care and scrupulousness will not hurt. The next step is to very carefully remove the trim from the door and attach the speaker itself to the existing place. Don't forget about the cladding. To install it, you will need to cut out a circle opposite, having previously measured it. Then everything is put back in its original place. It would seem good and simple, and the question arises why the second option for installing speakers is needed.
For those who like to listen to music loudly, 13-centimeter speakers are not suitable, and the stamping in the casing is designed for 16 centimeters. Which will cause trouble when joining the grille and the casing itself. This is where the second method of installing speakers comes to the rescue.
So, how can you install speakers in the front doors, avoiding the above-mentioned disadvantages? To do this, we will focus on 16-centimeter speakers. When purchasing acoustics, if you buy from a car dealership, you will also need to purchase a spacer measuring 20 millimeters.
Or order one from the online store. The next step is to install speakers on the car. The first thing to do after removing the trim is to attach the spacer to the door (see photo).
Then the casing is installed in place, and the speaker is inserted through the existing hole.
Then we screw the speaker through the casing to the spacer. And lastly, we attach the grille. With such an installation, we will not only avoid the problem of the mesh diverging from the stamping, but also improve the sound of the music itself.
But along with the solution of one problem, a new one comes. The speaker is installed, the music sounds great, but the glove compartment does not open, and if it does, it only clings to the mesh of the installed speaker. To avoid this problem, let's consider the third method. In this case, you will have to work a little, but the result will be more positive than the two above. Here, when purchasing a 16-centimeter speaker, a 10mm spacer is purchased. and additionally a set of factory facings.
When installing the speakers using the third method, you will have to saw down the metal. In the photo, marked in red is the segment that just needs to be trimmed. But in each individual case, adjustment is needed for specific speakers. In this case, Helix Xmax 216.
Along with the spacer, you will need to screw the speaker to the door. How to do this correctly can be seen in the photo.
And in the casing you need to cut a circle “hole” for fasteners of the “standard” casing.
The final process is, of course, the complete assembly of the door. Check the sound of the acoustics and enjoy the result. Actually, the second and third results are the most practical, but the third is the most satisfactory. There are many advantages, the first is, of course, the sound quality, the second is that it is installed, as they say, “conscientiously.” Well, thirdly, there are no contacts with the glove compartment, unlike the second option. If you close your eyes to all the difficulties you encounter in the process, there are no downsides at all. And of course, any job requires a certain approach and attitude. You need to prepare all the tools and materials for work in advance. There is no need to file or cut anything without first taking accurate measurements. Under no circumstances should you rush, as this will certainly affect the quality of the work.
Features of audio system installation
When connecting the stereo system wiring, it is necessary to take into account certain features of the electrical supply.
This is provided using red and yellow wires. The first is responsible for remembering the audio system settings, the second is for turning off the radio, which is controlled by the car’s ignition. It is recommended to use a parallel connection type for both wires so that the audio system can only be turned off manually. In this case, it will not be affected by the car’s ignition key, but there will be a problem of excessive electricity consumption in parking mode, which is solved by installing a special regulator for the red electrical wire. With its help, you can turn off the radio by hardware when leaving the car for a long time. This regulator can be connected to the alarm system, that is, when the vehicle is locked, the audio system will turn off automatically.
The disadvantage of this system is the extra current consumption, but in any case it is much less than the indicators that provide power to the radio during standby mode.
If the audio system suddenly turns off due to excessive volume, display flickering, or high-pitched sounds, it is not due to a power failure. This situation occurs when the car battery is discharged and the current ceases to be constant. The problem is solved by connecting an additional capacitor, which provides constant power to the radio.
Once you have successfully connected all the necessary connectors to the car's electrical wiring, you can begin installing the front and rear speakers.
