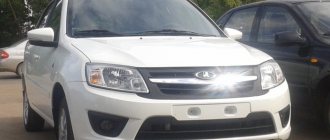
A car equipped with fog lights will come in handy for traveling in conditions of limited visibility, fog and other adverse weather conditions. Another important step will be the proper installation and adjustment of these external lighting elements. Despite the fact that fog lights were not installed from the factory in all trim levels of the Lada Grant, installing them yourself will not be difficult.
Read about how to correctly and safely implement fog lights on a Lada Granta into your lighting system with your own hands and get tangible results from all this, read below in our material.
Preparatory stage (selection of PTF for Lada Granta)
In order to install the PTF in the Lada Granta, special installation locations will be required. Fortunately, the standard bumper already has such standard places from the factory. Their dimensions are completely similar and identical to the PTF from Kalina and have two different types.
Bosch brand and has a flat glass headlight block, and headlights with convex glass are produced under production in Kirzhach. These two types of headlights have the same mounts, so choose for yourself which headlights to buy for yourself.
Although, according to Grantovodov, glass from Bosch is much stronger.
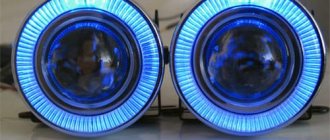
On the left side there is a PTF from “Bosch” (LUCH), on the right side there is “Kirzhach”.
If you don’t want to “bother” with installing “Stock” elements, you can install standard PTFs; fortunately, you can also find a place for them in the front bumper.
First stage of installation
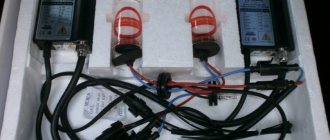
First of all, before installation, prepare the workplace for work, check the set of fog lights for integrity and also the set for connecting the PTF for the presence of all wires, relays and fuses. If you have never installed such lighting elements yourself before, then carefully study the car’s electrical wiring diagram and the PTF connection diagram.
Detailed instructions for installing fog lights
Installing fog lights on a Granta is not an easy procedure. Many of our compatriots prefer to connect and adjust the optics at a service station. In this case, you can be sure that everything will be done correctly and in accordance with the rules. However, installation of optics can also be done at home - there is nothing difficult about it if you strictly follow the instructions given below.
Installation procedure
To install, you will need standard plumbing tools, including screwdrivers and a utility knife. You will also need a drill for drilling holes and sandpaper. Of course, you should also buy an anti-fog optics kit, which should include instructions and a wiring diagram.
So, how to install anti-fog optics on Grant:
- First you need to open the hood and disconnect the battery, that is, disconnect the “-” terminal from it. This is done in order to de-energize the on-board network, since all work on the headlights must be done with the power turned off.
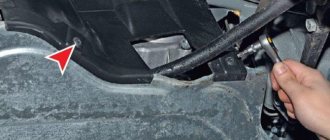
- Next, the front bumper is dismantled. To do this, you will need to unscrew the bolts securing the radiator grille, as well as the bumper itself. Two bolts are located under the license plate; you also need to unscrew the lower mounting bolts. After completing these steps, unscrew the screws securing the bumper at the bottom to the fender liners and wheel arches. Carefully, so as not to damage, remove the bumper; to do this, its corners will need to be moved apart a little.
- Now the bumper can be installed on a flat surface - you need to prepare a place for installing the fog lights. To do this, you will need a drill - with its help you need to drill holes around the entire perimeter of the recess that is on the bumper. Next, using a utility knife, you will need to remove the plugs. The edges of the resulting holes will be uneven in any case, so you will also have to sand them with sandpaper or a stone, which will need to be pressed into a drill. Similar actions are carried out on the back side of the bumper.
- Then you will need to install the optics housing at the mounting location. It will need to be secured in the installation hole using self-tapping screws. Make sure that the headlight housing is installed firmly and securely - if it “walks” along the hole, it will be affected by strong vibrations generated when driving on uneven roads. Accordingly, this can lead to accelerated failure of the power supplies in the headlight.
- The next step will be the electrical installation of fog lights. The PTF package should include instructions with a connection diagram. In any case, the wiring from the optics is carried out through the engine compartment into the vehicle interior, in particular, through a special technological hole for the fuse box wires.
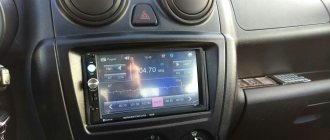
- Having completed these steps, you need to install a relay and a corresponding safety element in the fuse box, which will be responsible for the operation of the fog lights. One of the optical drives should be connected to the control button in the cabin, which should be installed on the center console.
- Once all these steps are done, you will need to reinstall the front bumper. In this case, you will need an assistant so that when installing the bumper, he will pull the optics control wiring into the engine compartment. When the bumper is in place, the fog light wires must be securely secured with zip ties. It would be a good idea to additionally insulate the wiring using electrical tape - this will prevent possible negative effects of moisture on the wires.
- Next, all you have to do is connect the battery terminal and diagnose the functionality of the optics. If necessary, the luminous flux can be adjusted to the same level as the low beam.
Step-by-step preparation process
- First of all, remove the minus terminal from the battery.
- To make the PTF installation much easier, you need to remove the bumper.
- To do this, we unscrew 4 screws on the wheel arches, 2 self-tapping screws on the mount at the bottom of the bumper, as well as all the nuts that secure the engine crankcase protection or boot, which come from the manufacturer's factory. After this, unscrew the radiator grille.
Hooray! Removed!
- And only after completing all this work will it be possible to easily dismantle the front bumper. And this must be done very carefully so as not to damage the mounting points and the body itself: first of all, we pull off each of the corners, and then, prying the bumper from below, we take it out of the fixing points.
Video “Detailed instructions for installing optics”
Detailed instructions for installing fog optics in a garage with a description of all the nuances and features are given in the video below (the author of the video is the NapoziTiV channel).
Fog lights are a useful option for every car owner. In addition to working directly during fog, they can also be used in normal night modes to increase the fan of light in front of the car. However, on the Lada Granta, as on many modern cars of this class, fog lights (hereinafter referred to as PTF) are not installed on all trim levels. Today we will look at installing them ourselves.
Installation
- buy PTF (articles: 21900-3743011-00 and 21900-3743010-00), for example here. For Lada Granta FL, PTF catalog number: 261500097R.
- PTF activation button (article 759.3710-07.01A or 995.3710-07.06).
To install the PTF in the bumper, it must be removed. Then cut holes of the required diameter. Sand the sawn edges with sandpaper. And secure it to the fog lights in the bumper using screws. There shouldn't be any difficulties at this stage.
The whole process is also shown in the video:
Reviews
| from 2800 | |
| Kit 21900-3743011 | —/— |
| —/— 2190-3743011 | —/— |
| —/— 2190-3743010 | —/— |
| PTF wiring kit for LADA Granta (2190 2874498) | from 600 |
| PTF "LUCH" set 1118-3743010/11 | from 1800 |
| PTF glass (02B08507) Granta / Kalina 2 / Largus, Datsun | from 750 |
| AUTOMOTIVE LIGHTING / BOSCH (982469641) | from 2000 |
| № | Positive |
| 1. | Kirill , 36 years old: after purchasing a Lada Grant from the showroom, I immediately purchased a PTF from OSRAM 21900-3743010. I didn’t install it at the service station because I can do it myself. In general, I am satisfied with the quality of lighting, no complaints. |
| 2. | Vitaly , 29 years old: it is obvious that there are not enough foglights out of the box. I often drive at night and need a good view of the road. Since I don’t understand manufacturers, I entrusted it to a specialist at a service station. PTF Lada Granta liftback - my advice. |
| 3. | Georgiy , 37 years old: I’ve been working as a taxi driver for the second year, my shift often ends after one in the morning. The disadvantage of the standard lighting system is obvious. I bought a “LUCH” set 1118-3743010/11 at the market. The cost is 1850 rubles, the quality is good, installation couldn’t be simpler. |
| 4. | Victor , 25 years old: I work as an entrepreneur, purchasing goods from hundreds of kilometers away. By morning the products should be on the counter. To help the standard headlights, I installed PTF. Second week, no complaints. |
| 5. | Maxim , 28 years old: I leave my positive review of BOSCH fog lights (982469641). Special thanks to the store manager for his practical advice. |
| 6. | Konstantin , 37 years old: during scheduled maintenance, he ordered the service of installing a PTF from a technician. I chose OSRAM 21900-3743010 because the price and quality are at a decent level. Numerous positive reviews. |
| 7. | Vladimir , 48 years old: I was a little upset by the lack of fog lights from the box on the Lada Granta liftback. I had to install it myself last weekend. The lighting is good, no complaints. |
| Negative | |
| 1. | Alexander , 36 years old: not only are fog lights not included in the kit, but they also provide poor lighting. We are talking about a domestic manufacturer. Installed by BOSCH (982469641). I use it myself and recommend it to others. |
| 2. | Vitaly , 39 years old: installed domestic PTF OSRAM 21900-3743010. I regretted buying it, wasted money. The quality is below average, the angle of inclination is several degrees. I don't recommend it. |
| 3. | Vyacheslav , 37 years old: not happy with the installed fog lights, they don’t cover the side of the road, visibility is mediocre, the light is dim. |
Conclusion Every product has its own buyer. If you don’t find fault with a budget car, which is the Lada Granta Liftback, the quality of PTF lighting is good, it is enough for visibility. Of course, when compared with headlights from foreign brands in the premium segment, the advantage of the latter is obvious. In order to increase the service life of accessories, purchase products exclusively from certified points of sale. Require the provision of documents, check the functionality on site.
Possible problems and malfunctions
The low beam of the Lada Granta does not illuminate the right side of the road well enough, so additional optics will be an excellent assistant and will provide a bright luminous flux.
During the installation process you may encounter the following problems:
- crease in the corners of the wings when removing the bumper;
- damage to electrical wiring terminals;
- incorrect connection or short circuit of the wire.
The bumper on the Grant is made in the form of one large part, so during dismantling problems may arise in the form of damage to the front fenders, so you need to remove the bumper together with an assistant on both sides at the same time.
If nothing lights up when you test turn on the optics, the plugs are most likely damaged due to incorrect connection. To fix the problem, change the connector. If the lights come on for a second and then go off, this may indicate a faulty relay.
Fog lights device
The standard fog lights are equipped with a plastic mount that holds the optics in the Granta's bumper. The reflector design allows you to effectively illuminate the road surface due to its low location in the bumper and a wide horizontal beam.
DIY installation of fog lights
In the process of installing fog lights, several steps will have to be completed:
- installing headlights in the bumper,
- pulling wires,
- connecting the relay and fuse,
- installing a button or replacing the turn control knob and headlights.
Each car model has its own characteristics, so you need to find out in advance the nuances of connecting the PTF on automobile forums or from colleagues with similar cars. You should begin installing fog lights in your car by disconnecting the negative terminal of the battery.
Installing fog lights in the front bumper
Many motorists at this stage are faced with the problem of removing the bumper. An inspection hole or lift will help make the task easier. Here are some simple tips that will make it easier to install PTF in the front bumper:
- First you need to prepare a place where the removed bumper can be placed.
- There is no need to rush and tug the bumper too hard, otherwise the plastic may crack.
- When the bumper is removed, you need to carefully cut holes in the appropriate places for installing fog lights. It is better to do this operation, starting with a small hole, gradually adjusting it to the size of each headlight (this will avoid the formation of cracks through which moisture and dust will subsequently penetrate into the PTF).
- For some fog lights, special decorative plugs are sold, which are selected according to the car model and even the color of the bumper. With such plugs, the process of fitting the holes in the bumper for the fog lights is much simpler.
- Next, all that remains is to screw the fasteners to the bumper, and then use them to secure the headlights themselves.
When both fog lights are installed in place, after mounting the bumper on the car, the power wire connectors are connected to them.
Pulling the wiring to connect the PTF
From the button or knob for turning on the fog lights, you need to stretch the wires to the fuse box. To do this, you will need several wires ranging from 20 cm to 1.5 m in length (depending on the connection diagram and the characteristics of a particular car).
The meaning of the connection is quite simple: the switch should turn on the relay, which in turn will close the power circuit and supply voltage to the fog lights. This work is easiest to do using a universal scheme, suitable for almost any brand of car (see video above).
On cars that are factory-prepared for connecting PTF, everything is much simpler. Otherwise, you will have to install the wiring yourself.
- The positive contacts of each headlight are connected to each other, and then connected with one common wire to the corresponding power circuit relay, according to the PTF connection diagram.
- The negative terminal of each fog lamp is connected to the body or chassis of the vehicle. The connection point must be well cleaned of paint, rust and dirt.
- It is better to secure all additional wires to body elements or other wiring with plastic clamps or electrical tape.
Well, inserting a relay and a fuse into the corresponding socket will not be difficult.
Installation of fog light switch
Depending on the car model, the fog lights can be turned on by a separate button in the car's light on/off control unit or by a knob for turning on the direction indicators and headlights.
In the latter case, it will be necessary to dismantle this unit and install in its place a new unit equipped with a fog lamp switch
When performing this work, it is important to select all the fastening elements of the casings and panels, then dismantling will not bring additional problems with broken plastic parts
After completing all the stages of installing the PTF, all that remains is to check the connection sequence, the reliability of fastening of the connections, connect the negative terminal to the battery and perform a test activation of the foglights. If the fog lights are turned on and off in normal mode, it is necessary to finely adjust the light flux in height (see adjustment diagram). In the future, do not forget to regularly clean the fog lights from dirt and promptly change burnt out bulbs.
DIY installation of fog lights
In the process of installing fog lights, several steps will have to be completed:
- installing headlights in the bumper,
- pulling wires,
- connecting the relay and fuse,
- installing a button or replacing the turn control knob and headlights.
Each car model has its own characteristics, so you need to find out in advance the nuances of connecting the PTF on automobile forums or from colleagues with similar cars. You should begin installing fog lights in your car by disconnecting the negative terminal of the battery.
Installing fog lights in the front bumper
Many motorists at this stage are faced with the problem of removing the bumper. An inspection hole or lift will help make the task easier. Here are some simple tips that will make it easier to install PTF in the front bumper:
- First you need to prepare a place where the removed bumper can be placed.
- There is no need to rush and tug the bumper too hard, otherwise the plastic may crack.
- When the bumper is removed, you need to carefully cut holes in the appropriate places for installing fog lights. It is better to do this operation, starting with a small hole, gradually adjusting it to the size of each headlight (this will avoid the formation of cracks through which moisture and dust will subsequently penetrate into the PTF).
- For some fog lights, special decorative plugs are sold, which are selected according to the car model and even the color of the bumper. With such plugs, the process of fitting the holes in the bumper for the fog lights is much simpler.
- Next, all that remains is to screw the fasteners to the bumper, and then use them to secure the headlights themselves.
When both fog lights are installed in place, after mounting the bumper on the car, the power wire connectors are connected to them.
Pulling the wiring to connect the PTF
From the button or knob for turning on the fog lights, you need to stretch the wires to the fuse box. To do this, you will need several wires ranging from 20 cm to 1.5 m in length (depending on the connection diagram and the characteristics of a particular car).
The meaning of the connection is quite simple: the switch should turn on the relay, which in turn will close the power circuit and supply voltage to the fog lights. This work is easiest to do using a universal scheme suitable for almost any brand of car ().
On cars that are factory-prepared for connecting PTF, everything is much simpler. Otherwise, you will have to install the wiring yourself.
- The positive contacts of each headlight are connected to each other, and then connected with one common wire to the corresponding power circuit relay, according to the PTF connection diagram.
- The negative terminal of each fog lamp is connected to the body or chassis of the vehicle. The connection point must be well cleaned of paint, rust and dirt.
- It is better to secure all additional wires to body elements or other wiring with plastic clamps or electrical tape.
Well, inserting a relay and a fuse into the corresponding socket will not be difficult.
Installation of fog light switch
Depending on the car model, the fog lights can be turned on by a separate button in the car's light on/off control unit or by a knob for turning on the direction indicators and headlights.
In the latter case, it will be necessary to dismantle this unit and install in its place a new unit equipped with a fog lamp switch
When performing this work, it is important to select all the fastening elements of the casings and panels, then dismantling will not bring additional problems with broken plastic parts
After completing all the stages of installing the PTF, all that remains is to check the connection sequence, the reliability of fastening of the connections, connect the negative terminal to the battery and perform a test activation of the foglights. If the fog lights are turned on and off in normal mode, it is necessary to finely adjust the luminous flux in height (). In the future, do not forget to regularly clean the fog lights from dirt and promptly change burnt out bulbs.
Connection
Below is a universal diagram for connecting a PTF using an additional button. The PTF kit contains everything necessary for installation and connection. In some cases, it may be necessary to lengthen the wires (cross-section of at least 0.75 sq. mm), be prepared for this.
It is recommended to hide the wiring under the hood in corrugation (cambric). We route the wires from the engine compartment to the passenger compartment through standard holes in the engine panel (the hole above the pedals). It is most convenient to place the relay inside the panel, behind the light control module (LCM). Plus, for switching the PTF, we take it from the battery or in the mounting block (most often this is a thick pink wire). Other useful contacts can be found in the table from the article on installing an alarm system. We install the button in any place convenient for you.
From the factory, the PTF is controlled via the light control module, diagram:
In our case, a separate, new button will be used to turn on the fog lights. The advantage of such a universal PTF connection is that the installation process is very simple and does not require much time and money. The disadvantage is that there is no indication of the fog lights on the dashboard, but this can all be solved by modifying the panel.
The process of installing and connecting the PTF on the Lada Granta FL is shown in the video:
By the way, do you know what is needed to convert a regular Lada Granta into a new FL?
Keywords: fog lights Lada Granta | fog lights Lada Kalina | fog lights Lada Priora | bumper Lada Granta | bumper Lada Kalina | bumper Lada Priora | external lighting for Lada Granta | external lighting for Lada Kalina | external lighting for Lada Priora | headlights of Lada Granta | headlights of Lada Priora | headlights Lada Kalina
6
Found an error? Select it and press Ctrl+Enter..
Mounting options
Before installing the PTF, an electrical wiring diagram is developed - it will eliminate unnecessary wiring and guarantee the functioning of the electrical circuit.
Bumper mounting
There are 3 installation options: in the openings provided by the manufacturer, on a bracket or in a blind bumper where there is no niche for PTF.
To configure, use a homemade template. It is installed at a distance of 5 cm from the PTF. During adjustment, the coincidence line is set at a distance of 10 cm below the center of the lamps. By adjusting the headlights, they provide increased visibility and minimize the likelihood of being dazzled by oncoming cars.
Installation in a blind bumper
This option is labor-intensive; you have to cut out holes for the PTF.
Procedure:
- Remove the bumper and mark where the headlights will be.
- Drill holes around the perimeter, and then cut out a piece of the bumper with a sharp knife.
- Attach the headlights with appropriately sized bolts. Mount the protective cover - attach it to the bumper.
The headlights are adjusted using a special key - it is included in the package.
Other installation methods
PTF can be placed on a bracket made of durable steel. The bracket is fastened in accordance with the PTF installation standards. The part is secured with self-tapping screws. PTFs are installed at the mounting points and the wiring is connected.
Installation in the opening provided by the manufacturer:
- Raise the car by placing a 20 cm thick wooden beam under the front wheels.
- Remove the protective shields that cover the bottom of the bumper.
- Unscrew the fasteners from the plugs provided by the manufacturer.
- After inserting the PTF into the guides, attach them with self-tapping screws.
If non-original headlights are installed, the dimensions and mounting points may not match. Then the elements have to be adjusted.
Installation of fog lights in the bumper
Installing fog lights will not take much time. For accuracy, you need to take measurements and mark the locations of the headlight mounts.
For installation you need to follow the steps:
- Wash the bumper from dirt.
- Attach the fog lamp to the installation site and make marks for the frames.
- Remove the mounting frame from the headlight.
- Drill holes at the mounting location.
- Install the frame using self-tapping screws or bolts that are included in the kit.
- Screw the headlight to the frame.
- Install a switch in the cabin.
- Carry out wiring using one of the suggested methods.
- Carefully hide the cables in the corrugation and secure them to the main harness using plastic ties.
To install standard parts in factory locations, you need to remove the plugs and screw the bolts into special ebbs. In some cases, cars have all the necessary wiring for quick connection.