What is a fuel pump
The gasoline pump is a key component of the power system; its job is to ensure an uninterrupted, timely supply of fuel to the system.
In each model, the design and location of the fuel pump is unique; for the Lada Kalina, this device is located on the opposite side of the power unit.
On the one hand, this arrangement allows you to benefit from the technical capabilities of the machine, but on the other hand, the device requires more powerful operation than models in which the fuel pump is located closer to the engine.
In order for Kalina’s fuel pump to cope with its job, it is presented in an electric version. Its advantages are:
- simplicity of design;
- good fuel supply;
- safety.
But, as one might expect, Kalina’s electrics are not yet a strong point; they often break down, which is the main disadvantage.
In addition, the disadvantages of the Lada Kalina gas pump include increased noise levels, sensitivity to the quality of gasoline, and the fact that it requires cooling.
The issue of high-quality gasoline in our country, unfortunately, still remains unresolved; this is one of the reasons why the fuel system of the Lada Kalina fails.
Filters become clogged, which disrupts the operation of the entire mechanism and ultimately leads to pump failure.
This is why filters, or meshes as they are also called, need to be changed regularly.
We’ll talk about this, but first, let’s figure out what malfunctions happen with the Kalina fuel pump?
Types of faults:
- One of the most common pump malfunctions is a rapid decrease in pressure after the engine starts. This fact indicates serious violations that can be caused either by a valve defect or a breakdown of the pressure level regulator; it is quite possible that the injectors are also clogged. A sharp drop in pressure leads to problems in starting the engine , which, if the breakdown is not corrected, can even lead to engine failure.
- It also happens that the engine loses power, or the engine does not start at all, even when cold or hot. All this happens when a membrane or spring breaks, a rod wears out, or filters become clogged, and the latter happens more often than anything else.
- In any case, having discovered that there is something wrong with the fuel system, you should first check the condition of the filters, because, due to low-quality gasoline, they become clogged quite quickly, and it is better to change them in a timely manner, without waiting for problems. Now let’s talk about how to change the mesh from the pump yourself.
Purpose of the fuel pump
In short, the main task of a gas pump is to supply fuel from the gas tank to the car engine. In other words, the fuel pump is the “heart” of the car’s fuel system. And if problems arise in any of the departments of this “heart,” the car will not start, since gasoline will not reach the injectors.
Fuel pump of the Lada Kalina car
The design of the pump may seem primitive to some, but not everything is so simple: the gas tank in the Lada Kalina (and in many other cars) is located far from the engine, so the gas pump must be very powerful in order to supply gasoline at the required pressure to a large distance.
Gasoline pumps are either mechanical or electric. The Lada Kalina has an electric fuel pump (since at the moment it is considered the most modern and efficient). Like any other device, the Lada Kalina electric fuel pump has both advantages and disadvantages.
Let's start with the positives. This pump is reliable, its design is very simple, and most importantly, it is safe because it stops working immediately after the machine engine is turned off.
There are also disadvantages: the electric gasoline pump is quite noisy, it must be constantly cooled with something, and for uninterrupted operation it requires very high-quality fuel (and this is the most serious problem, because the “quality” of domestic gasoline today leaves much to be desired).
Changing the mesh with your own hands
So, the mesh located in the fuel pump is forced to constantly come into contact with dust and dirt, because the pump itself is located between the seats, and dust constantly settles on its body.
That is why experienced motorists are not lazy to wipe the pump body with a damp cloth from time to time to avoid untimely clogging of the system.
- The very first thing we do is buy a new filter.
- Raise the rear seats to provide access to the pump.
Motorists advise carrying out such work every 45,000 - 50,000 km. mileage, this is exactly the time during which the Kalina mesh wears out. Of course, this work is classified as dusty, but, in principle, it is not as difficult as it seems, it can be done alone, in half an hour - an hour.
If the engine power of a Lada Granta car drops, increased noise occurs, or whines are periodically heard when the fuel pump is operating, then most likely the fuel pump is faulty. First check the pressure in the fuel supply system by connecting a pressure gauge to the fitting on the fuel rail in the engine compartment If the pressure in the power system is higher than 400 kPa (4.0 kgf/cmg), then the pressure regulator installed in the fuel pump module is faulty and must be replaced (see “Repairing the fuel module of Lada Granta.”)
When and why you need to change/clean the fuel pump screen
Let's start with the fact that general problems with the fuel system (fuel pump in particular) should be divided into the most common groups:
- the fuel pump mesh and fuel filter are clogged;
- the fuel pump itself has failed;
- injector problems;
Let us add that we should also not exclude the possibility of air leaks, that is, airing of the power system. Another culprit of problems may be the pressure regulator in the fuel rail. In this case, engine malfunctions may be partially similar to some of the symptoms mentioned above. For example, a slight ingress of air into the fuel system results in the engine not starting for a long time after parking.
Let's go back to the fuel pump. Its malfunction means that the performance of the fuel supply system is reduced. If the fuel pump breaks down, then the car becomes unsuitable for normal use. Signs of a fuel pump malfunction are as follows:
- It is impossible to start the engine, the fuel pump does not pump;
- the engine starts, but runs with serious interruptions;
In this case, the service often recommends diagnosing, repairing or replacing the fuel pump. It should also be taken into account that the fuel pump mesh filter may become clogged inside the device. Let us immediately note that it is impossible to accurately answer the question of when to clean the fuel pump stack. Some car enthusiasts clean/replace the fuel pump mesh as needed or as a preventative measure every 50-70 thousand km. mileage, while others are faced with the need to clean the fuel pump grid for the first time at mileages of 150 thousand km or more. and more. Let us add that the operating manual for some models specifically states that it is recommended to replace the fuel pump stack once every 120 thousand km.
It should be added that the loss of dynamics and the appearance of symptoms of a clogged mesh occurs gradually. For this reason, each driver decides to clean the fuel pump himself. On powerful naturally aspirated engines, the gradual deterioration in acceleration is not felt as strongly as compared to highly accelerated engines with a small displacement. For this reason, many owners of large-volume trucks begin to solve the problem after noticeable complications appear. Also, the condition of the pump grid is greatly influenced by the quality of the fuel being filled and a number of other factors and individual operating conditions, which we will talk about a little later.
Operations performed when removing the Lada Granta fuel pump
Removing the fuel module is shown on a car with a VAZ-21116 engine. On cars with other engines, this work is performed in the same way.
1. Reduce the pressure in the supply system.2. Fold the rear seat cushion forward.3. Lift the cut out parts of the carpet and the thermal and noise insulating lining above the hatch at the base of the body.
4. Remove the four screws securing the hatch cover above the fuel module.
5. ...and remove the cover.
6. Disconnect the wiring harness block from the fuel module by releasing its spring clip.
7. Disconnect the fuel hoses from the module fittings by pressing the buttons of their spring clamps and sliding the hoses along the fittings.
Disconnect the hoses from the fuel module fittings carefully, avoiding lateral forces, so as not to break the fittings.8. Using a screwdriver, slide the spring plate of the fuel module bayonet mount counterclockwise and turn the plate until the seven cutouts in it align with the protrusions on the fuel tank flange.
9. Remove the plate.
At the factory, the spring plate securing the fuel module is tightened (or, if necessary, unscrewed) with a special tool. If it is absent, a strongly tightened plate can be moved out of place with light blows of a hammer, resting the drift on the bent upward tendril of the plate.10. Remove the module from the tank by tilting it to the side...
11. ...to avoid bending the fuel level indicator sensor lever and turning the float on the lever. Otherwise, the indicator readings in the instrument cluster will be incorrect.
When removing the fuel module from the tank, immediately place a cleaning cloth under it, as gasoline may leak from the module’s glass.
12. Remove the rubber O-ring from the tank flange. Be sure to replace a heavily compressed, hardened or torn ring to avoid gasoline leakage.
13. Install the fuel module and all removed parts in the reverse order of removal. After installation, slightly tighten the spring plate of the module with light blows of a hammer through a drift (see note above). When installing the module into the fuel tank, the installation arrow on the module cover should be directed towards the rear of the car.
When connecting fuel lines, follow the direction of gasoline supply indicated on the fuel module fittings
I think there is no need to explain once again that the design of the fuel pump on Kalina and Grant cars is not at all different. That is why the entire process of replacing the components of the fuel pump on the above cars will be the same. Also, it is worth noting that when compared with the models of the 10th VAZ family, there are some points that differ.
Features of draining gasoline from the Lada Granta tank
Where is the fuel filter located on the Lada Largus?
The fact is that you won’t be able to drain the fuel using the “old-fashioned” method through the neck.
The reason for this is the low location of the fuel tank, as well as the specific design of the neck. The same applies to other modern VAZ models, as well as foreign cars produced since the 90s.
Method 1: Using the fuel line under the hood
In this situation, the simplest method is to use a fuel channel.
- To begin with, you will need to unscrew the nipple, which is located at the end of the injector ramp.
- After this, a regular hose is put on this ramp, the other end of which is immersed in any container that is sufficient to hold gasoline. Despite the fact that almost any hose will do, experts recommend using special types of hoses that are used to refill home air conditioners. This will allow you to screw the hose onto the fuel rail without unscrewing the nipple at all.
- After this, you will need to force the gas pump to pump gasoline. The most obvious solution is to turn on the ignition, which will make the pump work.
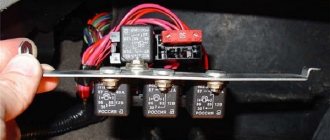
- But there is one peculiarity: the pump will not be able to function in this mode for more than a few seconds. In order for the duration of its operation to be increased, up to constant operation, you will need to turn on the ignition, and then insert the corresponding jumper into the gasoline pump relay (number K12 in the fuse box). An alternative to this may be the need to bridge contacts number 11 and 16, which are located in the diagnostic connector. This will make it possible for the pump to operate even without ignition.
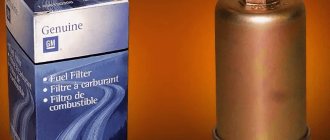
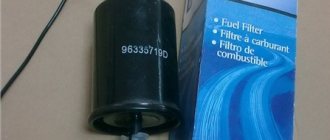
Factory fuel filter
You can also use the area after the fuel filter to drain. To do this, you need to dismantle the fuel filter from the injector side, and put a hose on its outlet, which is lowered into the drain container.
Method 2. Removing the gasoline pump
There is another option that may be easier for many people. We are talking about completely removing the gasoline pump. This is done by raising the rear row seat, after which you need to unscrew the pump mounts. Next, you get direct access to the fuel, so you can pump it out using the traditional method.
This is a fairly simple procedure that does not require prior preparation. In the case of the Lada Granta, the entire fuel module will have to be dismantled.
- To do this, the rear seat cushion is folded down.
- After which the parts of the mat, previously cut by the manufacturer, are raised. Under them you will find four screws that secure the cover. They will have to be unscrewed. A Phillips screwdriver is used for this purpose.
- After this, you will need to disconnect the block with electrical wires from the pump itself.
- You will also have to remove the fuel hoses that hold the device in its position.
- Now you can carefully grasp the pump pressure ring by unscrewing it counterclockwise. For this purpose, it is recommended to use a flat-head screwdriver and a hammer, if necessary. As a result, the ring comes off easily.
- The fuel pump itself is removed by slightly tilting it to the side. This must be done in order not to damage the gas gauge sensor lever. In addition, this way you will protect the float on the lever from turning around its axis. If it is misaligned, it may result in subsequent false readings of the amount of fuel in the tank.
Assembly is carried out in reverse order. If necessary, the sealing ring can be replaced with a new one, otherwise the smell of gasoline will be felt in the cabin. The arrow drawn on the fuel module cover should point to the rear of the car. Also follow the readings on the fitting arrows, which will tell you the direction of fuel movement.
Causes of clogged strainer on Grant
It is not necessary to change the grid so often, since when refueling with normal fuel, it can easily travel more than 100,000 km. But symptoms may appear that indicate a clogged fuel pump mesh:
- poor engine start
- insufficient pressure in the fuel system
- dips when pressing the gas pedal
- the engine began to slowly gain speed
If you begin to notice the problems described above, then the first thing you should do is look at the mesh filter and, if necessary, replace it.
Why might the mesh need to be replaced?
Two grids - dirty and clean
First of all, because of bad gasoline. If you regularly refuel at dubious gas stations, then it’s only a matter of time before the fuel pump fails. Purification of gasoline from impurities in the gasoline pump occurs in several stages, and the mesh of the gasoline pump is the first line of defense, so to speak. It is the first to absorb all large particles of impurities and dirt. After passing through the mesh, gasoline enters the fine fuel filter, then passes through another mesh (which is located near the fuel pressure regulator), and finally goes through the third mesh (located directly in front of the injectors). If problems arise in any of these areas, you won’t be able to go far. The car engine simply will not start. Or it will start, but will work unevenly and jerkily.
recommends changing fine filters every 30,000 kilometers
. But he doesn’t give any recommendations about the fuel pump mesh. Therefore, many car owners forget to change this grid, and remember about it only when the engine begins to behave strangely.
The general rule is: if the car has traveled 60,000 kilometers, the mesh should either be cleaned or replaced. It is advisable to clean it only if there is no serious mechanical damage to it. But if the machine has traveled the distance indicated above, then the mesh in the pump is often worn out to such an extent that it is easier to throw it away than to clean it.
Procedure for replacing the fuel pump mesh on a Lada Granta
Since the fuel filter on a Lada Granta car is located directly in the tank, it must be removed from there. To do this, one half of the rear seat is folded back, after which the two screws securing the hatch are unscrewed. Below it is the fuel pump. To remove it, you need to do the following:
- Relieve pressure in the vehicle's power system
- Disconnect the block with power wires
- Disconnect the two fuel pipes from the fuel pump cover.
- Move to the side the retaining ring that secures the pump in the tank
- Pull out the entire module assembly
After this, you can begin removing the mesh filter without any problems.
We move a little to the side three latches - latches, which are clearly shown in the photo below.
Now we move the lower container to separate the module into two parts, first disconnect the tube, which is shown in the photo.
Now we completely separate the two parts of the module.
Now we have full access to the mesh, and it is enough to pry it with a screwdriver so that it moves away from its seat. You may have to apply a little more force than expected, but you can remove it without any problems.
Cleaning method
The procedure is carried out in several stages. First, the rear seat cushion is removed and half of the sofa is reclined. Then remove the plastic cover of the fuel pump. Then you need to relieve pressure in the fuel system.
Now you can remove the negative terminal from the battery. It is necessary to disconnect the tubes from the pump (gasoline may spill). A special clamping ring-cover is unscrewed. The remaining gasoline should be drained from the fuel pump housing and the sealing ring should be removed. The pump can now be removed.
You will need to disassemble the pump to clean it. First, the lower part is removed, and only then the mesh. To dismantle the latter, you need to pick up the filter with a screwdriver at the place where the pump is attached to the housing. Usually the mesh is very dirty.
You can replace the part with a new one, but you can also clean it. As for cleaning the fuel pump mesh, it is better to choose one designed for cleaning the carburetor. If there is a need for mechanical action, it is better to clean the part with a soft brush. Then the mesh is dried and blown. At the end of the process, it is recommended to wash the mesh itself and the bottom of the fuel pump housing with gasoline. All that remains is to put everything back together.
Replacing the fuel pump on Grant
Before changing the fuel pump on a Lada Granta, the motorist must relieve the pressure inside the fuel lines. To “zero” the car’s fuel system, you must:
- Put the Granta at neutral speed;
- Apply the parking brake;
- Remove the rear sofa;
- Disconnect the wiring from the fuel pump;
- Start the Lada and wait for it to stall;
- Crank the starter for a few seconds.
To work with the fuel filter, the car enthusiast will need:
- flathead and Phillips screwdrivers;
- spanner set to “10”;
- hammer;
- rags.
After resetting the fuel lines, it is necessary to remove the terminals from the battery so that the possibility of supplying power to the fuel pump is completely excluded.
Installing a new fuel pump
The first step is to open the fuse panel (on the left side of the front panel) and remove the element responsible for the operation of the unit.
Next, dismantle the rear sofa and remove the plastic trim. Below it is the fuel tank flap (on the right side). The hatch cover is held on by four screws - remove them using a screwdriver. Next, disconnect all the fittings from the cover of the old fuel pump.
Using a “10” wrench, unscrew the nuts of the pressure ring of the fuel pump, of which there should be 8 pieces along the entire diameter of the ring. Next to the clamping ring there is a pin with which the ground wire is in contact. We throw off the wire, and then completely remove the clamping ring. The ring unscrews counterclockwise; for ease of dismantling, it needs to be tapped with a hammer.
You need to make sure once again that all wires and lines adjacent to the part are disconnected. Only then can you remove the used unit and place a new one in its place. You also need to install a new O-ring between the tank opening and the pressure ring - it is made of rubber and wears out quite quickly.
Installation of a new pump is carried out in the reverse order. Before disassembling, draw a diagram or photograph the original location of all fittings and hoses on the fuel pump cover.
Purpose and types of fuel filters
Which is better - “granta” or “viburnum”? "Lada Granta" and "Lada Kalina": comparison, technical characteristics
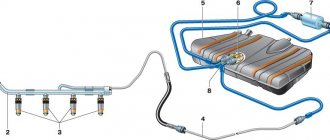
The Lada Granta car is based on the Lada Kalina. From its predecessor, it inherited a fuel supply system with two filters. Before entering the main fuel filter, gasoline passes through the fuel pump strainer. This two-stage cleaning scheme in fuel systems of injection engines is classic.
The fuel pump mesh acts as a coarse filter. It prevents large particles of dirt from entering the fuel supply system, which can completely or partially block the fuel line and affect the operation of the fuel pump.
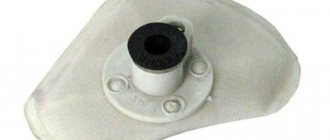
The fuel pump mesh is a coarse filter
The mesh filters of the Lada Granta and Lada Kalina cars are completely identical. Externally, they can be identified by the oblique cut of the mesh. Despite the low cost (about 100 rubles), the mesh performs essential functions and prevents serious damage. Interruptions in the fuel supply due to a clogged mesh are the most harmless of the possible problems that low-quality fuel can create.
A distinctive feature of the Lada Granta mesh filter is its oblique cut
Fine dirt particles (less than 10 microns) do not cause much damage to injectors, pistons and cylinders. Larger particles are retained by a fine fuel filter.
Such filters first appeared on the VAZ 2110 with an injection engine and have remained virtually unchanged to this day. The only difference is that instead of fittings and tips with threaded connections, clamping clips are used. The Lada Granta is equipped with exactly these clips with smooth fittings with a diameter of 8 mm for fastenings with clamps. Threaded filters can also be used, but only after replacing the hose tips, which, in turn, does not make any sense.
The Lada Granta car is equipped with a fuel filter with smooth fittings with a diameter of 8 mm for fastenings with clamps
On sale there are fuel filters from various manufacturers costing from 150 to 500 rubles. The difference is significant. Is it worth overpaying?
Fuel filters have two main parameters - screening fineness and performance or throughput
An additional parameter that car owners sometimes pay attention to, but ignore Russian standards, is the surface area of the filter element
According to experts from the magazine “Behind the Wheel,” there are no filters on the legal spare parts market that are unsuitable for use. All filters retain particles larger than 10 microns, while providing 2 liters of fuel per second. Therefore, there is no need to overpay.
The arguments in favor of expensive filters are as follows:
- higher degree of fuel purification. The screening fineness of a standard filter is 10 microns. However, you can find filters on the market that retain particles as small as 5 microns;
- large filter surface area. The larger the area, the more dirt will remain on the filter, and the longer it will last.
The practical value of these arguments is questionable. Is it worth catching particles that are too small if engine designers don't think it's necessary? Is it necessary to delay replacing the fuel filter when it can become completely clogged after just one unsuccessful refueling?
However, in cases where a high degree of purification or long mileage without replacing filters is not a whim, but a necessity, you should pay attention to the technical parameters of the filters, the values of which can be found in manufacturers’ catalogs
Photo gallery: fuel filters for the Lada Granta from various manufacturers
MANN is a leading supplier of filters for European car manufacturers
SCT filters - a combination of decent quality and reasonable price
BIG FILTER is the largest manufacturer of fuel filters in Russia
Cleaning the part
Replacing the Lada Granta fuel pump in some cases is not the only way to get rid of fuel supply problems in some cases. To restore the functionality of the fuel pump, it requires thorough cleaning. To do this, you need to dismantle the unit using the method described above.
Next, unscrew the lower part of the fuel pump cup. The glass has a filter mesh that needs to be removed using a screwdriver. The mesh will need to be cleaned with a rag and rinsed in solvent. After this, the remaining elements of the fuel pump are cleaned.
After cleaning is completed, it is recommended to install a new coarse mesh, as the cells on the old one may be damaged.
Before performing work, read the operating instructions so that you know in advance where the Lada Granta fuel pump is located, as well as how to attach it. It is better to carry out work in a well-lit room away from open flame sources. For protection, use gloves to avoid damaging your skin with gasoline or solvent.
Purpose and principle of operation of the fuel pump
Chevrolet Niva fuel filter: where is it located and how to replace it
The fuel pump is designed to pump fuel from one point to another. In a car, the role of the first point is played by a fuel reservoir - the tank, and the second - by the engine, where the pumping takes place. This process occurs at a certain pressure, which is maintained by the pump reducer, which is a very important point.
Fuel pumps are divided into 2 types according to the type of drive: electric and mechanical. Inside the first there is an electric motor with a mini-pump, which operates from the mains and uninterruptedly pumps fuel into the engine. The second type is becoming increasingly rare, as it is installed on carburetor cars, and operates due to the reciprocating movement of the lever.
Replacing the fuel filter Lada Kalina
Lada Kalina Universal Logbook Replacement of ball joints
Replacing the fuel filter Lada Kalina. Fuel pump repair: replacing the mesh
Malfunctions in the fuel system are fraught with constant problems with starting the engine, as well as discomfort while driving in the form of jerking and unstable operation of the engine. A faulty fuel pump or fuel filter makes it impossible to start the engine. While driving, the engine may suffer significant power losses due to significant excess fuel consumption.
Today I will talk about how to replace the fuel filter with your own hands. and also how to repair the Lada Kalina fuel pump.
Replacing the fuel filter Lada Kalina
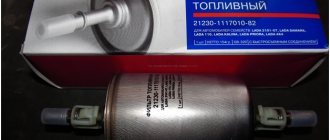
1. First of all, you need to purchase a fuel filter and a fuel pump; you can find out the brand in the operating manual or technical documentation, or simply ask an experienced consultant at the store for advice.
2. Before installing the fuel pump mesh, you must remove the black rubber band.
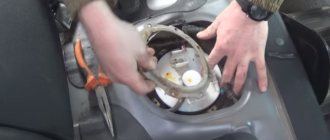
3. Remove the rear seats and gain access to the cover under which the fuel pump is located; to do this, you need to unscrew the four mounting screws.
4. Before continuing, you need to clean the surface from dust using a vacuum cleaner or a damp cloth, everything must be clean, otherwise dust, sand, etc. may get into the tank.
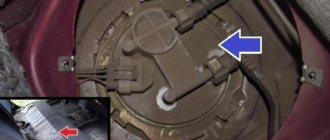
5. In the photo I marked the place where it is necessary to remove the fuel hoses.
6. Now let’s talk about how to remove the fuel hoses of the fuel pump. Use a screwdriver to press the lock on one side, and use the other to pry up the fuel hose in the direction of the arrow. Now remove it, be careful and extremely careful not to break anything.
7. Wipe the pump using a rag.
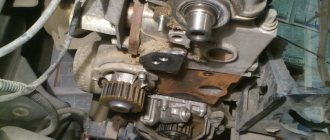
8. Remove the golden-colored locking ring; the arrows in the photo indicate the direction in which to unscrew. It will take a lot of force to move the ring out of place, for example I used a hammer and a screwdriver.
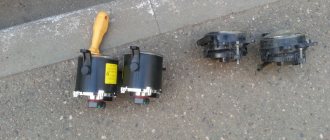
9. Carefully remove the fuel pump; if you are not confident in yourself, place some kind of rag on the “fireman”, this will “save” your interior in case you accidentally spill gasoline in the cabin. The pump is covered with a characteristic yellow coating.
Disassembling the fuel pump Lada Kalina
1. Remove the wires connected to the pump and the fuel level sensor.
2. Having pryed up the intake tube, it must be thrown off. There is no need to remove the fuel corrugated hoses.
3. Carefully bend the four plastic clips, then remove the lower cup. Afterwards, look into the glass and check if there is dirt in it, I’ll tell you right away - it won’t be there.
4. A coarse filter or, in common parlance, a “mesh”, as a rule, looks terrifying, like mine, for example.
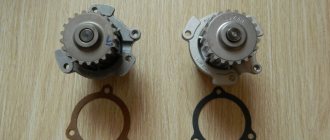
5. Remove the mesh using a screwdriver; this may require some force. For comparison, here is a photo of two meshes - new and old. In my case, the mesh reached this state after 50,000 runs.
6. Carefully wipe all parts of the Lada Kalina fuel pump, remove all existing dirt from the glass.
7. Now you can assemble the pump and install it in the tank in the reverse order.
We can say we’re done with the fuel pump. Now you can start replacing the fuel filter.
Self-replacement of the fuel filter Lada Kalina
Replacing a fine filter or, in common parlance, a fuel filter is not a difficult task and can be done at home. It is located in the area of the right rear wheel, near the jack cup.
1. It is better, of course, to remove the hoses from the fuel pump, this will make it easier to replace.
2. Using a “10” wrench, remove the filter from the clamps. The arrows in the photo indicate the direction and force required to remove the clamps.
3. Now you can install a new fine filter for Lada Kalina. By the way, the Lada Kalina fuel filter should be replaced every 30,000 km.
4. For fun, I disassembled the old fine filter. as it turned out there was nothing interesting there, just an ordinary dirty accordion, see photo.
When to replace the fuel filter Lada Kalina. and also the replacement of the fuel pump is completed, we can take stock and draw some conclusions:
- Replacing the fuel pump mesh is mandatory when replacing the fuel filter.
- When carrying out this kind of work, do not forget to clean the fuel level sensor using solvent.
- It is advisable to do everything together, that is: replacing the fuel pump, replacing the fuel filter, flushing the gas tank.
https://vaz-remont.ru
Signs of a fuel pump malfunction
Mechanical fuel pumps
In a mechanical fuel pump, malfunctions most often occur due to wear of the sealing gaskets and the formation of leaks between parts of the housing. As a result, the tightness of the structure is broken, air gets in, fuel stops getting into the carburetor and the engine stalls. A similar consequence is caused by membrane rupture and valve failure. At the same time, the car begins to move jerkily until the fuel supply stops completely.
Electric fuel pumps
On cars with mechanical and electronic injection, the signs of a fuel pump malfunction are slightly different, but they can be classified into certain groups:
- The engine does not start. Rotation of the starter with dry spark plugs does not cause flashes in the cylinders. There is no pressure in the fuel line, or it is extremely low; the buzzing of the pump is not heard when the ignition is turned on or the starter is operating.
- The engine does not start, although occasional flashes occur in the cylinders. There is pressure in the fuel line, but without a pressure gauge its value cannot be determined. The candles are dry.
- The engine starts and idles normally, but pressing the accelerator causes it to stop. If you want, it is possible to raise the speed to medium, but attempts to start lead to the engine stalling. There is a black coating on the spark plugs, the operation of the fuel pump is characterized by a changing sound.
- The engine starts, holds idle speed normally, and picks it up easily at neutral speed. When driving at medium and high speeds, a “twitching” is observed. It happens that after a certain mark on the tachometer the speed does not pick up, and the engine stops producing the required power under load. At the same time, the spark plugs are white, and by their appearance it seems that the car is ignited too early or has a lean mixture.
It is worth noting that the above symptoms of fuel pump malfunctions are also typical for other engine breakdowns, and they cannot be used to unambiguously diagnose a fuel pump malfunction. For example, speed also fluctuates if there is a problem with the air sensor, throttle valve, clogged injectors or poor quality fuel.
Replacing the fuel pump in detail with a description of each step
The algorithm of actions is as follows:
- Remove the negative terminal from the battery. A mandatory requirement if you carry out any work that affects the electrical system of your car.
- The fuel pump is located under the rear seat. The rear seats need to be raised, I remove them altogether. It comes off easily. You need to “pull the string” in the center of the seat and remove it.
Pull the loop and pull it up
Relieving pressure from the fuel rail using a screwdriver
4 bolts securing the plastic fuel pump cover
Removing hoses from the fuel pump
An alternative option for relieving pressure in the fuel rail
The main method is a little inconvenient and dangerous. Since gasoline can ignite, and if the muffler pants have not yet cooled down, it can cause a fire in the engine compartment. Therefore, there is an easier way.
- Disconnect the power supply from the fuel pump.
- Start the car and let it run until it stalls on its own.
Fuel pump installation location
In cars with an injection engine, the fuel pump is located inside the gas tank, and in the case of a carburetor engine, it is under the hood or near the gas tank. Some models have two fuel pumps installed at once: one at the gas tank, and the other at the engine. The exact location of the pump in your car can be found in the service book or owner's manual.
Table: location of the fuel pump in various cars
| Car model | Where is the fuel pump | How to get there |
| VAZ 2109/2114/2115 | In the fuel tank | Remove rear seats |
| VAZ 2121 Niva | In the fuel tank | Remove rear seats |
| Ford Focus | In the fuel tank | Through the trunk |
| Ford Mondeo | In the fuel tank | Remove rear seats |
| Hyundai Solaris | In the fuel tank | Remove rear seats |
| Hyundai Tuscon | In the fuel tank | Remove rear seats |
| Hyundai Sonata | In the fuel tank | Remove the gas tank |
| Kia Rio | In the fuel tank | Remove rear seats |
| Renault Megane | In the fuel tank | Remove rear seats |
| Daewoo Nexia | In the fuel tank | Remove rear seats |
| BMW E34 | In the fuel tank | Remove the mat and spare tire from the trunk, find the black cover and remove it |
| BMW E39 | In the fuel tank | Remove rear seats |
| "Lada Kalina" | In the fuel tank | Remove the rear seats, remove the insulation trim |
| "Lada Priora" | In the fuel tank | Remove rear seats |
| "Lada Granta" | In the fuel tank | Remove rear seats |
| "Lada Largus" | In the fuel tank | Remove the second row of seats |
| Chevrolet Cruze | In the fuel tank | Remove the gas tank |
| Chevrolet Aveo | In the fuel tank | Remove rear seats |
| Chevrolet Lacetti | In the fuel tank | Remove rear seats |
| Volkswagen Passat | In the fuel tank | Through the trunk |
| Volkswagen Jetta | In the fuel tank | Remove rear seats |
| Suzuki Liana | In the fuel tank | Through the trunk |
| Opel Astra H | In the fuel tank | Remove rear seats |
| Honda Accord | In the fuel tank | Through the trunk |
| Great Wall Hover | In the fuel tank | Remove the gas tank |
| UAZ Hunter | In the fuel tank | Remove seats, right |
| Audi A4 | In the fuel tank | Through the trunk (from the side of the tank filler neck) |
| Skoda Octavia | In the fuel tank | Remove rear seats |