The fuel pump in a car is designed to supply gasoline from the fuel tank to the engine. For carburetor cars, mechanical pumps are used.
Due to the short distance between the carburetor and the fuel pump, fuel is supplied at low pressure. Cars with an injection-type fuel system are equipped with electric fuel pumps that supply gasoline under high pressure.
The operation of such a pump is controlled by an electronic system that takes into account the throttle position, as well as the air-fuel ratio.
Basic fuel pump malfunctions
The fuel pump in the Prior may operate intermittently due to low-quality fuel. This is due to the fact that a fine fuel filter is installed here after the fuel pump.
At the inlet there is only a filter mesh that performs rough cleaning. The gasoline at some of our gas stations is so dirty that the mesh gets clogged quite quickly. The engine does not start well or stalls during operation.
The car jerks along the way and slowly picks up speed. If the filter mesh is partially clogged with debris, the optimal supply of gasoline to the engine is disrupted in different operating modes. When the pump is unable to maintain the required pressure in the fuel system 3.7-4.0 atmospheres , improper mixing of air and fuel occurs. As a result, the car loses speed.
In addition, even a well-warmed-up engine after a short stop can then start only after prolonged operation of the starter.
Unstable operation of the power unit is most often a consequence of a faulty fuel pump. First of all, you need to check the pressure level in it.
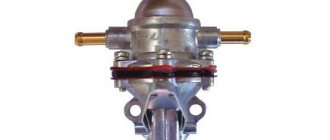
If after stopping the engine the pressure in the pump drops too quickly, then there is obviously damage to the diaphragm, as well as the sealing gasket. In this case, the gasket should be replaced, and the diaphragm should be reinforced with a special film.
Features of fuel filters for the Lada Priora car
VAZ 2170 fuel filters have their own characteristics.
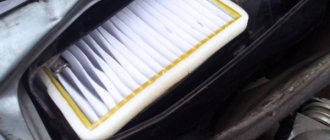
- The coarse filter (FGO) is a fine mesh made of petrol-resistant plastic and capable of trapping solid impurities and dirt larger than 80 microns. It is made in the form of a flattened bag with a pipe in the middle, attached to the fuel pump using a clamp on the fitting.
Fine mesh filters gasoline before it enters the pump
Removing and disassembling the fuel pump
The fuel supply mechanism in the Priora is located in the gas tank, so to get it you need to:
- Remove the rear passenger seat. The latches holding it in place are on the sides.
- There is a hatch in the bottom of the car, secured with two self-tapping screws. Having removed it, we gain access to the fuel pump, which is fixed in the fuel tank with a flat metal ring.
- Remove the ring, which is held in place by nuts screwed onto eight threaded pins spaced evenly around the hole in the gas tank.
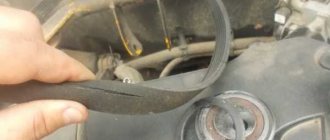
- We remove the two fuel hoses and remove the retaining ring.
- We disconnect the electrical connector through which power is supplied to the pump located in the plastic casing.
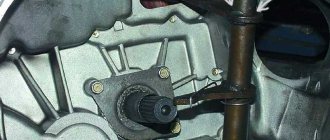
- We take out the housing; this must be done carefully so as not to damage the float, thanks to which the filling level of the gasoline tank is shown on the instrument panel.
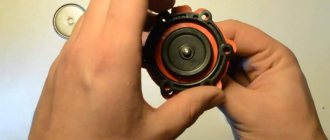
- The next step is to pull out the pump itself, bend the four latches located on the body, and take out the fuel pump, at the bottom of which there is a coarse mesh.
As a rule, the entire mesh looks quite dirty, and its central part is literally clogged with various debris. To remove the old mesh, you just need to grab it on all sides with your fingers and pull it towards you, or pry it with a flat-head screwdriver.
The procedure for dismantling and installing a fuel pump on a Priora with your own hands
Using a Phillips screwdriver, unscrew the two screws securing the cover, and the pump will be located under it. Next, we need to disconnect the two fuel hoses by first pressing the clamps that secure them to the fittings of the top cover. One hose is secured with one metal clamp, which you need to press on and pull the hose to the side.
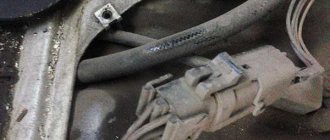
The second hose fits more tightly and in order to remove it, you need to press the “buttons” on both sides, which are shown in green in the photo below.
After this, disconnect the power plug with wires from the module by lifting the latch slightly upward.
Next, unscrew all the pump mounting nuts using a 10 mm socket.
Remove the ring as shown in the photo below.
And the second plastic ring also needs to be removed from the studs.
After this, it will be possible to remove the entire fuel pump module from the tank assembly, since nothing else holds it.
To pull it out completely, you need to tilt it slightly to the side so that the fuel level sensor does not interfere with removal.
Please note that when removed, there may be a lot of gasoline in the container, so it must be drained immediately. Then you can take further actions, either replacing the pump, or the grid, or the fuel level sensor.
After completing all the necessary procedures, you can begin installing the pump in its original place and connecting all hoses and power wires. It is worth noting that the fuel pump on the Priora is from a new VAZ 2110 model, that is, for 1.6 liter engines. The price of such a pump assembly ranges from 2,200 rubles to 3,000 rubles.
Most of the units and components in cars of the Lada Samara model line can be changed with your own hands. To do this, just stock up on the necessary tools and purchase a new part. This material describes in detail how to replace a VAZ 2110 fuel pump and its filter element - a mesh. The work is quite simple, since installing a new product does not require an inspection hole or a lift. After studying this material, the reader will learn how to change the fuel pump, when it needs to be done and how to determine that the unit has failed. To make sure that the device has failed, you need to measure its pressure - the article contains several ways to perform this action.
Advice! Many Samara owners install a VAZ 2110 Bosch fuel pump. Despite the higher cost, the imported unit has a long service life, and it is easier to maintain when compared with a standard unit.
Preparatory stage
You will not need any skills when replacing the filter, you will not need specialized devices, just a key to “10”, know where the element to be replaced is located, and how to change it correctly, and for this there are detailed step-by-step instructions. To carry out the work, you need a lift or inspection hole, since the filter is located on the bottom of the car in the rear. Stock up on rags. Also prepare an unnecessary container. Inspect the fuel hoses and fasteners, pay attention to their integrity. If necessary, clean them from dust and dirt.
How to remove the fuel level sensor Priora/Granta
You will need : remove the fuel pump, prepare a flat-head screwdriver and a marker.
Removing the FLS (fuel level sensor):
- Slide the fuel module cover and disconnect the wire from the pressure regulator.
- Disconnect the block from the fuel pump by squeezing the lock with a screwdriver.
- Release the 2 FLS latches and move it along the grooves towards the cover.
- Remove the Priora FLS.
Diagnosis and Troubleshooting
It is relatively simple to verify that the electrical network is faulty - this can be done without removing the fuel pump. When the sound of its operation is not heard when the ignition is turned on, you must immediately check the fuse responsible for this circuit. It is installed in a block mounted at the bottom in front of the front passenger seat. You need to remove the block cover, find the fuse marked F3, rated for 15 A, and replace it. This kind of work can be done on the road.
If the operation of the fuel pump has not resumed, you should switch your attention to relay K2, located in the same block. It closes the power circuit of the pumping device based on a signal from the controller. You can also check the serviceability of the relay in road conditions, for which you will need a piece of copper wire. Diagnostics are carried out in the following order:
- Remove relay K2 from the connector.
- Turn on the ignition.
- Using a wire, connect the contacts marked “30” and “87”; the numbers are marked on the relay. Another option is to apply power to pin “11” located in the diagnostic connector. The +12 V voltage can be taken nearby, from the cigarette lighter.
- If you hear the pump humming, then you need to change relay K2.
If after the above manipulations the unit is still “silent”, it is necessary to check the integrity of the wiring and the reliability of the contact at the place of its connection. This will require a device, so it will not be possible to carry out such work in the middle of a field. Unless you can check the serviceability of the fuel pump itself by disconnecting the connectors from it and supplying 12 V directly from any convenient source. If the pump still does not hum, it should be replaced.
Be careful when connecting wires directly and make sure that there are no drops of gasoline nearby, as a spark may cause it to ignite.
It will not be possible to diagnose insufficient fuel supply to the injectors under road conditions, unless you carry a pressure gauge with a corresponding hose for connection to the fuel rail. The amount of gasoline supplied is characterized by the pressure in the network, to measure which you will need a pressure gauge. The check is performed as follows:
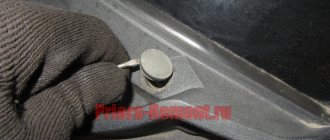
- Twist off the plastic cap covering the diagnostic fitting. It is located at the end of the fuel rail and is a regular spool.
- Press the spool rod to release the pressure in the line. In case of gasoline leakage, place a small container under the spool. Perhaps the malfunction will make itself felt already at this stage if there is no pressure in the network and no fuel flows from the fitting.
- Unscrew the spool and put the hose from the pressure gauge onto the fitting. With the ignition off, apply 12 V directly to the pump. To clearly record the readings, it must work for at least 10 seconds.
If the pressure is below 3.6 bar, you must first change the coarse filter. If this does not help, then you will have to check the RTD and the tightness of the injectors. This is the only way to accurately determine the source of the problem.
Replacing the fuel pump mesh - step-by-step instructions
Attention! We will be working with a flammable substance, so first of all, remove any sources of fire. Do not smoke while doing this work! Some, by the way, light a cigarette out of habit while performing such work. As a result, they pay very dearly for their inattention and violation of basic safety precautions.
- Turn off the power to the fuel pump or remove the fuse that controls the fuel pump.
- Start the engine and let it run until it stalls. This way you will relieve excess pressure in the fuel line and spill a minimum of gasoline when removing the fuel pump.
- Next you need to remove the rear sofa (seats).
- For “every fireman”, remove the “-” terminal of the battery, gasoline is highly flammable, you never know.