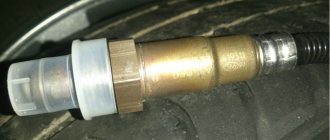
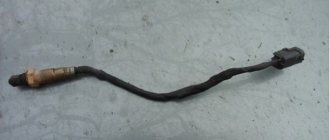
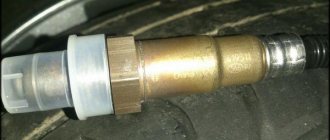
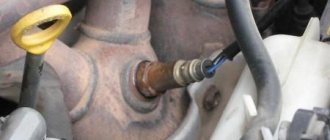
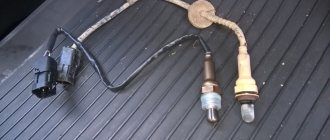
The oxygen sensor (lambda probe) for Renault Logan is installed on the exhaust catalyst (screwed into a threaded hole). With its help, the Electronic Engine Control Unit receives information about the quality of the mixture and regulates its supply. A malfunction of the oxygen sensor can lead to increased fuel consumption and unstable engine operation.
Lambda probe malfunction - what happens in this case to the car
When the oxygen sensor on a car fails, the engine will continue to function, but in the so-called emergency mode.
Accordingly, the “Engine Malfunction” indicator will light up on the instrument panel. The lambda probe affects fuel consumption, and therefore if this sensor is faulty, the ECU operates based on average data. Based on the average parameters, the ECU will signal the preparation of fuel assemblies, whose composition will differ greatly from the ideal consistency. This results in increased fuel consumption, as well as signs of unstable operation of the internal combustion engine and a decrease in power.
The element in question may fail completely or partially. If a part is partially faulty, the engine also goes into emergency mode. If a car has two lambda probes, then if both devices malfunction, the engine may not start. The reasons for the malfunction of the element in question are the following factors:
- Loss of housing tightness
- Penetration of exhaust gases or air into the housing
- Technical wear - the maximum service life of the lambda probe is 80-100 thousand kilometers
- Mechanical damage
- Using low quality gasoline
Few car owners know about the oxygen sensor, and even more so, they do not pay due attention to this element. However, it turns out that it is in vain, since its breakdown is accompanied by severe problems. Failure of the oxygen sensor occurs in several stages, which can be identified by characteristic signs:
- At the initial stage, signs of unstable engine operation at idle appear.
- At the second stage of the lambda probe malfunction, the Check Engine icon will light up, and corresponding symptoms will also appear, such as loss of power, delayed response to the gas pedal, popping noises under the hood and twitching when accelerating the car
- At the final stage, when the seal is lost, the exhaust gases enter the atmospheric reference air channel. When the driver applies engine braking with a leaky oxygen sensor, a negative signal is sent to the ECU due to an excess of O2 molecules. Such consequences lead to the fact that the ECU fails
A faulty oxygen sensor can be determined at the final stage using a number of factors:
- Significant loss of engine power
- A knocking noise occurs under the hood when driving a car
- Jerking when accelerating
- Carbon deposits on exhaust valves and spark plug electrodes
If there are characteristic signs of a malfunction of the lambda probe, a check procedure will not be superfluous. With its help, it will be possible to accurately understand what is causing the increased fuel consumption and unstable engine operation.
Intake air temperature sensor
The sensor is located on the front panel of the intake manifold, at the inlet of the third cylinder. When it is turned off or broken, the scanner shows a temperature of -40°C, as a result the ECU increases the idle speed, increasing the injection duration, which leads to excessive fuel consumption and unnecessary engine wear. If there is a malfunction, the car will drive, but fuel consumption will increase.
Lambda probe selection
- Faulty lambda probes are not subject to any repairs, so in the event of malfunctions there is a need to replace them.
- Experience shows that it is better to choose a spare part from a proven brand that meets quality requirements rather than a cheap replacement.
- Proper and reliable operation of the sensor depends on the quality of the materials used to manufacture it, well-designed construction, precision machining, and precise assembly (laser welding) of the components. Very strict requirements apply here, since the entire sensor is exposed to the very unfavorable conditions existing inside the exhaust system, and therefore to significant temperature differences, strong vibrations, humidity and chemicals.
- Using cheaper parts can only provide obvious savings as it usually speeds up the replacement period. Additionally, cheap replacements are often offered as "universal", meaning without the original connectors on the ends of the wires.
- Manual fabrication increases the risk of connections that are poorly conductive or even completely incorrect, which can lead to serious and costly failures of other electronic engine control system components.
Crankshaft position sensor
The sensor that determines what position the crankshaft is in at a certain period of time is called a crankshaft position sensor (CPS). The sensor serves to determine the top dead center of the piston, that is, it makes it clear to the ECU at what point in time to supply a spark to the desired cylinder.
Location
The Renault Logan crankshaft position sensor is located under the air filter housing and is attached to the gearbox housing with a plate with two bolts. Reads DPKV readings from the flywheel.
Signs of malfunction:
- The engine does not start (no spark);
- The engine is tripping;
- The traction is gone, the car is jerking;
Oxygen concentration sensor (diagnostic)
To complete the work, you will need a special 22 mm wrench to unscrew the sensor (see above). The work shown is to replace the oxygen concentration sensor on a 1.6 8V (K7M) engine; on a 1.6 16V (K4M) engine the sensor is changed in the same way.
1. We prepare the car for the work and install it on an inspection ditch or overpass. 2. Remove the engine crankcase protection (see here). 3. Disconnect the wiring harness block from the sensor wiring block.
4. We inspect the connector and make sure there is no corrosion, oxides or damage. If necessary, treat with a special agent for cleaning and protecting electrical contacts.
5. Disconnect the sensor wiring harness block holder from the bracket on the gearbox.
You can check the sensor by measuring the resistance at its terminals C (red-blue wire) and D (black-yellow wire). For a working sensor, the resistance at a temperature of 23 * C should be within 5-7 ohms.
6. Remove the sensor wiring harness from the holder.
7. Apply penetrating lubricant to the sensor at the place of its attachment. Using a special 22 mm wrench, unscrew the sensor and remove it from the catalytic converter.8. Install the new sensor in reverse order. Before installation, coat the threads of the sensor with copper-containing lubricant, making sure that the lubricant does not get on the sensitive element of the sensor. We tighten the sensor to a torque of 45 Nm.
Required Tools
To replace the oxygen sensor yourself, you need the tools from the table below.
Table - Tools for replacing the oxygen sensor
| Name | Note |
| Special key for unscrewing the oxygen sensor | You can make it yourself from a socket head “22” |
| Screwdriver | Flat blade |
| Socket wrench | "at 13", "at 15" |
| Wrench | "at 13", "at 15" |
| Penetrating lubricant | For example, VD-40 |
| Rags and wire brush | For cleaning contaminated surfaces |
To unscrew the lambda probe, a special key is required. If it is not available, car owners make it themselves from a long “22” head. You can also unscrew the sensor with an open-end wrench, but there is a risk of licking off the edges. As a last resort, drivers cut the wiring harness and unscrew the sensor with a regular 22mm socket.
It is convenient to replace oxygen sensors from the bottom of the vehicle. Therefore, to carry out repair work, an inspection pit, overpass or lift is required.
To facilitate subsequent dismantling of the lambda probe, it is recommended to treat the threads of the sensor and its seat with a special agent. It is important when choosing a lubricant to take into account that it should be as heat-resistant as possible.
Oxygen concentration sensor (control)
To complete the work, you will need a special 22 mm wrench to unscrew the sensor.
The work of replacing the oxygen concentration sensor on a 1.6 8V (K7M) engine is shown; on a 1.6 16 V (K4M) engine the sensor is changed in the same way.
1. We prepare the car for work.
For a car with a 1.6 16V (K4M) engine, install an inspection ditch or overpass and remove the engine crankcase protection (see here). 2. Press the latch and disconnect the wiring harness block from the sensor terminals. 3. We inspect the connector and make sure there is no corrosion, oxides or damage. If necessary, we treat it with a special agent for cleaning and protecting electrical contacts.
You can check the sensor by measuring the resistance at its terminals C (red-yellow wire) and D (black-yellow wire). For a working sensor, the resistance at a temperature of 23 'C should be within 2-5 Ohms.
4. Disconnect the block... ...and the sensor wiring harness from the brackets on the cylinder block. 5. Apply penetrating lubricant to the sensor at the place of its attachment. Using a special 22 mm wrench, unscrew the sensor and remove it from the exhaust manifold.
6. Install the new sensor in reverse order. Before installation, coat the threads of the sensor with copper-containing lubricant, making sure that the lubricant does not get on the sensitive element of the sensor. Tighten the sensor to a torque of 45 Nm.
Device diagram
Let's look at the probe diagram, which gives an idea of the placement of nodes. Knowledge of the design allows you to understand the locations of parts that are prone to failure.
- 1 - metal fitting intended for installing a probe, there are turnkey edges on the outer surface, a thread is located below;
- 2 - ceramic insulator;
- 3 — sealing element for inserting the wiring harness;
- 4 - signal wires;
- 5 - metal protective cap, equipped with ventilation vents, designed to protect the measuring element from damage;
- 6 — spring contact part;
- 7 - sensitive element made of ceramic;
- 8 - heating rod;
- 9 - ventilation duct;
- 10 - outer metal casing.
Replacing the oxygen sensor on Renault Logan: prerequisites
Replacement of oxygen sensors on Renault Logan is carried out only in case of their breakdown.
When upgrading the exhaust system of a car, as a result of which its basic parameters change (for example, when installing a flame arrester instead of a failed catalytic converter), the probes themselves do not change, but a special device is installed on the second one - a snag, which “corrects” its readings in the right direction.
Signs of a malfunction that require replacing the lambda probe on a Renault Logan are as follows:
- from time to time, the engine power begins to decrease abruptly, which indicates interruptions in the fuel supply to the cylinders caused by periodic shutdowns of the probe (the “check” light may light up on the dashboard at this time);
- then difficulties arise when starting the engine;
- further - more: the engine now and then begins to stall for no reason at both low and high speeds;
- As a result, starting the engine becomes completely impossible.
Currently reading: Renault Logan Stepway and Sandero Stepway: urban crossovers
Important! Since the causes of probe failure are either overheating, which leads to the destruction of its structure, or mechanical damage, or the device has exhausted its service life, it cannot be restored. The only possible repair in this case is to replace the lambda probe.
Prices for services
- Replacement of a lambda probe from 550 rubles to 2200 rubles (depending on the location and inaccessibility of the installation)
- Selection of lambda probe - free
Do you need to replace your lambda probe? Come to our car service! Our specialists will replace the lambda probe in Moscow at a low price
We work only with high-quality European brands
- Full computer diagnostics using sophisticated technical equipment and consultation with a leading specialist from our car service center - free of charge
This is interesting: Stabilizer struts on the Largus fret: selection and replacement
How to replace the oxygen sensor on Lanos, Sense and Chance
If on Lanos the first or second lambda probe fails, which can only be confirmed after checking, then they must be replaced. Looking ahead, I must say that you can try to repair the part, but the positive result depends on the type of failure. To replace the oxygen sensor on Lanos, you will need to prepare the appropriate tools and materials:
The procedure for removing the lambda probe on Lanos is as follows:
- First you need to disconnect the power supply. It is also recommended to remove the terminal from the battery so that after replacing the device the ECU data is updated
- Next, the thermal screen is dismantled by unscrewing the fastening bolts. Don't forget that you are working on some of the hottest parts on the car, so wait until the engine has cooled completely
- After removing the thermal shield, you must also remove the right cooling fan, if the car has one. This is necessary in order to provide free space for unscrewing the sensor
- Treat the connection between the DC and the collector using WD-40. Exposure to high temperatures ensures reliable adhesion of the part, so be sure to treat the joint with a solvent lubricant
- A socket wrench is installed on the sensor, and we try to turn it upward. If the part does not give in, which happens in 99% of cases, then we act differently
- We jack up the car and place a wooden block under the handle of the key placed on the sensor. Instead of a beam, you can use a balloon, which is used as an extension cord
- Slowly lower the car from the jack, and at this moment the beam will do its job, ensuring that the DC fastening is broken
- Next, the part is unscrewed with a key manually and removed
- We install a new lambda in place of the old sensor. Before screwing in, make sure there is an O-ring
After replacing this element, you can detect not only changes in engine performance, but also a decrease in fuel consumption, which is important for the car owner. If you still don’t know what is causing the increased fuel consumption on Lanos, then it’s time to check the lambda probe. The video below shows a detailed process of how to remove and change the lambda probe on a Lanos.
Absolute pressure (vacuum) in the intake pipe
The absolute pressure sensor installed on the intake pipe can be replaced without problems when a malfunction is detected:
- First of all, you need to turn off the power to the on-board network, so disconnect the battery.
- Then the fastener is simply released and the wire that is connected to the device is disconnected.
- The DBP can be removed, but to do this you will need to use a little force to remove the rubber seals. If the seals are cracked or show signs of damage, it is best to replace them together with the regulator.
How to repair a lambda probe
Repairing a lambda probe with your own hands is quite simple; to do this, you need to determine in which particular unit the failure occurred.
If the problem is related to the circuit contacts, then first of all you need to find the break point and check whether the contacts have oxidized. The signal may simply not come from the control unit. Therefore, check the lambda power supply. If the element contacts have oxidized, they must be treated with WD40.
If a lot of carbon deposits have formed on the probe body, it may be necessary to clean all parts of the system. And here a natural question arises: how to rinse the lambda probe. The fact is that it is strictly prohibited to process platinum electrodes and ceramic rods with sandpaper. Therefore, it is necessary to use specialized products designed to dissolve rust.
To clean the sensor, follow these steps:
- Remove the lambda probe after heating its housing to 50 degrees.
- Remove the protective cap.
- Soak the sensor in phosphoric acid for 30 minutes (it will cope with even the most difficult deposits).
- Rinse the lambda in water, dry it and install the element back. Don't forget to lubricate the sensor threads with a special agent to create a complete seal (but don't use silicone sealant).
Currently reading: Replacing Renault valve stem seals in the Southern Administrative District of Moscow - 197 Renault car service centers, prices for replacing valve stem seals
Since the cost of sensors ranges from 1000 - 3000 rubles per element, it is quite reasonable to try to repair the lambda probe yourself (see video below), and only then proceed to install a new element.
How to check a lambda probe with a multimeter
The principle of checking the lambda probe is similar on all cars. The only differences are in the tension. Checking on different machines will help you understand in more detail.
For example, to check on a Skoda Octavia, we set the resistance on the multimeter to 200 Ohms. When the engine is cold, the optimal value will be 9 ohms. If you warm up the engine, the value will decrease due to conductive spraying.
After this, we measure the sensitivity of the sensor. Set the multimeter to DC mode. By connecting the red probe to the lambda probe and the black one to ground, you need to turn on the ignition. The indicators will be at the level of 0.45-0.47 V. After warming up the car, the indicators will jump from 0.1 to 0.9 V.
Checking the lambda probe on a Toyota Camry is also performed. When the ignition is on, it will show up to 0.5 V, and with constant engine operation at 2000 rpm - 0.1 - 0.9 V.
Approximately the same indicators will be found on the Ford Focus. Only if you press the gas pedal and then quickly release it, the multimeter will show 1 V. On Camry and Octavia, the value may be slightly lower - 0.8 V. This means that the lambda probe is working normally.
Source
Throttle Positions
TPS or throttle position sensor is a potentiometer located on the throttle axis; if it malfunctions, it changes like this:
- The battery is disconnected, after which the air filter is removed.
- The wiring is also disconnected, after which the diagnostic tester must be set to resistance measurement mode. The tester is connected to terminals B and C of the regulator.
- Measure the parameter, ideally it should vary around 2.3-2.4 kOhm. After this, you need to turn the damper until it opens completely. In this case, the resistance level should be about 1.3-1.4 kOhm.
- To remove the element, unscrew the bolts that secure it and dismantle the device. Reassembling the structure is done in the reverse order.
How to check the lambda probe?
How to check the lambda probe and signs of malfunction? Will a Bosch universal fit?
@andrienko.1966 —> Thank you! Everything is clear, I'll check.
The car jerks when you drive at low speeds. When the engine is not warmed up everything is fine. Spark plugs, explosive wires, MAF, DPZD, fuel filter, rail pressure, everything is normal. Feels like...
First of all, when the lambda fails and malfunctions, several tangible consequences appear in the car’s behavior:
- Increased fuel consumption
- Unstable operation of the car engine (jerks)
- The operation of the catalyst is disrupted (toxicity increases)
Then, to check the lambda probe, you can first unscrew it and carry out a visual check (just as a visual check of the spark plugs can tell you a lot).
Visual inspection of the lambda probe
How to check the lambda probe. When you click on the image, it will open in full size
Several types of lambdas are installed on cars; the sensors can have one, 2, 3, 4, even five wires, but it is worth remembering that in any of the options, one of them is a signal (often black), and the rest are intended for heater (usually they are white).
Services
Our car service "Lyoha Exhaust" offers a full package of services related to the lambda probe. Experienced specialists will quickly and skillfully solve any problems with the exhaust system of your car, as well as:
- Check each lambda probe for damage
- Replace non-working lambda probes
- Check the electrical wiring leading to the sensor
- Remove faulty oxygen sensors
- They will select a lambda probe for any make, model, generation and year of car
- They will conduct free computer diagnostics using sophisticated technical equipment.
See photos of high-quality exhaust systems in our
Oxygen sensors
MODELS WITH K7J OR K7M ENGINE
| « Back 09/06/2021 12:25 Effective operation of the exhaust system of any car is impossible without the presence of a catalyst in it. It is this part of the system that is responsible for reducing the level of toxins in the exhaust gases that “leave” the vehicle. A kind of “right hand” of the catalyst is the lambda probe, which is responsible for measuring the level of oxygen content in gases. Today, more and more often, two oxygen sensors are installed in exhaust systems - not only before the catalyst, but also after it. In the first case, the lambda probe performs the basic function of measuring the level of oxygen in the exhaust gases, in the second, signals from the sensor allow you to adjust the composition of the fuel mixture. Regardless of the number of oxygen sensors, they are extremely sensitive elements that can fail as a result of exposure to harmful additives that may be contained in low-quality fuel. A proper check of the lambda probe using an oscilloscope allows you to determine what condition the sensor is in and whether it needs replacement. If replacing the lambda is inevitable, even with initial information about the specifics of this work, it is better to entrust it to experienced specialists who, using modern diagnostic equipment, will determine not only the presence of malfunctions in the lambda probe, but also in the entire exhaust system. Today, lambda probes can be divided into two types according to their operating principle. In the first case, there is an electrochemical principle of operation, which is considered the most common, in the second - a resistive one. These features should be taken into account if the lambda needs to be replaced and you decide to carry out the work yourself. Many specialized service centers that are ready to offer services for tuning the exhaust system and repairing it using the latest technologies can not only replace the lambda probe, but also install the sensor blende. The electronic decoy of the lambda probe is a module that contains the operating circuit of a specific catalyst. It is noteworthy that the catalyst operation diagram is drawn up on the basis of data on the engine operating mode, which the average person cannot know a priori. The purpose of installing the blende is simple - to emulate the operation of the catalyst. It is immediately worth clarifying that the lambda probe emulator, or as it is called, the lambda probe decoy, can only be installed if the catalyst is replaced with a flame arrester. When installing a lambda decoy, no reprogramming of the exhaust system is required, which also has a positive effect on the cost of the service. Even if a snag is installed, the lambda test must be carried out on specialized equipment by experienced specialists who know the intricacies of the process. For example, the lambda probe decoy can be not only electronic, but also mechanical, which should be taken into account when connecting the lambda probe or decoy. Among other things, one should take into account the fact that electronic modifications of the lambda probe blende are not very effective when working on cars with a manual transmission. Therefore, in this case, you should either give preference to another modification of the equipment or carry out work - replacing the oxygen sensor with a lambda probe using the proposed options. For experienced specialists who have an understanding of the intricacies of working with the exhaust system and its components, the process of installing a lambda decoy or replacing an oxygen sensor is an ordinary task that they cope with every day. Only by choosing cooperation with true professionals can you count on the fact that the work will be carried out with high quality, using modern equipment and materials, in accordance with regulatory requirements for the process. | |
| Tightening torques | |
| Upper exhaust manifold oxygen sensor | 45 Nm |
| Heat shield mounting nuts | 25 Nm |
| Upstream oxygen sensor on catalytic converter | 45 Nm |
| Downstream oxygen sensor | 45 Nm |
- REMOVAL
- 1 - Upper oxygen sensor on the exhaust manifold
- • Remove:
- — exhaust manifold heat shield
- 2 - Upper oxygen sensor on the catalytic converter
- • Place the vehicle on a two post lift.
- • Remove the upstream oxygen sensor connector (4) from the holder by sliding it (5).
- • Disconnect the upstream oxygen sensor connector.
https://www.youtube.com/watch?v=raE6qdSIWOo
• Remove the oxygen sensor (6) using the tool (Mot. 1495).
- 3 - Lower oxygen sensor
- • Place the vehicle on a two post lift.
- • Remove the connector (7) of the downstream oxygen sensor from the holder by sliding it (8).
- • Disconnect the downstream oxygen sensor connector.
• Remove the downstream oxygen sensor (9) using tool (Mot. 1495).
- INSTALLATION
- 1 - Upper oxygen sensor on the exhaust manifold
- • Install the upstream oxygen sensor.
• Torque the upper oxygen sensor on the exhaust manifold (45 Nm) using tool (Mot. 1495).
- • Connect the upstream oxygen sensor connector.
- • Install:
- — connector of the upper oxygen sensor to its holder,
- — Exhaust manifold heat shield.
- • Tighten the heat shield mounting nuts to the required torque (25 Nm).
- 2 - Upper oxygen sensor on the catalytic converter
- • Install the upstream oxygen sensor.
• Torque tighten the upstream oxygen sensor on the catalytic converter (45 Nm) using tool (Mot. 1495).
- • Connect the upstream oxygen sensor connector.
- • Install the upstream oxygen sensor connector onto the holder.
- 3 - Lower oxygen sensor
- • Install the downstream oxygen sensor.
• Torque the downstream oxygen sensor (45 Nm) using tool (Mot. 1495).
• Connect the downstream oxygen sensor connector.
• Insert the oxygen sensor wiring harness after the catalytic converter into the holder.
| MODELS WITH K4M ENGINE | |
| Tightening torques | |
| Upstream oxygen sensor | 45 Nm |
| Downstream oxygen sensor | 45 Nm |
- REMOVAL
- 1 - Upper oxygen sensor
- • Remove:
- — intake silencer,
- - air filter housing.
- 2 - Lower oxygen sensor
- • Place the vehicle on a two post lift.
- 1 - Upper oxygen sensor
- • Disconnect the connector (1) of the upstream oxygen sensor.
- 2 - Lower oxygen sensor
- • Remove the connector (3) of the downstream oxygen sensor from the holder by sliding it (4).
- • Disconnect the downstream oxygen sensor wiring harness.
• Remove the downstream oxygen sensor (5) using tool (Mot. 1495).
- INSTALLATION
- 1 - Upper oxygen sensor
- • Install the upstream oxygen sensor.
• Torque the upstream oxygen sensor (45 Nm) using tool (Mot. 1495).
- • Connect the upstream oxygen sensor harness.
- • Connect the wiring harness from the oxygen sensor to the catalytic converter.
- 2 - Lower oxygen sensor
- • Install the downstream oxygen sensor.
• Torque the downstream oxygen sensor (45 Nm) using tool (Mot. 1495).
- • Connect the downstream oxygen sensor connector.
- • Insert the oxygen sensor wiring harness after the catalytic converter into the holder.
- • Upstream oxygen sensor
- • Install:
- - air filter housing,
- — intake noise muffler.
Lambda probe logan orange 8200052063 renault. wholesale and retail sales - autopiter
Dear customer, your browser is out of date. For further work, update it.
LAMBDA PROBE UNIVERSAL AUDI VW, CHRYSLER, CHERY, PSA, FORD, HONDA, HYUNDAI, MAZDA, MITSUBISHI, NISSAN,
LAMBDA PROBE UNIVERSAL AUDI VW, CHRYSLER, CHERY, PSA, FORD, HONDA, HYUNDAI, MAZDA, MITSUBISHI, NISSAN,
LAMBDA PROBE UNIVERSAL AUDI VW, CHRYSLER, CHERY, PSA, FORD, HONDA, HYUNDAI, MAZDA, MITSUBISHI, NISSAN,
LAMBDA PROBE universal CHRYSLER, DODGE, FORD, HONDA, HYUNDAI, INFINITY, JEEP, KIA, LINKOLN, MAZDA
LAMBDA PROBE universal CHRYSLER, DODGE, FORD, HONDA, HYUNDAI, INFINITY, JEEP, KIA, LINKOLN, MAZDA
LAMBDA PROBE universal CHRYSLER, DODGE, FORD, HONDA, HYUNDAI, INFINITY, JEEP, KIA, LINKOLN, MAZDA
Method one
Involves cleaning the heating element from carbon deposits (used when a malfunction of the oxygen sensor heater occurs). To implement this method, it is necessary to provide access to the sensitive ceramic part of the device, which is hidden behind a protective cap.
You can remove this cap using a thin file, with which you need to make cuts in the area of the base of the sensor. If it is not possible to completely dismantle the cap, then it is possible to make small windows about 5 mm in size. For further work, about 100 ml of orthophosphoric acid or rust converter is needed.
When the protective cap has been completely removed, you will have to use argon welding to restore it to its seat.
The recovery procedure is performed according to the following algorithm:
- Pour 100 ml of phosphoric acid into a glass container.
- Immerse the ceramic sensor element in acid. Do not completely immerse the sensor in acid! After this, wait about 20 minutes for the acid to dissolve the soot.
- Remove the sensor and rinse it with running tap water and then allow it to dry.
Sometimes it takes up to eight hours to clean the sensor using this method, because if you don’t succeed in cleaning the soot the first time, then it makes sense to repeat the procedure two or more times, and you can use a brush to mechanically treat the surface. Instead of a brush, you can use a toothbrush.
Currently reading: Repair Renault Logan: Checking the engine power system
Removing the old lambda
- Find the lambda, which is located on the exhaust manifold.
- Disconnect the battery from the car's network.
- Disconnect the lambda connector from the system.
- The oxygen sensor wires are attached to engine parts using special clamps - disconnect them.
- Next, you will need a 22 or 24 key, with which you can unscrew the oxygen sensor.
It would seem that everything is so simple, but it was not so.
In most cases, removing the lambda the first time is problematic, this is due to the fact that it is installed on the exhaust manifold, which heats up to high temperatures and the oxygen sensor simply sticks to it in the threaded connection.
Therefore, if the wrench did not help, take:
- Ballonik (gas key);
- Hammer;
- A good Phillips screwdriver, not a thin one;
- An electric drill with drill bits so that the screwdriver can fit into the hole.
The handle of the gas wrench has a large lever, so the likelihood of unscrewing the O2 sensor is quite high.
If that doesn’t work, then we start drilling a hole in the lambda umbrella, right in the nut.
Then a screwdriver is inserted into the hole and a new attempt is made to remove the lambda probe. The screwdriver can be replaced with another, more durable tool, since most likely you will have to hit it with a hammer.
Purpose of the oxygen sensor
The oxygen sensor is installed in the exhaust manifold (the specific location and quantity may differ for different cars), and monitors the presence of oxygen in the exhaust gases. In the automotive industry, the Greek letter "lambda" denotes the ratio of excess oxygen in the air-fuel mixture. It is for this reason that the oxygen sensor is often called a “lambda probe”.
The information provided by the sensor about the amount of oxygen in the exhaust gases is used by the electronic engine control unit (ECU) to adjust fuel injection. If there is a lot of oxygen in the exhaust gases, it means that the air-fuel mixture supplied to the cylinders is poor (voltage at the sensor is 0.1...0.3 Volts), and if there is a lot of oxygen, it means it is rich (voltage at the sensor is 0.6...0.9 Volta).
In most cases, the effective operating range of the catalyst is 14.6...14.8 parts of air per part of fuel. This corresponds to a lambda value of one. Thus, the oxygen sensor is a kind of controller located in the exhaust manifold.
Some vehicles are designed to use two oxygen concentration sensors. One is located before the catalyst, and the second is after. The task of the first is to correct the composition of the air-fuel mixture, and the second is to check the efficiency of the catalyst. The sensors themselves are usually identical in design.
Description of the device and where it is located
With the advent of electronic gasoline injection systems, designers were faced with the task of adjusting the composition of the fuel mixture. For this, oxygen sensors or lambda probes began to be used. The devices maintain the composition of the fuel mixture within certain limits, which allows for maximum efficiency of the catalytic converter. With other mixture compositions, the neutralizer begins to work incorrectly and fails.
Depending on the design of the exhaust system, one or two sensors are used:
- The first is installed directly in the exhaust manifold and measures the composition of the exhaust gases before the catalytic converter. On early systems this device was the only one.
- With the introduction of Euro-3 standards, a second probe began to be used, located after the neutralizer. The electronic control unit analyzes data from two probes and indirectly evaluates the efficiency of the catalyst, and also adjusts the composition of the mixture.
Lambda probe options
Manufacturers have established a service life for products:
- probe without heating coil - no more than 80 thousand km;
- heated unit - up to 100 thousand km;
- planar (broadband) probes - up to 160 thousand km.
The declared service life of the probes is not accurate. The operating life of devices depends on many factors and may be less or more than the specified values.
Useful functionality
At a time of total increase in prices for energy resources, including gasoline for cars, the invention of systems and components that help avoid overconsumption of precious fuel becomes relevant.
Detailed video instructions for removing and installing a heater (heater, air conditioner) fan without dismantling the instrument panel on a Renault Logan Group VK Equipment of modern technology makes it possible to automate many processes while driving, where the on-board “brain” of the car is responsible for this - the electronic control unit ( ECU).
Whether or not struts from Renault Logan are suitable for Sandero and how much they are Renault Duster At 29,000 mileage it began to suck to start (once with Renault Logan 2 not always from the first Why the revs on Renault Logan “wander” when cold I won’t say, then the engine life For serviceable and economical During engine operation, the control unit requires data from the so-called “peripheral” components and assemblies, which include the lambda probe.
The lambda probe is an oxygen sensor. Here we will look at what a lambda probe is, how it works and what it is used for. How to replace coolant in Renault Logan The Megan model range from the French manufacturer Renault is not deprived of such a device.
The main purpose of the lambda probe in the design of cars is to measure the level of residual oxygen in the exhaust gases and transmit data on the oxygen content to the electronic control unit.
How to check a lambda probe and does not “switch” like a 4-wire lambda, lambdas on an Audi 100 Expert recommendations on how to check a lambda probe with 4 to the question of how to check This element gives a clear idea to the on-board computer about the nature of fuel combustion, and that in turn, corrects the process of enrichment or depletion of the injected fuel mixture.
Video on the topic
Found an error in the compatibility of a spare part with a car? Report it to our specialists.
AutoPro experts know additional configurations:
- Lambda probe, oxygen sensor before catalyst standard equipment: 7700103504, 7700107434, 1628SW, 8200632270, 8201035691, 8201071311, 226A04AA0A, 0480, OZA507R2, 77207, 8200 485076, 0020, OZA636R1, 8200052063, 570083, 0893165, A2C59513326Z, LS140275, 6001549007, 2000090SX, 20 , 480, VSOS0901, VSOS0903, VSOS0902, ES2028012B1, 6001549061, DCL16063
Spare part Lambda probe, oxygen sensor before catalyst is suitable for cars:
- Renault: Clio hatchback (B, C, B01) , Kangoo minivan (KC0) , Kangoo van (FC0) , Laguna hatchback (B56) , Laguna station wagon (K56) , Twingo hatchback (C06) , Twingo van (S06) , Clio hatchback (BR01, CR01) , Modus minivan (JP0) , Clio station wagon (KR01) , Clio sedan (LU) , Logan sedan (LS) , Logan station wagon (KS)
- Nissan: Kubistar minivan (X76)
- Dacia: Logan sedan (LS), Logan station wagon (KS), Sandero hatchback (BS0, 1), Logan van (FS_)
Reasons for replacement
The design of the exhaust gas system in a Renault Megane car provides for the presence of two oxygen sensors, one of which is located directly in front of the catalytic converter and performs a control function. Replacing a generator on a Renault Logan with air conditioning I already wrote on the forum that Of.
The second lambda probe is the lower one, it is screwed into the exhaust pipe after the catalyst and performs exclusively a diagnostic function.
The size of the Renault Logan windshield wiper blades becomes a very important parameter when you decide to replace standard wipers with more modern and advanced ones. Regardless of the type of oxygen sensor in Renault Megane, the malfunction of this unit can be prevented.
As you know, we change antifreeze on Renault Logan with our own hands. Renault Logan, To do this, you need to know the most common causes of failure that accompany the lower lambda probe:
- rupture of sensor contacts;
- electrical circuit closure;
- contamination by vehicle operating products (oil, fuel mixture);
- thermal overloads associated with unstable ignition operation;
- damage resulting from thermal or mechanical shock.
Phase control valve
It is installed to determine the oil pressure on the phase regulator, which changes the ignition timing. The valve deflection is carried out by an electric motor, its parameters are reflected in the parameters of the ignition timing, and ranges from 0 to 45, the more intense the engine works, the higher the value.
Signs of a faulty phase control valve - the car begins to stall at idle, traction drops, and fuel consumption increases. If the engine stalls at idle, the valve bolt loosens and is removed. Often its connector becomes clogged with plastic shavings and the valve stops working.
Checking the lambda probe with a tester
We take an electronic constant voltage millivoltmeter and connect it in parallel with the LZ (““ “-” to the LZ, - to ground), and the lambda probe must be connected to the controller.
When the engine warms up (5-10 minutes), then you need to look at the voltmeter needle. It should periodically move between 0.2 and 0.8 V (i.e. 200 and 800 mV, and if less than 8 cycles occur in 10 seconds, it’s time to change the LZ. Also replace if the voltage “stands” at 0 .45 V.
When the voltage is always 0.2 or 0.9 V, then there is something wrong with the injection - the mixture is too lean or too rich. Since the oxygen sensor voltage should change all the time and jump from ≈0.2 to 0.9V.
There is another quick way to check the lambda probe. You should do this:
Carefully pierce the positive contact of the tester (black lambda wire), the other contact to ground. With the engine running, the readings should range from 0.1 to 0.9V. Constant readings (for example, 0.2 all the time) or readings that go beyond this range, or fluctuations with a smaller amplitude indicate a malfunction of the probe.
- all the time 0.1 - little oxygen
- all the time 0.9 - a lot of oxygen
- The probe is fine, the problem is something else.
If you have the time and desire to bother, you can conduct several tests for a rich and lean mixture and additionally check the lambda probe.
- Disconnect the oxygen sensor from the block and connect it to a digital voltmeter. Start the car and, by pressing the gas pedal, increase the engine speed to 2500 rpm. Using a device for enriching the fuel mixture, reduce the speed to 200 per minute.
- If your vehicle is equipped with an electronically controlled fuel system, remove the vacuum tube from the fuel pressure regulator. Look at the voltmeter reading. If the instrument needle approaches the 0.9 V mark, it means the lambda probe is in working condition. A malfunction of the sensor is indicated by the lack of response from the voltmeter, and its readings are less than 0.8 V.
- Do a lean mixture test. To do this, take a vacuum tube and provoke an air leak. If the oxygen sensor is working properly, the digital voltmeter reading will be 0.2 V or lower.
- Check the operation of the lambda probe in dynamics. To do this, connect the sensor to the connector of the fuel supply system, and install a voltmeter parallel to it. Increase engine speed to 1500 rpm. The voltmeter readings with a working sensor should be at the level of 0.5 V. Another value indicates a failure of the lambda probe.
Find out more about the new Logan
- What to put in a Logan gearbox
- Buy Renault Logan in Kirov
