Removing and replacing the speedometer drive of a VAZ 2109
We remove the speedometer drive on a VAZ 2109 car to replace the housing, sealing ring or the drive gear itself. Its removal can be done without dismantling the gearbox itself; to do this, the car must be driven onto an inspection hole or overpass. The repair procedure is as follows:
- Using a socket wrench, unscrew one bolt securing the speedometer drive housing to the gearbox and pry it off with a flat-head screwdriver.
- Now you can remove the driven gear itself. This gear is made of plastic, so it must be carefully inspected and if signs of wear are found, replace it with a new one. Also pay attention to the seat where the tip of the speedometer flexible rod is inserted; it should not be broken with licked corners, otherwise this defect is also the reason for replacing the gear.
- Pay attention to the box body where the drive is installed. If traces of oil leaks are noticeable, then it is necessary to replace the rubber sealing ring located on the drive housing. To remove it, you need to remove the driven gear and then push out the O-ring.
- Wash all parts in clean kerosene.
At this point, the repair work on removing and repairing the VAZ 2109 speedometer drive is completed. After washing all the parts, reassemble it in reverse order and install it in place.
AVTOTRUE.RU
- Home
- Auto garage
- Replacing the Drive Gear of the Speedometer Drive VAZ 2109
Installing a speedometer on a VAZ 2109 car
The purpose of the speedometer is to inform the driver about distance and speed. It also defines the composition of its units - a counter showing the mileage of the car, called the odometer, and the speed - the speedometer itself. A broken speedometer is a very unpleasant breakdown. Traffic cops can be penalized for speeding and difficulty changing gears correctly, especially around corners. Repair of the VAZ 2109 speedometer is carried out independently.
Symptoms of speedometer defects:
- The numbers don't exactly hit the shelf, but eventually they stop working.
- The speedometer begins to display the wrong vehicle speed.
- Sensors burn out.
To repair the VAZ 2109 speedometer, you need to remove the front panel:
- Unscrew the beard. To do this, tighten two screws on one of the panels.
- The top panel releases three clips and turns off the side lights, hazard lights and low beams.
- The radio is removed, the cigarette lighter is turned off.
- Unscrew the two screws securing the panel and the speedometer cable. Three gaskets removed and panel removed.
- The screws holding the speedometer unit are loose.
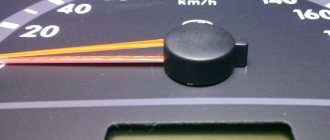
If you have exceeded the speedometer, you must do the following:
- Slide the pointer over the stop.
- Tape a piece of construction tape to the bottom of the scale.
- The marker is placed at the top of the arrow.
- Using a ruler, the distance on the device is measured from zero to 10 km per hour. Its value is 0.7 mm.
- The required distance on the adhesive tape from the previously placed mark is measured and the mark is placed again.
- The speedometer needle is removed and installed so that its lower position drops to the second mark.
Speedometer drive: types and differences
A speedometer is an important element in cars, as well as several other vehicles, as it is necessary to monitor speed in order not to violate traffic rules. But this is not the last function of this device.
All possible speedometers have a high-speed magnetic unit; due to the rotation of the magnets, a flow is formed, it moves through the coil, thereby facilitating the induction of eddy currents. They thereby begin to create more magnetic fields. They interact with each other, the needle of the device moves along the frequency scale, with the help of this the magnet rotates.
All speedometers are divided into three categories.
- Mechanical speedometers.
- Electromechanical speedometers.
- Electronic speedometers.
Mechanical speedometers. In this type of speedometer, the process of speed measurement and indication occurs thanks to a mechanical device. A gear is used as sensors, which is connected to the secondary shaft of the gearbox; this is the speed unit with an arrow indicator and the drum counter. Previously, speedometers were used in the form of a drum and tape. But they stopped using them quite a long time ago.
Electromechanical speedometers. In these devices, speed is measured using various electronic or electromechanical sensors that are connected to the gearbox. The speed is indicated by a milliammeter or the speed unit of a mechanical speedometer, and the distance is indicated by a counting drum, which drives a stepper motor.
Electronic speedometers. This is a development of new electromechanical speedometers; the main difference is the replacement of the odometer - in an electronic device it is completely digital.
How to remove the speedometer drive with your own hands - instructions
VAZ 2110
- We support the anti-rollback shoes of the rear wheel, then we need to jack up the front of the car, and then install it on supports.
- On a model with a cable-driven speedometer, remove the fastening pin and disconnect the cable from the gear drive.
- Unscrew the fastening bolt and remove it together with the heat shield.
- Remove the drive with the gear from the crankcase and remove it from the seal ring.
- The gear can be removed from the gearbox housing; be sure to check the condition of the gear; if defects are detected, it must be replaced.
- If there are signs of wear or damage to the gear, the condition of the gear should be checked.
- To remove the gear, release it from the transmission. Then you need to unscrew the mounting bolt and remove the drive gear housing. Then you should remove the drive gear and remove all the adjusting washers.
VAZ 2107
- Using a “13” wrench, you need to unscrew the bolt of the clamp securing the exhaust pipe of the muffler.
- Take a 10mm wrench and unscrew the drive fastening nut.
- Using a 13mm wrench, unscrew the two nuts securing the cross member.
- Then you need to lower the rear of the transmission.
- The pipe section must be moved to the right and then the speedometer drive must be removed from the crankcase hole.
VAZ 2114
- We unscrew the DS counterclockwise.
- After removing the DS, check the VAZ 2114 speed sensor drive.
- Using a “10” wrench, unscrew the nut and pull it out.
- After removing the drive, you need to check the condition of the ring and, if necessary, replace it.
Do-it-yourself repair of the VAZ 2109 speedometer drive
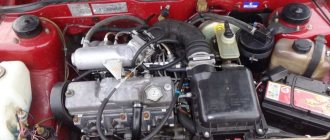
The speedometer of this car model is equipped with a mechanical drive. The installation of gears, including the drive gear, is carried out on the secondary shaft of the box. The transmission of torque to the speedometer, which is located on the dashboard, is provided by a flexible shaft.
One of the features of the car model is that the equipment can have either a high or low dashboard, which in turn means that when purchasing a flexible shaft, you need to make sure that its length is suitable for your car.
Peculiarities
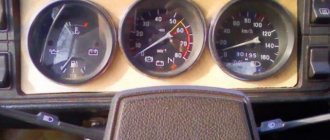
The speed counting system of the 09–99 family has several design features. They are connected to the dashboard of these cars. Over the years, manufacturers equipped these models with 3 types of panels. It is especially important to understand their nuances. The choice of components when replacing faulty parts depends on them.
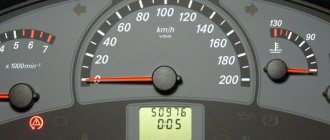
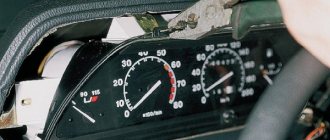
Low
This dashboard was the first modification. One of its features is the absence of a tachometer. As for the speedometer, its system is completely mechanical. It works due to transmission rotation from a mechanical drive, through a flexible shaft to the speedometer itself.
Cars with a low panel were equipped with flexible shafts (cables) 80 centimeters long. The drive gear is also different. It has 8 teeth, which is 4 less than the tall panels. The correct calculation of the speed of movement depends on the number of teeth on the gear.
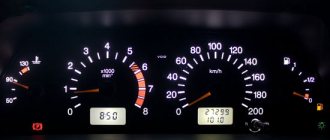
High
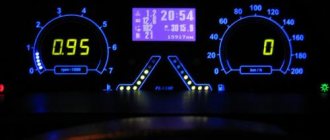
The high panel replaced the low one. The main difference is the absence of a voltmeter and the presence of a tachometer.
The speedometer system remains the same - mechanical. The difference from cars with a low panel is the length of the speedometer cable, it is 1 meter. It also uses a longer drive rod and changes the number of teeth from 8 to 12. This is a significant difference.
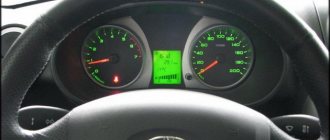
Europanel
This panel is already equipped with injection models of the VAZ-2109. Its peculiarity is the complete absence of mechanical drives. The speedometer system is also modernized. Now the mechanical drive has been replaced by a magnetic sensor, a flexible shaft, electrical wires, and the drive of the speedometer itself has become electronic. Complete difference from carburetor models. The work is carried out without gear rotations, which has significantly reduced the percentage of errors in calculations.
Before you figure out why the speedometer does not work, you need to understand the principle of its operation on cars with different layouts.
How to check the speedometer shaft?
Usually, to check the functionality of the shaft, it is enough to drive a couple of tens of meters. Start the engine and drive 20–30 meters and observe the behavior of the end of the shaft. If the tip is motionless, you need to lift the hood cover, unscrew the nut that secures the shaft. If only the shell of the part gives in, then this will indicate only one thing - a shaft break has occurred. In this case, you will have to remove the remaining tip from the drive. For this job you will need pliers.
Another development of events is also possible if both the shaft and the shell fail, and this will indicate that there are simply no edges at the tip of the shaft. Regardless of the reason for the shaft failure, it will have to be replaced.
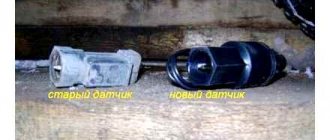
Often the need to change the drive arises due to wear of paired gears. In order to solve this problem, you do not have to remove the gearbox. To solve the problem, it is enough to have an inspection hole or overpass.
The first step is to unscrew the bolt that secures the drive housing to the gearbox. After this, the housing is removed, then the gears. The latter must be replaced. In order to choose the gears that are suitable for your car, just compare the new ones with the old ones, the number of teeth should be the same.
If there is oil on the housing, it would be a good idea to check the O-ring and replace it if necessary. The drive elements are washed using clean kerosene.
The order of assembling the unit is reverse.
Signs of breakdown
The car itself can tell you that the DS is out of order. To do this, you just need to pay attention to the characteristic signs of such a breakdown:
- The speedometer does not work at all or provides incorrect information about the current speed;
- Idling behavior is unstable;
- Gasoline consumption is increasing;
- The motor does not produce full power.
The practice of VAZ 2109 owners shows that the most obvious sign of a breakdown of the engine is the engine stopping at idle while coasting, or the engine stopping when the clutch is pressed to change speed.
If the engine breaks down, the “Check Engine” light on the dashboard should light up. If the car is equipped with an on-board computer, then the error code corresponding to the malfunction is 24.
https://youtube.com/watch?v=qiDmZLUuTMI
Causes of failure
There are several main reasons why a DS may stop working:
- There is a break in the electrical circuit. Therefore, first of all, we advise you to check the condition of the wiring and contacts. They could become dirty or oxidized. It's not difficult to clean them. Additionally, we recommend treating contacts with Litol.
- Break near the connector. Here the wiring often bends and chafing occurs. Don't forget to check the condition of the insulation of the wires that are located near the exhaust manifold. Often they melt under the influence of temperature, which leads to short circuits.
- The speedometer cable is worn out. Over time, as the vehicle is used, the cable becomes covered with burrs, cracks, and breaks. As a result, the speed sensor stops working properly.
https://youtube.com/watch?v=jsP9uC7EE-Q
Verification methods
The first thing you need to do is make sure that a voltage of 12 V is supplied to the DS contacts. Since the operation of the DS is based on the Hall effect, the test is performed by torsion. The voltage varies within 0.5-10V.
Today, there are three main ways to check the performance of a speed sensor. The first two involve the use of a multimeter. Which one to choose, decide for yourself. We will talk in detail about all three methods of checking DS.
| Verification method | Your actions |
| Method one |
|
| Method two |
|
| Method three |
|
If checking the DS shows that everything is fine with it, be sure to check the functionality of the sensor drive. It is necessary to hang up the front wheel and find the DS drive by touch. Now start rotating the wheel with your foot and check with your hand whether there is rotation in the drive and how stable it is. The help of a partner will not hurt you here.
How to recognize a faulty speedometer?
- The speed is displayed incorrectly;
- The numbers stop crooked;
- The sensor has burned out.
The main condition for success is the correct dismantling of the front panel. Let's consider the sequence of work. A pair of screws are unscrewed, which serve to fix the bottom panel, and the “beard” is removed. The top panel is released from the clamps, and the emergency lights are turned off. This applies to side lights, low beam, and cigarette lighter. Next comes dismantling the pads and removing the panel itself. There is now free access to the screws securing the speedometer.
Thank you for your attention, I hope the article was useful for you, see you again at VAZ Repair.
VAZ 21099 - removing the speedometer drive mechanism
Removal and subsequent replacement of the speedometer drive mechanism on a VAZ 21099 car can be performed without dismantling the gearbox. To carry out repair work, prepare a set of keys and a new drive, then perform the following sequence of actions:
- First of all, clean the drive surface from dirt, then disconnect the flexible speedometer cable from it.
- Using a socket head, unscrew the nut securing the drive housing to the gearbox, then pry it off with a flat screwdriver and carefully remove it.
- Disconnect the driven gear and shaft from the drive.
- Next, use a suitable rod to push the rubber O-ring out of the body.
Now that disassembly has been completed, wipe all parts with a rag soaked in kerosene or gasoline, and then conduct a visual inspection of all elements for mechanical damage. Pay special attention to the gear with the shaft, since it is made of plastic, the shaft itself is most often subject to damage, so that its edges are not licked off. Replace all rubber seals if they have lost elasticity or become dry.
At this point, the repair work to remove the speedometer drive mechanism on the VAZ 21099 car has been completed. After repairs are completed, perform installation in reverse order.
0 0 votes
Article rating
Work technology
Replacing the speedometer cable on a VAZ 21099 with a high and low instrument panel includes the following steps:
- the electrical system is de-energized, for which the battery is removed;
- then the instrument panel is dismantled;
- after ensuring access to the fastening elements, you need to unscrew the fastening nut and remove the slots from the device body;
- for ease of installation, the new cable is attached to the shell of the old one;
- the fastening nut of the drive installed on the gearbox is dismantled;
- the tip is removed from the spline connection;
- the old cable is pulled out of the engine compartment;
- after checking the correct position of the new cable, tighten the union nuts;
- the instrument panel is mounted in the reverse order;
- the battery is connected;
- The functionality of the device is checked.
It is important to consider some aspects when performing such work, for example:
- the cable should be lubricated using greases (Litol, CV joint, CIATIM);
- lubricant must also be applied to the spline joints;
- union nuts are mounted and dismantled using adjustable pliers;
- To prevent damage to the threads, screwing the nuts is done very smoothly, controlling the applied force.
Also, the cause of incorrect speed readings may be a failure of the gear drive. Its drive gear gradually wears down and loses connection with the gearbox. Therefore, before installing the speedometer cable, you should check the condition of this unit. When replacing this unit, you must ensure that the drive is applicable to this vehicle model.