The modern “Prior” engine is a sixteen-valve injection unit with built-in valves, which, unlike previous analogues, are highly reliable and have a long service life. But when the timing belt breaks, the pistons collide with the valves, which can cause the latter to bend. Further operation of such a vehicle is no longer possible. The solution is to replace the valves on the Priora (16 valves). Reviews from motorists note that such a malfunction occurs extremely rarely. Most often this happens due to untimely replacement of the belt. In today's article we will look at how to replace valves (Priora, 16 valves), as well as installing spark plugs and cleaning injectors.
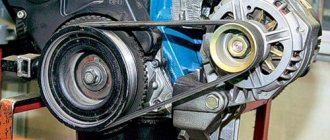
Belt condition
Drivers should take into account that the valves can last a million kilometers if high-quality fuel is used. However, this is not the only condition for reliable and long-term operation. The fact is that if you regularly check the condition of the timing belt for breaks and microcracks, you can completely eliminate valve bending. If you find any defect in the coating of this part, immediately purchase a new belt. This way you will reduce the chances of parts bending several times.
What to do if they are already bent?
If this incident has already happened, you should know that dismantling these elements, as well as replacing hydraulic compensators (Priora, 16 valves), is not such an easy process, since it requires disassembling the cylinder head. It is worth noting that disassembling the cylinder head itself is carried out only in extreme cases. That is, only when replacing springs, valves and other important mechanisms. Also, each time the cylinder block is disassembled, a new gasket is installed.
The replacement of valves on a Priora (16 valves) begins with disassembling the engine. Of course, you don’t need to disassemble the entire motor - just remove the head and install it on a special workbench so that the distribution heads are located at the top. Next you need to remove the engine mount on the left side. To do this, unscrew the nuts holding the support. Once they are unscrewed, it will be very easy to remove.
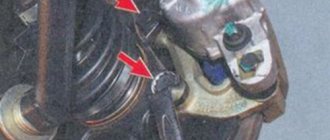
At the next stage, you should dismantle the support bracket, having first removed the bolts securing the fuel pipe and phase sensor. Next, using a 21 key, disconnect the sensor from the emergency system. This element signals a critical oil level; it is located in the bearing housing.
Replacing valves on VAZ 2170, 2171, 2172
Despite the complexity of engine repair, you can replace the valves on a 16-valve Priora with your own hands. To do this, you need to have a general understanding of the structure of the internal combustion engine, stock up on the necessary spare parts and tools, and also use this article as a guide.
Tools and spare parts required for replacement:
- Socket wrenches for 8, 10, 13, 19 and 21.
- Valve spring puller.
- Oil seal remover.
- Screwdrivers.
- Tweezers.
- Gasket between head and block.
- Set of valves.
Removing the engine head
The valve replacement procedure must begin by removing the engine head.
After removing the head, place it on a wooden base with the camshafts facing up to avoid damaging the valves. Then you need to remove the left engine mount. To do this, use a 13mm socket wrench to unscrew the 3 nuts securing it.
After the support is disconnected from the body, use a 10mm wrench to unscrew the bolt that holds the fuel pipe in place and disconnect it.
Then, using the same 10mm wrench, unscrew the 2 bolts that secure the camshaft position sensor.
Then you need to disconnect the emergency oil pressure drop sensor. To do this, you need to unscrew it from the bearing block with a 21 key.
Then, using a 19 key, unscrew the coolant temperature sensor from the thermostat,
and with a 21 key, unscrew its rear part from the engine head housing.
You can now disconnect the thermostat. To do this, unscrew the two 13 nuts that hold it in place and remove it from the studs along with the gasket.
Then, for convenience in further work, use a spark plug wrench to unscrew the spark plugs.
Now remove the camshaft bearing block. To do this, use an 8 socket wrench to unscrew the 20 bolts holding the block body.
Then remove the camshafts from the recesses in the cylinder block and remove the oil seals from their front ends.
Remove the plugs from the end of the head.
Then you can remove the valve lifters from it.
After disconnecting all elements, clean the surface of the head from carbon deposits and possible burrs.
Replacement process
First you need to install a stop under the valve to be removed. Then correctly install the valve spring remover.
To do this, screw the bolt that secures the bearing block cover into the hole on the head housing and hook the puller onto it. Now compress the spring with this tool and remove both valve retainers from the upper spring plate.
This can be done with tweezers or a screwdriver. If the “cracker” does not come out, then you can lightly hit the upper plate of the spring with a hammer and release it. Now you can remove the puller. Then remove the top plate and remove the spring from the hole.
Now you can easily remove the valve by pushing it a little with a screwdriver.
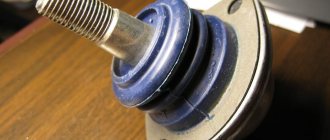
The next step in the replacement is to remove the oil seal from the valve. It is pressed from the bushing with a special puller or pliers.
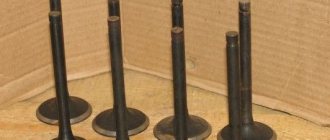
Then clean the valve from carbon deposits and inspect it carefully. Valves with the following defects must be replaced:
- Deep scratches and damage on the valve working surface.
- A bend in the rod or a crack in it.
- Burnt-out working plane.
You should also carefully inspect the valve seats for significant damage. If there are defects, then you need to sand them in a specialized workshop. Check the condition of the valve springs. If they are damaged or bent in any way, replace them.
After a complete inspection of all valves, replace the faulty ones and install the valves in place, lubricating them with engine oil first. To assemble the head and install it in place, repeat the steps described in the article in reverse order.
Important: the gasket between the cylinder block and the head is disposable. Therefore, be sure to replace it before installing the head.
Thermostat
Next you need to switch to the thermostat. "Priora" (16 valves), in which replacement of the thermostat itself is not required, remains still not running. The next step is to remove the temperature sensor from the element body. It is used to monitor the coolant temperature. Now you can loosen a few fixing bolts and freely remove the thermostat out. The sealing gasket is removed from the studs. After this, you need to remove all the candles. At the same time, the Priora (16 valves) will not require such action as replacing the pump. Below you will find detailed instructions for dismantling the spark plugs.
Main signs and causes of faulty valves
Replacement of all valves on a Priora with 16 valves can occur either when they are bent or when they burn out. They can burn out due to poor quality parts or poor quality of the mixture used.
If the vehicle engine overheats too quickly, then sooner or later the working surface of all valves begins to burn out (wear out). Another point is that the valves and their mechanisms have a return spring. If the return spring begins to wear out, the valve will begin to hit the piston during operation. In this case, the result will be the same as a damaged timing belt.
It is important for the vehicle owner to correctly diagnose problems with valves. The very first sign of an emerging problem is a decrease in the level of engine response, which manifests itself in a noticeable decrease in vehicle power. In some cases, tapping sounds are heard.
A common symptom of valve problems is black smoke coming out of the exhaust pipe. This problem is combined with increased engine oil consumption. The machine may also operate unstably when idling. It is difficult to diagnose this problem, since it is difficult to accurately determine the cause of the breakdown without disassembling the engine.
Engine specialists know a large number of examples in which a Priora arrives at a car service center with signs of broken valves, but in the end everything is fine with them. Therefore, in order to diagnose the car and remove the cylinder heads. Only then will it be possible to check the valves for sure.
Tools for work
In order to extract these elements, we need the following set of tools:
- Spark plug wrench 16 mm with rubber seal.
- 10mm wrench with ratchet.
- Ratchet handle.
- Extension. Without him we won't get to the wells.
Initially, the upper engine casing (plastic decorative trim) is removed. By the way, before doing this you need to remove all the ignition coils. To do this, remove the plug from each side and unscrew the bolts securing each of them. Next we move on to the candles. To do this, it is recommended to use a spark plug head with a rubber ring to grip the part from the well. At this stage, the extraction of candles can be considered complete.
Removing the block head
The cylinder head needs to be removed like this:
- fuel system pressure relief;
- removing the negative terminal of the battery;
- disconnecting wires from sensors;
- draining liquid;
- dismantling the rear engine mount;
- removing the valve cover;
- unscrewing the screws securing the mass harness;
- dismantling the wire going to the negative battery;
- removing the timing belt and dismantling the camshaft pulleys;
- removing the oil check guide tube;
- disconnecting the fuel supply tube to the ramp (you will need a 17 key);
- disconnecting all harnesses coming from the engine control unit;
- removing the 8 cylinder head mounting screws (you will need a 10mm hex wrench).
It is recommended to check the lower head mirror and its condition. In order to do this, you need to take a ruler and make sure there are no distortions.
Twisting force
During further assembly, pay close attention to the force with which you tighten them back. For a car like the VAZ Priora, the torque is 30-40 Nm. If you don’t have a torque wrench, you can use the traditional method. To do this, twist the candle with one hand until it stops. These efforts are quite enough to screw the parts into the well. By the way, if you lightly clamp the spark plug, it can simply shoot out while the engine is running due to the high pressure in the combustion chamber of the engine.
What about the cost? A set of new parts can be purchased at a price from 500 to 2 thousand rubles, depending on the manufacturer. For injection engines, choose products marked “R”.
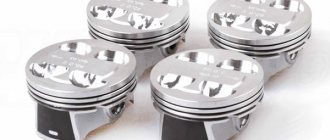
Characteristics of the part and signs of wear
A set of valves for LADA Priora is a set of 4-16 elongated metal products with disks that seal the combustion chamber and regulate the flow of fuel into it and the removal of exhaust gases. Engines are equipped with intake and exhaust valves. 2-4 of these products are installed per cylinder . The following signs indicate the need to replace them:
- Motor overheating.
- Reduced car power.
- Unstable operation of the machine at idle.
- Smoke from the muffler.
What's next?
The replacement of valves on the Priora (16 valves) does not end there. After unscrewing the spark plugs, you should unscrew all the bolts securing the camshaft, and then remove this part. There are two of them on the sixteen-valve Priora, and both shafts need to be removed. To do this, you will also need to remove the plugs located in the end part of the cylinder head. After the motor is disassembled, the valves are directly replaced. On the Priora (16 valves) it is done as follows.
After removing the camshaft, use a puller to remove the fastening “crackers”. It is recommended to place a small stand under the “plates”. How do you then replace the valves on the Priora (16 valves)? After removing these parts, the plate is removed along with the springs.
You should be very careful, as the spring force is quite large. If you are careless, they can jump off the plate. There is another part under the springs. These are stubborn plates. They also need to be removed. But this is done only after removing the valve seal. In order to dismantle it, we will use a special grip.
The dismantling process is as follows. We clamp the oil seal with a grip, while pressing it a little. After making a couple of turns left and right (at the moment of turning), we pull the oil seal up. It is not recommended to make such tilts with a pressed grip, as there is a risk of damaging the seating shoulder of the mechanism on the guide sleeve. That's it, we've done most of the work. Now all that remains is to remove the old valves and install new ones.
Why the valves bend on the Priora: let’s understand the reasons
Valve bends on Priora are a common problem that owners of modern cars from AVTO-VAZ often encounter. Such consequences occur because the pistons collide with the valves, and this ultimately leads to their deformation. Moreover, not only valves, but also pistons can become deformed.
Now about the reasons for such phenomena. It was already mentioned above why this happens. This is all due to malfunctions of the timing mechanism, or more precisely, bending of the valves on a Priora can only happen in two cases:
- If the timing belt breaks or slips. The reasons for this are very different: the life of the belt is exhausted, engine oil or coolant gets on it, which occurs due to a leak in the pump, jamming of the water pump, as well as a malfunction of the tensioner roller (promotes the belt slipping).
- If the timing mechanism is incorrectly adjusted, which happens when replacing the timing belt.
What happens in this case when the belt breaks or slips, thereby disrupting the synchronization of the timing parts. The following happens:
- In this case, the camshaft stops, and at the same time the valves freeze in the corresponding position;
- the crankshaft continues to move by inertia.
A few revolutions of the crankshaft are enough for the pistons to collide with the valve plates, and at the same time deformation of these parts occurs. This is exactly what happens. And now there is only one question left to figure out: why does this happen? After all, such problems did not happen on carburetor-type cars, and if the timing belt broke, then to continue driving, it was only necessary to replace it. Now, bending of the valves leads to the need to replace them on Priora, and this is not only a big expense (especially for owners of cars with 16-valve engines), but also time-consuming.
Interesting! Priors are produced with different types of engines, and in almost all modifications the valves bend when the timing belt breaks. Only one type of internal combustion engine (21114), which was installed on early Prior models (migrated from the “tens”), is not susceptible to this phenomenon. However, such engines are extremely rare on the VAZ-2170, since they were soon replaced by 21116 units.
In the past, valves didn't bend on cars, so why is this phenomenon happening now? The reason is that engineers (not just Auto-VAZ) are constantly improving power units. Such upgrades can improve characteristics such as efficiency and power, as well as reduce consumption. One of the ways to achieve positive changes in engine performance is to reduce the volume of the combustion chamber. Previously, the engine design was such that the valves were located higher and could not contact the pistons in any way. However, modern internal combustion engine manufacturers have abandoned such designs for a number of reasons described above.
Modern engines that are used on Priors, and these are 21116, 21124, 21126, 21127, use a modernized engine design. What happens in them is that if the valve stops while the engine is running, it collides with the piston. As a result, the weakest part of the valve, the rod, is deformed by the force of the piston. It is impossible to restore it, so it is definitely a replacement. Moreover, it is recommended to change all 4, 8 or all 16 valves on the Priora.
To prevent the possibility of valve bending on the Priora, auto-VAZ manufacturers tried to solve this problem by using pistons with recesses (grooves), due to which, in theory, the possibility of valve bending was eliminated. Some modifications of engines were equipped with such pistons, but they were soon quickly abandoned. The reason for this is the following disadvantages:
- heavy weight due to the complexity of the design;
- increased fuel consumption;
- power reduction by 5-7%;
- still bends the valves.
If you decide to replace the pistons on the Priora (with products with grooves) in order to reduce the likelihood of the valves bending on the Priora, then this is not recommended. The reasons for this are known: a decrease in engine power (and a noticeable one), an increase in fuel consumption and a drop in dynamics. In this case, it would be more correct to monitor the life of the timing belt (it needs to be changed every 60 thousand km) and choose only original parts (pump, belt, rollers).
What should I do to prevent the valves from bending?
Often, motorists solve this problem by installing a 124 type piston group. However, this replacement is not worth the money, according to reviews. After all, to do this you will need to remove the old piston group, take out the engine, disassemble it, remove all the shafts, and so on. At the service station they will charge you about 50 thousand rubles for such a procedure.
But there is a simpler and cheaper way - simply regularly diagnose the timing belt for defects and, if necessary, replace it with a new one. It is also worth noting that you should only buy a branded belt. Otherwise, there is a risk that it will break within the next 10 thousand kilometers. High-quality belts last 100-200 thousand kilometers and do not need to be replaced. Therefore, you should not save on such a responsible purchase. Well, the most reliable option is to use a chain instead of a belt (as on the ZMZ 406), but, unfortunately, this cannot be done on “Prior” engines.
How to change valves on a Priora with a 16 valve engine
From time to time, Priora owners need to change valves - this is due to the technical features of 16 valve engines. Typically valves bend after the timing belt stretches or breaks. With such problems, the camshafts either stop working or lose synchronization with the crankshaft. As a result of such a defect, the pistons begin to hit the valves, which causes their deformation.
In some cases, damaged and/or deteriorated pistons add to the problem of bent valves.
To ensure that the Priora owner does not have such problems, it is worth carrying out maintenance work on the vehicle and engine from time to time.
If the valves are still bent, you will have to change them yourself, or with the hands of a specialist at a service center. This is not the most difficult job if the vehicle owner has basic skills and understands how to repair his car.
The main signs that replacement of these parts is necessary
- A sharp drop in engine power.
- “Trippling” (when one of the cylinders in the engine stops working).
- Increased fuel consumption.
- Difficulty starting the engine even when “hot”.
Cleaning the injectors is a more affordable solution compared to replacing them with new parts; moreover, in both cases they will have to be removed. Below we will look at how to remove and clean this part from accumulated deposits.
First you need to remove the ramp. This is the part in which the injectors are located. When replacing, the engine itself must be cool.
So how do you remove the ramp? First, we de-energize the fuel pump by disconnecting the wires from it, start the engine and let it run on the remaining fuel that is in the fuel lines until it stalls. This way we will remove pressure differences from the gasoline supply system. Next, we safely remove the ramp, having previously de-energized it (the wiring is located on the interior side).
For further dismantling, unscrew the fuel hoses and all wiring connected to the ramp. These are the idle speed regulator, the pressure regulator, and the throttle position sensor. Using a hexagon, unscrew the 2 ramp fastening bolts. The last part can now be safely removed in a direction parallel to the ground.
How valves bend
When the timing belt breaks, the camshafts stop rotating, thereby leaving some valves open. At this moment, when the camshafts have stopped, the crankshaft continues to rotate by inertia, therefore, the pistons move, when the piston of the cylinder in which the valves are open rises up, it hits these valves and bending occurs.
Now the injectors
They are cleaned on a separate clean surface. For further work we will need the following elements: injectors, a 12-volt light bulb, a can for cleaning the carburetor, a switch and a pair of wires. We connect all the parts in series:
- Lamp.
- Nozzle.
- Switch.
Using a plastic clamp, we attach a hose 30 centimeters long at the outlet of the spray nozzle. Next, turn on the nozzle, and lower the end of the tube into the cleaning liquid. Then we monitor the change in jet spray. It can expand or contract (it all depends on the degree of contamination). After the jet has stopped changing, you can safely complete the cleaning process. The element is assembled in the reverse order similar to removal. For the future, it should be taken into account that such an operation must be repeated at least once every 30 thousand kilometers (as well as replacing spark plugs).
So, we found out how to replace valves on a Priora (16 valves) with your own hands. As you can see, this process is very complicated, but you can still cope with it.
Valves enlarged VAZ 2110, 2111, 2112 exhaust 29 mm (set 8 pcs)
Exhaust valves VAZ 2112 enlarged, diameter 29mm
The installation allows you to increase the filling of the engine cylinders, which helps to increase the power of the car.
In warehouse in Samara
Our online store tuningprosto.ru offers a wide selection of both standard and lightweight valves for VAZ engines. We sell only original valves produced by AvtoVAZ OJSC. Refinement (lightening) of valves is carried out using high-precision German equipment, which allows achieving a minimum error in weight during the lightening process.