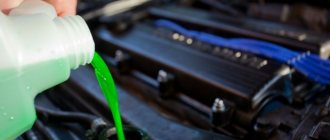
When to replace?
The manufacturer recommends changing the standard coolant after 75,000 km or 5 years of vehicle operation. These figures are typical only for a new car, since all SOD parts are new without traces of oxidation or rust. If the car was purchased on the secondary market, it is recommended to replace it with flushing the system immediately after its purchase. And subsequently change the antifreeze every 50,000 km or 3 years of operation.
An example of old antifreeze with rust
If the Priora was filled with antifreeze for some unknown reason, then it should be replaced with antifreeze. Antifreeze has more active chemicals that over time react with aluminum, thereby damaging the thermostat or pump.
How often do you need to change antifreeze on a Priora?
The coolant should be changed for the first time after 75 thousand km or after 5 years. Then replacement is necessary after 40 thousand km or after 2 years. Usually it is indicated on the expansion tanks or in the service book what brand of coolant is filled.
It is not recommended to mix different categories of antifreeze, since manufacturers add different impurities, which, when reacting, can precipitate, which will lead to rapid clogging and failure of the entire system. When changing the brand of coolant, car owners flush the cooling system. Flushing consists of several sequential operations to replace the fluid, but instead of antifreeze, a special flushing agent should be poured. After the fluid has been filled, start the car and let it run. Then drain the liquid and repeat the operation.
The procedure for replacing coolant is similar on all domestic cars and differs only in the volume of liquid and the location of the drain holes.
Coolant volume in Priora
The amount of coolant required for the correct operation of the Priora’s internal combustion engine is 7.9 liters. These figures are stated by the manufacturer, but are not a standard. The coolant container can be filled from 6.5 liters. Monitoring the presence and volume of antifreeze should be carried out after the engine has warmed up to operating temperature. If necessary, coolant must be added or pumped out.
Coolant level in the Priora expansion tank
The volume of coolant does not depend on the Priora engine model. Consequently, the amount of coolant will be the same for both an 8-valve and a 16-valve engine.
Cleaning the Cooling System
Experts recommend cleaning the system after each replacement. When you change antifreeze to antifreeze, or vice versa, switch from antifreeze to antifreeze, be sure to clean the system. What you may need for this:
- Plastic funnel and hose.
- A packet of regular citric acid.
- Distilled water (15 liters for Priora).
- A brush, sized to fit into the neck of a 5-liter bottle.
Please note that if the coolant is not cloudy, then you can only get by with distilled water. Otherwise, be sure to add citric acid. A good working fluid begins to lose color over time, that is, it becomes discolored, and a contaminated fluid always becomes cloudy.
Cleaning of the LADA Priora cooling system should be carried out after removing the air lock. Let water flow through the system through the open pipe. Using a brush, you can clean the expansion barrel separately. After this procedure, damage to the tank body is clearly visible. After cleaning the system is complete, you can add antifreeze.
Choice of antifreeze
You have the right to choose the liquid yourself, but it is not recommended to save on this. Low-quality coolant can freeze at low temperatures and damage the power unit. It is best to use medium-priced liquids starting from 600 rubles per 5 kg.
It is recommended to fill the fluid with the same color as before replacement. Red antifreeze is poured from the Priora factory.
List of manufacturers you can trust:
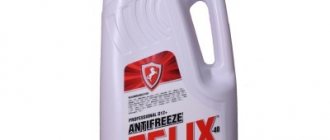
- Felix
- ShellZone
- NORD
- Sintec
- X-Freeze
Consequences of untimely replacement
Over time, the refrigerant loses its original characteristics, as a result of which it will not be able to effectively cool the power unit.
If the antifreeze is not changed on time, this is fraught with serious problems:
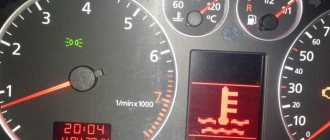
- The engine will heat up faster, and regular operation of the machine with an overheated engine can lead to its complete failure.
- The working fluid in the cooling system will freeze and it will be impossible to start the internal combustion engine in the cold season.
- The pressure in the lines may increase. Because of this, the oil seals and seals will be squeezed out, resulting in a refrigerant leak.
ICE malfunctions due to coolant
One of the most unpleasant coolant-related issues that motorists encounter is the loss of antifreeze from the expansion tank. At best, this happens due to a loose clamp on one of the pipes, and at worst, due to a breakdown of the gasket between the head and the cylinder block.
Reasons why antifreeze is lost:
- The clamps on the pipes are loose;
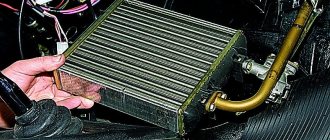
- The main radiator or heater is damaged;
- The expansion tank burst;
- The pump seal is leaking;
- The gasket between the cylinder head and the block is damaged;
What is a “spider” for Priora and what is it for?
Tuning the exhaust system of the Lada Priora includes replacing the exhaust manifold with a similar sports version, which is called the “spider”. The main difference between the original manifold and the spider is that the latter has a larger diameter and the same length of outlet pipes, which facilitates the rapid release of exhaust gases from the cylinders to the exhaust pipe.
This spider design prevents exhaust gases from flowing back into the combustion chamber, which increases engine power and performance. In addition, the manifold performs the function of purging the combustion chamber and filling it with a combustible mixture due to the pressure that is created when exhaust gases are released.
To tune the Priora exhaust system, a ready-made kit for installing a direct-flow Stinger exhaust with additional components that are perfectly attached to each other is often used. As a rule, the tuning kit includes the following parts:
- new muffler with nozzle;
- spider;
- resonator Stinger Sport with a pipe diameter of 51mm.
The need to install a “spider” on Priora arises when:
- long vehicle acceleration time;
- low engine power;
- failure of the old exhaust system, where installing a spider on a Priora is considered as an alternative to the old one.
On the tuning parts market there are many modifications of “spiders” made by different manufacturers. Some models are produced without oxygen sensors, which requires reflashing the electronic engine control unit.
There are spiders with long and short pipes, which are indicated by the corresponding numbers 4-2-1 and 4-1. These designations reflect the shape of the spider pipes, that is, 4 pipes merge into 2, and then into 1, in the second option, respectively, 4 pipes are immediately combined into one, which significantly reduces the length.
The most popular among car enthusiasts has become the long spider 4-2-1, which, unlike the short one, shows good results in a wide speed range. A short spider 4-1 is better suited for forced engines operating at 6-10 thousand rpm.
Mixing
Often people on forums wonder if it is possible to mix coolants. There is only one answer to this question - NO! Never mix different coolants, especially antifreeze and antifreeze. All these liquids have different chemical formulas and a reaction can occur between them under the influence of high temperature.
Consequences of mixing
It is allowed to mix antifreeze of different brands, but of the same colors.
What to choose: antifreeze or antifreeze
Both antifreeze and antifreeze are coolants. At the same time, antifreeze is the international name denoting coolants for cooling systems of internal combustion engines.
Antifreeze is also an analogue of antifreeze; it was developed back in Soviet times. It is noteworthy that the name TOSOL is not patented. As a result, today antifreeze manufacturers are actively producing products called TOSOL. Such a liquid today has nothing in common with the old Soviet development and is still the same antifreeze. It turns out that this is antifreeze, only domestically produced.
At the same time, TOSOL is traditionally used in domestic cars; it is poured at the factory during the manufacture of new cars. However, if you need to switch from it to antifreeze, no problems arise.
The main thing is to avoid mixing different types of coolants, and also to use products in the cooling system whose properties meet the tolerances of the car manufacturer itself.
Airlock
The design of the SOD on the Priora is made in such a way that the air plug in it is squeezed out independently by the system itself. When replacing antifreeze, the resulting air lock will come out of the system on its own when the car warms up to operating temperature and the thermostat opens to a large circle through the main radiator.
Therefore, all the myths about the airlock on the Prior are a bluff!
You should pay attention to the expansion tank plug, it must be in good working order, the pressure relief valve must function properly. Otherwise, the air lock will not be able to escape.
Filling new antifreeze into the VAZ 2170
To eliminate air and prevent the formation of an air lock in the cooling system, first you need to slightly loosen the throttle body hose clamp and disconnect it. New coolant is poured into the reservoir until it begins to flow from the hose removed from the throttle body. Once this happens, install the hose in place and tighten the clamp. Then you need to add antifreeze to the factory standard so that the top layer is halfway between the Min and Max marks.
Adding antifreeze to a Priora
If after replacing the fluid the system does not work correctly, it means there is an air lock that needs to be removed.
To remove the air lock yourself, loosen the clamp again and remove the hose from the throttle assembly. Open the tank lid, cover it with clean gauze or a bandage, then blow out the system until liquid appears from the hose, install the hose back and tighten the fastener securely. All actions must be carried out on a cooled engine. The method, which involves eliminating the air lock by disconnecting the hose from the throttle assembly, is not recommended due to the high pressure in the system on a warm engine.
Antifreeze replacement process
Replacing the coolant is not a complicated procedure, but it requires tools and a little skill in car repair.
The change process on engines with 16 and 8 valves is no different; all work is performed the same way.
Before replacing, you need to prepare a 1m long hose and attach a funnel to it with electrical tape. A funnel can be made from a plastic bottle.
Funnel with hose
What you need:
- 10 liters of antifreeze;
- Container with a volume of at least 10 liters;
- Ratchet, extension, head “13”, “19” and “10” mm;
- Crosshead screwdriver;
Work must be carried out on a cold engine; under no circumstances drain the fluid on a hot engine - there is a risk of serious burns, as the coolant temperature reaches 100 degrees.
Procedure for changing coolant
It is advisable to carry out the work on an inspection hole or overpass, but if there are none, you can do without them.
- We drive the car into the pit, remove the engine crankcase protection and unscrew the expansion tank cap.
- Using a ratchet and a 13mm socket, loosen the coolant drain plug on the engine block until it can be unscrewed freely by hand. We substitute the container and use a hose from the funnel to drain the coolant from the block.
- We screw the plug into place and now move the container under the radiator. On some Priora models there is no drain plug on the radiator, so antifreeze should be drained through the lower pipe.
- We unscrew the plug (or the clamp on the lower pipe and remove it) and drain the coolant from the radiator. Then we screw everything into place.
Next, it is recommended to rinse the system with distilled water and citric acid.
- For 10 liters of distilled water, pour 1 sachet of citric acid. Pour this solution into the expansion tank and start the engine.
- Let the engine run for 5 minutes, then stop it and let it stand for 5 minutes, then drain the solution.
- After flushing, fill in new coolant, warm up the engine, control the antifreeze level and rejoice. The process of changing the coolant is complete.
Level control and how many liters are needed
To understand how many liters of refrigerant need to be poured into the Priora 16 valves, refer to the car’s operating instructions. The technical manual states that the cooling system capacity is 7.8 liters. Therefore, exactly the same amount of refrigerant is poured into it.
The Prio Dvenar channel published a video in which it showed how the procedure for replacing the coolant in Priora is carried out.
Fluid level diagnostics must be performed on a cold engine. Open the hood and locate the antifreeze expansion tank. You will see two marks on the tank - MIN and MAX, the volume of liquid should be normal between them. If there are no marks on the tank, then it has a horizontal edge that shows the normal level of antifreeze. In order for the system to effectively cool the power unit, it must not be filled with less than the required amount of refrigerant.
Let's sum it up
As you can see, from this material it follows that there are no obstacles to independently replacing the antifreeze on the domestic LADA Priora. The set of necessary tools and materials is minimal. The knowledge required for replacement is all present in the manual. All that remains is to make a replacement.
Sources
- https://linhai-russia.ru/uhod-za-avto/kak-pomenyat-antifriz-na-priore.html
- https://avto-ritet.ru/remont/tonkosti-zameny-ohlazhdayushhej-zhidkosti-na-priore.html
- https://avto-idea.ru/remont/zamena-antifriza-lada-priora-kakuyu-ohlazhdayuschuyu-zhidkost/
- https://mirsmazok.ru/antifrizy-i-teplonositeli/zamena-antifriza-priora/
- https://KrutiMotor.ru/kak-zamenit-antifriz-ili-tosol-na-lada-priora-svoimi-rukami/
- https://Vaz-Lada-Granta.com/priora/zamena-ohlazhdayushhej-zhidkosti.html
- https://enginehack.ru/zamena-antifriza-na-priore/
- https://kamaz1981.ru/other/nado-li-slit-tosol-snimaa-vypusknoj-kollektor-lada-priora.html
What are the consequences of ignoring the replacement of the catalyst gasket?
One of the unpleasant features of operating Kalina with a damaged catalytic converter gasket is the increased noise level during operation of the exhaust system. In addition, the correct mixture formation is disrupted due to improper functioning of the oxygen sensor. All this causes the formation of carbon deposits on the elements of the power unit, timing mechanism, spark plugs, worsening their performance. Well, the most unpleasant moment is that after a short period, the exhaust gas neutralizer itself will simply fail.
Since the ceramic parts of the part are destroyed and clog small areas of the part with their fragments, reducing its permeability, more pressure will now be required for the free movement of gas mixtures through the collector.
Table of filling volumes
Filling volumes and names of liquids used in the Lada Priora car, according to the instructions of the manufacturer.
| Place for filling the required liquid | Name of infused liquid | Volume of infused liquid (L) |
| Engine crankcase (lubrication system for engine rubbing parts) | Automotive motor oils classified according to SAE 5W-30, 5W-40, 10W-30, 10W-40, 15W-40 | 3,5 |
| Gear box | Automotive transmission oil classified according to SAE 75W-90, 80W-85 | 3,3 |
| Interior heating and engine cooling system | Antifreeze or antifreeze with a freezing point of at least -40 degrees | 7,9 |
| Fuel tank | Gasoline with an octane number of at least AI - 95 | 43 |
| Hydraulic Brake System | DOT-4 brake fluid | 1 |
| Windshield washer reservoir | Special liquid for glass processing that does not freeze in frost (in winter), water (in summer) | 2,2 |
Recommendations
- Immediately after replacing the coolant, the engine must be warmed up, while simultaneously checking the heating of the lower radiator hose. It should be cold at first, but then quickly warm up. Its heating will indicate that the antifreeze is circulating normally in a large circle.
- Then the engine should continue to warm up until the cooling system fan turns on. After turning off the fan, turn off the engine and allow the engine to cool.
Using a spanner “13”, unscrew the nut and remove the wire tip from the contact bolt of the traction relay. Now, using a key set to “13”, unscrew the starter mounting bolts (3 pieces), and the starter is removed from the car. If there is a box with traction control, removal of the starter is not required.
Source
VAZ 2110: replacing the exhaust manifold on your own
Exhaust manifold VAZ 2110
When the car engine is running, smoke and the smell of gas may appear under the hood of the car. The reason may be that the exhaust manifold has burnt out. On a VAZ 2110, replacing the exhaust manifold is associated with metal burning. In this case, it is not recommended to delay replacing it. Since further operation of the machine may cause big problems. Replacing the exhaust manifold of a VAZ 2110 can easily be done with your own hands. Burnt holes are almost impossible to visually examine. When the engine is running, the hood should be open. Exhaust gases will escape, not into the exhaust pipe, but will whistle through these burnt holes. Gases can escape under the bottom of the machine, since the material burns out mainly in those places where the pipe is bent.
Self-replacement
Replacing the exhaust manifold of a VAZ 2110
- the car needs to be driven into the garage;
- hang a lamp with a safety light under the hood;
- before starting repairs, antifreeze must be drained from the tank;
- disconnect the battery terminals;
- take it out;
- put on a rack;
- disconnect the vacuum booster hose from the receiver;
- also disconnect the hoses of the electric pneumatic valve cover and the ramp pressure regulator;
- disconnect the chips of the throttle sensor, idle air control;
- disconnect the throttle valve cable;
- loosen the clamp on the air supply hose to the air flow sensor housing;
- disconnect it;
- loosen the clamps for attaching the hoses to the throttle pipe and ventilation of crankcase gases on the cylinder head cover;
Replacing the cathode collector for a VAZ 2110
- remove the hoses in pairs;
- loosen the crankcase ventilation hose clamp;
- remove it from the throttle assembly;
- In the same way, carry out further work with the coolant inlet and outlet hoses.
- loosen the clamp;
- disconnect the adsorber purge hose;
- remove the throttle assembly;
- remove the sealing gasket.
The receiver must be removed together with the throttle assembly. In addition, it is necessary to disconnect all inlet and outlet hoses and idle speed sensor chips from the assembly. Carefully check to make sure that all fastenings are completely loosened.
Unscrew the 2 nuts for attaching the fuel supply and outlet pipe bracket to the receiver. The same - 1 nut for fastening the receiver to the bracket, 5 pieces for fastening to the intake manifold. Remove the receiver, remove the gasket.
Why does antifreeze leave the cooling system?
If you notice that the liquid in the tank is constantly leaking and is below normal, it means that there is a leak in the system that urgently needs to be fixed. Regardless of how much fluid is lost, it is necessary to conduct a thorough diagnosis of such system parts as:
- expansion tank pipes;
- steam exhaust pipe from the radiator;
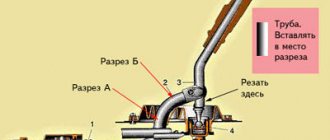
- throttle body and thermostat hose;
- all clamps.
Diagnostics of the throttle hose and thermostat Priora
If the connections are ok, check the tank housing, radiator and thermostat, it is possible that the problem lies there. In addition, sometimes antifreeze leaks out of the pump hole. If, after examining all of the above components, the leak problem remains, and the antifreeze also goes away, it is recommended to contact specialists who will conduct a more thorough diagnosis.
Article number and cost of antifreeze for Priora
According to factory standards, coolant of different brands cannot be mixed in Lada Priora. The Lada-A40 brand is suitable for Priora, its catalog number is: 88888100005082. The cost of the liquid is approximately 550 RUR. rub. for 5kg. There is also a list of acceptable liquids:
- Antifreeze G-48;
- OZH-K Tosol-TS;
- Macra Cool Stream liquid Standard/Premium;
- 2 types OZh-40 Tosol-TS/OZh-65 Tosol-TS.
What types of car malfunctions can occur due to antifreeze?
When the coolant begins to drain, the owner of the Lada Priora should think about why this is happening. Antifreeze leaks often occur due to mechanical damage to the cooling system. In the worst case scenario, the engine overheats and the cylinder head gasket burns out.
The car owner noticed that antifreeze was constantly flowing, reasons:
- Leak between block and cylinder head. In this case, you can tighten the bolts better.
- When the radiator is damaged. You can try to replace it, but there are times when only repairs are required.
- The water pump has become unusable. The situation can be corrected by replacing the pump.
- The pipes are damaged. Initially, you need to tighten the clamps; if the problem does not go away, you can replace the hoses and pipes with new ones.
- The expansion tank of the automobile cooling system is damaged. There is only one option - replace the tank.
- Malfunctions can also be short-term in nature:
- There is scale on the cooling jacket; it can also be seen on the pipes and on the walls of the radiator. Flushing the system will help. Next, fill in new high-quality coolant.
- The existing antifreeze circulates poorly through the system. In certain cases, the pump, and in some cases the entire water pump, needs to be replaced.
- When the car owner first notices a low coolant level, he needs to top it up to the level. If the leak becomes regular, the system needs to be checked for leaks.
How to choose a coolant?
Answering the question of what antifreeze to use in Priora, the manufacturer did not provide a large assortment to its users. It is best to use the Felix-40 cooler. You can use other brands, but this is not recommended. The engine system may wear out in a shorter period of time. As a result, you will have to contact the service for global repairs and replacement of parts.
To find out what kind of antifreeze your car uses, look under the hood. There should be a barrel with a sticker next to the fuel compartment.
If you are using antifreeze from another manufacturer, it is recommended to study its characteristics. It must meet international quality standards.
How to check the fluid level and how much will be enough?
To determine how many liters of coolant are needed to fill the tank, carefully read the vehicle's owner's manual. You will need approximately 7.8 liters. Some car owners prefer to fill a little less - 6 liters.
You can check the antifreeze level in the tank even on a cold engine. To do this, lift the hood lid. You will see a tank. There are two marks on it with a maximum and a minimum value. The fluid level must be within these marks.
If there are no recognition symbols on the tank itself, look for them nearby. There should be a scale that indicates how much antifreeze is in the tank on a Priora with 16 valves. For the engine to operate properly, the level of cooling fluid must remain stable.
