A car is a fairly mass-produced product, which is due to the complexity of its design from scratch. And although recently new technologies have appeared that make it possible to automate this process, there are also opposite trends. For example, the use of universal platforms, on the basis of which all new models are designed. In any case, today's situation cannot be compared with that observed 30 years ago, when most cars were similar in appearance, like twins. Today, in terms of exterior diversity, everything is much more optimistic, but as for the interior design, here, with the exception of elite models, there is much more monotony. Therefore, every car owner strives to somehow individualize his vehicle, to give it a bit of exclusivity. Akvaprint is a technology that provides such an opportunity, and for relatively little money. We will try to tell those who want to make their car unique, different from others, about how aquaprint is made, what tools, materials and equipment are required for this.
Rules for performing aquaprint.
What it is?
Aquaprinting of parts began to be used in Japan approximately 40 years ago. And now in Russia the method is in demand among car enthusiasts. Special pattern transfer technology allows you to create unique surfaces with:
- wood texture;
- the plane of the stone;
- reptile scales.
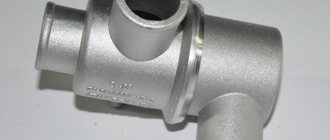
Carbon fiber trim is often chosen for sports cars. Metal and plastic elements of the interior of exclusive cars are designed to match the structure of the leather and seats.
How is aquaprint made? The technology is:
- surface cleaning;
- applying the main shade and preparing the film;
- film activation;
- immersion in containers to transfer the image to the part;
- drying and varnishing.
To ensure that the coating is evenly and efficiently distributed, the image textures are adjusted according to parameters several centimeters larger than the plane of immersion of the element.
Immersion printing training
Before you make hydrographic printing, you should remember that the advantages of this technology are resistance to adverse external factors, lack of seams, multiple options and durability. That is, the appearance of a car or other item for 10-15 years will depend on the accuracy, attentiveness and, often, taste of the entrepreneur.
Therefore, at the very beginning of organizing an enterprise, it is necessary to take a training course in order to perfectly master the application technique.
It is worth noting that immersion printing technology is not particularly difficult and consists of two main stages:
- placing a special film in the solution;
- applying a film to a part to apply a pattern.
But it is better to gain an understanding of the process through on-the-job training. You can take advantage of master classes that exist on the Internet.
What is decorated with this method?
Aquaprint is also called hydrographic, impression or hydrographic printing. This is an effective decoration method that allows you to achieve high-quality results. Typically, the technology is used to decorate cars - external and internal parts. The use of hydrographic film allows you to achieve a unique appearance of transport. This will also protect against theft, since cars with noticeable designs are stolen less often.
The film attaches well to metal, plastic, wood, and glass. On each material, the image lasts for a long time after being fixed with varnish and subject to the decoration technology. Such an image does not deform for a long time even from temperature and moisture. How aquaprint is made is described below.
Organizational Plan: A Step-by-Step Guide
Opening a project involves the following procedure:
- Conducting marketing research in order to obtain information about the number of companies providing similar services in a particular city and their pricing policy.
- Development of a detailed business plan containing all financial calculations.
- Search for the area where this work will be carried out.
- Hiring a specialist.
- Registering a business with a government agency, choosing a legal form.
- Purchase of equipment and consumables.
- Conducting an advertising campaign using various methods.
Registration of type of activity
When registering a company engaged in applying immersion printing, the status of an individual entrepreneur will be sufficient. The registration procedure consists of several stages:
- preparation of necessary documents (passport, application for registration of activities, TIN, receipt of payment of state duty);
- submitting a package of documents to the tax authority;
- choice of taxation system;
- receiving a certificate of registration within five working days.
In addition to obtaining documents, for work you will need:
- permission from SES and fire inspection;
- certificates for materials used in the process of applying hydrographic printing.
When drawing up an application for registration of an activity, you must indicate one or more OKVED codes, in this case – 25.61 (Metal processing and coating of metals).
Search for premises
At the beginning of the activity, a room with an area of 50 m2 will be sufficient; in the future, in order to create optimal working conditions, it is recommended to expand to 200 m2. Communications must be available:
- circuit;
- heating;
- cold and hot water supply;
- ventilation system.
Since during the work you will have to deal with caustic substances, it will be important to equip a high-quality hood
Purchase of equipment for immersion printing
To provide hydrographic printing services, you will need appropriate equipment, which may be special or additional. The first option includes:
- A tank containing at least 500 liters of liquid must be connected to a water supply and drainage system. In order to maintain the desired water temperature, you will need a heating device and a thermometer, and for purification - a filter.
- Films specially intended for decoration (not construction). This material should not be wrinkled or have scratches, since it is on it that the image chosen by the customer will be applied.
Additional equipment you will need to purchase:
- Spray guns - with their help, the base color and decorative pattern will be applied to the film. Due to the fact that these two types of work are performed with different reagents, each operation will require a separate device.
- Activator – for attaching the applied pattern to a specific part.
- Sanding machine - to process the finished surface.
- Additional sink – for washing finished products.
- Drying chamber required at the last stage of the technological process.
Consumables
In addition to equipment for applying hydrographic printing, you will need the following consumables:
- A primer designed to improve adhesion so the base paint adheres well to the surface.
- An activator that helps fix the image on the part.
- A varnish that acts as a finishing coat. The material protects the image from the negative effects of ultraviolet rays, water, and mechanical damage. Depending on the desired result, the varnish can be transparent or have a tinting effect.
You will also need masking tape, a compressor and sanding paper for the work.
Staff
Immersion printing technology requires certain skills that hired specialists must have. When placing strict demands on them, it must be taken into account that a highly qualified master will not work for a low salary. The company will need workers to produce water prints, as well as to perform decoration.
Premises requirements
Aquaprinting can be done at home, without the participation of a specialist. Decorating things is allowed at home if it comes to small details. It is more convenient to carry out hydrographic printing in a utility room or garage with an area of at least 20 square meters. m. The main thing is that there is a container for work, where the part to be decorated can completely fit. Moreover, the container must be installed stably so that it does not swing, otherwise the design will be transferred unevenly.
In the room where hydrographic printing is planned, there must be hot water - connected or heated. This is due to the fact that to decorate with film, the container is filled with water at a temperature of at least 35 degrees. Hydraulic printing is a simple and inexpensive procedure that is also accessible to beginners.
Materials and equipment
How is aquaprint made? First you need to prepare everything you need for work. Used or new equipment can be used. Equipment for water printing will require:
- a tank that will be sufficient to immerse the part;
- containers for washing finished decorative products;
- special film for image transfer;
- a set of devices and tools for preparation - roughing and grinding;
- activators of film, paints and varnish;
- painting gun - spray gun or compressor with a spray gun.
The surface with old worn paint or with chips is sanded and sanded before priming. Having removed dirt and roughness from the part, you need to degrease the surface and apply the base color.
Since the immersion printing process requires maintaining a temperature (29-32 degrees), a thermometer (mercury or alcohol) and an electric industrial boiler with a heating sensor are required. The thermometer must be fixed on the surface of the liquid. A boiler is needed to temporarily turn on and heat water.
To carry out aquaprinting with your own hands, you can use an old bathtub. You can make the container yourself from a barrel, sawing it vertically, and also installing it on clamps in the form of a platform. The second half can be adapted for washing products.
To drain the waste liquid, wash the tank and fill the bath, a pipeline with a drain and a water supply with taps are installed. If there is no central connection for communications, then a special filter and pump are installed in the pipeline. It is necessary to install an additional reservoir into which the filtered solution will be pumped. This helps to carry out the process according to the principle of circulation of filtered liquid.
The work can be done at home if you follow the aquaprint technology. It is important to familiarize yourself with all the nuances in advance. Only after this can you begin to do the work.
Workshop workers
There are two ways to organize the activities of an immersion printing workshop: mastering the technology yourself and finding an experienced specialist.
In the first option, the entrepreneur will have to look for training courses on this topic: many suppliers provide them for free when purchasing a set of equipment. It is also advisable to study master classes and videos published on the Internet. Finally, you can purchase a starter kit for aquaprinting, which includes several types of films and all the necessary reagents.
The second option is more difficult to implement: even in a large city you can only find a couple of dozen immersion printing experts. Therefore, the business owner will have to either send an apprentice to the same courses, or use a third way - learn how to apply the image yourself, and hire an experienced car painter to prepare and paint the parts: fortunately, such masters are more common than waterprint specialists:
Employees of the aquaprint workshop
| Job title | Rate, rub. | Qty | Amount, rub. |
| Painting specialist | 25000 | 1 | 25000 |
| Accountant at ½ rate | 10000 | 1 | 10000 |
| Payroll tax | – | – | 10500 |
| Total: | 45500 | ||
Preparation
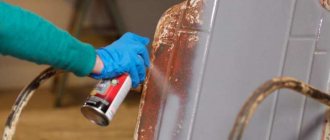
How is aquaprint made? First, the surface is cleaned with coarse sandpaper. Rubberized areas are removed and surfaces with corrosion are sanded with primer and varnish.
Cleaning from oil stains and dust is required. It is convenient to process a large area with a grinding machine, and for small, hard-to-reach areas of bends, grinding is carried out manually or using a drill with a small grinding attachment. High-quality grinding can be done with a special paste or automotive primer.
After cleaning the parts, they are degreased with pure gasoline or alcohol. Then automotive primer is applied. After drying, secondary sanding with sandpaper and degreasing is performed. Then you can proceed to the next stage.
Film
To create an aquaprint at home, fill the container with water and heat it to 35 degrees. Then, according to the sketch of the part, the film is cut based on the 3D geometry of the form.
Guessing the area for complex geometry is not so easy. Craftsmen make sketches of the dimensions of the part in advance, perform development and drawing of the surfaces of the planes. The size of the film is made with a margin; small notches need to be created on the edges in increments of 2 cm. The activator is prepared for work and the pattern is transferred.
How much can you earn from hydrographic printing and how quickly does the investment pay off?
To open a project you will need approximately 100,000 rubles, 70,000 for the purchase of equipment and 30,000 for consumables. This is provided that at first the garage will be used as a production area.
The cost of one square meter of water print is 1,100 rubles. The cost of work is calculated for each item separately and depends on the surface area and the degree of complexity of the technological process. On average, the cost of one completed order ranges from 7,000 to 16,000 rubles. Net profit minus tax and current expenses is 8,000 rubles. A company can fulfill from 10 to 15 such orders per month and have a net profit of up to 100,000 rubles. The most profitable work will be with cars and motorcycles. Taking into account the fact that the workload will be low at first, the company will be able to fully recoup the initial investment after 4–5 months of production activity.
Transferring a drawing
This is the next stage of do-it-yourself waterprinting at home. The prepared film is placed on the water in the bath. To do this, fingers are dipped and an impression is made on the edge of the film. It is important that the sticky surface rests on the surface of the water.
The notches made on the film are gradually rolled up. If bubbles appear under the surface of the film, carefully blow them out. 2 minutes after turning the areas, apply the activator with a spray gun using S-shaped movements. After 10 seconds, the film dissolves, and a jelly-like mass with a pattern remains on the surface.
Then the prepared part is immersed in the bath at an angle of 45 degrees. All movements must be neat, smooth and uniform. After immersion, the parts are taken out. You need to inspect it - the paint should lie evenly.
DIY crafts for car enthusiasts
Technology of puttying and painting plastic bumpers
We offer instructions for making an aquaprint yourself, without the use of special equipment, a spray gun, etc. One set for aqua printing will be enough. It consists of the following:
It’s worth noting right away that aqua printing should not be considered a simple film. This is the application of paint in a special way on the surface of a jelly film.
So, the technology for creating aquaprint:
- take the part on which you plan to apply the design and degrease it. Apply a matting sponge on top. — Apply marks to the workpiece. Due to them, the primer and paint will adhere well. — Degrease the part again, and then apply a layer of primer.
Shake the can of primer well and spray at a distance of 15 cm from the surface of the part. Apply one coat and leave to dry for 10 minutes. - Start applying paint. Move your hand away from the part by 30 cm. In this case, paint the surface in 2 or 3 layers. Be sure to allow 5 minutes for each coating to dry.
— After final painting, leave the part until completely dry. — At this time it is necessary to prepare the film. You need to find out which side is glued. To do this, wet your finger in water and press on the film. The side of the film to which the finger is glued will dissolve in water. — Unfold the film, place the part on top to measure out the required piece. — Cover the desired part of the film with tape, you get a kind of frame.
— Cut off part of the film, not forgetting about the reserve. Place the roll of remaining aquaprint in cling film for storage. — Prepare the part for printing. This means that you need to make a mount that can hold the part during the process.
— Now you should prepare a container with warm water (22–29 degrees). Place the film there, sticky side down, being careful not to form bubbles underneath.
— Leave the aquaprint in the water for 2 minutes. — Then you should shake the can with the activator and apply it to the film from a distance of 20 cm. One layer is sprayed, but it must be uniform, without gaps, otherwise a defect will result. — Wait 30 seconds for the film to activate, then place the part on the drawing in water.
— Take out the finished part and rinse under running water, washing away the remaining gelatin film.
— Apply a layer of varnish, and do it twice. The varnish will protect the completed drawing, make the image high-quality, and the surface glossy.
It should be sprayed by moving your hand 30 cm from the surface of the part. Allow at least 10 minutes between each coat. Do not touch the part with your hands during drying. The part will dry completely after 5 hours.
Author; Matula Mikhail
Popular;
- How to sheathe interior parts with carbon fiber
- Repairing a plastic part of a car with your own hands
- We get rid of corrosion without welding
- Do-it-yourself liquid rubber coating technology for cars
- Method of painting alloy wheels with liquid rubber
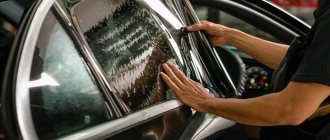
- Method of tinting a windshield with athermal film
- A simple way to imitate wood on a plastic part
- How to tint a car yourself?
Difficulties
Aquaprinting at home is a simple technology. But it has features that you need to know in order to avoid mistakes:
- If the water in which the film is placed is cold, then folds will form on the product. The best temperature is 30-35 degrees.
- It is important to choose the right amount of activator. If there is not enough of it, the coating will peel off, and if there is too much, it will smear. There should be enough developing component so that the film stretches without wrinkles.
- Washing must be done with clean water, otherwise the image will be damaged and the varnish will be applied unevenly.
- Preparing the product for applying the image must be done carefully. If there are traces of rust and dirt, the image will not transfer smoothly.
Stages of work
We prepare the product - remove roughness and unevenness, treat it with a primer. The color of the base may vary; to achieve the desired result, apply enamel of the desired shade; We prepare the film - select the film with the application texture we need, cut out the required area (with an allowance of 3-5 cm) to cover the part. We lower the prepared film into a technological bath filled with water; We activate the film - carefully, according to the technological process, we apply an activator to the film, which prepares the film for transfer to the product; We apply the film - the processed product, prepared for application, is immersed in the bath
For the correct transfer of texture from the film to the part, it is very important to follow the technology: the required angle of inclination and speed of immersion of the product; We apply a protective coating - after applying the film, the part is washed and dried. Then the surface of the part is treated with varnish. The number of layers is discussed individually.
The number of layers is discussed individually.
Aquaprint as a business
Before opening a business providing these services, you need to familiarize yourself with the pros and cons of the activity. The advantages include:
- high demand;
- low competition;
- good profit;
- lack of large investments.
Due to the high demand, hydrographic printing is highly profitable. People's desire for unique things makes such a business in demand. After all, many motorists want to have a car with an unusual exterior. Waterprinting is also done on mobile phones, laptops and other things.
Today, this business is not very widespread, so it will become a source of stable and high income. As practice shows, this area is profitable due to its low cost. If a person has printing skills, then he can achieve success without large investments.
One of the shortcomings of the business is the lack of experienced specialists who can do the work themselves. If a novice businessman has the skills of this technology, then he can teach those who want to become familiar with the principles of aquaprinting.
Workshop assortment
Due to the lack of a formed market, there is no single pricing policy for immersion printing services: each entrepreneur himself determines how much an aquaprint costs. Most often, the workshop price list sets fixed rates for standard parts of known shapes and sizes, and the processing fee for non-standard elements is determined taking into account their dimensions. Here are the average prices in the Moscow region:
Cost of aquaprint
| Product | price, rub. |
| Car interior detail, per cm² | 4–6 |
| Full interior, sedan | 8000–10000 |
| Full interior, SUV | 10000–12000 |
| Full interior, golf class | 5000–7000 |
| Body element, per cm² | 4–6 |
| Motorcycle helmet, bicycle helmet | 6000–8000 |
| Parts of a gun or crossbow | 10000–18000 |
| Musical instrument, per cm² | 6–8 |
| Smartphone case, mouse, laptop cover, per cm² | 8–10 |
| Set of wheels R15 | 15000 |
| Set of wheels R16 | 16000 |
| Set of wheels R17 | 17000 |
| Set of wheels R18 | 18000 |
| Set of wheels R19 | 19000 |
| Set of wheels R20 | 20000 |
| Set of wheels R22 | 22000 |
In general, to determine the cost of work, entrepreneurs are guided by the following rules:
- When calculating the area of a part, the maximum length and width are taken into account;
- The presence of holes does not affect the cost;
- If it is necessary to putty chips and scratches, the price is increased by 20%;
- With a large area of elements, it is practiced to provide a discount of up to 50%.