What is it for?
Many drivers, especially beginners, want to get their car tinted.
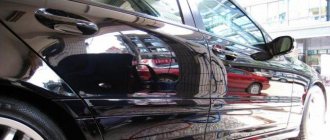
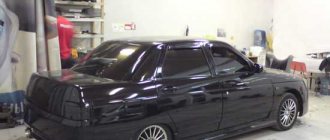
Black windows give even a budget car a more attractive look. To be tinted “to zero” is the pinnacle of the dreams of some categories of motorists who are not afraid of problems with the Road Patrol Service. In addition to the aesthetic component, tinting solves a number of practical problems. For example, the film does not allow sunlight to pass through, which is especially important in summer. This way the interior heats up less and interior elements do not fade. The next reason is impenetrability to prying eyes. Every driver perceives a car as a personal space and does not want passers-by and other motorists to examine the interior and himself.
Should I do it myself?
The easiest way is to take the iron horse to a car repair shop, where they will quickly and efficiently cover the windows with a protective film. But you have to pay for pleasure, which no one wants to do. An attractive option is to make it yourself at home, especially since at first glance there is nothing complicated about it. There is no need to crawl under the hood or understand the components, everything is on the surface. What could be easier than sticking a film?
You can actually do the tint yourself. There are many videos on the Internet with detailed instructions on how to make it yourself. However, you need to remember some nuances. This way there will be no problems with the law, and the aesthetic appearance of the car will be combined with a comfortable stay inside.
Glass preparation
Before tinting the rear window of a car with your own hands, you must thoroughly clean its surface, because the glass should be as smooth as possible and completely free of chips or deposits. If there are any radio or cellular antennas glued to the glass, then in this case you will have to either bypass them or completely dismantle them.
What and how can you tint?
Even twenty years ago, seeing a completely tinted car was not such a rarity. Nowadays, traffic rules quite strictly limit the covering of car windows. Incorrect installation of tinted films will result in a fine of five hundred rubles and, of course, removal of the tinting.
To prevent such trouble from happening, you need to remember two things. Firstly, all windows are allowed to be tinted, including the front window. Secondly, different types of glass have different capacity limits. According to GOST, the windshield should transmit 75% of the light flux, the front (driver and front passenger) - 70%. This requirement was introduced because tinting limits the driver’s visibility behind the wheel, and, accordingly, increases the risk of an accident. Therefore, there are no throughput standards for rear windows. The only thing is that car enthusiasts cannot use mirror-type tint film.
Interestingly, law enforcement agencies have no questions about the factory darkening. Now some brands are rolling out cars with tinted windows. Such darkening is considered “weak”, below the values permissible by GOST, since international standards are much stricter in this matter than native legislation. Therefore, some car owners are not happy with it. But at the same time, it is one of the most durable and wear-resistant. At the manufacturing stage, special components are added to the glass to darken it. Together with the film, you can completely block access to light into the car interior.
How to choose a film?
The choice of darkening agents must be approached as responsibly as possible. A good film is durable and corresponds to the stated ability to transmit light, but it is not cheap. So there is no need to save money here. Moreover, the car owner has already saved on installation by doing all the work with his own hands. Again, you need to remember that tinting is done individually for each glass, which means that at least three sets of films will be required.
In addition to the throughput written on the packaging, you need to look at the color of the canvas. A film of a dark gray shade will be optimal for rear row windows. It will protect passengers well from ultraviolet radiation and prying eyes. At the same time, it must be matte and not reflect the appearance of an interested buyer in the canvas. A regular film will suit a black car, but there are other variations. For example, there are tints with a “transition” on sale. In such films, the colored edges smoothly blend into the classic black fabric. This film will harmoniously combine with yellow, red, blue and bodywork.
You also need to navigate the types of films. They are:
- Painted. Cheap and easy option. Paint is added to the canvas, thereby creating darkness. Does not create a mirror effect, but is not durable. Burns out quickly. Suitable for drivers who want to try car tinting for the first time.
- Metallized. They contain a suspension of some metal, usually aluminum. The layer is placed between the shielding layer and the painted layer. This trick allows you to significantly extend the life of the tint; the film does not fade under ultraviolet light for a long time.
- Spatter. The technology for producing metallized films has been improved; now tints are created through ion exchange. In addition, with spatter films, various impurities are applied to the canvas. This product has a very aesthetic appearance and justifies the high price with its durability.
- Products from Infiniti. The Japanese manufacturer applies metal spraying to the outer layer. This trick improves the reflectivity of the film (transmits no more than 30% of the light flux). In addition, it has a mirror effect. Therefore, it is better not to drive in Russia with such tinting unless the car enthusiast wants to run into a fine.
- With the transition. The tint layer will be applied unevenly over the entire canvas. As a rule, the film in the upper part has the greatest reflectivity. At noon, when the sun shines most strongly, the driver and passengers will not worry about a celestial body shining in their eyes. At the same time, visibility is reduced much less than with traditional films. It can be considered to some extent a compromise.
- Energy saving. Innovative technology removes glare, that is, reduces strain on the driver's eyes, and prevents ultraviolet rays from entering the car. Interestingly, the glass appears transparent.
- Carbon type. Expensive and rare. The canvas is placed in a vacuum and the surface is sprayed with graphite. This improves the film's performance. Does not glare, does not reflect, does not transmit light, durable. The only downside is the price.
Based on functionality, films are divided into:
- Shockproof. Protects people from splinters if the glass breaks.
- Sun protection. Everything is simpler here - preventing ultraviolet rays from entering the interior of the car.
- Decorative. Typical for owners of premium car brands. Emphasize the style and individuality of the car.
By capacity:
- 5% - full tinting. It is impossible to see anything from the outside, even if you look closely. The best option for rear windows.
- 10% - individual outlines are visible in the car’s interior, but nothing more.
- 15% - silhouettes with little detail are visible. Not much different from the previous version.
- 20% - passengers' faces are visible.
- 35% - small objects and people are visible quite clearly.
- 50% and above - good visibility from outside the car. Nothing can be hidden from prying eyes.
By manufacturer. The leaders on the market are films from American manufacturers. They are of good quality and high price. Of course, the Russian market is not limited to American goods only. Recently, stores have been flooded with products from China, Israel, India, and South Korea. The most popular brands among buyers are:
- Johnson;
- Infinity;
- SunTek;
- SunGuard;
- SunControl;
- LLumar;
By price.
The cost of materials is a key factor when purchasing them, and tint film is no exception. The assortment in stores is large, but the rule “a good product cannot be cheap” applies here too. High-quality tinting is made from expensive raw materials using modern equipment. Cunning auto repairmen like to offer customers cheaper tinting, but you shouldn’t believe them. Such a film will most likely last a year or two, after which the car owner will again worry about the problem of bright sun. If you plan to have tinting for as long as possible, then there is no point in saving, only unnecessary expenses.
The cost of film is determined per roll or per linear meter. A good painted option costs from $10 per meter. A priori, metallized film will cost one and a half to two times more. High-tech products (energy-saving, carbon and others) cost from fifty dollars per meter. You also need to consider the cost of the car. There is no point in buying expensive protection for a budget brand car, since the owner will sell it before the film wears out its life. And on the contrary, it’s a pity to put a cheap painted analogue on a car that costs several million rubles.
Characteristics of removable tinting
Removable tinting is a film that has a static effect of adhering to car glass. In terms of external characteristics, it differs slightly from ordinary film. The only noticeable difference is that after gluing it there is a clouding effect, which disappears as a result of shrinkage.
The main characteristics of removable auto-tinting include increased resistance to low temperatures and mechanical stress. During long-term use, the film is not damaged or deformed. Removable tinting perfectly protects the interior from ultraviolet radiation and does not interfere with normal illumination.
Plastic removable tint option
A distinctive feature of removable film compared to conventional film is the possibility of reusable use without loss of proper appearance and effectiveness. Regardless of the number of removals and re-installations with your own hands, it will protect the interior of the car and hold firmly to the windows.
At the same time, it is worth knowing that, most likely, a fine cannot be avoided when stopped by an inspection officer. Judicial practice shows that in most cases the court takes the side of the traffic police, relying on the fact that at the time the illegal actions were recorded (in our case, the presence of tinting not in accordance with GOST), the driver had already violated the norms, that is, the offense had already taken place.
How to prepare for covering with blackout film?
You should thoroughly prepare for pasting: get tools, film, soapy water. To prepare soapy water, just pour half a dozen drops of detergent into a one and a half liter volume of clean water.
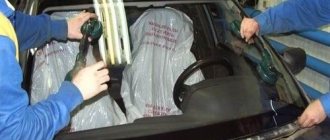
When everything you need is at hand, you should proceed to dismantling the glass. Gluing films without first dismantling them is a very difficult undertaking and entails a considerable risk of ruining the work. After removing them, the glass should be washed with soapy water. Some contaminants may not respond to a soap solution, in which case it is necessary to resort to a solvent and rinse again with soapy water.
Now the windows are ready, they are clean and shiny, like from the factory, and you can start installing the tint. Soapy water will still be useful during gluing, so it is better not to put it in the far corner.
Required Tools
If you have no experience in applying tinting to car windows, it is better to buy an inexpensive tinted film for your first experience. However, you should not take a cheap one - in such a canvas, not only the quality of the glue, but also the top coating is often low. You need to take the film coating “with a margin”, but a small one - taking into account future adjustment. In addition to the main material, for self-tinting you will need to prepare the following:
- liquid detergent or soap;
- water;
- spray;
- cloth napkins;
- sharp blade, construction or stationery knife;
- powerful hair dryer;
- plastic staple – for smoothing and removing bubbles from under the film;
- sponge for washing (before gluing, the work area is cleaned and degreased).
Attention! Tinting should be done in a garage where there is good lighting. Work cannot be carried out outside, as dust, wind and insects can spoil the result.
Algorithm for installing darkening film
Action 1. Pattern.
“Measure twice, cut once” says a popular saying and it is completely applicable to car window tinting. At this stage we will need a felt-tip pen and a stationery knife.
The film is applied to the glass and the edges are marked with a felt-tip pen, allowing 5–8 mm as a tolerance. In the next step, use a knife to separate the excess from the selected shape.
Action 2. Pasting.
Now let's move on to the central action. The soap solution came in handy again. Use a spray bottle to spray its contents onto the glass. This makes it easier to move the film and adjust it to the glass. Then you should wash your hands and apply a small layer of soapy water to your fingertips.
With one hand we hold the cut piece of film, and with the other we remove the packaging cover from it. Wet the exposed surface with the adhesive layer in a soap solution. And only after that we carefully apply the film to the surface of the glass. It's okay if wrinkles appear on the film. The main thing is to remove the transverse irregularities; the longitudinal ones can be dealt with at the next stage.
Step 3: Ironing.
Now it's time for a spatula and a hair dryer. Use a spatula to smooth out uneven surfaces and vertical folds. It is necessary to move the tool from the center to the edges of the glass, while at the same time blowing the object with hot air from a hairdryer. This is not an easy task, so it is best to do the tinting with an assistant. Then you can divide the responsibilities. One warms up the glass, the other smooths out wrinkles and irregularities.
Ideally, the film should be completely adjacent to the glass, but in reality, the film is rarely applied without flaws. The surface of the glass may become covered with bubbles from air and water trapped inside. This is where you need to put the needle. Use it to pierce the bubbles and level the area with a spatula. If the puncture is applied carefully, the hole will be very small and will not damage the appearance of the car.
The treated glass must dry, and the car owner, without wasting time, takes on something else. When the entire set of windows is tinted, carefully insert it into place.
Material cutting
To properly stick the tint film on the car glass yourself, you need to cut it precisely. For this:
- attach the purchased material with the side of the protective layer to the outside of the glass;
- align and secure the film (you can, for example, use magnets);
- Make markings with a thin marker with an overlap of 7-15 mm;
- Using a stationery knife or special tinting blades, cut the material as evenly as possible along the marked lines.
You can also first make patterns according to the size of the glass from any suitable materials, and then cut out the film itself using them. It is important to remember that the horizontal pattern of the pattern is always laid out along the length of the roll.
Once you have cut out the desired amount of tint, unevenly shaped windshields and rear windows need to be heat molded. It will help you correctly glue the film to the car so that the tint lies exactly and fits perfectly.

