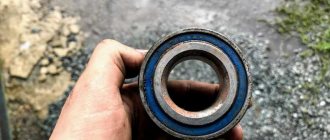
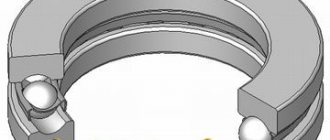
The purpose of the bearing is to reduce the rolling resistance of the vehicle. Therefore, wear and tear is a normal process that occurs as a result of vehicle operation.
In modern passenger cars, two types of wheel bearings are used according to requirements:
- Ball.
- Roller (conical).
The versions of these products used vary depending on the application and load.
These bearings are designed and rated to withstand high loads and environmental levels. Severe radial (caused by potholes) and axial (caused by hitting curbs) impacts are their biggest enemies. Extreme cornering also reduces wheel bearing life due to the high axial lateral forces generated. In addition, the product is exposed to factors that shorten its service life, such as:
- Corrosive water;
- Dust and sand that penetrate the housing;
- Speed inappropriate for rough roads.
The most common sign of wear is its noisy operation, as well as the noise of mechanical friction and vibration transmitted to the body and steering system.
Replacement
The work must be carried out using the necessary tools. There are two options for replacing the wheel bearing - with subsequent wheel geometry and without its need. The replacement is similar for all VAZ cars (front-wheel drive).
Tool you will need:
- Ratchet with head "7", "10", "13", "17", "19" or E30;
- A key for unscrewing the CV joint or a head at “30”;
- Powerful flat head screwdriver;
- Gas torch or wheel bearing puller;
- Hammer;
- Steering wheel end puller (may not be needed);
Replacement with subsequent wheel geometry
- You need to start by unscrewing the CV joint nut; the car should be installed on a horizontal plane with the steering wheel turned slightly to the side. Using a wrench, unscrew the grenade nut counterclockwise.
CV joint is a Constant Velocity Joint (not to be confused with lubrication). Colloquially it is called a "grenade". It got its name because of the presence of a large number of balls inside and its appearance similar to a combat grenade. There is also CV joint grease -3 and 4, used to lubricate this joint.
- We jack up the car and secure it so that it does not roll or fall off the jack. Remove the wheel;
- Separate the brake pads using a flat screwdriver;
- We unscrew the caliper from the steering knuckle and hang it by the wire (under no circumstances hang the caliper by the brake hose).
- We dismantle the brake disc by unscrewing the guides.
- Unscrew the two bolts securing the strut to the steering knuckle.
- Unscrew the bolts securing the ball joint.
- We remove the steering knuckle from the car.
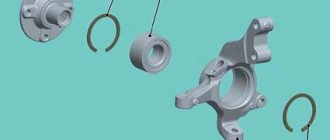
- We take out the retaining rings on both sides of the fist.
- Next we need to knock out the old bearing; for this you can use a punch of the required diameter or use a puller.
- Then, once the bearing is removed, a new one must be installed. Pre-install one retaining ring and press in a new one on the opposite side.
- If you have a puller, then carefully press in the new bearing, avoiding distortion.
- If you don’t have a puller, you first need to put the new bearing in the freezer for a couple of hours.
Why in the freezer?
According to the laws of physics from the school curriculum, cold bodies contract, and hot bodies expand. Therefore, a cold bearing will have a smaller diameter than a hot one, making installation easier.
- Next, use a torch to heat the steering knuckle and carefully lower the bearing into it, tapping a little. IMPORTANT, avoid distortion; the bearing should run smoothly without snagging.
You can use an old bearing as a mandrel.
- After the bearing is pressed in, install the second retaining ring and assemble everything in the reverse order.
Replacement without wheel geometry
In order to carry out a replacement without the need for wheel geometry, it is necessary to completely dismantle the steering knuckle assembly with the strut.
- Without removing the wheels from the car, we need to loosen the CV joint nut (grenade) to “30”. To do this, unscrew the grenade nut counterclockwise with a wrench.
- We tuck the car, which is fixed, so that it does not roll or fall off the jack. We remove the wheel.
- Separate the brake pads using a flat-head screwdriver.
- We unscrew the caliper from the steering knuckle and hang it by the wire (do not hang the caliper by the brake hose).
- Remove the brake disc by unscrewing the two guide wheels.
- We unscrew the steering tip mount and remove it from the strut bipod using a puller.
- Unscrew the two ball mounting bolts.
- Unscrew the three bolts securing the strut support to the side member.
- We remove the strut along with the steering knuckle from the car.
The next step is to remove the bearing from the knuckle and install a new one.
- We remove the retaining rings on both sides from the steering knuckle.
- Next, you need to knock out the old bearing; for this you can use a punch with a diameter smaller than the diameter of the bearing or use a puller.
- After the old bearing is removed, a new one must be installed. Pre-install one retaining ring and press in a new bearing on the opposite side. To do this, if you have a puller, carefully press the bearing into place, avoiding distortion. If you don’t have a puller, then you first need to put the new bearing in the freezer for a couple of hours (so that its diameter decreases slightly).
- Next, use a torch to heat the steering knuckle and carefully lower the bearing into it, tapping a little. IMPORTANT: avoid distortion; the bearing must run smoothly without snagging.
An old unnecessary bearing can be used as a mandrel for installing a new one.
- After the bearing is pressed in, install the second retaining ring and assemble everything in the reverse order.
The wheel bearing replacement process is complete.
Detailed instructions for replacing the product
To begin work, you will need to place the car on a flat surface.
Loosen the wheel bolts. Place chocks under both sides of the wheels. If they are unavailable, you can use ordinary bricks.
Raise the car on a jack.
For insurance, place a stop under the side member, using the spare wheel.
Engage forward gear.
Unscrew the bolts and remove the wheel. Next, unscrew the hub nut.
It is necessary to unscrew the nuts on both sides of the brake caliper.
Use a screwdriver to push the brake pads apart.
Using wrench No. 17, unscrew the rear bolts.
Remove the caliper and move it to the side. We tie it with wire for convenience.
The hub nut has been removed. Remove the brake disc.
In order to remove the hub we will use a puller.
Unscrew the nuts securing the casing and dismantle it.
Unscrew the ball joint nuts.
Remove the fasteners that secure the pivot pin to the rack.
Disconnect the steering knuckle.
Using a vice, clamp the steering knuckle. The hub should be located at the bottom.
We install a metal mandrel with a diameter of 32 mm. We hit the mandrel with a hammer and knock out the hub. The inner bearing race will remain on it.
Using a chisel and hammer, we expand the clearance for the puller. Next, use a puller to remove the clip.
It could be easier. Using an angle grinder (grinder), we make a cut across the holder. Next, hit it hard with a hammer. The clip shatters into pieces.
We proceed to remove the other bearing race that remains in the fist.
Using round-nose pliers, remove the retaining ring.
We insert the mandrel and clamp everything together in a vice.
We tighten the vice and at the same time squeeze out the bearing ring.
We clean the bearing seat from dirt and oil. Wash with diesel fuel and wipe with a rag.
Lubricate the surface with lithol.
We insert the bearing into the hole and, using a mandrel, carefully drive it in 10mm. We make sure that there are no distortions.
The retaining ring needs to be installed.
Next, press the hub using a vice.
Then we mount it all on the rack. And we carry out installation in the same sequence as dismantling, but in reverse order.
So you have managed to replace the front wheel bearing for your VAZ 2170.
It's not that difficult.
Replacing the front wheel hub bearing
There are two ways to replace a bearing. The first is by removing the steering knuckle assembly, the second is without removing it from the car. The work is shown on the right wheel bearing. The left wheel hub bearing is replaced in the same way. We remove the wheel.
Using a screwdriver, remove the protective cap from the hub. We install the wheel and tighten the two bolts that secure it. We lower the car onto its wheels.
Use a bevel to straighten the dented collar of the hub bearing nut in two places. Apply the parking brake, engage first gear and place shoes under the wheels.
Use a 30mm socket to loosen the hub bearing nut. The nut is tightened with a large torque, so the head and driver must be strong enough to transmit the necessary force. We hang up the front part of the car (namely both front wheels, because otherwise the anti-roll bar interferes with dismantling, pushing the suspension elements up). We remove the wheel. Unscrew the hub bearing nut completely...
...and remove the puck. Remove the front wheel brake disc (see “Removing the front wheel brake disc”). Disconnect the right wheel drive from the hub (see “Removing the front wheel drives”). In order not to disturb the wheel alignment angles, you can replace the bearing without removing the steering knuckle. To do this, connect the ball joint to the knuckle...
Priora wheel bearing size
While driving, an unpleasant cracking noise may be heard in the area of the front or rear wheel. It usually disappears when turning. This behavior of the chassis indicates that the wheel bearing requires replacement. A malfunction occurs in almost every car that has already experienced a lot of mileage. The condition of the front or rear wheel bearing is also affected by driving style. The replacement is quite simple, but the driver will have to remove the strut and then take the Priora to a wheel alignment.
Don't want extra costs? Then read how to replace a wheel bearing without dismantling the strut and subsequent “camber” .
Preparing for work
This process is best carried out in the light if we are talking about the street. A bearing is a miniature component. It will be ideal if you drive Priora into the inspection hole. We will disassemble the front hub part, since this is more difficult than carrying out the same operation with the rear hub, especially without removing the strut. And now to the tools:
- Spanners for 17, 19.
- A bearing puller is the main tool, so without it you will have to dismantle the strut and perform a wheel alignment.
- The head is 30, it is desirable that it be equipped with a reliable wrench.
- The frame is usually a homemade tool, which is a cut of a pipe of a certain size. With its help we will knock out the hub.
- WD-40 lubricant.
Lada Priora, like other passenger models of this brand, is a front-wheel drive vehicle. There are many more parts in the front, hence the more complex process of removing the bearing. The rear support component of the hub is removed in the same way; you will need less time to do it, so the instructions describe the rear support bearing.
From steel rims to alloy rims
The Lada Priora leaves the assembly line of the plant equipped with 14-inch iron wheels. Standard wheels have their pros and cons. The latter are known to everyone: they are an incomprehensible appearance and a large weight of the product. The appearance is often covered with decorative plastic caps, which have the main drawback of flying off the wheels and getting lost on the potholes of our roads.
But car owners have found their own way here too: they secure the wheel caps with plastic self-tightening clamps to tie the car’s wires. Nothing can be done about the enormous weight of the iron discs, although this affects maneuverability and fuel consumption. The advantages of metal products are:
- After a strong impact with a pothole or stone, the metal rim will receive a dent or deformation, which can be corrected using special rolling equipment. The warped appearance can simply be corrected with a can of spray paint or a new decorative cap.
- The low price will allow you to change very deformed factory wheels without any problems.
But high-quality cast or forged products are not so easy to deform or break, which is why they are becoming increasingly popular. Many Lada Priora owners do the following: they put winter tires on original iron rims, which will serve in languid winter conditions, and use light-alloy ones in the summer.
Bearing replacement
- The process begins with flaring the hub nut, after which you can pull off the fastener. We will have to disassemble almost the entire hub, so each fastener that needs to be unscrewed should be lubricated with WD-40;
What are the best bearings to install on Priora?
You have already figured out how the replacement takes place without dismantling the rack. But some owners of Lada Priora have a question: what is better to choose - a standard part or an alternative one. The most important thing is that it is a ball component; roller ones are not as durable. If there is no option for Lada Priora in the store, then it is better to take a part for Kalina. Some motorists recommend buying cheaper bearings for the “ten”, but it is better to look for more modern options.
Video on replacing the wheel bearing on a Priora is below.
The wheel bearing is a small but quite important part of the car - one of those that directly affects the safety of the driver and passengers. Therefore, you need to carefully monitor the bearings and periodically check their condition. If, when rocking a wheel that has been hung, play is felt, or noise appears during movement, it is better to replace the wheel bearing.
However, if the play is increased, you can try to loosen the nut and check the tightening torque. If it is less than permissible, then you can tighten and lock the nut again. So the wheel bearing on the Priora will probably last for some time.
To press the bearing in, you just need to use the appropriately sized mandrels that are included in the kit. If you don’t have mandrels, you can use the rings of the old bearing.
The rear wheel bearing of the Priora is not a scarce part at all. Priora rear hubs are available for sale from a variety of manufacturers - both domestic and foreign. In any case, the price is relatively small. If you are in doubt whether the wheel bearing is suitable for Lada Priora cars, the dimensions are indicated on the product itself.
Replacing the rear wheel bearing on a Priora can be done at a car service center, or independently. Let's carefully consider the second option.
First, let's prepare everything you need. We will need a 30mm socket wrench, a thin chisel, pliers for removing the retaining rings and two pullers - a universal one and one for pressing out the bearing.
Remove the decorative cap and hub. This is done like this: first we unlock the hub nut. Then loosen the tightening of this nut and the wheel bolts. We engage first gear and install reliable stops under the wheels of the front axle. We lift the back part and install it on the stops. Remove the wheel, brake drum and brake pads. Finally unscrew the hub nut and remove the thrust washer.
Next, using the prepared puller, we press the hub from its axis, clamp it in a vice and remove the retaining ring.
We also use a puller to press the old bearing out of the hub. We clean it and press in a new bearing for the Priora front hub. Reinstall the previously removed retaining ring.
Using a suitable mandrel, press the hub onto the axle and install the brake drum and wheel in place. We lower the jack and finally tighten the hub nut (it’s better to buy a new one). Then we lock it and install the removed cap on the hub. Congratulations, you have replaced the wheel bearing on a Priora yourself.
Good day everyone, I was concerned about replacing the front wheel bearings on the Lada Priora, having carefully studied the information on the Internet, it was established: 1. dimensions of the front wheel bearing are 35x68x37 (Kalina/Priora); 2. Thus we have the following options: FAG: 713 6140 30 (set + nut); FAG: 713 6900 50 (set + nut); FAG: 713 8045 10 (2 bearings included); SKF VKBA 3441 (set + nut); SKF VKBA 1414 (set + nut); SKF VKBA 1315 (set + nut); SKF BAH-0031 D (bare bearing). Anyone who has real operating experience, please share your impressions, thank you!
Comments 15
It’s so interesting to watch... Somewhere on the Tayotov forum or BMW, if a person bought a bearing from FAG, SKF, SNR, NSK, KOYO and it quickly turned out well, then he does not “complain about the quality” but usually writes, “I got it wrong” or “they sold a fake.” But here, first they want a good bearing from a famous brand for 700 rubles, and then they complain about its quality.
PS For an ATV, for example, I take an original Japanese wheel bearing KOYO, at best it costs 2000 rubles, but usually it’s closer to 3000 rubles. Everything that is sold under this brand in this size from 600 to 1500 rubles is fake. And the bearing there is smaller than the eight rear...
Is it worth buying the original?
It is often advised to buy original bearings. An original is a part selected by a car manufacturer for sale on markets. These are the parts that are delivered to conveyors. When buying an original bearing, you will be absolutely sure that it will suit you. But there are several questions that need to be addressed here.
The original or a fake?
The original bearings are all the same and if you examine it carefully you will find the engraving. It is located on the edge of the upper or lower part. It should contain several information:
- manufacturer (logo);
- Country of Origin;
- designation digital or alphanumeric details, sizes;
- Additional information is possible;
- The kit must include a hub nut (usually disposable), there may be pins or bolts, seals.
Priora wheel bearing dimensions
They sentenced me to 3 wheel bearings, 2 front and 1 rear. I started googling the Internet to find the best option; I really didn’t want to install the original LADA. I needed the best possible ones, so I decided to try FAG.
Some information about FAG:
The concern's production facilities have the most extensive geography: the USA, Great Britain, the Czech Republic, China, Brazil, Korea and other countries. The company is the official supplier of auto components for Mercedes, VW, Volvo, Nissan, Honda and other automakers. At the end of 2001, a large German bearing manufacturer, the INA group, bought more than 90 percent of the company's shares. Once united, the new company Schaeffler KG became the second largest in the world.
About the bearings themselves:
Front - Fag manufacturer number: 713 6140 30
Installed on cars: SKODA: Favorit Felicia VOLKSWAGEN: Caddy pickup. Bearing dimensions: outerØ [mm] 68 innerØ [mm] 35 Width (mm) 37 The kit includes: Bearing + Retaining ring + hub nut. Produced at a plant in India (You can see it in the photographs) It is a substitute for the original VAG number: 6U0 498 003 Average price per piece: 1250 rubles
Rear – Fag Manufacturer Number: 545312A
Installed on cars: FIAT: MILLE CLIP, UNO. Bearing dimensions: outerØ [mm] 60 innerØ [mm] 30 Width (mm) 37 Includes: Bearing only. Produced at a plant in Germany (You can see it in the photographs) It is a substitute for the original Fiat/Alfa/Lancia number: 7 171 4455 Average price per piece: 500 rubles
Interesting point:
While I was studying catalogs I came across a kit for the front axle! Its original number: FAG 713804510. (I managed to buy it for 1800 rubles)
The difference is that this kit simply packs 2 bearings. Now it is more expensive than buying them separately, but whoever looks for will always find)))
And in conclusion:
Everything worked as if it were original, the car became much quieter, the hum disappeared. Well, only time will tell how long they will last.
Price for work:
Front: The hubs were removed and taken to a service station 350*2=700 rubles Rear: 400 rubles Total: 1100 rubles
The replacement cost
Bearing set 1800 rubles + rear 450 rubles + labor 1100 = 3350 rubles
Thank you
karmanych for removing the hubs and Sanych14 for taking them to the service station.
P/S
I wanted to take photos of the bearings from the garage, but I didn’t have time to take them. These are the only photos left.
The main part of the VAZ-2170 hub, like any other brand of car, is the bearing. Caring for it, timely maintenance and replacement is a necessary part of proper car maintenance. After all, disruptions in the operation of this rolling mechanism not only reduce ride comfort, but also increase the risk of getting into a traffic accident. If its functions are impaired, the car's handling deteriorates, and this is quite risky.
List of suppliers
- SNR is the largest French supplier in Europe and rightfully ranks first in product quality;
- SKF is the second-ranked supplier of bearing products, known in the markets for 100 years;
- NSK is also the second largest manufacturer of wheel bearings in the world from Japan;
- FAG is a manufacturer from Germany, absorbed by the INA concern, with high quality products;
- NTN is Japan's largest manufacturer;
- Kouo is the third largest manufacturer in Japan and is part of the Toyota concern;
- Timken is a manufacturer from the USA, the largest in the production of tapered bearings, the quality of which is exceptional.
These companies own many factories around the world, producing products of similar quality that meet the most stringent requirements.
If you need bearings for agricultural machinery, then it is better to pay attention to FKL, a Russian company located in Voronezh. Parts from this company have been supplied to all European countries for 50 years, are known for their high quality, and have no analogues in the world.
Priora hub design
These Priora parts are available both rear and front. Therefore, replacing the bearing bearing on them is somewhat different due to design features and differences. Therefore, it is first worth considering their differences before talking about replacing the rolling mechanism itself.
Front hub "Priors", device
The front hub of the Priora, like on other cars, has an independent suspension. That is, it is not tightly fixed to the body, but has a certain freedom of movement being in the steering knuckle. In addition, the front wheels are driven and swivel. This is what causes certain differences in design. Although it is quite simple, replacing the bearing on it is a rather complex procedure. The front hubs of the Priora are metal discs with a neck, inserted into the steering knuckle with devices and devices designed both for their movable connection with the body and for the free movement of the wheel in the direction of rotation. In addition, the drive shaft from the gearbox enters the center of the hub. Therefore, slots are cut inside it. A lever system and a shock absorber strut make this connection. And the ball joints of the steering mechanism control the steering knuckle, into which the hub is pressed.
Replacing the bearing on the front strut of a Priora
To carry out this operation you will need the following tools and devices:
- hammer;
- mandrels;
- screwdriver (large);
- retaining ring remover;
- core;
- chisel;
- two-jaw bearing puller;
- head at "30"
- wrench set to “17” (socket);
- pliers.
The most convenient way to replace a wheel bearing on a Priora is to use a lift. As a last resort, you can jack up the front part and hang the wheel.
First of all, having removed the decorative plug, remove the cap of the hub fastening nut. Under the nut there is a special locking washer, the edge of which is bent over the nut. Using a thin chisel, loosen the nut and loosen it a little.
Now the Priora can be lifted and the wheel completely removed. Using a 17 key, loosen the fastening of the steering knuckle to the strut. Unscrew the ball joint mountings a couple of turns. Completely remove the hub mounting nut. Remove the caliper and brake disc one by one. Completely remove the mounting bolts and remove the steering knuckle and hub.
Removing the old bearing
Using a special drift, knock the hub out of the fist. Often the inner race remains on the hub journal. It needs to be removed with a puller. Pull out the retaining rings on both sides of the bearing. Now it can be pressed out either with a special diameter drift or with a new bearing.
After inserting the new one, secure it with retaining rings. Apply lubricant generously and reassemble the Priora in reverse order. Replace the second bearing in the same way.
Rear hub "Priors", device
Unlike the front, the rear hub of the Priora is mounted on a fixed shaft attached to the supporting beam. And this beam is attached to the body by a system of levers and shock absorber struts. Its design is much simpler, however, as practice shows, removing and replacing the Priora wheel bearing at the rear is often much more difficult than at the front.
Working with rear bearings
So, for this job you will need a slightly smaller set of tools:
- thin chisel;
- hammer;
- head at “30”;
- pliers for removing retaining rings;
- pressing puller for rollers;
- universal three-jaw puller;
- metal brush for removing rust.
Remove the plugs in exactly the same way, unscrew the fastening nut at “30” and loosen it. Lift or jack up the Priora. Remove the wheel completely. Tapping gently with a hammer, remove the brake drum. It is advisable to remove the brake pads to avoid damage.
Completely unscrew the fastening nut. Using a three-jaw puller, remove the hub with the roller from the shaft. Sometimes it may happen that here, too, the inner race remains on the shaft. Well, in this case, again, a two-jaw puller is in hand. But again, it is advisable to pre-treat with anticorrosive. After the required part is removed, just like on the front steering knuckle, remove the retaining rings for replacement. Well, now, slowly, using a special puller (available for sale), press out the old bearing or outer race, if the inner race remains on the shaft. Wipe the hub and shaft thoroughly. Press in the new bearing and secure it with retaining rings. Before replacing the hub, thoroughly brush the brake pad seats while you can. Having seated the hub, put the washer and nut in place, not forgetting to secure the cotter pin. Apply CV joint grease generously.
Be sure to brush the brake drum, and after installing the pads, reassemble everything in the reverse order.
Dimensions and types of bearings for the rear and front hubs of the Priora
From the above, you can understand that the front bearings are larger than the rear ones. After all, on the front hub it is put on its neck and pressed into the steering knuckle. But at the rear, on the contrary, the bearing is installed inside the hub itself, and the inner race fits onto the axle’s supporting shaft. Therefore, replacing them with each other is impossible. These rolling parts are made in the form of double-row ball bearings. Both of them, the rear and the front, are closed, with internal lubrication.
The best parts of this type are rollers manufactured at the Vologda plant. However, there are imported analogues that can also be installed on Priora hubs - these are SKF VKBA 1306 and FAG 713 6910 10. According to reviews from car enthusiasts, this is a completely adequate replacement.
The video shows the process of replacing the front wheel bearing of a Priora:
VA, and if it’s not a secret, why push out the hub, if religion/beliefs/writing your own doesn’t allow you to use a sledgehammer, and there’s no press?
[Message modified by user 09/17/2010 22:41]
I read it and was a little upset. but I hope that we will live in Kalina for a long time. I'll go to the inspection and ask the technician about the size.
Yes, Priora has a lot of other things, I would say - almost EVERYTHING! Is it worth creating topics about this?
[Message modified by user 09/18/2010 12:12]
Structure and types of bearings
There are three types:
The separator in the bearing keeps the rotating parts at the same distance, evenly distributes the load, ensuring quiet and unhindered rotation. The most durable, reliable separators made of metal are also made of polymer.
Bearings are divided into open and closed, the latter being preferable as they are protected from dirt getting inside.
How to replace the front wheel bearing on a Lada Priora (VAZ 2170) with your own hands
The front wheel bearing on the Priora VAZ 2170, as on other VAZ cars, often fails, especially when the mileage exceeds 80,000 km. First there is noise from the wheel, which can increase during acceleration.
Vibration also often occurs, wheel play increases, and in some cases the noise turns into a grinding sound - all these signs mean that the front wheel bearing of the Lada Priora requires immediate replacement. If you delay repairs, the consequences can lead to wheel jamming, which leads to unsafe situations on the road.
This article will tell in detail about the principles of replacing wheel ball bearings (hereinafter referred to as SP) on cars of the VAZ family, in particular on the Lada Priora. The instructions are accompanied by many photos and videos. The material also provides information on how to choose a front wheel bearing for a Priora by number, size, price, and manufacturer.
After reading the article, you will understand that replacing the front wheel bearing is done with your own hands without special skills, experience, or special tools, and the price for repair work of this type in a car repair shop is very high.
Recommendations
Comments 14
ANY priors have a bearing from Kalina. Of course, exceptions to the rules or alterations by previous owners are not excluded.
I have “tenth” bearings, Priora ’08. www.drive2.ru/l/536633418562142803/
The 10th does not fit on the Priora, they are identical to the Kalina!
When the front one began to hum, I came to the store, they gave me a Priora from Kalina, it was either from Kaldina or from 10K-I xs
All Priora have front step from Kalina
I changed the front hub in the fall. 2008, installed this:
This question also came up recently, 1 Kalinovsky - 68x35x37
2 Eight - 64x34x37. They told me to buy a Kalinovsky from a Yen Prior 2013, I bought it, I thought I would change it, but listening with a stethoscope said not to rush... everything is still going well. Maybe there is an opportunity to agree to take both, and return one based on the results? But I’m inclined that you also have a Kalinovsky, although I never found out which one on mine)), FAG is now in the stash)
And I didn’t encounter vibration at 110 km, I think it was the front hub or hardly
This question also came up recently, 1 Kalinovsky - 68x35x37
2 Eight - 64x34x37. They told me to buy a Kalinovsky from a Yen Prior 2013, I bought it, I thought I would change it, but listening with a stethoscope said not to rush... everything is still going well. Maybe there is an opportunity to agree to take both, and return one based on the results? But I’m inclined that you also have a Kalinovsky, although I never found out which one on mine)), FAG is now in the stash)
How to diagnose the front wheel bearing on a Priora and the causes of failure
At the beginning of the article, signs of a malfunction were already mentioned, if they occur in the VAZ 2170, it is necessary to check the hub assembly. To diagnose a breakdown, it is enough to do several operations:
- Raise the car with a jack;
- Check the play of the suspended wheel with your hands;
- Rotate the wheel and listen for noise;
- Watch several videos on the principle of diagnosing the front wheel bearing of a Priora.
Faulty wheel bearing:
An example of the operation of a failed wheel bearing:
How to check the ball bearing of a wheel hub:
Wheel bearing diagnostics:
vazoved
I drive a LADA VESTA CROSS, Moscow
Then there will simply be no one to pay the fines! This is a Korean 7 in 1 car tablet video recorder for Android..
I forgot about fines and Yandex Navigator.
There is FULL HD shooting, radar detector and GPS with 32 satellites. I got it at a reasonable price for just a few thousand HERE
Why does the front wheel bearing of a VAZ 2170 (Priora) fail:
- Expiration of service life;
- Incorrect operation of the suspension, aggressive driving style, road quality;
- Poor quality ball bearing (defect, counterfeit, manufacturing defect);
- Depressurization (dust, moisture, dirt);
- Malfunction of adjacent components (brake disc imbalance, etc.);
- Road accidents, collisions with deep potholes in the asphalt or holes.
