In order to remove a bearing from the electric motor shaft of some tool (drill, grinder, etc.) or, for example, a generator without unnecessary problems, you will need a simple device - a puller.
These devices can be large or small, and can also vary in design - for example, there are pullers with two, three or even four jaws.
However, regardless of external differences and design features, bearing pullers operate on the same principle.
If we talk about which one is better, then three-legged models are considered universal. Although in most cases the use of two-legged devices is sufficient.
In addition, pullers are hydraulic and mechanical.
The first ones are convenient because no effort is required. The second ones are cheaper and easy to manufacture. In this article we will look at homemade mechanical pullers.
Unlike factory-made devices, pullers made by yourself will cost less (for assembly, you can use any available materials that you can find in the workshop) and will last longer.
We will look at how to make simple devices that will be of interest to those who do not have a welding machine in their workshop or garage.
To work, you will need the most common power tool that every man has:
- electric drill;
- Bulgarian;
- hand tool.
Types of wheel bearing pullers
Study the summary table, which presents several main types of BSC, as well as specific recommended models.
| Type and model | Application | Average price, rub. |
| With 3 legs | Removing parts from axles and shafts, including rear hub ball bearing races. | 2000-3000 |
| With 2 legs | Removing parts from axles and shafts, including rear wheel hub bearings. | 1000-2000 |
| Cup with a set of mandrels | Removing and pressing parts into holes, including steering knuckles and front wheel hub bearings. | 6000-8000 |
What pullers are needed to remove and press in wheel bearings?
For the front and rear wheels, it is recommended to use two types of tools: with three or two legs and a cup puller - this is the minimum set of removable tools for the correct and safe removal and pressing of parts of hub units.
Let's sum it up
Replacing a wheel bearing is one of the rather complex processes when repairing a car. It is important to perform all procedures with precision down to each individual movement. One inaccurate moment can cause a number of troubles and cause more serious and expensive breakdowns. However, many car owners who have already removed their cars from warranty prefer to do such repair processes themselves. This can save a lot of money, but it is not recommended to perform the procedure without certain skills.
You can argue for a long time about whether it is even worth doing your own car repairs. The question is quite complex and has a number of features. However, doing the work yourself provides a serious advantage - saving money on the services of a service center. This is what motivates the motorist to study in detail the instructions for repairing cars with his own hands. Have you ever done a hub repair or bearing replacement yourself?
A quick overview of wheel ball bearing pullers
It is impossible to choose a universal kit for all types of car repairs, since the range of actions is limited:
- a variety of shapes, sizes for charging to the starting position;
- limited work space.
Cup - “Force 9T0311”
- Internal mandrels 34-80 mm.
- External mandrels 44-90 mm.
- The dimensions of the outer diameter of the cups are 44-90 mm.
- Rod (stud) with nuts.
- The plates fit a wide range of sizes.
- The steering knuckle remains in place.
- The set is included in the workshop press kit.
- Pressing-pressing takes place in one step.
Three-jaw – “KS TOOLS 630.3002”
Garage tool. Suitable for use in restricted access work areas.
- Long life if you follow the manual.
- The articulated design of the paws engages securely.
- Removing stuck parts from shafts and machine axles.
- Wide grip range - 20-230 mm.
- Maximum force - 4.5 tons.
- Screw rod dimensions: M18 x1.5 x 240.
- The dimensions of the bolts for the hinges are 19 mm.
Two-grip universal – “Kukko K-2030”
The tools from the set of the German manufacturer Kukko are well-thought-out forms of gripping mechanisms. On the traverse, the paws move along guides, and the suspension screws fix the specified position.
- Grasp the paws at an angle parallel to the axis of the tension force.
- Reliability of engagement.
- Maximum tension - 5.5 tons.
- The legs rotate 180 degrees.
- Wide grip range.
- Double acting.
- Suitable for use in confined spaces.
Hydraulic pullers
You can also find hydraulic pullers on the market. The operating principle of hydraulic SSPs is similar to jacks. Designed for repair shop mechanics, no muscle power required, speeding up the repair time. Pay attention to the quality of the metal, the rotation of the screw rod, and the condition of the hinges.
- the force of influence on the pressed-in unit reaches 20 tons,
- operation time is reduced,
- the share of physical costs is reduced.
- limitation of the working area of application,
- the price is higher than a mechanical tool.
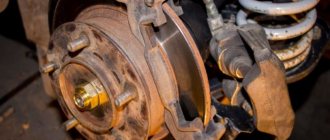
When to replace
When, as part of the diagnostics, you have determined that the wheel behaves in an uncharacteristic manner, you will need to replace the chassis element.
Under no circumstances should you delay replacing the wheel bearing, as this could lead to a potential loss of control while driving. In fact, there is a risk of being left without a wheel.
If you notice play during the inspection, a complete bearing replacement is not always necessary. In some cases, the problem is resolved by adjusting the axial clearance. Here you will need to use the adjusting nut and your standard set of tools. The adjusting nut must be tightened to the appropriate position. Be sure to use fresh, high quality lubricant when making adjustments. Noise, creaking and knocking indicate that it is time to change the bearing. There are simply no other options here.
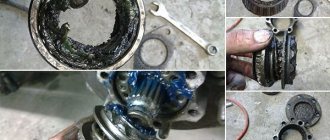
Wear itself occurs mainly due to natural processes during operation. The average lifespan of a wheel bearing is 100 thousand kilometers.
But shock loads also play a big role. When we drive with you on bad roads, we constantly run into potholes and fall into holes, of which there are simply a huge number, all this affects the chassis and contributes to accelerated wear of the bearing.
Puller for VAZ and LADA cars
To replace the front and rear hub units on VAZs, according to the manufacturer’s recommendations, two types of removable devices are needed.
- Gripping tools are used to remove the ball bearing from the rear wheel.
- For pressing and pressing the bearing at the front wheel, cup types are used.
You can select models of these tools from the overview presented above. To select a cup puller, focus on the outer and inner diameters of your bearings, but as a rule, it is enough to read reviews and get advice from the seller.
Checking status
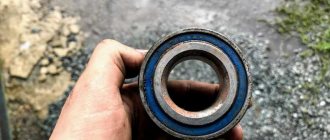
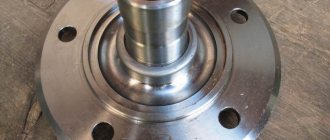
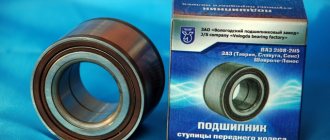
I think there is no point in talking about what a bearing is and what it consists of. Despite its rather modest size and simple design, it remains an extremely important element in the hub and entire chassis of the vehicle.
You can check the current condition of the hub bearing or wheel bearing with your own hands. Moreover, this procedure is carried out in the same way for many cars, including:
- VAZ 2107;
- Daewoo Lanos;
- Renault Logan;
- Toyota Carina;
- Niva Chevrolet;
- VAZ 2110;
- Samand (Iranian car);
- SsangYong Kyron;
- Gazelle;
- Opel Cadet;
- Niva 21214;
- UAZ Patriot;
- Renault Duster, etc.
But first, the driver must have a reason to check the element. The primary sign of possible problems is considered to be extraneous noise in the area of the front wheel.
If there are certain suspicions, and the noise indirectly confirms your theory, a mandatory check is required.
Do-it-yourself universal wheel bearing puller
Buying a puller is not always justified, since it is not used so often when operating and repairing a car, so if you want, you can make the tool yourself.
Homemade tools also have advantages:
- Proven material.
- Possibility to make it to your own size.
- The cost is lower than that of a purchased device.
- Possibility of finishing or alteration.
Homemade three-grip tool
This type of tool is the most difficult to manufacture, since the parts have a unique shape and require precise dimensions to mate them.
Required tools and materials:
- Grinder with cutting disc for metal;
- Sheet 1 m2 10-20 mm thick;
- Hairpin M18x1.5x 400 mm;
- Two nuts M18x1.5 height 20 mm;
- Pipe section outer diameter 89 mm, wall thickness 7 mm;
- M10 bolts for hanging the legs in the eyes;
- Welding machine.
The legs are cut from a sheet of 10-20 mm, L = 200-220 mm, the cross is made from an M18x1.5 nut, or cut out of a solid sheet with a grinder. Mark the contours of the crosspiece, cut it out, drill a hole in the center, then use an M18x1.5 tap to cut the thread.
Second option: weld a nut to the sheet instead of threading it. Holes are made in the eyes for M8 or M10 bolts.
Video: “Making three grippers”
Cup puller
The main part of the tool: M18 pin, cup and replaceable disks. A threaded bolt and nut can be picked up in a store, but the remaining parts will have to be ordered from a turner based on a sketch or drawing.
For VAZ 2108, 2109, 2110, 2111 washers are suitable - 30, 34, 37, 77 mm, bowl (ring) - 77 mm. For other car brands, find the original part number and its dimensions, and then cut out the appropriate washers and cups.
Video: “Do-it-yourself cup puller”
Double grip removal tool
Having amateur welding skills, two gripping devices are made from plates, nuts, and studs.
Not the easiest way to make a SSP in a garage; to assemble it you will need:
- Sheet 5 mm;
- Bolt M 14x1.5x 240;
- Bolts with nuts M6;
- Nuts M14.
Video: “Do-it-yourself two-grip device”
Removable traverse for pressing out
This option is suitable for pressing and pressing the ball bearing out of the hub without removing it from the knuckle. The photo shows an example of such a design.
- One or two strong steel plates are taken, a hole for the bolt is drilled on top and a nut is welded.
- A second nut is welded coaxially from below.
- Next, holes are made for M10 bolts at equal intervals. The legs are cut from a 10 mm plate.
- The two plates are bolted together. Between them there is a long M16 bolt.
The only purchase is a crown to match the size of the ball bearing race. Cut the required washers from a 10 mm strip.
Tools and materials required:
- Bulgarian;
- Welding and drilling machine;
- Internal pipe section D 75 mm;
- Strip 70x30x5, 2 pieces;
- M6 bolts with nuts 4 pieces, lock nuts 8 pieces
- Thick-walled washer D 45mm.
Recommendations
Replacing wheel bearings may vary from vehicle to vehicle. Modern cars may be equipped with various easily damaged electronic devices that must be removed when replacing a bearing. Therefore, if you are not a highly qualified car mechanic, it is better to entrust this work to car service specialists.
It is also worth doing a wheel alignment after replacing the wheel bearing. An adjusted wheel alignment will improve the car's road holding on turns and straights, eliminate vibration, and also reduce tire wear and fuel consumption. Vibration may also occur due to a crookedly inserted bearing. To eliminate it, you need to knock out the bearing again and check the tightness of the wheel nuts.
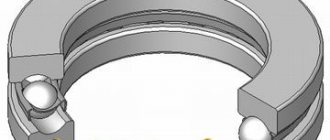
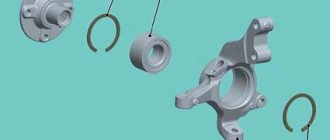
Device
The main element in the design of this element is the central bolt. This is what makes the puller work. The bearing is thus squeezed out of the working place or, conversely, pressed in (depending on which direction the central bolt is turned). Some devices are equipped with a hydraulic cylinder (for example, a hydraulic bearing puller, as in the photo below).
The design also includes grips. They come in two varieties:
- Grips that engage with the object being removed using a special tool. They operate independently of the bolt action.
- Pressing the part due to the force of a bolt or hydraulic cylinder.
How to unscrew it if it's stuck?
I’ll tell you a few ways that will 100% help you unscrew this element, so here we go:
Trite with your hands. Often you just don’t have enough strength, just call a “more powerful” person and everything can work out. I will say this in 80% of cases they unscrew it by hand. YES, and you need to tighten it again with your hands, tightly! IT'S ENOUGH!
Special key. I already wrote about it once, you can read it here, of course it’s not always at hand, but if you have a friend with a car, he can drive to almost any spare parts store and buy it. I personally even saw it in several supermarkets, the cost is a penny, about 200 - 300 rubles. Everything with it is quite easy and simple, we hook it on and unscrew it, of course, the body of the element will get wrinkled, but actually we don’t need it anymore.
Rope and screwdriver (another lever). Sometimes they also use an old alternator or timing belt. What we do is twist a loop around the filter, tighten it with a screwdriver, tightly. And we try to unscrew it. The main thing is that the rope or belt does not slip.
Next come barbaric but effective methods. The most important thing is that they are dirty, that is, you will get dirty in oil anyway, if you are not afraid, then they are for you.
A hammer and a long, strong screwdriver. Actually, this method is used to unscrew most intractable filter elements. Since the walls of the element are soft, they are usually aluminum, or tin, and other soft metals. It breaks through very easily (just like a tin can). What we do is drive a long and strong screwdriver all the way through, that is, so that it goes in on one side and comes out on the other. And then we unscrew it like a lever. The most important thing is that everything can be done without a special key, and actually using those tools that are always in the garage. The only downside is that your hands are dirty, because some of the oil is always inside.
Hammer and chisel. This is generally the method that they say “ATAS”, there is nothing to explain here, we take a chisel and “fuck” it with a hammer, the most important thing is to hit closer to the bottom, to the place of fastening, and counterclockwise. The case, of course, will be all dented, but the most important thing is to unscrew it. The downside here is not only that you can get dirty, but also that you can hit the engine block with a chisel. I personally recommend the method with a screwdriver, it is still less dangerous.
As you can see, there is nothing complicated, you can do without a special key, just pierce the housing with a screwdriver.
Now we are watching a short video.
And that’s all for me, read our AUTOBLOG.
(17 votes, average: 3.94 out of 5)